
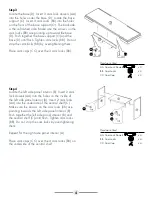
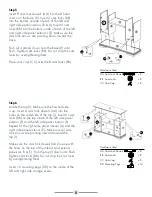


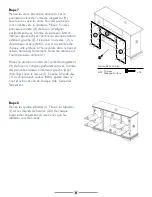
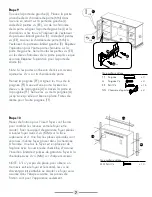


Step 7
Locate the 2 back panels (G) and the storage back
panel (H). Make sure the finished sides of the
panels face in toward the mantel. Line up a back
panel (G) so it is flush to the back of the left side
panel interior (B) and left side panel exterior (E).
Secure with 12 back panel screws (MM) - 5 down
each side and 1 at the top and bottom. Tighten
until secure. Repeat for the other back panel (G).
Line up the storage back panel (H) so it is flush to
the back of the left and right side panel interiors
(A and B) and the top (I). Secure with 10 back
panel screws (MM) - 4 across the top and bottom
and 1 on each side. Tighten until secure.
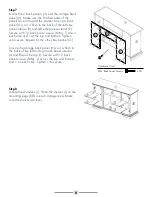
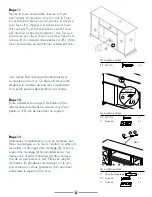
Step 8
Locate the 4 shelves (J). Place the shelves (J) on the
mounting pegs (DD) in each storage area. Make
sure the shelves are level.
6
G
G
H
MM
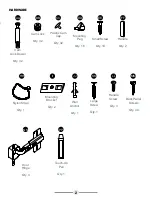
Hardware Used
MM Back Panel Screws
x 34


