background image

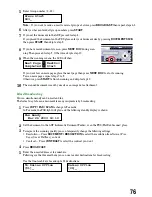
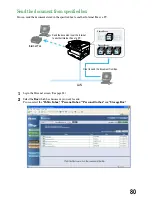
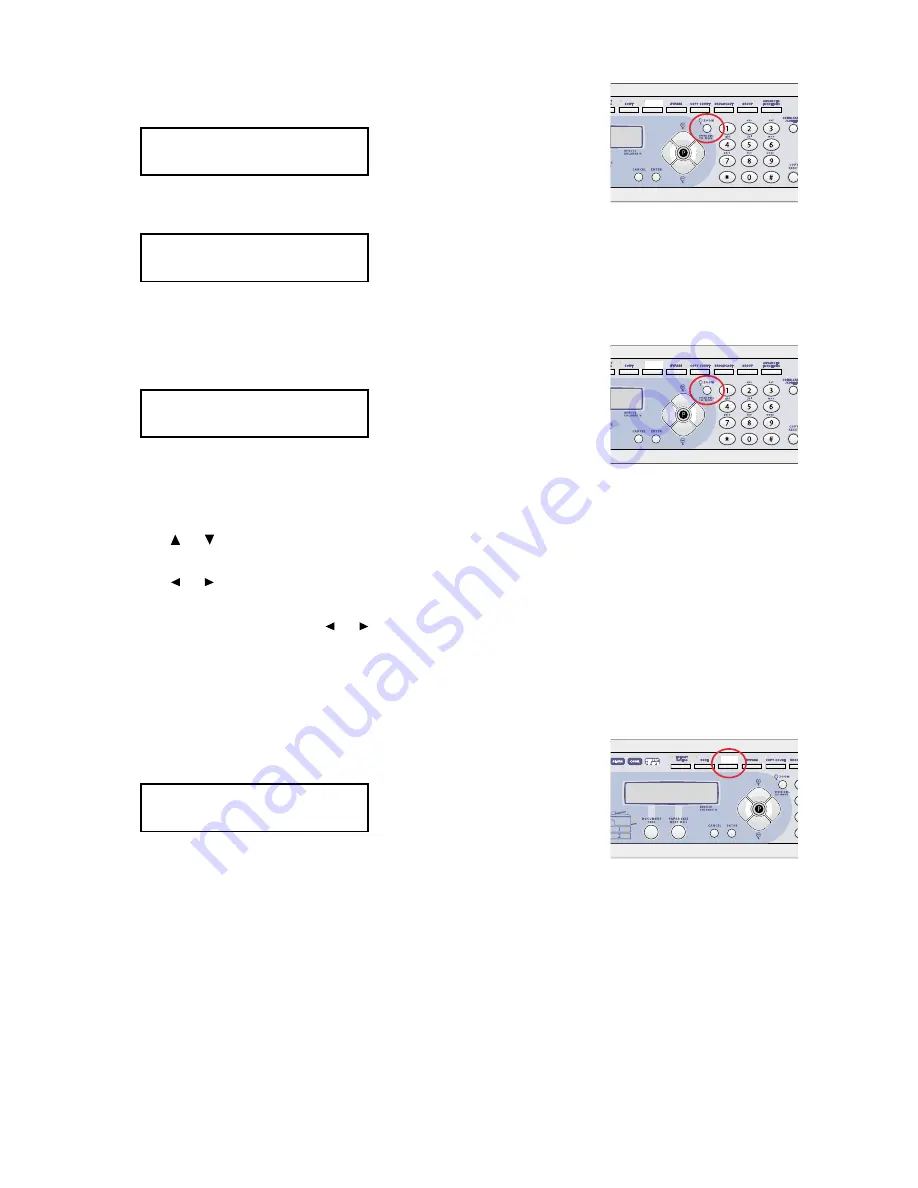
Using Speed dial number:

1. Press the 

SPEED DIAL/TEL INDEX.

2. Use the numeric keypad to enter three-digit identifier of the e-mail

address you want to send.

Tel index search:

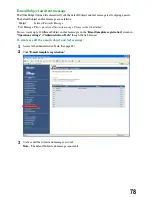
1. Press the 

SPEED DIAL/TEL INDEX

twice.

The EasyDial directory sorts entries alphabetically in the following
order:

(1)

by alphabet,

(2)

by number and 

(3)

by symbol.

2. Scroll through the listings to find the one you want. You do this by pressing the following cursor key:

or 

to select the character set — alphabet, number or symbol — for the first character of the

Location id.

or 

to check different listings within that character set.

Note:

The scrolling is “open-ended.” For example, when you run out of listings beginning with alpha-
bet “A”, pressing 

or 

automatically moves you into listings beginning with other

characters.

3. When the LCD displays the name you want to send, press 

START

.

Directly entering:

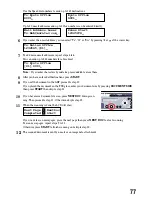
1. Press the 

ADDRESS/ID ENTRY.

2. Use the one-touch keys and numeric keypad  to enter the e-mail

address.

4

After you have entered e-mail address, press 

START

.

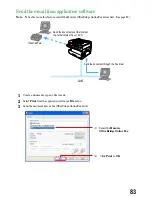
5

If you set the document in the ADF, proceed to step 6.
If you placed the document on the FBS glass, enter your document size by pressing 

DOCUMENT SIZE

,

then press 

START

then skip to step 7.

Mail Address;Lower
To:_

ADDRESS/ID
     ENTRY

Telephone Index  [D]
Dallas Office  :[01]

ADDRESS/ID
     ENTRY

To:Kyoto Office
S001_

Enter Speed-Dial No.
S_

ADDRESS/ID
     ENTRY

73

Содержание MFX-1300

Страница 1: ...OfficeBridge Online User s Guide for MFX 1300 MFX 1700...

Страница 2: ...l for bodily harm or damage to hardware The following symbols are used to distinguish the types of alerts Shown below are the examples This symbol indicates warning or caution An illustration will giv...

Страница 3: ...duct names contained herein are trademarks of Murata Machinery Ltd Windows 95 Windows 98 Windows NT Windows Me Windows 2000 and Windows XP are the registered trademarks of Microsoft Corporation in the...

Страница 4: ...dress 19 To confirm the MAC address 19 OfficeBridge Online screen Startup the OfficeBridge Online 21 Access to an Administration tools 22 Login the Personal screen 23 User Registration 25 PC FAX Trans...

Страница 5: ...mail from application software 83 Internet Fax Reception 86 View the received fax 86 Received Fax forwarding setting 87 Forwarding received e mail to fax 88 Installing the OfficeBridge Online Printer...

Страница 6: ...on the OfficeBridge Online Installation Disk Reference Manual on the CD This manual describes the details of using the OfficeBridge Online interface on your PC The Reference manual is made with the HT...

Страница 7: ...atures What is the OfficeBridge Online 6 PC FAX Transmission Reception 7 Network Scanner 9 Bulletin Board 10 Circular Board 11 Processing Request 12 Network Printer 13 Internet transmission reception...

Страница 8: ...gistering the users that will use this system not only allows them to use the special boxes but also provides them with an individual box to allow individual management of faxes etc The received faxes...

Страница 9: ...n User B 2 Confirmation 3 Browser Operation 4 Download OfficeBridge Online 1 Automatic Distribution External 6 Send Distribute Bulletin Board Public Inbox Completed Box Personal Inbox Personal Outbox...

Страница 10: ...e distribution list The new document arrival notice is only given when the InfoMonitor is running For information on the installation refer to InfoMonitor on page 95 3 Browser Operation The processing...

Страница 11: ...pplication that supports TWAIN In addition the scanned document can be managed with a commercially available document management application TWAIN Standard This standard applies to the exchange of dat...

Страница 12: ...eed to print the posted document and hang it on the wall 2 Viewing Registered users can use the browser to view a posted document Registered uses can use the browser to share information If InfoMonito...

Страница 13: ...The circular document does not need to be printed 2 Circular Settings The issuer can specify the subjects users to whom the circular will be sent to allow efficient circulation 3 Viewing The contents...

Страница 14: ...write comments when making a request to the person in charge of processing This allows the requester to accurately communicate the processing request 3 Processing request A processing request can be...

Страница 15: ...ter Printouts with a maxi mum size of Letter or A4 and resolution of 600 dpi can be printed 1 Printing Instructions You can use the unit as a printer from your computer 2 Print This allows you to prin...

Страница 16: ...essage OfficeBridge Online uses Simple Mail Transfer Protocol SMTP to transfer your outgoing mail to your SMTP mail server which in turn uses SMTP to send your mail to the Internet Internet fax recept...

Страница 17: ...foMonitor monitors OfficeBridge Online When new fax e mail or scanned data arrives at specified box of the OfficeBridge Online InfoMonitor notifies the registered users The UserIDs of New docu ments a...

Страница 18: ...Machine configuration Setting the IP Address Subnet mask and Gateway Address 17 Setting your Time Zone 18 Confirming the MAC Address 19 16...

Страница 19: ...cursor with the cursor key and overwrite it 4 Press ENTER 5 Enter the subnet mask address using the numeric keypad Note To enter numbers less than 2 digits between the dots use the cursor key to move...

Страница 20: ...of Time Zone GMT 11 00 Midway Island GMT 10 00 Hawaii GMT 09 00 Alaska GMT 08 00 Pacific Time US Canada GMT 07 00 Mountain Time US Canada GMT 06 00 Central Time US Canada GMT 05 00 Eastern Time US Ca...

Страница 21: ...ress that is assigned to the equipment MAC address is hard coded and is not configurable The MAC address consists of 6 hexadeci mal numbers separated by colons To confirm the MAC address 1 Press Progr...

Страница 22: ...OfficeBridge Online screen Startup the OfficeBridge Online 21 Access to an Administration tools 22 Login the Personal screen 23 User Registration 25 20...

Страница 23: ...ll appear Note If the User List screen does not appear confirm the IP address in Setting IP Address Subnet mask and Gateway address page 17 and carry out power Off On of the fax main unit to restart A...

Страница 24: ...ing settings and registration Administration tool enables the management and browsing of the unit information 1 Click Admin Tools on the User List screen 2 The Administration tool screen will appear F...

Страница 25: ...Login the Personal screen 1 Click User ID you want to login on the User list screen 2 Enter the login password Note If the password is not set this screen will not appear 23...

Страница 26: ...The Personal screen will appear For information of using the Personal screen refer to Explanation of OfficeBridge Online screen on Chapter 1 of the Operation edition of the Reference Manual on the CD...

Страница 27: ...gister up to 50 users 1 Access to the Administration Tools See page 22 2 Click User Registration under Operation Settings In initial setting the user 01 to user 05 are registered without password sett...

Страница 28: ...26 PC FAX Transmission Reception PC FAX Transmission 27 PC FAX Reception 33...

Страница 29: ...ing to the software application you are using the names of features and functions listed in Print menus and dialog boxes may vary The steps described in this section are using the Windows XP 1 Create...

Страница 30: ...d it later click Temporary Storage The document is stored in the Personal Outbox It will be named Send document followed by sav ing day and time DDHHMMSS format DD day HH hour MM minutes SS seconds 5...

Страница 31: ...You can confirm the sending command status on this screen If you want to cancel the fax sending Perform the following steps on the Personal Outbox screen 1 Select the document you want to cancel 2 Sel...

Страница 32: ...een See page 23 2 Select the Box which has document you want to send You can select the Public Inbox Personal Inbox Personal Outbox and Storage Box Fax Send the document to a Fax via telephone line Sh...

Страница 33: ...ou want to send 2 Select Sent from action menu 3 Click Execute 4 The Document Send screen will appear Enter the fax number 1 Enter the fax number 2 Click Add If you want to send to more than two locat...

Страница 34: ...Outbox screen You can confirm the sending command status on this screen If you want to cancel the fax sending Perform the following steps on the Personal Outbox 1 Check the document you want to cancel...

Страница 35: ...area on the table of your User ID The number shows how many unread messages are in the box Fax Fax reception Shared Boxes Personal Boxes Storage Box Bulletin Board Public Inbox Completed Box Personal...

Страница 36: ...have got a new message in your box the new message arrival notification will appear on your PC 3 To view the received fax login your personal screen and click the Document subject or File icon Note Ac...

Страница 37: ...ate a rule refer to the Help Override the print setting from the fax machine You can instruct the machine to print the received fax message by simply pressing a Soft key even it is set to no print the...

Страница 38: ...unction label you just set What the Soft key Soft key is a shortcut key You can program the Soft key to turn on or off any function with just the touch of a but ton Your machine has three Soft keys on...

Страница 39: ...t setting To enable this setting press the Soft key which assigned Received Fax Print see above When the light next to the soft key glows it means the setting is active To turn off the setting simply...

Страница 40: ...anner Network Scanner 39 Setting Scan parameter 40 Setting Scan mode 41 Scanning the document 44 Download the scanned image from the Personal screen 47 Download the scanned image from application soft...

Страница 41: ...llows 1 Scan the document with your machine The scanned data will be stored in the specific Personal Inbox See page 44 2 Download the scanned data from the Personal Inbox See page 47 If you want to ch...

Страница 42: ...cuments If your machine is the MFX 1700 you can choose to scan at 200 dpi 300 dpi 400 dpi or 600 dpi The default settings is 400 dpi If your machine is the MFX 1300 the resolution is fixed at 300 dpi...

Страница 43: ...document Scan Mode Prompt This mode allows you to set the Scan mode setting every time you perform the Network scanner feature The default settings is Off To set the Save Method 1 Press Program G 3 2...

Страница 44: ...e Create scanned document subject 1 Access to the Administration Tools See page 22 2 Click Create scanned document subject under Operation Settings 3 Enter the subject for scanned data For more inform...

Страница 45: ...r feature The default settings is Off 1 Press Program G 3 2 Press ENTER The machine will show 3 Press twice to select 03 Scan Mode Prompt 4 Press ENTER 5 Press or to select the subject for scan data f...

Страница 46: ...50 and 200 by following procedure 1 Press 2 Using the numeric key to enter your desired ratio 50 to 200 3 Press again Note The enlargement is available only for scanning using the FBS It is not availa...

Страница 47: ...etting you want to change is appeared Then press ENTER 8 Change the setting as you want then press ENTER To change other settings repeat steps 6 to 8 9 After you have changed all settings as you want...

Страница 48: ...ise press START to finish scanning and the machine will return to the standby mode 13 Place the next page Press NEXT DOC to start scanning To scan more pages repeat steps 12 13 Otherwise press START t...

Страница 49: ...reen Follow this procedure to download the scanned image from the Personal screen 1 Login the Personal screen See page 23 2 Click the Subject you want to download on the Personal Inbox 3 The Document...

Страница 50: ...on of Windows and Browser you are using File down load dialog box will appear In this case if you want to save the file with PDF format click Open this file from its current location then save the fil...

Страница 51: ...to access the OfficeBridge Online TWAIN connector from your application software 1 Start the application software that supports TWAIN scanning 2 Select OfficeBridge Online TWAIN connector in your appl...

Страница 52: ...ck is placed by Preview previews of the document can be displayed When you click a button or input a number into the text box the display moves to that page D Resolution Set the linear resolution for...

Страница 53: ...O Exit button When you click the Muratec OfficeBridge Online TWAIN Connector ends 6 After setting each item select the scan document image from the File list then click the Download button The documen...

Страница 54: ...Bulletin board Distribution Processing request Bulletin board 53 Distribution 56 Processing request 58 52...

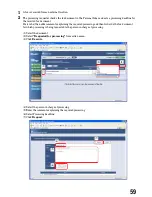
Страница 55: ...cument with the machine The scanned data will be stored in the specific Personal Inbox 2 Post to the Bulletin board 3 Registered users can use the browser to view a posted document Note If InfoMonitor...

Страница 56: ...ng the document page 44 2 Login the Personal screen See page 23 3 Post the document to the Bulletin board 1 Select the document 2 Select Distributed and or posted to the bulletin board from action men...

Страница 57: ...and 95 is left running it will automatically notify registered users when a new bulletin board document is posted 1 Login the Personal screen See page 23 2 Click Bulletin Board to show the Bulletin bo...

Страница 58: ...ers you want to send it 3 The document is distributed to each Personal Inbox of the registered users The registered user can use the browser to view the document Note If InfoMonitor is left running it...

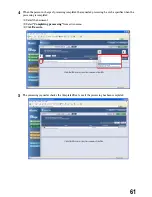
Страница 59: ...nu 3 Click Execute 4 Enter the subject and comment if necessary 5 Select the users you wan to send the document To select consecutive users click the first user press and hold down SHIFT and then clic...

Страница 60: ...rded faxes This processing is optimum for documents that have an operations flow such as forwarding from the person in charge of operations to the person in charge of sales shipment or from the sales...

Страница 61: ...ents explaining the required processing and then forwards the fax document for which processing is being requested to the person in charge of processing 1 Select the document 2 Select Requested for pr...

Страница 62: ...opy of the process requested document is keeping in the Storage Box until the person in charge of processing complete the requested job 3 A new document arrival notification is sent to the computer of...

Страница 63: ...ested processing he or she specifies when the processing is completed 1 Select the document 2 Select Completing processing from action menu 3 Click Execute 5 The processing requester checks the Comple...

Страница 64: ...Network Printer Network Printer 63 62...

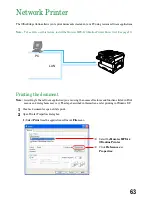
Страница 65: ...document Note According to the software application you are using the names of features and functions listed in Print menus and dialog boxes may vary The steps described in this section are for printi...

Страница 66: ...nter driver functions refer to the Help 4 Print the document Note You can cancel a print job in progress by pressing the STOP button on the main unit See Canceling the printing job next page 64 1 Clic...

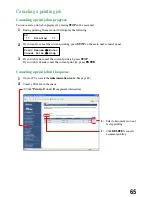
Страница 67: ...s control panel 3 If you wish to do cancel the current print job press STOP If you wish to do not cancel the current print job press ENTER Canceling a print job in the queue 1 On your PC access to th...

Страница 68: ...Custom Paper Scanning No No 3 82 to 8 5 Direction Feed No No 5 5 to 14 0 Direction 1 inch 25 4 mm Metric version Paper Size C1 C2 Bypass Tray Legal S 8 5 14 No No Yes Letter S 8 5 11 No No Yes Half Le...

Страница 69: ...r fax machine s operating instruc tions Then press Program and select the same size of paper you loaded using the cursor key After you change the paper press ENTER Your machine will start the printing...

Страница 70: ...68 Internet FAX Transmission Reception Setting the Internet Parameters 69 Internet Fax sending 72 Internet Fax Reception 86...

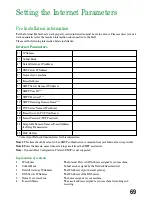
Страница 71: ...word POP Password 14 Acceptable Domain Name or E mail Address for Relay Transmission 15 MAC Address Contact your Network Administrator for this information Note1 This item should be set only when SMTP...

Страница 72: ...an be displayed by pressing Program G 1 0 3 ENTER see page 19 Setting the IP Address Subnet mask and Gateway Address To set the IP Address Subnet mask and Gateway IP Address press Program G 1 0 2 ENTE...

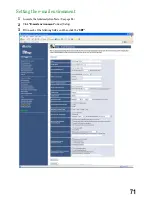
Страница 73: ...Setting the e mail environment 1 Access to the Administration Tools See page 22 2 Click E mail environment under Setup 3 Fill in each of the following fields and then click the SET 71...

Страница 74: ...ia LAN from your machine 1 Press COPY FAX SCAN repeatedly until the following dis play is shown In Fax mode the FAX light will glow 2 Set the document in the ADF Automatic Document Feeder or on the FB...

Страница 75: ...haracter set Note The scrolling is open ended For example when you run out of listings beginning with alpha bet A pressing or automatically moves you into listings beginning with other characters 3 Wh...

Страница 76: ...document in the ADF Automatic Document Feeder or on the FBS FlatBed Scanner glass 3 To improve the scanning quality you can temporarily change the following settings Resolution Press DOCUMENT RESOLUTI...

Страница 77: ...xt page then press NEXT DOC to start scanning To scan more pages repeat steps 9 to 11 Otherwise press START to finish scanning and skip to step 12 12 The scanned document is sent by e mail as an image...

Страница 78: ...s an image data attachment Mixed Broadcasting You can simultaneously send e mail and fax The fastest way to fax one document to many recipients is by broadcasting 1 Press COPY FAX SCAN to change to Fa...

Страница 79: ...FBS glass enter your document size by pressing DOCUMENT SIZE then press START then skip to step 11 10 If you have more documents to scan press NEXT DOC during scan ning Then proceed to step 11 Otherwi...

Страница 80: ...facsimile message Please see the file attached You can create up to 10 different Subject and text messages on the E mail template registration screen in Operation settings of Administration Tools thou...

Страница 81: ...or to select the label 4 Press ENTER The registered e mail subject and text message will appear Press or to toggle the Subject and Text message You can view the message by pressing or Note If you wan...

Страница 82: ...Select the Box which has document you want to send You can select the Public Inbox Personal Inbox Personal Outbox and Storage Box Internet Fax Send the document over the Internet to another Internet F...

Страница 83: ...ant to send 2 Select Sent from action menu 3 Click Execute 4 The Document Send screen will appear Enter the e mail address 1 Enter the e mail address 2 Click Add If you want to send to more than two l...

Страница 84: ...ick Cover page tab 2 Click Attached 3 Enter Subject and Message You can up to enter 80 characters for Subject and up to 864 characters for text message 4 Click Set to after you entered Note The Subjec...

Страница 85: ...ate a document or open a file to send 2 Select Print from the application software s File menu 3 Send the document data to the OfficeBridge Online Fax driver Send the document through the Fax driver L...

Страница 86: ...d it later click Temporary Storage The document is stored in the Personal Outbox It will be named Send document followed by sav ing day and time DDHHMMSS format DD day HH hour MM minutes SS seconds 5...

Страница 87: ...6 The screen will change to the Personal Outbox screen You can confirm the sending command status on this screen 85...

Страница 88: ...the table of your User ID The number shows how many unread messages are in the box E mail reception Shared Boxes Personal Boxes Storage Box Bulletin Board Public Inbox Completed Box Personal Inbox Pe...

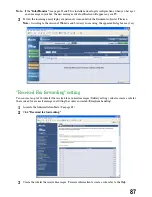
Страница 89: ...to the version of Windows and browser you are using the appeared dialog box may vary Received Fax forwarding setting You can create up to 100 rules for the received fax or e mail messages Delivery se...

Страница 90: ...g numbers in the text of the mail as follows FAXNO XXXX xxxx forwarding fax number 1 Always begin from the start of the line 2 As long as above condition is fulfilled the number can be written anywher...

Страница 91: ...or domain name as you desire Setting of Fax Forwarding request conditions 1 Access to the Administration Tools See page 22 2 Click E mail environment under Setup 3 Select one desired condition from W...

Страница 92: ...90 Installing the OfficeBridge Online Printer Fax driver Installing Printer Fax driver 91 Uninstalling Printer Fax driver 93...

Страница 93: ...nline Printer Fax drivers Note For Windows XP or Windows 2000 or Windows NT log on to Windows as a member of the Administrators group Note According to the Windows version you are using the name of it...

Страница 94: ...puter or press Program G 1 0 2 ENTER on your fax machine 8 Select the port OB_ IP Address for OfficeBridge Online Printer driver In this example we ve selected OB_200 1 37 99 9 Select the port OB_ IP...

Страница 95: ...example utilizes Windows XP To remove the OfficeBridge Online Printer Fax drivers 1 Open Add or Remove Programs in Control Panel Note To open Add or Remove Programs click Start click Control Panel and...

Страница 96: ...94 Installing the OfficeBridge Online Utilities Installing the OfficeBridge Online Utilities 95 Uninstalling the OfficeBridge Online Utilities 99...

Страница 97: ...dows NT log on to Windows as a member of the Administrators group Note According to the Windows version you are using the name of items listed in dialog boxes may vary The following example utilizes W...

Страница 98: ...8 The Server address setting dialog box will appear Enter the IP Address assigned to your fax machine In this example we ve entered 200 1 37 99 Note If necessary you can see the IP Address by followi...

Страница 99: ...10 Confirm the installation components click Next 11 To finish the installing click Finish 97...

Страница 100: ...Note To open Add or Remove Programs click Start click Control Panel and then double click Add or Remove Programs 3 Click Change or Remove Programs and then click the OfficeBridge Online Utility Then...

Страница 101: ...utilizes Windows XP To remove all installed OfficeBridge Online utilities 1 Open Add or Remove Programs in Control Panel Note To open Add or Remove Programs click Start click Control Panel and then d...

Страница 102: ...100 Installing Reference Manual Installing the Reference Manual 101 Uninstalling the Reference Manual 104...

Страница 103: ...ministrators group Note According to the Windows version you are using the name of items listed in dialog boxes may vary The following example utilizes Windows XP In case of the OfficeBridge Online Ut...

Страница 104: ...CD ROM drive You can also browse through the folders to find the Setup exe by clicking Browse Click OK 3 The Setup wizard will appear Click Next 4 The License Agreement screen will appear Read the ag...

Страница 105: ...7 To finish the installing click Finish 103...

Страница 106: ...ograms click Start click Control Panel and then double click Add or Remove Programs 2 Click Change or Remove Programs and then click the OfficeBridge Online Utility Then click Change Remove to remove...

Страница 107: ...Troubleshooting Trouble with screen operation 106 Trouble with InfoMonitor 108 Trouble with a printer 109 105...

Страница 108: ...for some versions of the same browser With OfficeBridge Online cook ies are used for managing the connection between OfficeBridge Online and the web browser Is your web browser set to prohibit the use...

Страница 109: ...ssing it with the Web Browser screen displayed When the screen is moved with the Web browser s Back button the connection management informa tion is not sent to OfficeBridge Online so connection manag...

Страница 110: ...packet has not arrived Is automatic deletion after down loading of a document set with InfoMonitor on another computer Is a user registered for OfficeBridge Online Was OfficeBridge Online started when...

Страница 111: ...lay Cause Is the address of OfficeBridge Online that are you trying to con nect to correct After installation is the OfficeBridge Online address dif ferent Is the address of OfficeBridge Online that a...

Страница 112: ...110 Appendix Specifications 111...

Страница 113: ...protocol TCP IP Browser Microsoft Internet Explorer 4 01 SP1 or a later version or Netscape Navigator 6 0 or a later version Internet fax E mail communication protocol SMTP POP3 Original document size...

Страница 114: ...s Data format TIFF Scanning speed MFX 1300 3 5 seconds Legal 300 dpi 3 7 seconds A4 300 dpi MFX 1700 1 9 seconds Legal 200 dpi 2 1 seconds A4 200 dpi Reduction Enlargement Inch version 200 129 Half le...

Страница 115: ...Professional English version Windows XP English version Computer PC AT compatible Hard disk space for installing OfficeBridge Online InfoMonitor At least 4 MB OfficeBridge Online TWAIN Connector At le...

Страница 116: ...merica Inc 3301 E Plano Parkway Suite 100 Plano Texas 75074 http www muratec com Muratec UK Ltd Tempus Court Onslow Street Guildford Surrey GU1 4SS http www muratec co uk 2003 Murata Machinery Ltd D92...

Отзывы: