Moxa MXNVR-RO
Hardware Connection Description
3-10
3.
Pull out the faceplate by unscrewing the thumbscrews in the upper corners, and then remove the plate.
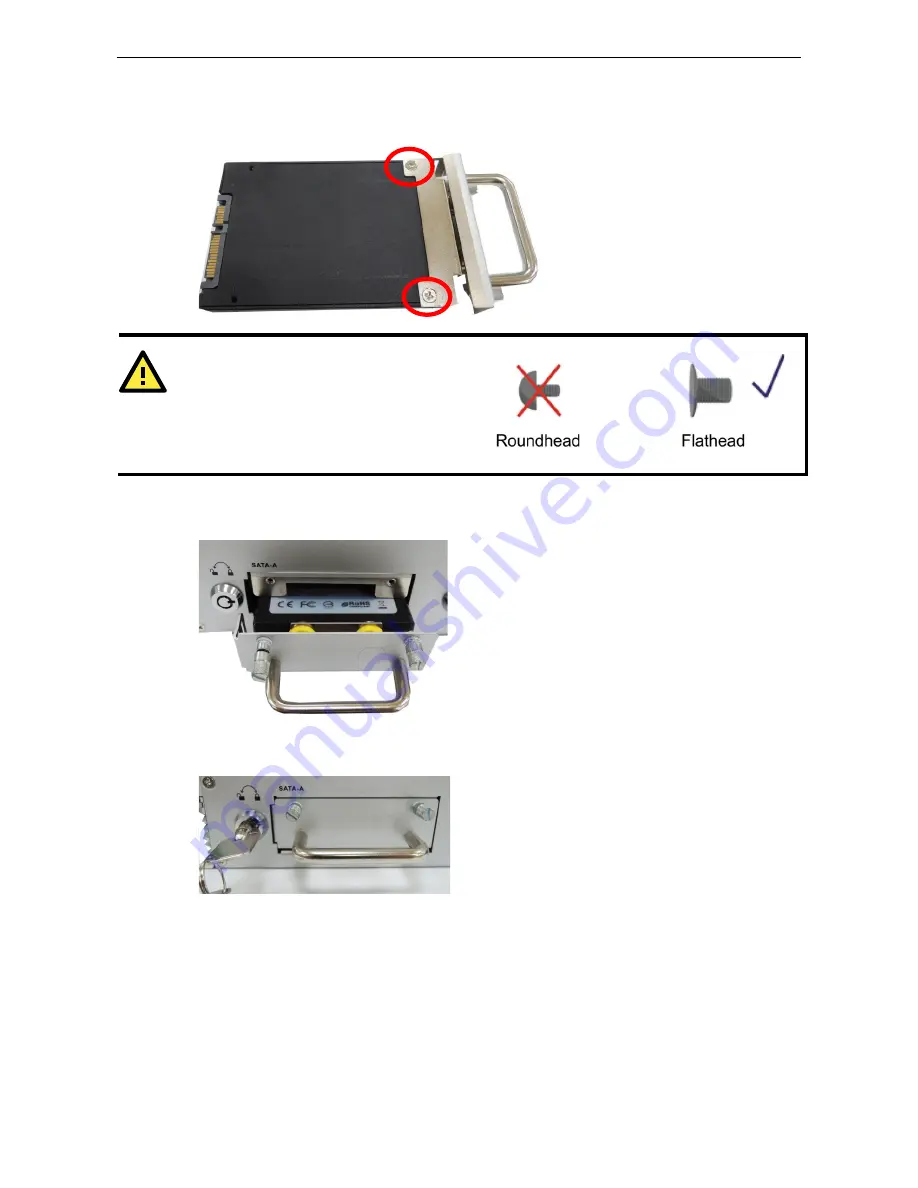
Fasten the storage drive to the faceplate flange as shown below, using the two flathead screws that were
shipped with your MXNVR-RO-T.
ATTENTION
To successfully fit the disk into the slot, use the
flathead screws to fasten the hard disk to the tray.
Do not use the roundhead screws, since they may
prevent you from being able to insert the tray into
the slot.
4.
Carefully align the drive with the drive slot, and gently insert the drive into the computer, taking care that
it slides smoothly and firmly into the SATA mounts.
5.
When finished, turn the key clockwise to activate the lock and tighten the thumbscrews. Use the same
method to install a hard disk in the second storage tray.
As these are hot-swappable storage trays, you can replace the storage disks while the computer is still powered
on. Follow these steps:
1.
Push the hot-swap button, located on the lower right of the front panel.
2.
Observe the L1 LED indicator (marked in the diagram below). When the LED starts blinking, the system will
start to unmount the storage disk.


