7A
7B
EN
EN
01
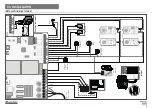
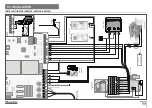
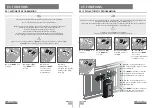
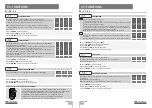
• Make connections for all accessories according to the wiring diagram (page 5A).
02
• Connect the control board to a 400V 3 ~ phase power supply (terminals L1, L2, L3)
03
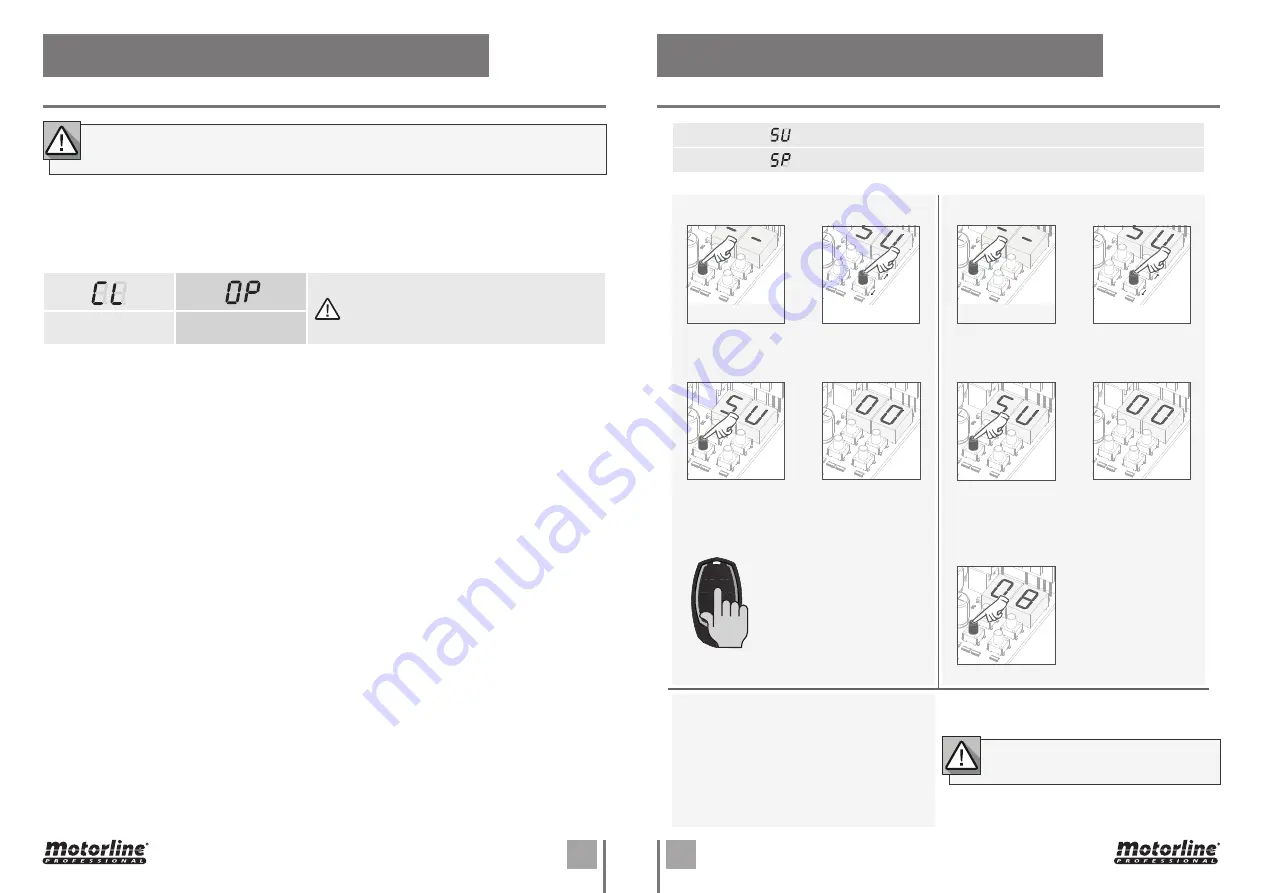
• Check that the movement of the gate matches the one shown on the display:
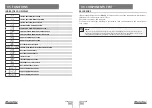
03. INSTALLATION
BASE INSTALLATION PROCESS
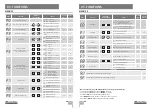
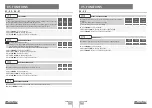
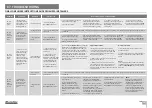
04. PROGRAMMING
PROGRAMMING AND DELETE TRANSMITTERS
O processo de instalação, assume que o portão já tem as chapas de fim de curso instaladas.
Para mais informações consulte o manual do motor.
02
• Select
[SU]
use
UP
or
DW
.
05
• Press cmd for 3 sec
and the location will be
empty.
The display will blink
and the position will
be free.
02
• The display will show
[SU]
.
03
•
[SU]
will flash.
04
•
[LU]
flashes, confirming that all
commands have been deleted.
01
• Press the cmd button for 10 sec.
01
• Press the
cmd button for
3 sec.
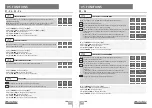
TRANSMITTER PROGRAMMING FOR TOTAL OPENING
TRANSMITTER PROGRAMMING FOR PEDESTRIAN OPENING.
02
• Select
[SU]
use
UP
or
DW
.
03
• Press cmd
once to confirm.
04
• Use
UP
or
DW
to select the
transmitter
location you want
to delete.
04
• The first free
position appears.
05
• Press the command
button you want to
program. The display will
blink and move to the
next free location.
03
• Press cmd
once to confirm.
01
• Press the
cmd button for
3 sec.
• PROGRAMMING TRANSMITTERS
• ERASE ALL THE TRANSMITTERS
• ERASE TRANSMITTERS
• If you do not press any key for 10 sec.
the control board will return to standby.
CLOSING
OPENING
In case the display does not match the movement
of the gate, disconnect the control panel from
the power supply and change the wires T1 and T2
and check if it is correct with OP and CL.
04
• Check the limit switches so that the
CL LED
goes out when the closing limit switch is
activated and the
OP LED
goes out when the opening limit switch is activated.
05
• Make an automatic or semi-automatic programming of the course - menu
[P0]
(page 9A).
06
• If necessary, adjust the gate slowing time at the opening and in the closing - menu
[P1]
(page 10A).
07
• Adjust the force - menu
[P2]
(page 10A).
08
• Enable or disable the use of photocells in the
[P5]
menu (page 10B).
09
• Enable or disable the use of photocells 2 in the
[P6]
menu (page 10B)
10
• Program a command (page 7B).
The control board is now fully configured!
Check the pages of the menu programming if you want to configure other features of the
Control board.


