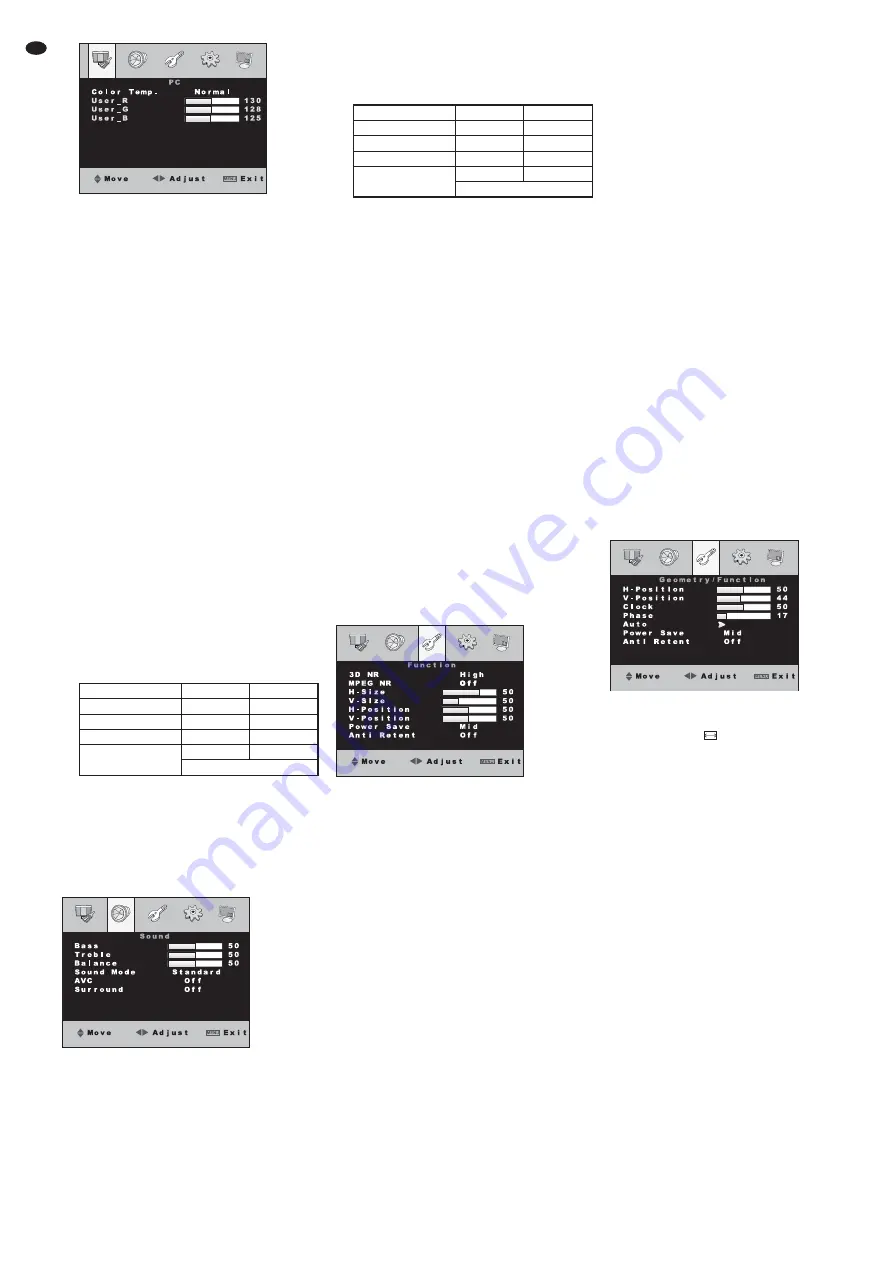
It is possible to switch between five colour dis-
plays with the buttons
and
:
“Normal” standard setting
“Warm”
warm colour display
“Cool”
cool colour display
“S-RGB” common colour standard in the
computer field
“USER”
individual setting
Use the button SOURCE /SEL. or
the buttons
and
to select the
lines “USER_R” (proportion of red),
“USER_G” (proportion of green)
and USER_B (proportion of blue)
successively and adjust the
desired value with the buttons
and
.
Note: Do not switch to another colour dis-
play before exiting the submenu so that
the values are accepted as a “user” set-
ting.
To exit the submenu, press the button MENU /
EXIT, MENU or CANCEL.
Scale
(picture format)
It is possible to switch between the picture for-
mats “Full” (4 : 3 format, picture fills the screen
completely) and “16 : 9” with the buttons
and
.
Picture Mode
(picture presetting)
It is possible to switch between the picture
presettings “Standard”, “Dynamic”, “Soft” and
“User” with the buttons
and
.
Note: When adjusting individual values for “Contrast”
and “Brightness”, the unit automatically changes to
“User”. Before exiting the menu, do not switch to
another picture presetting so that the individual values
are accepted as a “user” setting.
9.2 Menu page 2: Audio settings
Bass
Treble
The levels for bass and treble can be attenu-
ated (button
) or increased (button
).
Balance
(stereo balance left / right)
The volume ratio Left / Right is balanced at the
value 50. The sound can be moved to the right
with the button
and moved to the left with
the button
.
Sound Mode
(audio presetting)
It is possible to switch between the audio pre-
settings “Standard”, “Movie”, “Music” and
“User” with the buttons
and
.
Note: When adjusting individual values for “Bass” and
“Treble”, the unit automatically changes to “User”.
Before exiting the menu, do not switch to another audio
presetting so that the individual “treble” values are
accepted as a “user” setting.
AVC
The menu item “AVC” has no function for this
model.
Surround
(surround sound effect)
The function can be switched on or off with the
buttons
and
. With the function switched
on, the menu item “Balance” cannot be
adjusted.
9.3 Menu page 3:
Optimizing the picture /
additional functions
The menu page 3 shows different adjusting
options, depending on the signal source.
– If the source is not a computer but e. g. a DVD
player or a camera, the version “Function” is
shown
chapter 9.3.1.
– If the source is a computer, the version “Geom-
etry / Function” is shown
chapter 9.3.2.
9.3.1 Version “Function”
3D NR
(3D noise filter)
In case of interference and noise in the pic-
ture, the 3D noise suppression can be acti-
vated in three steps to improve the picture
quality. Select “Off” (filter deactivated) “Low”
(low level), “MID” (medium level) or “High”
(high level) with the button
or
.
MPEG NR
(MPEG noise filter)
To remove interference in the picture caused
by video compression (block artefacts), an
MPEG noise filter can be activated in two
steps. Select “Off” (filter deactivated), “Low”
(low level) or “High” (high level) with the but-
ton
or
.
H-Size
(width of picture)
V-Size
(height of picture)
H-position
(move picture horizontally)
V-position
(move picture vertically)
Line “H-Size”
button
= reduce picture width
button
= increase picture width
Line “V-Size”
button
= reduce picture height
button
= increase picture height
Line “H-Position”
button
= move picture to the left
button
= move picture to the right
Line “V-Position”
button
= move picture upwards
button
= move picture downwards
Note: The menu items “H-Size” to “V-Position” can
separately be adjusted for the signal sources “AV1”
and “AV2”. These menu items are deactivated for sig-
nal sources connected digitally.
Power Save
(energy saving mode)
By reducing the brightness of the LED back-
light, the energy consumption may be
reduced. Select one of the following settings
with the button
or
: “Off” (energy saving
mode off, max. brightness)
“Low”
“Mid”
“High”
“Super” (min. brightness).
Anti Retent
(preventing shadow images)
To prevent image retention (= continued light-
ing of preceding picture contents, may occur
with longer still pictures), different anti-reten-
tion modes may be activated. It is possible to
select with the button
or
:
“Off”
no anti-retention mode activated
“1 Hour”
realized every hour
“2 Hour”
realized every two hours
(slower but more precise than the
“1 Hour” mode)
“4 Hour”
realized every 4 hours
(the slowest but most precise anti-
retention mode)
“Test”
realized every 30 seconds,
for testing purposes
9.3.2 Version “Geometry / Function”
For picture adjustment with analog computer
connection the auto correction should be used
button AUTO
(10) or menu item “Auto”. If
the result is not as desired, the picture can be
adjusted manually via the menu items “H-Posi-
tion” to “Phase”. With digital computer connection
the menu items “H-Position” to “Auto” are deacti-
vated.
H-Position, V-Position
(picture position)
Line “H-Position”
button
= move picture to the left
button
= move picture to the right
Line “V-Position”
button
= move picture downwards
button
= move picture upwards
Clock
(pixel clock)
Via the pixel clock adjust the optimum picture
width at which no vertical stripes appear in the
picture:
button
= reduce picture width
button
= increase picture width
Phase
Adjust the phase so that an optimum sharp-
ness (e. g. of lettering displayed) is reached
and no horizontal picture interference occur:
button
= reduce value
button
= increase value
Auto
(automatic picture adjustment)
The automatic picture adjustment is activated
with the button
or
. The menu is exited
and “Auto-Adjust” is inserted for the time of
the adjustment. Values manually adjusted for
Name
Bass
Treble
Standard
50
50
Movie
35
65
Music
65
35
User
50
50
or individual values
Name
Contrast
Brightness
Standard
50
50
Dynamic
55
55
Soft
45
45
User
52
52
or individual values
12
GB


