656 952 a
33
5.14 Verteilerleiterplatte
Achtung!
Vor Öffnen des Geräts System
ausschalten und Netzstecker ziehen.
!
Deckel (1-6) öffnen.
!
Alle Steckverbinder von der Verteilerleiterplatte
(11-1) abziehen, 2 Schrauben (11-6) und die
Verteilerleiterplatte entfernen.
!
Beim Einbau ist darauf zu achten, dass die
Schirmanschlüsse mit unter die Befestigungs-
schrauben der Verteilerleiterplatte geschraubt
werden.
!
Die Steckverbinder werden mithilfe des
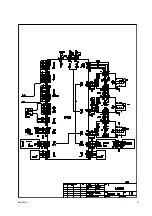
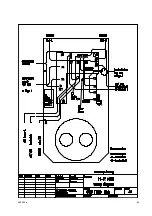
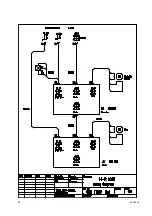
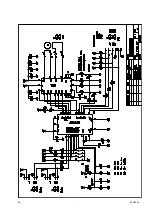
Verdrahtungsplans 656 950 Sch wieder
aufgesteckt.
!
Anschließend Deckel (1-6) wieder schließen.
!
Funktionstest durchführen.
5.14 Distribution PCB
Attention!
Prior to open the unit, switch off the
system and pull off the mains plug.
!
Open the cover (1-6).
!
Pull off all plug connectors from the distribution
PCB (11-1), remove 2 screws (11-6) and the
distribution PCB.
!
During installation make sure that the shield
connections are positioned under the fixing
screws of the distribution PCB.
!
Reposition the plug connectors following the
wiring plan 656 950 Sch.
!
Then close again the cover (1-6).
!
Perform the function test.
11-2
11-3
11-5
11-1
X11
X14
X8
X9
11-4
11-6
Содержание Hi-R 1000
Страница 11: ...656 952 a 11...
Страница 22: ...22 656 952 a 11 2 11 3 11 5 11 1 X11 X14 X8 X9 11 4 11 6...
Страница 24: ...24 656 952 a 11 2 11 3 11 5 11 1 X11 X14 X8 X 9 11 4 11 6 2 1 12 3 12 2 12 1 X...
Страница 25: ......
Страница 26: ...26 656 952 a...
Страница 30: ...656 952 a 31 4 1 4 2 4 4 4 3...
Страница 40: ...40 656 952 a...
Страница 41: ...656 952 a 41...
Страница 42: ...42 656 952 a...
Страница 43: ...656 952 a 43...
Страница 44: ...44 656 952 a...
Страница 45: ...656 952 a 45...
Страница 46: ...46 656 952 a...
Страница 47: ...656 952 a 47...
Страница 48: ...48 656 952 a...
Страница 49: ...656 952 a 49...
Страница 50: ...50 656 952 a 1 4 1 3 1 2 1 5 1 1 1 6...
Страница 51: ...656 952 a 51 Y 3 1 3 2 3 3 3 4 3 5 10 4 10 1 10 10 10 10 10 2 10 3 10 8 10 6 10 5 10 7 10 9...
Страница 52: ...52 656 952 a...


