background image


TD_QSG_SCALEREO_EN 


Rev. 2.0 / 19.04.2022 


Page 1 / 4 

3D Global Solutions GmbH 

Am Krebsgraben 15 / Geb. 2.2 

DE-78048 Villingen-Schwenningen


www.3dgs.eu / [email protected] 

Tel: +49 (0) 7721-916 19 60 


Quick Start Guide 


Stereo 3D Video Microscope System 

 
The SCALEREO

®

 system is available in two different variants: 


SCALEREO-Desk 

Complete 3D microscope system, including a height adjustable desk microscope unit (image 
3a) with integrated microscope optics, stereo camera unit and flexible lighting system.  


SCALEREO-AddOn 

3D video extension kit, including a 3D camera add-on module (image 3b) to upgrade existing 
optical microscopes (e.g. Leica M-Series 

/ Olympus / Zeiss / …) to become a digital 3D video 

microscope system.  

1.  Start-Up 

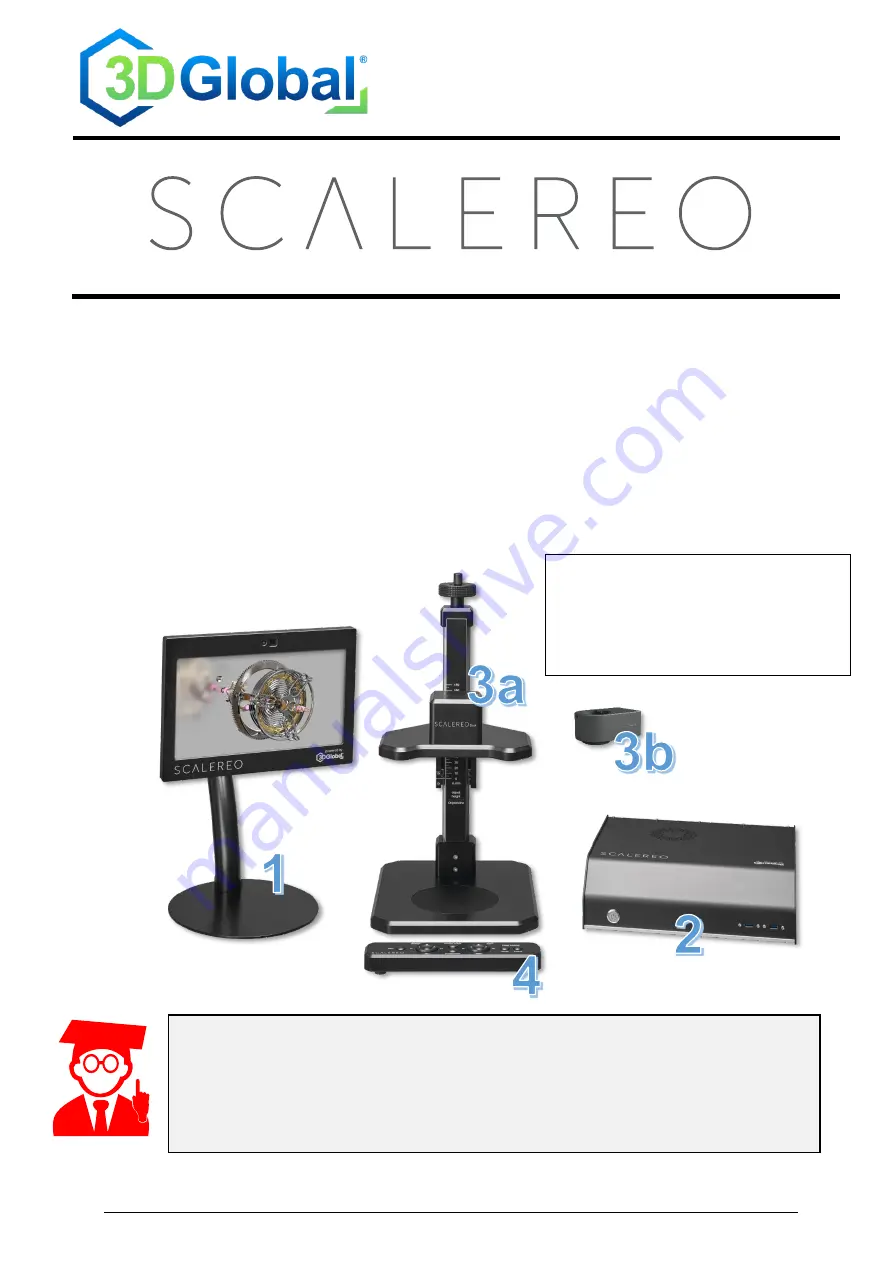
1.1  System components 


1  

–   3D Display  

2  

–  Signal Processing Unit (SPU)  

3a  

–   Desk Microscope Unit 

3b  

–   AddOn Module 

4  

–   System Control Bar 

The Power supply may not be connected until all components  

have been connected to the Signal Procession Unit (SPU) correctly!   


NEVER disconnect any component while the system is running! 

Summary of Contents for SCALEREO

Page 1: ...h integrated microscope optics stereo camera unit and flexible lighting system SCALEREO AddOn 3D video extension kit including a 3D camera add on module image 3b to upgrade existing optical microscopes e g Leica M Series Olympus Zeiss to become a digital 3D video microscope system 1 Start Up 1 1 System components 1 3D Display 2 Signal Processing Unit SPU 3a Desk Microscope Unit 3b AddOn Module 4 S...

Page 2: ...ble USB to the SPU Connect the power cable to the SPU 1 3 Start the system Switch on the main switch Briefly press the power button front side of SPU to start the system Wait until the system has completely booted and 3D visualization is provided To deinstall the system follow the steps above but in reverse order 2 Usage Requirements It is absolutely essential to observe these 3 basic requirements...

Page 3: ... press 0 5s on button F to set the focus plane upwards Long press 0 5s on button F to set the focus plane downwards 4 2 Photo video documentation 4 2 1 freeze image Press Freeze Image to temporarily freeze the current image on the screen PAUSE Press Freeze Image again to go back to LIVE image visualization 4 2 2 record photo video Short press 0 5s Photo Video to save the current image as a screens...

Page 4: ...e tracking of the viewing position The image is tracked to the user s current position even if the user s position changes only very slightly When this mode is activated User Tracking FINE appears briefly on the screen o OFF No active tracking of the 3D viewing position The user must be positioned optimally in the viewing zone located centrally in front of the display Permanent overlay of User Tra...

Reviews: