6
4. Installing the refrigerant piping
A
A
A
C
E
D
D
B
C
A
B
B–C
B–D
≤
8 m
C–D
P3 : A+B+C
≤
50
P4-6 : A+B+C(+D)
≤
50 m
Fig. 4-6
F
Open position side
G
Service port
H
Wrench hole
I
Refrigerant flow direction
Refrigerant pipes are protectively wrapped
• The pipes can be protectively wrapped up to a diameter of ø90 before or after
connecting the pipes. Cut out the knockout in the pipe cover following the groove
and wrap the pipes.
Pipe inlet gap
• Use putty or sealant to seal the pipe inlet around the pipes so that no gaps remain.
(If the gaps are not closed, noise may be emitted or water and dust will enter the
unit and breakdown may result.)
4.6. Addition of refrigerant
Refrigerant charge:
• The liquid refrigerant should be charged using the low pressure charge plug in the
service panel.
• Use the following table when adding R407C refrigerant to tubing that is over 20 m
(P1-P2.5)/30 m (P3-P6).
(kg)
Models
Piping length (One way)
-10 m
-20 m
-30 m
-40 m
-50 m
Factory charged
P1
1.7
1.8
–
–
1.7
P1.6
2.5
2.6
3.0
–
2.5
P2
2.6
3.1
3.7
–
2.6
P2.5
3.1
3.3
3.9
4.5
3.1
P3
3.3
3.9
4.5
3.3
P4
4.0
4.7
5.4
4.0
P5
4.6
5.3
6.0
4.6
P6
4.9
5.6
6.3
4.9
Example) For P5 model with 38 m of piping.
5.3 kg (40 m) – 4.6 kg
Therefore, additional refrigerant required = 0.7 kg
4.7. For twin/triple combination
Refrigerant piping limitation of length, height difference are shown in the figure. (Fig.
4-6)
A
Indoor unit
B
Outdoor unit
C
Multi distribution pipe (option)
D
Height difference (Indoor unit-Outdoor unit) Max. 30 m
E
Height difference (Indoor unit-Indoor unit) Max. 1 m
(1)
1
2
Fig. 4-5
Fig. 4-4
A
B
C
D
E
F
B
G
H
E
D
I
(2)
1
2
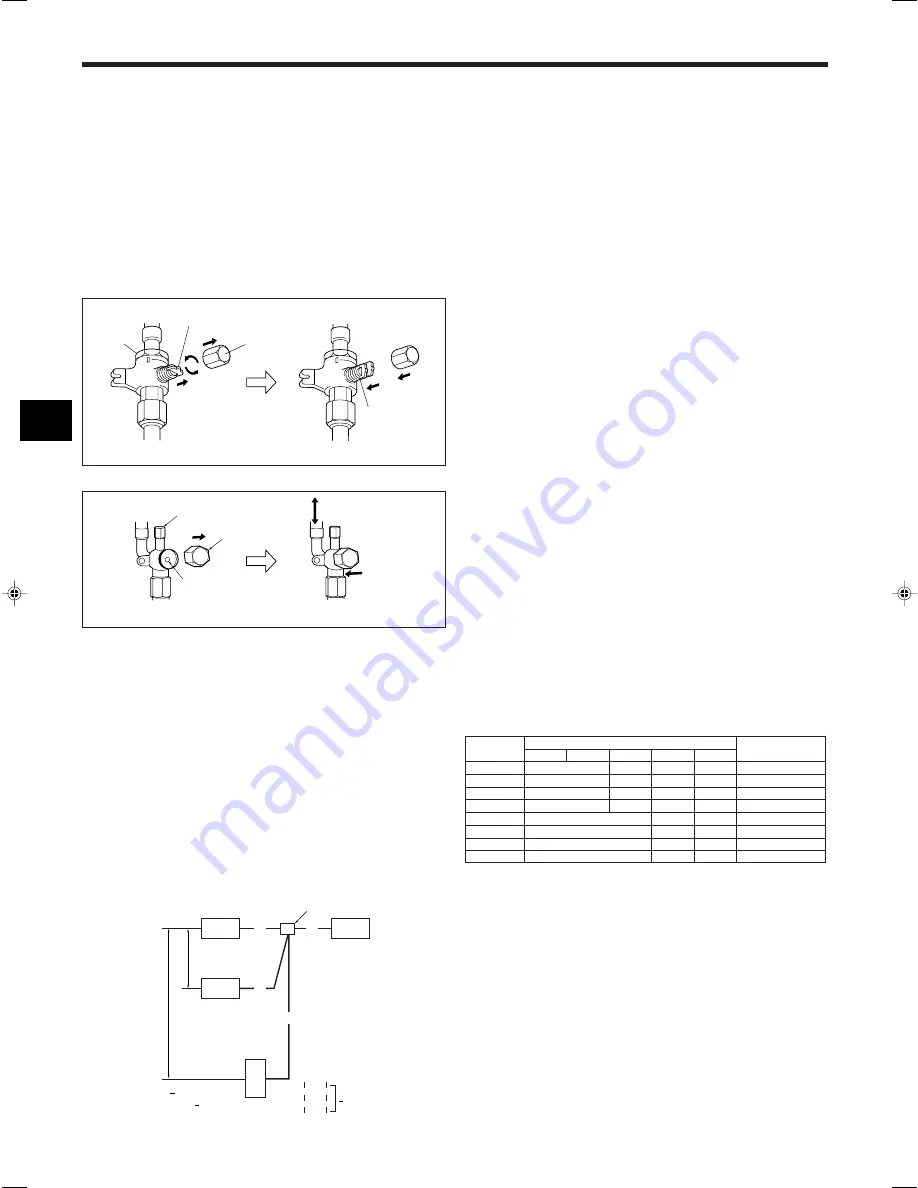
4.4. Refrigerant pipe airtight testing method
(1) Connect the testing tools.
• Make sure the stop valves are closed and do not open them.
• Add pressure to the refrigerant lines through the service port of the liquid stop
valve.
(2) Do not add pressure to the specified pressure all at once; add pressure little by little.
1
Pressurize to 0.5 MPa (5 kgf/cm
2
G), wait five minutes, and make sure the
pressure does not decrease.
2
Pressurize to 1.5 MPa (15 kgf/cm
2
G), wait five minutes, and make sure the
pressure does not decrease.
3
Pressurize to 3.3 MPa (33 kgf/cm
2
G) and measure the surrounding tempera-
ture and refrigerant pressure.
(3) If the specified pressure holds for about one day and does not decrease, the pipes
have passed the test and there are no leaks.
• If the surrounding temperature changes by 1 °C, the pressure will change by
about 0.03 MPa (0.3 kgf/cm
2
G). Make the necessary corrections.
(4) If the pressure decreases in steps (2) or (3), there is a gas leak. Look for the
source of the gas leak.
4.5. Stop valve opening method
(1) Gas side (Fig. 4-4)
1
Remove the cap, pull the handle toward you and rotate 1/4 turn in a counterclock-
wise direction to open.
2
Make sure that the stop valve is open completely, push in the handle and rotate
the cap back to its original position.
(2) Liquid side (Fig. 4-5)
1
Remove the cap and turn the valve rod counterclockwise as far as it will go with
the use of a 4 mm hexagonal wrench. Stop turning when it hits the stopper.
(ø6.35: Approximately 4.5 revolutions) (ø9.52: Approximately 10 revolutions)
2
Make sure that the stop valve is open completely, push in the handle and rotate
the cap back to its original position.
A
Valve
B
Unit side
C
Handle
D
Cap
E
Local pipe side
Содержание PU(H)-P GAA
Страница 98: ......


