21
5-5 Selecting the Drive of ATA Card
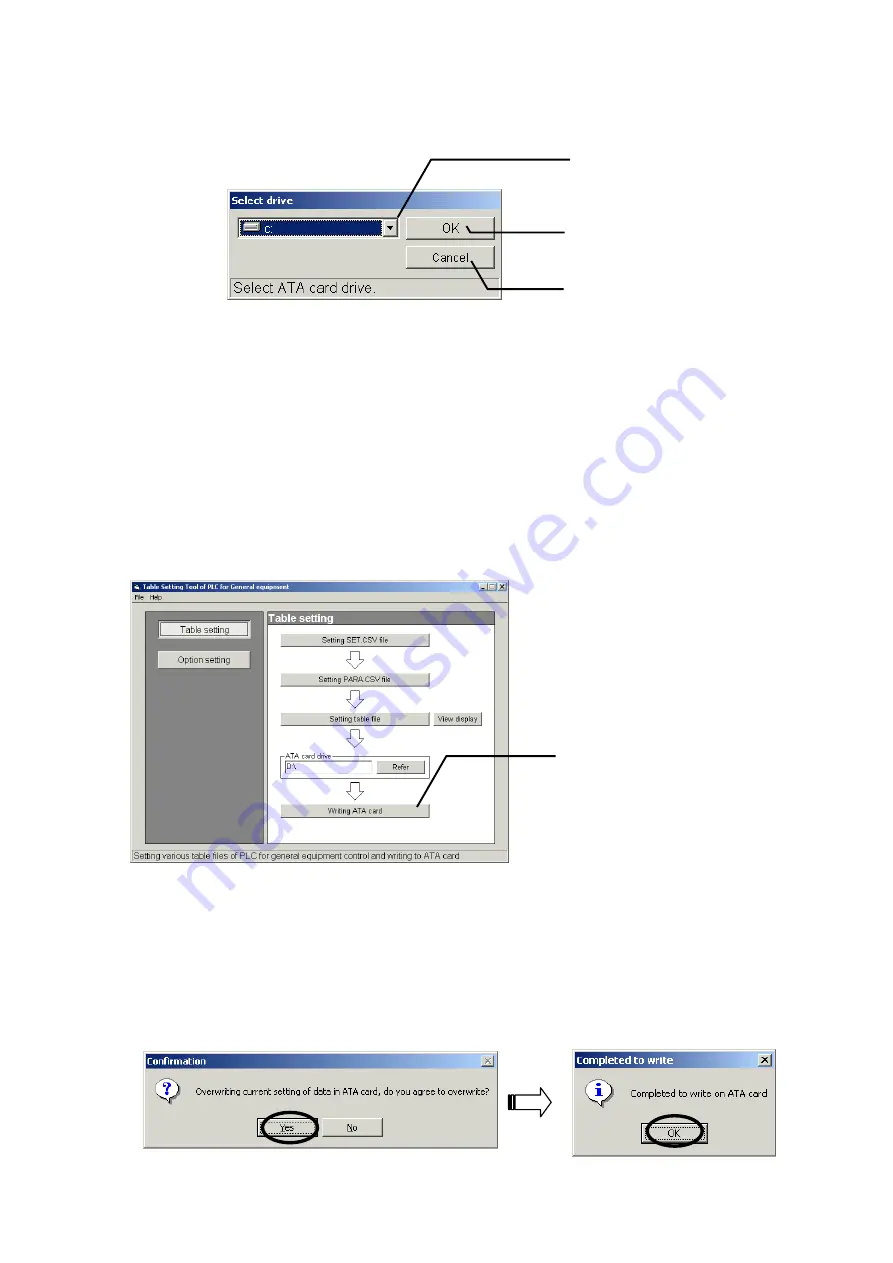
Clicking [Reference] of [ATA card drive] in the setting sub-menu displays the screen to select the drive. On
this screen, select the drive in which PC card of ATA card is inserted.
Figure 5-9 Screen to select drive
(1) Select the drive of PC card to write data in ATA card.
The sub directory of the ATA card cannot be chosen as the destination to write the data in; store data in the
root directory of the ATA card.
(2) After finishing the setting, click the [OK] button.
*Clicking the [Cancel] button returns to the initial setting screen without saving the set detail.
5-6 Writing in ATA Card
Clicking [Writing in ATA card] of the setting sub-menu allows you to write the detail being set to
ATA card.
Figure 5-10 Initial screen
(1) Set PC card being inserted with ATA card to the drive.
(2) Clicking [Writing ATA card] of the setting sub-menu displays a massage to confirm. After confirming the
message detail, write the set detail in ATA card. At completion of the writing, a message to finish is
displayed.
*Clicking the [Cancel] button returns to the initial setting screen without saving the set detail.
[OK] button
For saving of the set detail
[Cancel] button
For returning to initial setting
screen without saving set detail
Selecting the drive
For setting of the drive in which PC
card is inserted.
ATA card writing button
For writing of the set detail in ATA
card being inserted into PC card.


