background image

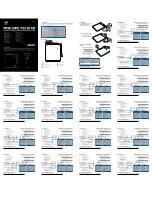
MCC-070 Controlled Charger

Midtronics BV Hoofdveste 6-8 3992 DG Houten

www.midtronics.com

15

Chapter 2: Charging

Controlled Charge


Controlled 

Charge

For charging situations when battery information 

(chemistry, rating, etc) is available.

Use 




 to navigate around the charger screen.  Press 


to Enter the selection.
1.  At the Main Menu, select the Controlled Charge icon.
2.  The VIN number can be added to the charge. If at the top 

no VIN is shown, you can add the VIN through manual en-

try, CVG entry or selecting the vehicle in the vehicle list.  

3.  Select the battery Chemistry, Units and Rating.
4.  Select Start.

The charger performs a Safety Check on the connected 

battery.

Battery unsafe to 

charge.

Attention

Cancel

Retry

If the battery passes, the charging process begins.
Use 

 or 

 to view the charging screens while the battery 

is being charged.

5.  Press 

 to abort the charging session.

6.  The Charge Complete screen is displayed at the end of the 

charge cycle.

Charge Complete!

Continue

7.  While this screen is displayed the charger is actually con-

tinuing to charge the battery in the background,  filling it 

to maximum capacity.  The charger will continue to do this 

until the battery’s acceptance of the charge is 100%.

8.  Press Continue to exit the top-off charge and display the 

Charge Results.

Quick Charge


Quick 

Charge

This function provides a simple, one-touch 

charge for a battery.

1.  At the Main Menu, select the Quick Charge icon.

The charger performs a Safety Check on the connected 

battery.

Battery unsafe to 

charge.

Attention

Cancel

Retry

If the battery passes, the charging process begins.
Use 

 or 

 to view the charging screens while the battery 

is being charged.

2.  Press 

 to abort the charging session.

3.  The Charge Complete screen is displayed at the end of the 

charge cycle.

Charge Complete!

Continue

4.  While this screen is displayed the charger is actually con-

tinuing to charge the battery in the background,  filling it 

to maximum capacity.  The charger will continue to do this 

until the battery’s acceptance of the charge is 100%.

5.  Press Continue to exit the top-off charge and display the 

Charge Results.

Chapter 2: Charging

Содержание MCC-070

Страница 1: ...INSTRUCTION MANUAL MCC 070 EU Controlled Charger JAN 2019 167 000651EN B...

Страница 2: ...MCC 070 Controlled Charger Midtronics BV Hoofdveste 6 8 3992 DG Houten www midtronics com 2...

Страница 3: ...1 Connections 11 Carrying Handle Optional 11 Stabilizing Base 11 Locking Power Cord 11 Charging Cables 11 Menu Layout 12 Main Menu 12 Settings Menu 13 Settings Sub Menus 13 Tool 13 Shop Settings 13 Ne...

Страница 4: ...MCC 070 Controlled Charger Midtronics BV Hoofdveste 6 8 3992 DG Houten www midtronics com 4...

Страница 5: ...arp blow been dropped or otherwise damaged in any way take it to a qualified service center 1 6 Do not disassemble charger take it to a qualified service center when repair is required Incorrect reass...

Страница 6: ...set at the correct voltage If the charger has an adjustable charge rate charge the battery initially at lowest rate If the charger has only one voltage verify that the battery voltage matches the vol...

Страница 7: ...the battery being charged gases from the battery will corrode and damage the charger 5 4 Never allow battery acid to drip on the charger when tak ing gravity readings or filling a flooded cell batter...

Страница 8: ...ive and can damage the clamps over time Before connecting the clamps ensure accurate test readings and protect the clamps by cleaning the bat tery case and terminals using a wire brush and a mixture o...

Страница 9: ...15 5 VDC 70A maximum Humidity 15 to 85 R H non condensing Dimensions without handle or base Height 4 80 in 12 19 cm Width 13 1 in 33 27 cm Length 12 0 in 30 48 cm Weight 16 75 lbs 7 6 kg Temperature O...

Страница 10: ...s highly corrosive If acid enters your eyes im mediately flush them thoroughly with cold running water for at least 15 minutes and seek medical attention If bat tery acid gets on your skin or clothing...

Страница 11: ...o the back of the charger using the four 4 included Phillips head screw and the appropriate threaded holes Stabilizing Base Secure the stabilizing base to the back of the charger using the two 2 inclu...

Страница 12: ...se Main Menu The Main Menu is the starting point for all tools and utilities which are depicted as icons Some icons lead directly to the function they represent while others are menu icons that lead t...

Страница 13: ...the Date Format the actual Date Time Format and the actual Time Power Supply Set the default maximum and minimum voltages used when the tool is in Power Supply mode Version Check the software version...

Страница 14: ...mp to the positive terminal and the black clamp to the negative terminal An alert is displayed if the clamps are reversed on the battery terminals To make sure both sides of the clamps are gripping th...

Страница 15: ...Continue 7 While this screen is displayed the charger is actually con tinuing to charge the battery in the background filling it to maximum capacity The charger will continue to do this until the bat...

Страница 16: ...displayed the charger is actually con tinuing to charge the battery in the background filling it to maximum capacity The charger will continue to do this until the battery s acceptance of the charge i...

Страница 17: ...l Ah Replaced Amp hours replaced in the battery Chemistry Battery chemistry selected by the technician Time Elapsed The elapsed time for the total charging session Possible Battery Decisions Battery D...

Страница 18: ...MCC 070 Controlled Charger Midtronics BV Hoofdveste 6 8 3992 DG Houten www midtronics com 18 Chapter 2 Charging...

Страница 19: ...to enter the month day and year Tap Set to save the date or Cancel to exit without saving Sep 17 2015 Oct 18 2016 Nov 19 2017 CANCEL SE T Time Format Select AM PM or 24 hour Time Tap or to enter the...

Страница 20: ...anually configure the charger IP Setup and set up a CVG3 Automatic Automatically scan for detectableWiFi networks and select a network from the displayed list for which to connect The selected network...

Страница 21: ...uten www midtronics com 21 Chapter 3 Settings Records Records Display either individual test records or a list of records including VIN Year Make and Model information Devices Devices Manage the Midtr...

Страница 22: ...MCC 070 Controlled Charger Midtronics BV Hoofdveste 6 8 3992 DG Houten www midtronics com 22 Chapter 3 Settings...

Страница 23: ...MCC 070 Controlled Charger Midtronics BV Hoofdveste 6 8 3992 DG Houten www midtronics com 23 Chapter 3 Settings...

Страница 24: ...nc and is protected by one or more U S and foreign patents For specific patent information contact Midtronics Inc at 1 630 323 2800 Midtronics products are warranted to be free of defects in materials...

Отзывы: