Midtronics Inc. 7000 Monroe Street Willowbrook, IL 60527
www.midtronics.com
25
EXP-803
Chapter 10: Maintenance / Troubleshooting
Internal Batteries
The tester uses six AA, 1.5-volt batteries (alkaline batteries
recommended) to allow testing of batteries down to 1 volt and
supply power while the menu is active.
Battery Power Indicator
The square in the upper left corner of the display indicates
the charge level of the battery pack. The square is black when
the battery pack is fully charged. It gradually changes to white
as the charge level declines. The tester will display a warning
message when the batteries need replacing.
Full
Powered
by vehicle
battery
Decreasing
Low
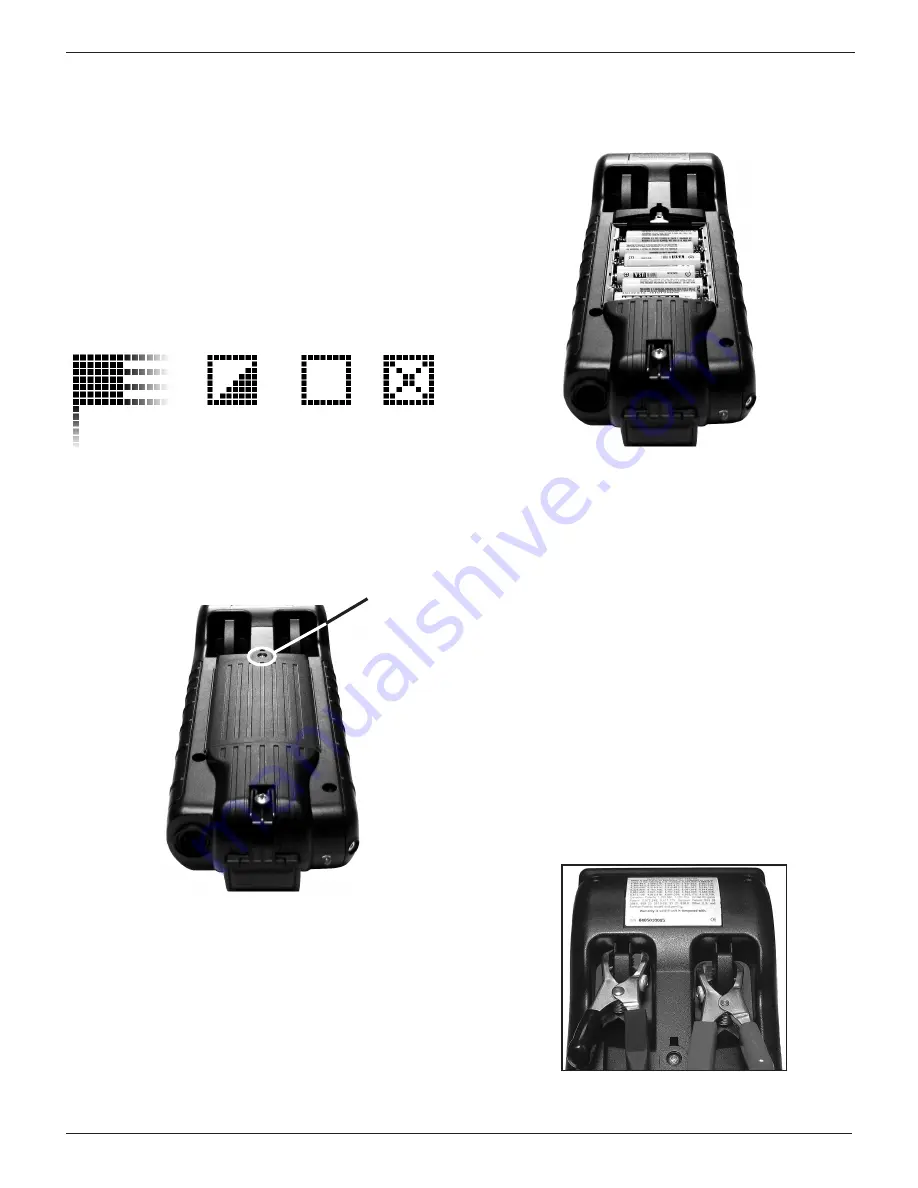
Replacing the Internal Batteries
1. Turn the analyzer face down.
2. Use a Philips screwdriver to remove the screw securing
the door to the battery compartment.
Remove the
screw and
lift the tab
3. Lift the door at the tab and place it aside.
4. Remove the discharged batteries.
5. Insert new batteries as shown. Make sure the positive and
negative terminals are positioned correctly.
6. Reposition the door on the battery compartment.
7. Reinsert and tighten the screw.
Clamps
The test cables that come with your analyzer are consumable
items. The more you use them, the shorter their useful life.
Here are a few things you can do to protect your test cables
from damage and premature wear:
Cleaning the Clamps
•
The grease, dirt, and sulfation that build up on battery ter-
minals are highly corrosive and can damage the clamps
over time. Before connecting the clamps, ensure accurate
test readings and protect the clamps by cleaning the bat-
tery case and terminals using a wire brush and a mixture
of water and baking soda.
•
Periodically clean the clamps using a mixture of baking
soda and water, or a mild hand-soap, and a small bristle
brush.
•
To protect the clamps from oil and dirt, clip them to the
back of the analyzer as shown.
Chapter 10: Maintenance / Troubleshooting
Содержание EXP-802
Страница 2: ...blank page behind cover...


