5
Midtronics B.V. Hoofdveste 6 3992 DG HOUTEN
www.midtronicseurope.com
CHAPTER 2:
DESCRIPTION
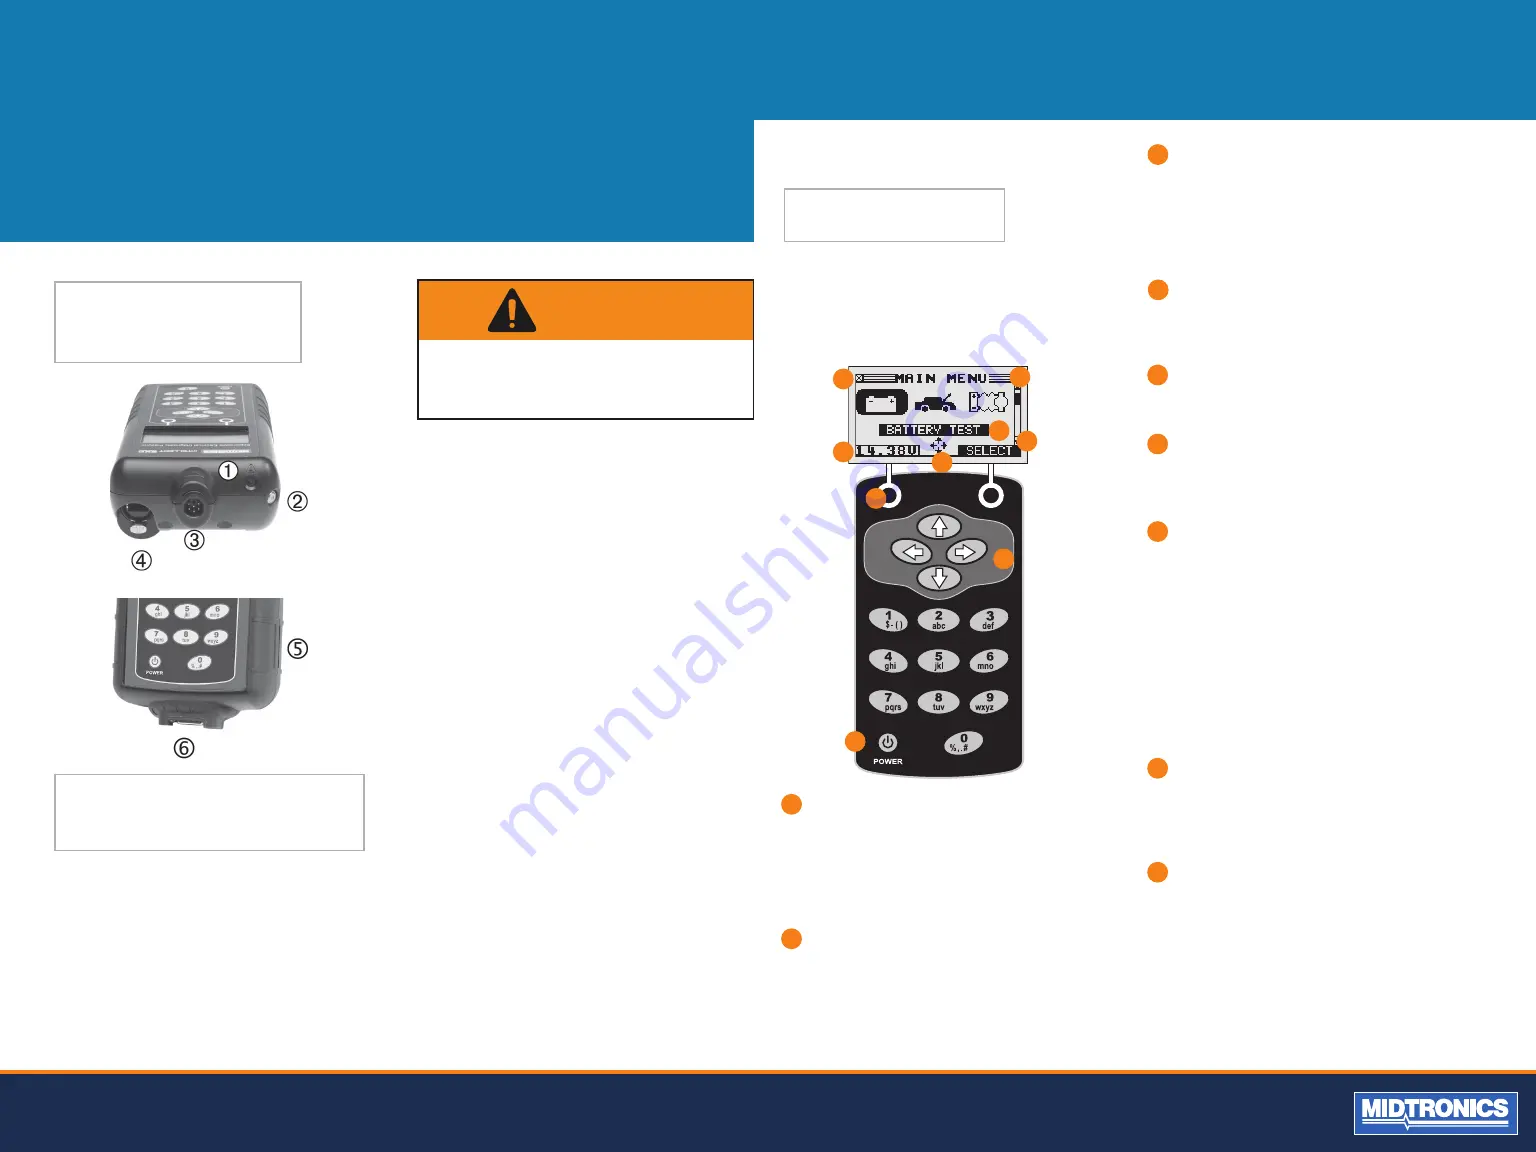
DISPLAY AND KEYPAD
The keypad and display work together to help you quickly
find and use the right tools at the right time. The display also
keeps you on track with on-screen navigation aids, directions
and messages.
INTERNAL BATTERIES STATUS
INDICATOR
This indicator appears in the screen’s top left corner, lets
you know the status and charge level of the analyzer’s six
1.5-volt batteries. The X in the top left corner of the screen
shows that the analyzer is powered by the battery you’re
testing to conserve the analyzer’s internal batteries.
VOLTMETER
When you first connect the analyzer to a battery it functions
as a voltmeter. The voltage reading appears above the left
soft key until you move to other menus or functions.
SOFT KEYS
Press the two Soft Keys linked to the bottom of the screen
to perform the functions displayed above them. The
functions change depending on the menu or test process.
So it may be helpful to think of the words appearing above
them as part of the keys. Some of the more common softkey
functions are SELECT, BACK, and END.
POWER KEY
Press the POWER button to turn the analyzer on and
off. The analyzer also turns on automatically when you
connect its test leads to a battery.
TITLE BAR
The title bar shows you the name of the current menu,
test tool, utility, or function.
SELECTION AREA
The selection area below the Title Bar contains selectable
items or dialog boxes that display information or require
a response.
MENU SCREEN ARROWS
When displayed in menu screens, the menu screen
arrows show you which ARROW key on the keypad to
press to display other icons or screens. The Up and Down
Menu Screen Arrows, for example, indicate when to
press the UP ( ) and DOWN ( ) ARROW keys to display
the screens above and below the current screen.
The Left and Right Menu Screen Arrows tell you when to
use the LEFT ( ) or RIGHT ( ) ARROW keys to select an
icon.
When displayed under a list of options, the menu screen
arrows show you which keypad arrow to press to
highlight a character or item in a list.
SCROLL BAR
Another navigational aid is the scroll bar on the right
side of the screen. The position of its scroll box shows
you whether the screen is the top (or only screen),
middle, or last in a series.
ARROW KEYS
Press the UP ARROW key to move up to the next
selectable item or row. When entering text, use the UP
ARROW key to move to the previous character.
1
2
3
4
5
6
1
2
3
4
5
6
CONNECTIONS AND DATA
PORTS
The analyzer ships with a storage card slot to protect it from
dust and debris. To remove the data card, push briefly on its
edge to release it and pull it from the slot. When inserting a
card, push it into the slot until it locks. The card is correctly
inserted when it is not protruding from the slot. To protect
the card slot and enable the analyzer to read and write to the
card, leave the card in the slot.
REMOVING AND INSERTING THE
DATA CARD
CAUTION: TO PREVENT DAMAGE TO THE ANALYZ
-
ER’S CIRCUITRY, DO NOT CONNECT THE ANALYZER
TO A VOLTAGE SOURCE GREATER THAN
30 VDC.
WARNING
1.
Data transmitter: sends test results to a PC using an op-
tional hardware and software kit.
2.
Infrared temperature sensor with a range of -28 °C to +93 °C
3.
6-pin connector for the battery test cable.
4.
Input for accessories. (optional)
5.
Spring-loaded data card slot for test data storage and
software upgrades.
6.
DB-9 connector for future expandability.
7
8
9
7
8
9


