26
DIGITAL RACK MIXER M32R User Manual
eq
The
eq
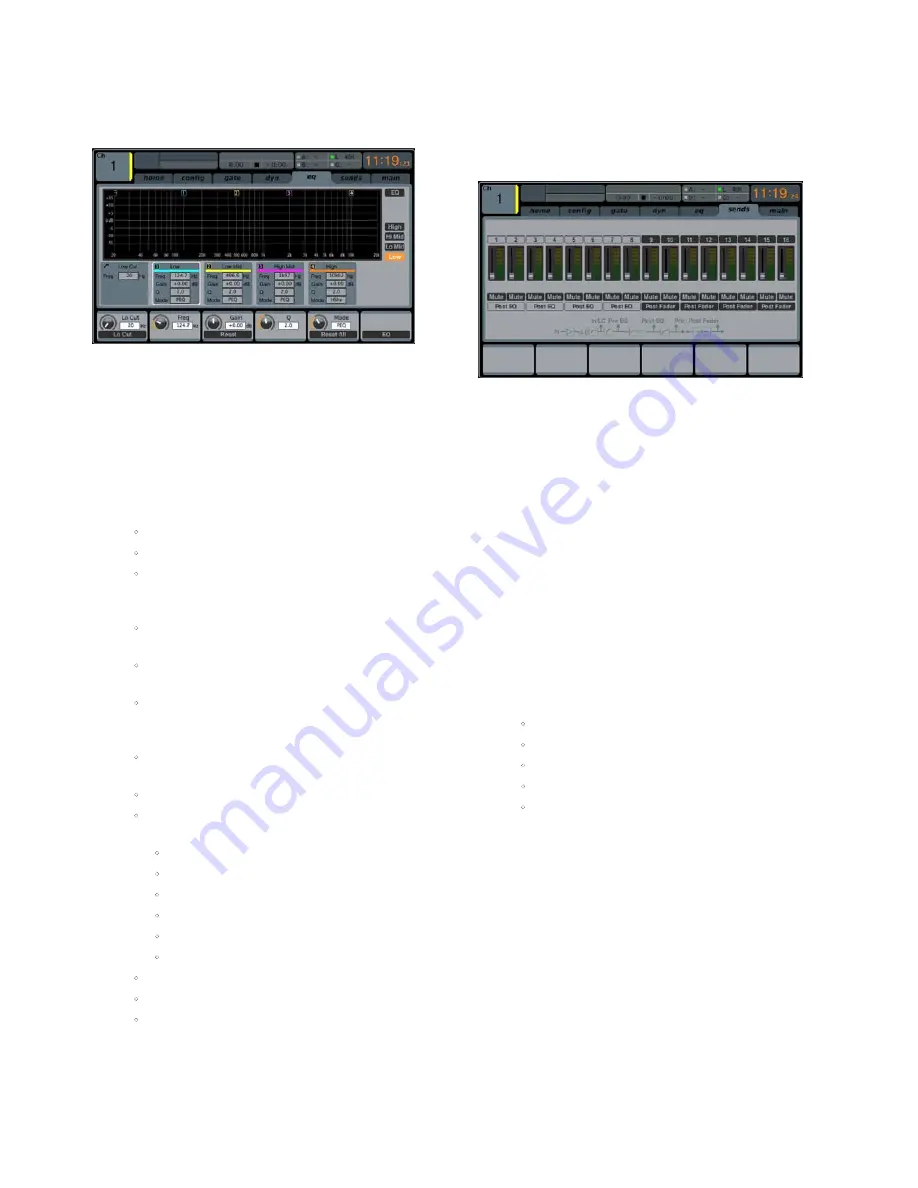
tab displays all aspects of the channel EQ, and also displays a detailed
visual graphic of the current EQ curve. This tab can also be accessed directly by
pressing the
VIEW
button on the top panel
EQUALISER
section.
1. If the currently selected channels is an input, the channel EQ contains
four bands, with various aspects of each band adjusted by push
encoders 2-5.
2. If the currently selected channel is a bus, the channel EQ contains six
bands, with various aspects of each band adjusted by encoders 1-6.
3. On the EQ screen, the various push encoders are always tied to an aspect
of the frequency adjustment, and the Up/Down navigation controls
are used to toggle between the 4 bands. The 6th encoder also toggles
which band is active.
•
Adjust the 1st encoder to set the low cut frequency.
•
Tap the 1st encoder to engage the low cut.
•
Adjust the 2nd encoder to adjust the frequency for the selected
band. All 4 bands can be shifted between 20 Hz and 20 kHz, so the
band labeled ‘Low’ can actually be used to adjust mids, etc.
•
Tap the 2nd encoder to determine whether the RTA operates as a
bar graph or spectrograph.
•
Adjust the 3rd encoder to set the amount of cut or boost for the
selected band.
•
Tap the 3rd encoder to set the RTA as pre or post, depending if
you want to monitor the incoming signal or the effects of the
EQ adjustment.
•
Adjust the 4th encoder to set the bandwidth (Q) of the selected
band. This is only available if the band is set to PEQ or VEQ.
•
Tap the 4th encoder to reset the selected EQ band.
•
Adjust the 5th encoder to determine the mode of the selected
band. The following options are available:
•
Low cut
•
Low shelf
•
PEQ (standard parametric)
•
VEQ (vintage style)
•
High shelf
•
High cut
•
Tap the 5th encoder to reset all of the EQ bands.
•
Adjust the 6th encoder to select the frequency band.
•
Tap the 6th encoder to activate the EQ.
sends
The
sends
tab displays and controls all aspects of the channel sends to the
16 mix buses. Compared to the dedicated top panel send controls, this screen
offers additional functions, such as send muting and simultaneous metering of
the selected channel’s 16 sends. This tab can also be accessed directly by pressing
the
VIEW
button in the top panel
BUS SEND
section.
The
sends
tab contains the following parameters that can be adjusted using
the six push encoders:
Page 1
1. Adjust the first push encoder to set the level for the first send of the
currently selected four-send group.
2. Tap the first encoder to mute the first send of the currently selected
four-send group.
3. Repeat the process with the next three encoders for the remaining
three sends in the currently selected four-send group.
4. Adjust the sixth encoder to select which four sends to control with the
rotary controls, shifting focus two sends at a time.
5. Tap the sixth encoder to select which four sends to control with the
rotary controls, shifting focus four at a time.
Page 2
1. Adjust the first push encoder to select from where in the signal chain
the send is tapped, for the first two sends of the currently focused four
sends. Options include:
•
Pre-EQ
•
Post-EQ
•
Pre-fader
•
Post-fader
•
Sub-group.
2. Adjust the third encoder to perform the same operation for the second
two sends of the currently focused four sends.
3. Adjust the sixth encoder to select which four sends to control with the
rotary controls, shifting focus two sends at a time.
4. Tap the sixth encoder to select which four sends to control with the
rotary controls, shifting focus four at a time.
Содержание M32R LIVE
Страница 56: ...56 DIGITAL RACK MIXER M32R User Manual 4 3 Appendix C Dimensions Top View...
Страница 57: ...57 DIGITAL RACK MIXER M32R User Manual Rear View Side View...
Страница 67: ......


