5
Using the LightLid 35 Plus II
NOTE: If your scanner configuration does not contain the LightLid 35 Plus II and you do not have
intention to use this device, please ignore this section.
2.
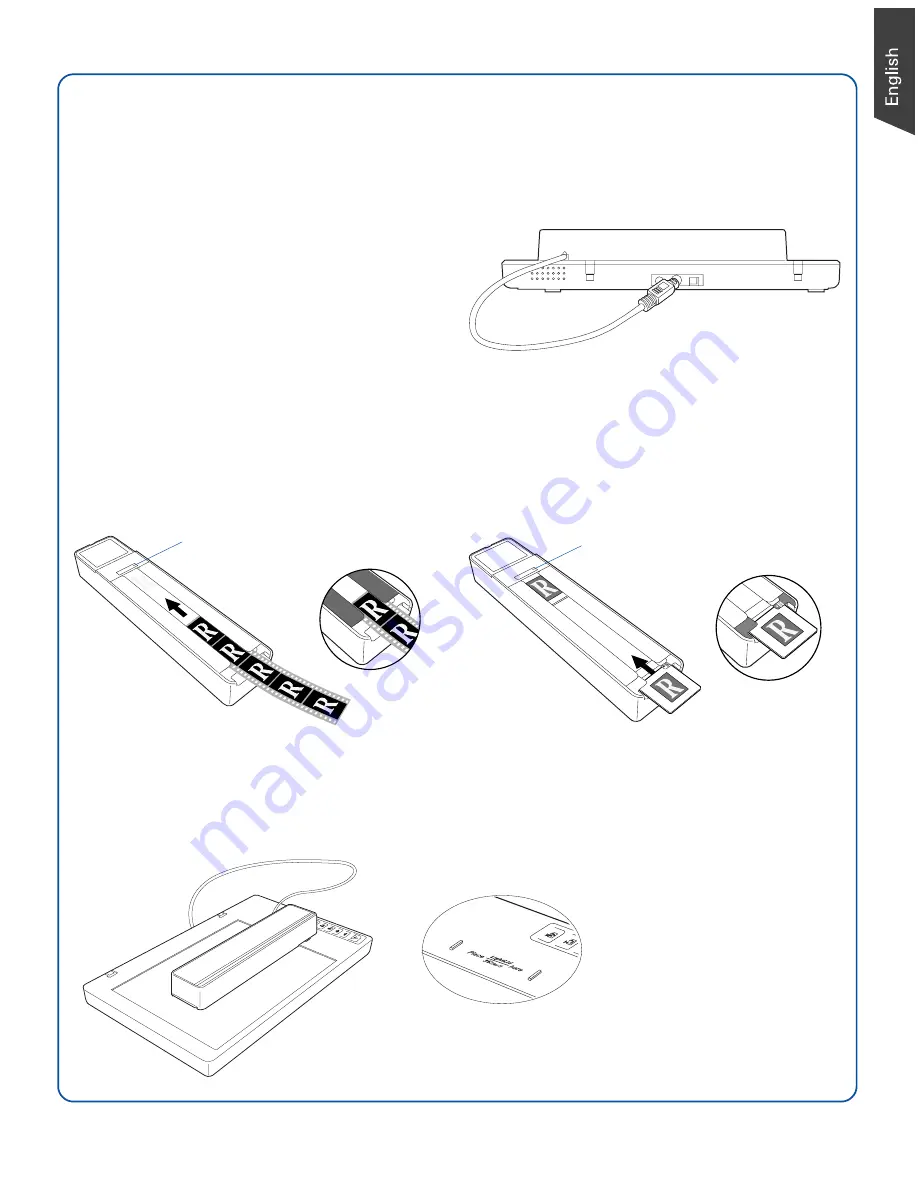
Ensure that the scanner is powered off;
then plug the connector of the LightLid
into the scanner’s 9-pin accessory port.
To load film
A.
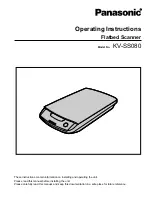
To load filmstrips:
Turn the LightLid 35 Plus II over. Load
the filmstrip inside the upper slot of the
LightLid, with the film’s shiny base
facing up.
Connecting the LightLid 35 Plus II
1.
Remove the scanner lid.
B.
To load slides:
Turn the LightLid 35 Plus II over. Load
the slide inside the lower slot of the
LightLid, with the slide facing up.
To place the LightLid 35 Plus II
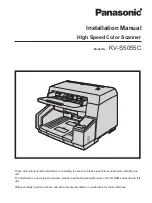
Place the LightLid 35 Plus II with the loaded film vertically on the scan bed. The LightLid
should be flush against the top ruler of the bed, with the slot running down the center.
Align the top of the
LightLid with the recessed
area, as label “Place
LightLid 35 Plus II Here”.
Do not block
calibration window
Do not block
calibration window


