background image

Micro-Air, Inc. 

Page 29 

EasyTouch 2.5 Operations Manual 


Rev 1.0 8/27/14 


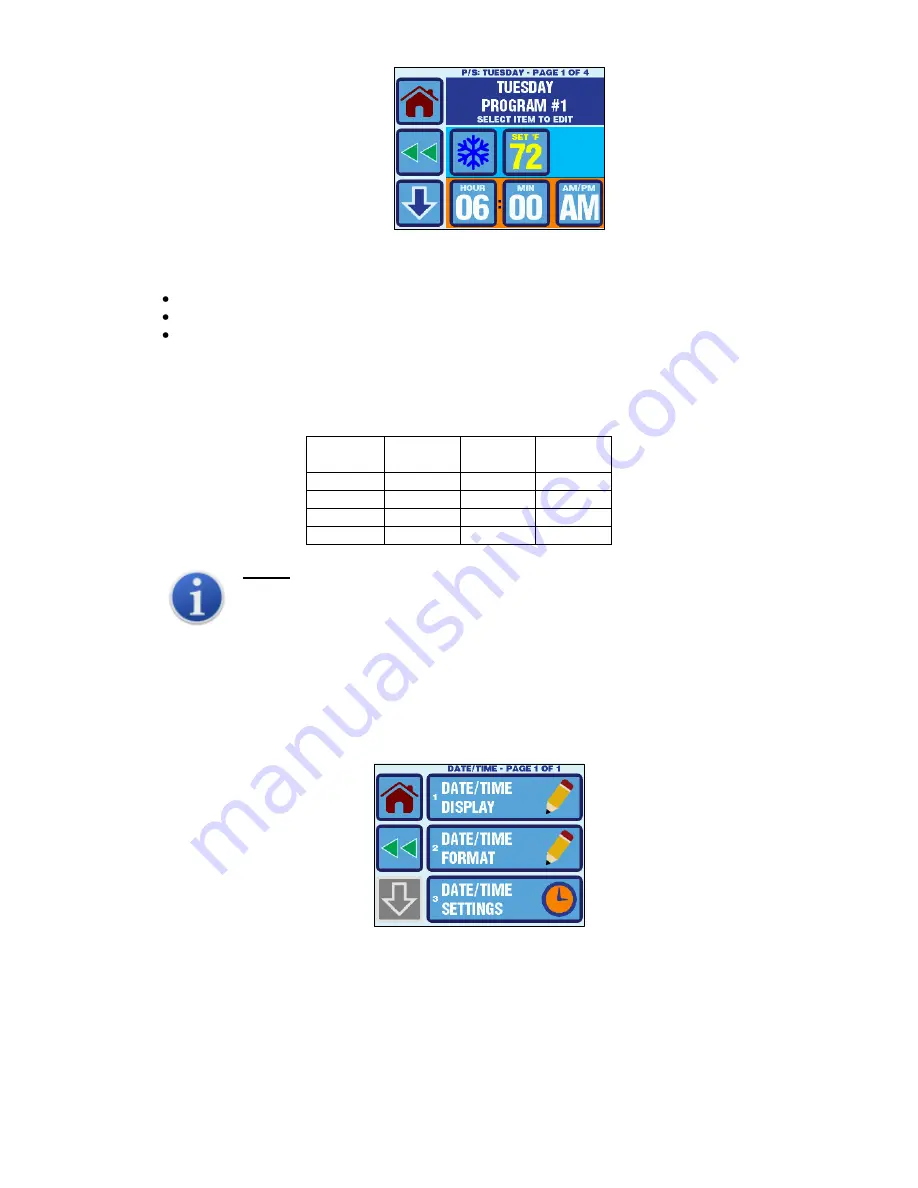
Figure 19 

– Program Scheduler Setup Example 

The 4 programs can be adjusted simultaneously for an individual day or a group of days:  


Program: Mon-Fri 


Program: Sat-Sun 


Program: Monday, Tuesday, Wednesday, Thursday, Friday, Saturday, and Sunday 

 
The default program settings for each day of the week are shown in Table 5.  Use this table as a 
guide for how design the Program Scheduler behavior for your particular needs. 
 

Table 5 

– Program Scheduler Default Day of the Week 

Program 

Number 

Mode 

Set 

Point 

Start 

Time 

COOL 

72°F 

6:00AM 

COOL 

72°F 

8:00AM 

COOL 

72°F 

4:00PM 

COOL 

72°F 

10:00PM 


NOTE: 

If the same Program Scheduler behavior is desired for Monday-Thursday, but Friday 
needs to be different, the best way to accomplish this is to program Monday-Friday as a 
group with the desired programs for Monday-Thursday, then go back and individually edit 
Friday’s programs to make them different. 


13. DATE/TIME MENU 

The Date/Time Menu allows the user to control the display of the date & time, change its format, and adjust 
its settings. To access the Date/Time Menu, go to Main Menu and then select Date/Time Menu.  The 
Date/Time Menu has 3 items on 1 page as show in Figure 20. 


Figure 20 

– Date & Time Settings Menu Screen 

13.1 Enabling the Date/Time Display


The Date/Time Display parameter controls the display of date & time on the Main screen only.  
Setting this parameter ON enables the display of the date & time as shown in Figure 21.  Setting this 
parameter to OFF disables the display of the date & time as shown in Figure 22.  When disabled, the 
EasyTouch logo is shown in place of the date & time. 
 

Содержание EasyTouch

Страница 1: ...EasyTouch 2 5 Operation Manual 2 5 Color TFT Touch Screen Controller for FX1 FX2 DX CW Control Boards Micro Air Inc www microair net 124 Route 526 Ph 609 259 2636 Allentown NJ 08501 Fax 609 259 6601 ...

Страница 2: ...8 7 1 Reversing Valve Operation for DX systems only 8 7 2 Water Valve Operation for CW systems only 8 8 OPERATION 9 8 1 Operator Controls and Display 9 8 2 Modes of Operation 11 8 3 Fan Speed Modes 12 9 FAULTS 12 9 1 Air Sensor Fault DX CW immediate lockout 13 9 2 High Pressure Fault DX Only contributes to lockout count 13 9 3 Low Pressure Fault DX Only contributes to lockout count 13 9 4 Low AC F...

Страница 3: ...splay Setup 31 14 3 Sleep Mode Settings 31 14 4 Display Lock 33 14 5 Cleaning Mode 34 15 TROUBLESHOOT COMMISSION MENU 35 15 1 System Status 35 15 2 Help Information 35 15 3 Commission Procedure 36 16 FAULT HISTORY RUN HOURS MENU 36 16 1 Fault History 36 16 2 Compressor Run Hours 37 16 3 Fan Run Hours 37 17 SPECIFICATIONS 38 18 WARRANTY AGREEMENT 39 ...

Страница 4: ... retains settings without batteries Programmable display brightness control Programmable failsafe modes Fits Vimar Eikon and Eikon EVO bezels 3 2 Optional Outside air temperature sensor Alternate air temperature sensor Pump Sentry Service water sensor Relative Humidity Control FX2 only with humidity option board Electric heating control capabilities Air Filter Cleaning or Replacement Timer Low Vol...

Страница 5: ...n While in Sleep mode the graphic will move around the screen See section 14 3 for more information on the various Sleep Mode settings Figure 3 Power Up Default Sleep Screen Display 5 INSTALLING THE DISPLAY PANEL 5 1 Choosing the Location Before mounting the control panel consider the location The display panel s built in air sensor provides excellent room air temperature sensing when properly loc...

Страница 6: ...t mount the display behind a door in a corner under a stairwell or any place where there is no freely circulating air If you cannot mount the display in a suitable location for accurately sensing room temperature install the optional remote air sensor as explained in section 6 1 5 2 Mounting the Display 1 Choose a wall location that has adequate depth at least 1 25 4mm behind the wall itself See F...

Страница 7: ...rn air grille DO NOT attach the sensor to the edge of the unit s drain pan since the condensate water and cold air spilling off of the heat exchanger coil will cause an inaccurate temperature reading 2 Plug its cable 6 pin connector into the ALT AIR jack on the circuit board 6 2 Outside Air Temperature Sensor Install the optional outside air temperature sensor to monitor the temperature outside th...

Страница 8: ...the temperature equals the set point The cabin temperature must exceed the set point by at least 4 F 2 0 C in order for the system to switch from heating to cooling If you select Cool Mode only cooling is supplied If you select Heat Mode only heating is supplied The cabin temperature in either mode is maintained within 2 F 1 0 C of set point by default When the heating or cooling set point is sati...

Страница 9: ...and release over the top of the numeric value to select the various temperature displays Set point s Inside Outside Service Water temperatures or Relative Humidity if equipped By default the temperature display will always revert back to showing the Inside Temperature after 3 seconds If you wish to change the default Temperature Display to one of the other available choices immediately after selec...

Страница 10: ...sub menus beyond See section 10 for more information on the menus 6 Up Button Press and release to display the set point Press and release or press and hold the UP button to increase the set point 7 Temperature Display Selection Indicates the current temperature display value SET INSIDE OUTSIDE SERVICE WATER or RH If the associated temperature sensor is not installed or is faulty will be displayed...

Страница 11: ... and how it can be adjusted If the system was most recently cooling the cabin temperature must drop below the set point by at least 4 F or 2 0 C by default in order for the system to switch from cooling to heating Similarly if the system was most recently heating the cabin temperature must exceed the set point by at least 4 F or 2 0 C by default in order for the system to switch from heating to co...

Страница 12: ...desired fan speed To select Manual Fan Speed Mode on the Main Screen press and release the Fan Button until the desired speed is indicated on the Fan Speed bar graph and the word MANUAL is displayed above the fan speed bar graph The selected fan speed will increase and decrease as the Fan Button is repeatedly pressed until the Fan Speed Mode is returned back to Automatic 8 3 3 Fan Only Mode While ...

Страница 13: ...witch is open while the compressor is off the most likely cause is an open connection in the pressure switch itself 2 If the high pressure switch opens while the compressor is operating in COOL mode the most likely cause is poor seawater flow or a fouled condenser 3 If the high pressure switch opens while the compressor is operating in HEAT mode the most likely cause is poor air flow through the e...

Страница 14: ...wn in Figure 9 All menus are hierarchically designed All sub menus and the various parameter settings available are accessed starting from the Main Menu All of the parameter settings are stored in non volatile memory and they are always retained even when the battery is removed A unique set of parameter settings can be saved and recalled or factory default settings can also be recalled Refer to se...

Страница 15: ... setting in non volatile memory Figure 11 EasyTouch Settings Screen Layout 1 Home Press this button at any time to discard any changes and return to the Home Screen 2 Back Press this button to discard any changes and return to the previous screen 3 Up Press the button to increase the setting to the next value or selection 4 Down Press the button to decrease the setting to the previous value or sel...

Страница 16: ...X or CW Settings button will be grayed out and not accessible since those underlying settings won t pertain to the current system mode Please see section 11 1 18 for more information on the DX CW Mode Selection Figure 12 Control Parameters Menu Screens 11 1 General Settings To access the General Settings go to the Main Menu select Control Parameters and then select General Settings The General Set...

Страница 17: ...r Split Capacitor 9 Filter Hours Setting Off Off 100 2500 Hours 10 4 Filter Hours Reset n a Resets reminder clears hours only 11 CAN Bus Unit ID 1 1 1 255 12 CAN Bus Group ID 1 100 1 255 13 5 Voltmeter Calibration 0 none 70 140VAC or 170 260VAC 14 Set Point Temp Differential 2 F 1 C 1 or 2 F 0 5 or 1 0 C 15 Humidity Mode Min Temp 50 F 10 C 40 75 F or 5 25 C 16 6 Auto Fan Speed Temp Differential 2 ...

Страница 18: ...e setting is saved via the SAVE button or the setting screen is exited via the BACK or HOME buttons or via Sleep Mode the fan speed returns to the previous state NOTE It is possible to adjust the low fan speed to be higher than the medium or high fan speed so please take this into consideration when adjusting all three speeds 11 1 4 Inside Temp Calibration 50 F or 25 C 0 no adjustment This paramet...

Страница 19: ...itor fan motor you MUST choose Shaded Pole for the Fan Motor Type parameter setting before operating the equipment Shaded pole fan motors are most often recognizable by an overhanging blower motor whereas split capacitor fan motors are most often enclosed inside the blower housing IMPORTANT Failure to select Shaded Pole for this parameter setting for an air conditioning unit with a shaded pole fan...

Страница 20: ...70 140VAC or 170 260VAC 0 none This parameter allows adjustment of the AC line voltage reading as measured by the EasyTouch This setting displays the live AC voltage reading and it can be adjusted by pressing the UP and DOWN buttons Calibrating this parameter provides a more accurate voltage level for use with the Low Voltage Monitor DX only see section 11 2 3 Use a calibrated voltmeter as a refer...

Страница 21: ...rature humidity sensor is plugged into the daughterboard s INTAKE jack It will be grayed out whenever EasyTouch is plugged into any other type of FX2 or FX1 circuit board or if the combo sensor is not plugged in Also humidity control only applies for CW control operation only When the appropriate hardware and mode of operation is detected EasyTouch will automatically enable humidity control in con...

Страница 22: ...t to ON two set points become visible on the Home and Main screens whenever selecting the various temperature display indicators Whenever the set point is adjusted the cooling set point is always displayed and adjusted by default The heating set point can only be adjusted by first changing the temperature display to show the heating set point temporarily or permanently and then adjusting the set p...

Страница 23: ...1 2 1 Compressor Start Delay 5 135sec 15sec The compressor start delay is used for installations where more than one system operates from the same power source Setting different start delays allows compressors to start at different times when AC power is interrupted Stage the units at least 5 seconds apart Note that this delay is only applied immediately after an AC power up and will only affect t...

Страница 24: ...components within the system during low voltage starting conditions The LOW AC fault will persist until the AC input voltage goes above this parameter setting or for a minimum of 2 minutes before allowing the compressor startup to proceed whichever occurs first After compressor startup if the AC input voltage goes below this parameter setting for 5 minutes the system will be shutdown and the LOW A...

Страница 25: ...ll the Service sensor This Pump Sentry parameter setting is the maximum Service temperature allowed during normal compressor operation If at any time during a cooling or heating cycle the Service temperature exceeds this parameter setting the system will be shut down and the EasyTouch will declare a PUMP Sentry fault The Pump Sentry fault will persist until the Service sensor temperature drops bel...

Страница 26: ...er Temp Differential 5 25 F or 3 14 C 10 F 6 C This parameter sets the temperature differential between ambient air temperature and inlet water loop temperature at the air handler For example the default setting of 10 F allows the valve output to be energized opening the water valve when the water temperature is at least 10 F less than ambient temperature in cooling mode and at least 10 F greater ...

Страница 27: ...ettings select the Recall Memorized option and then press the SAVE Button This action overwrites all of the active parameter settings with the previously memorized parameter settings 11 6 Recall Default Settings If at any time you want to restore the active and memorized parameter settings to the original factory defaults select the Recall Defaults option and then press the SAVE button This action...

Страница 28: ...will remain in effect until the beginning of the next Program number or Day of the Week For example if the Program Scheduler goes into override mode at 6PM on Wednesday and the next program is set to begin at 10PM on Wednesday the Program Scheduler will remain in override until 10PM NOTE The Program Scheduler requires an accurate date and time setting in order to function properly If the date and ...

Страница 29: ...sday but Friday needs to be different the best way to accomplish this is to program Monday Friday as a group with the desired programs for Monday Thursday then go back and individually edit Friday s programs to make them different 13 DATE TIME MENU The Date Time Menu allows the user to control the display of the date time change its format and adjust its settings To access the Date Time Menu go to...

Страница 30: ...age and is shown below in Figure 23 Figure 23 Date Time Setting Screen To edit a particular value press the button corresponding to the value After making the necessary adjustments in the edit screen press the SAVE button The day of the week will automatically be calculated based upon the set date NOTE If the EasyTouch battery is ever replaced the date time settings will be reset to 01 01 2007 12 ...

Страница 31: ... Brightness This setting can be adjusted from 5 to 100 Note that this setting does not affect the brightness used during sleep mode or during power up Display Colors The various portions of the display can have their colors changed The color choice palettes displayed consist of 126 different colors shown across 14 pages Pages 1 12 show the color choices from a standard color pallet page 13 shows t...

Страница 32: ...xt string that will be displayed in Sleep Mode when Custom Text is selected as the Sleep Mode Display parameter Figure 28 Sleep Mode Text Editor The active last character can be changed using the UP and DOWN buttons The character choices are as follows ABCDEFGHIJKLMNOPQRSTUVWXYZ0123456789 and a space character Navigating to the right is accomplished using the RIGHT ARROW button Navigating to the l...

Страница 33: ... by PIN This parameter controls the display access level at which PIN access is required There are 5 levels of access restriction including OFF no restriction each of which is a progressively higher earlier in the access allowed None no lock or restriction factory default Control Parameters access without the PIN is allowed to the Home Main screens and to all menus and settings except for the Cont...

Страница 34: ...e to green and the ENT button will be displayed as shown in Figure 33 Pressing the ENT button will save the new PIN into non volatile memory Figure 33 Display Lock PIN Change Display Screen IMPORTANT If the PIN is forgotten it can be restored to 1234 by powering off the control at the AC circuit breaker removing the battery for 30 seconds reinstalling and powering back up This will only reset the ...

Страница 35: ...ing on if the main circuit board is FX1 or FX2 and which option boards are installed See Figure 35 for examples of the System Status display Figure 35 System Status Display Screen Examples 15 2 Help Information Fault Help Lookup For each of the six faults described in section 9 a help description is available in the Fault Help Lookup menu These help descriptions are also displayed whenever a fault...

Страница 36: ...he faults that have occurred Each entry has a number date time and a fault type as shown in Figure 40 The most recent entries are shown at the top of the list with the lowest entry number For example entry 1 is the most recently recorded fault and entries 2 3 4 etc all occurred before entry 1 The Fault History can store a maximum of 500 faults Once filled it will be begin overwriting the oldest en...

Страница 37: ...isplayed hours are cleared the lifetime hours are always being maintained in the background and cannot be cleared Figure 41 Compressor Run Hours Display Figure 42 Fan Run Hours Display 16 3 Fan Run Hours The Fan Run Hours displays the number of hours the fan has been operating as shown in Figure 42 The value can be cleared by pressing the CLR button Once cleared the number of operating hours begin...

Страница 38: ...82 C Maximum Rh Conditions 99 Non Condensing Power Consumption Less Than 5 Watts DIMENSIONS Display Panel 4 309 109mm X 2 874 73mm Panel Cut Out 2 90 74mm X 2 165 55mm Bezel Type Required Vimar Eikon or Vimar Eikon EVO CABLE LENGTHS Display Cable Self Contained 15 4 6m Standard Display Cable Split System 30 9 1m Standard Maximum Display Cable Length 75 22 9m Maximum Alternate Air Sensor optional 7...

Страница 39: ...acement or the repair at Micro Air or at a service facility designated by us of such parts as inspection shall disclose to have been defective This warranty does not apply to defects caused by damage or unreasonable use including failure to provide reasonable and necessary maintenance while in the possession of the consumer Micro Air shall not be liable for consequential damages of any kind includ...

Отзывы: