Thermal Imaging Camera
Installation Guide
LWIR
5- 8
Showing and Hiding an ROI
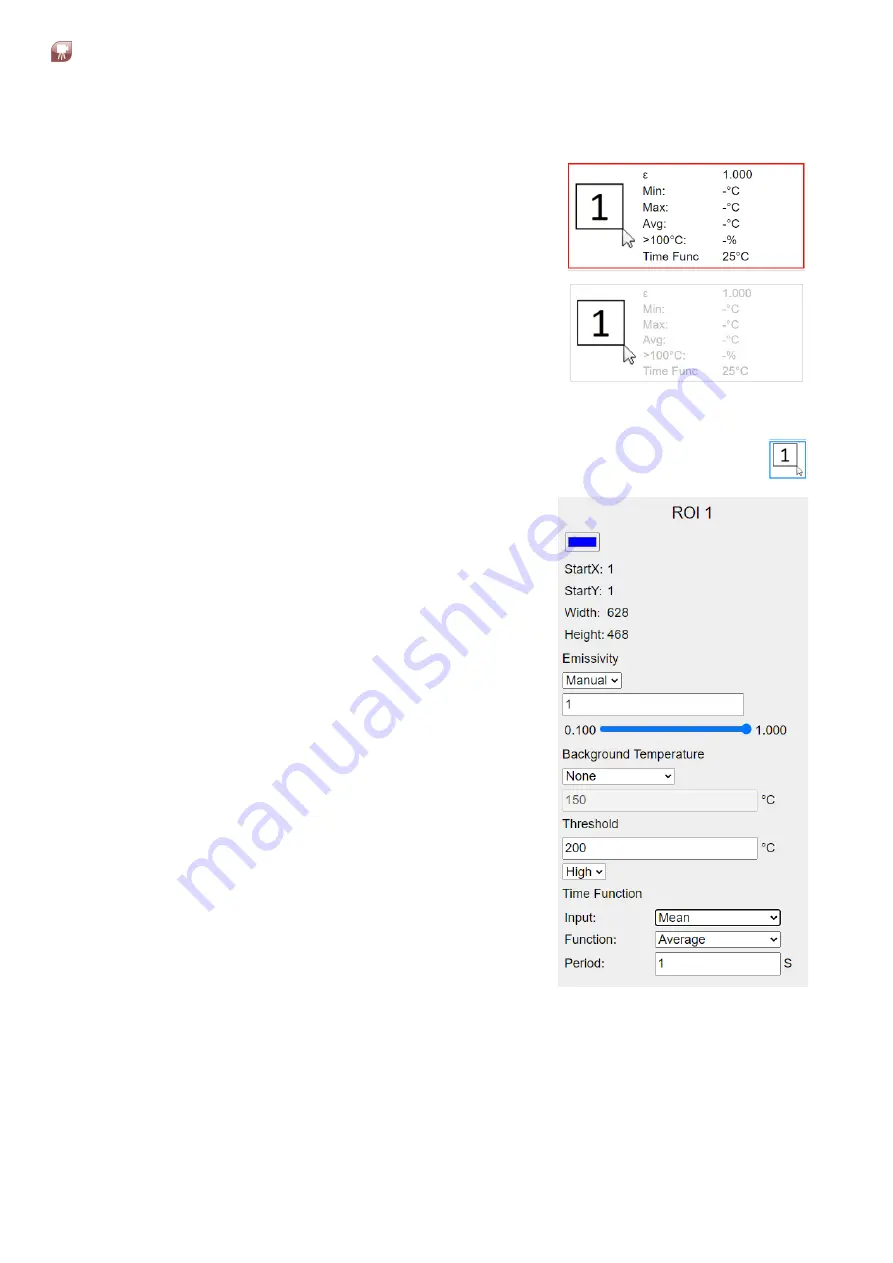
When an ROI is active, a box the same colour as
the ROI is displayed around the ROI information
panel to the left of the thermal image.
To hide the ROI, click on its information panel.
The ROI disappears from the thermal image and
information panel is greyed-out.
To activate the ROI, simply click on its information
panel again.
Note:
The ROI will still function in the thermal
imaging camera, but will not shown in the Web
Server.
ROI Settings
1) To adjust the settings of an ROI, click on the required ROI numbered
button in the Web Server menu, to the right of the thermal image.
The ROI settings are displayed.
2) You can adjust the colour of the ROI by
clicking on the colour swatch and selecting
the required colour from the palette.
3) To set the
Emissivity
of the area covered
by the ROI, you can either select a
Manual
input and type in the required Emissivity
value (or set it via the slider), or you can
choose to have the Emissivity set via a 4
to 20 mA current input (
mA In
). For more
details on using the
mA In
option, see
Section 5.8 I/O.
4) For
Background Temperature
, the
following options are available:
•
None
- No background temperature
correction.
•
ROI
- uses the temperature value of
another ROI in the thermal image to
set the background temperature value.
•
mA In
- uses a 4 to 20 mA current
input to set the background
temperature value.
For more details on using the
mA In
option, see I/O options in Section 5.8.
5)
Threshold
- allows you to set a
temperature value against which all pixels in the thermal image can be
compared. For example, if you set a Threshold temperature value of
200 °C and select the High option, the ROI information panel will display
>200°C - x%, where x is the percentage of pixels above 200 °C in the
thermal image. Similarly, the Low option will display the percentage of
pixels below the Threshold value.
Содержание LAND LWIR
Страница 47: ......


