background image

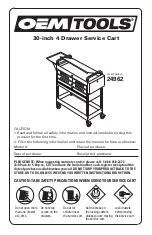
Please retain product label and instructions for future reference


HANDLE

WITH CARE

1

2

3

4

1.

2.

3.

4.

5.

6.

7.

Felt 

tacks 

Step 17

Parts needed - No. 22 

Cut the felt into seven strips lay 

onto the roof in the order shown 

in the illustration.

*Ensure there is approximately 

50mm of overhanging felt each 

side.

Once the felt is laid out fix to the 

roof using felt tacks at 100mm

intervals.

*Felt size: 4200mm

336x Felt Tacks

P 10

Roof

Closure Trim

Internal

23

*Measure and cut the

closure trims to

fit the internal space.

23

23

Roof

Closure Trim

Internal

21

*Measure and cut the

closure trims to

fit the internal space.

21

21

Pre drill 

hole

30mm 

screw

*

trim to fit

Step 15

Parts needed - No. 21 QTY 6 


Inside the building place the closure 

trim (

No. 21

) against the boarding 

and align with the roof as shown in 

the illustration.


Once in position fix each trim 

into place by pre drilling a pilot hole 

and using 6x30mm screws per trim, 

equally spacing them along the face 

of the board.

36x30mm Screws

30mm 

screw

Pre drill 

hole

*

Cut to fit

Step 16

Parts needed - No. 21 QTY 7 

Once the floor has been laid arrange the

closure trim (

No. 21

) around the outside 

edge of floor (

internally

), measure and cut 

down accordingly to best match the 

internalspace.

Secure each trim section into place using 

6x30mm spaced equally along the board 

as shown in the illustration.

*Do NOT fix the closure trim to the floor

boards.

42x30mm Screws


Содержание 0628LOG233-V4

Страница 1: ...d that the outdoor building is sprayed with water during extended periods of warm sunshine and sheltered as much as possible during rain or snow BUILDING A BASE When thinking about where the building...

Страница 2: ...6mm QTY 38 LB28 A 2996 Log Board 28x120x1715mm QTY 8 LB28 B 1715 Log Board 28x120x485mm QTY 28 LB28 B 485 Log Board 28x120x485mm QTY 28 LB28 C 485 Log Board 28x120x5000mm QTY 19 LB28 A 5000 Log Board...

Страница 3: ...717 Starter Board 28x120x1717mm QTY 2 LB28RT66 A 1717 Log Board 28x120x300mm QTY 20 LB28 B 300 Log Board 28x120x300mm QTY 8 LB28 C 300 Log Board 28x110x1000mm QTY 2 LB28RG110 B 1000 Log Board 28x54x17...

Страница 4: ...ing 2x70mm screws for each side of the bearer ensuring the framing remains level 32x70mm Screws Pre drill hole 70mm screw Step 2 Parts needed No 14 QTY 2 No 15 QTY 10 Following the same method outline...

Страница 5: ...ing either side of the door and window opening s can be placed either side depending on your needs IMPORTANT Pre drill before fixing screws 5 5 6 6 9 Step 5 See Pre Assembly Parts needed No 5 QTY 14 N...

Страница 6: ...ons for future reference Step 6 See Window Assembly Parts needed No 1 QTY 2 Refer to window assembly instructions to assemble windows Step 7 Parts needed No 1 QTY 2 Ensure that the lip of the window f...

Страница 7: ...e Assembly lay the last two boards No s 8 11 onto the front of the assembly Once in position place the last 2 log board s No 10 onto the plain sides fixing into position by screwing through the notche...

Страница 8: ...nce in position fix to each purlin using 4x40mm screws Due to natural occurences of wood shrinkage expansion You maybe required to use the provided spacers and place a space of 2mm to ensure every roo...

Страница 9: ...ng flush to the log board on one side Continue adding the floor boards internally making sure to interlock each individual board DoNOTsecure the boards until the last board has been measured and cut F...

Страница 10: ...nal space 21 21 Pre drill hole 30mm screw trim to fit Step 15 Parts needed No 21 QTY 6 Inside the building place the closure trim No 21 against the boarding and align with the roof as shown in the ill...

Страница 11: ...e 40mm screw 70mm bolt Step 19 Parts needed No 20 QTY 8 Arrange the storm braces No 20 around the building internally Place 2x storm braces per side fixing into place using 2x 70mm bolts per brace mak...

Страница 12: ...firm and level surface free from areas where standing water can collect as shown in the illustration and fix into place using 70mm screws 20x70mm Screws V2 V1 V2 V2 V2 V2 V1 V2 V2 V1 IMPORTANT Pre dr...

Страница 13: ...k into position After positioning each board fix the floor to the bearers below using 40mm screws 195x40mm Screws 40mm screw Pre drill hole Cut to fit V11 IMPORTANT Pre drill before fixing screws P 13...

Страница 14: ...rked cut the corresponding notches and place back into position Arrange the remaining strips V14 V15 V16 around the veranda as shown in the illustration and secure using 30mm screws ensuring there is...

Отзывы: