P 4
Please retain product label and instructions for future reference
Pre drill
hole
60mm
screw
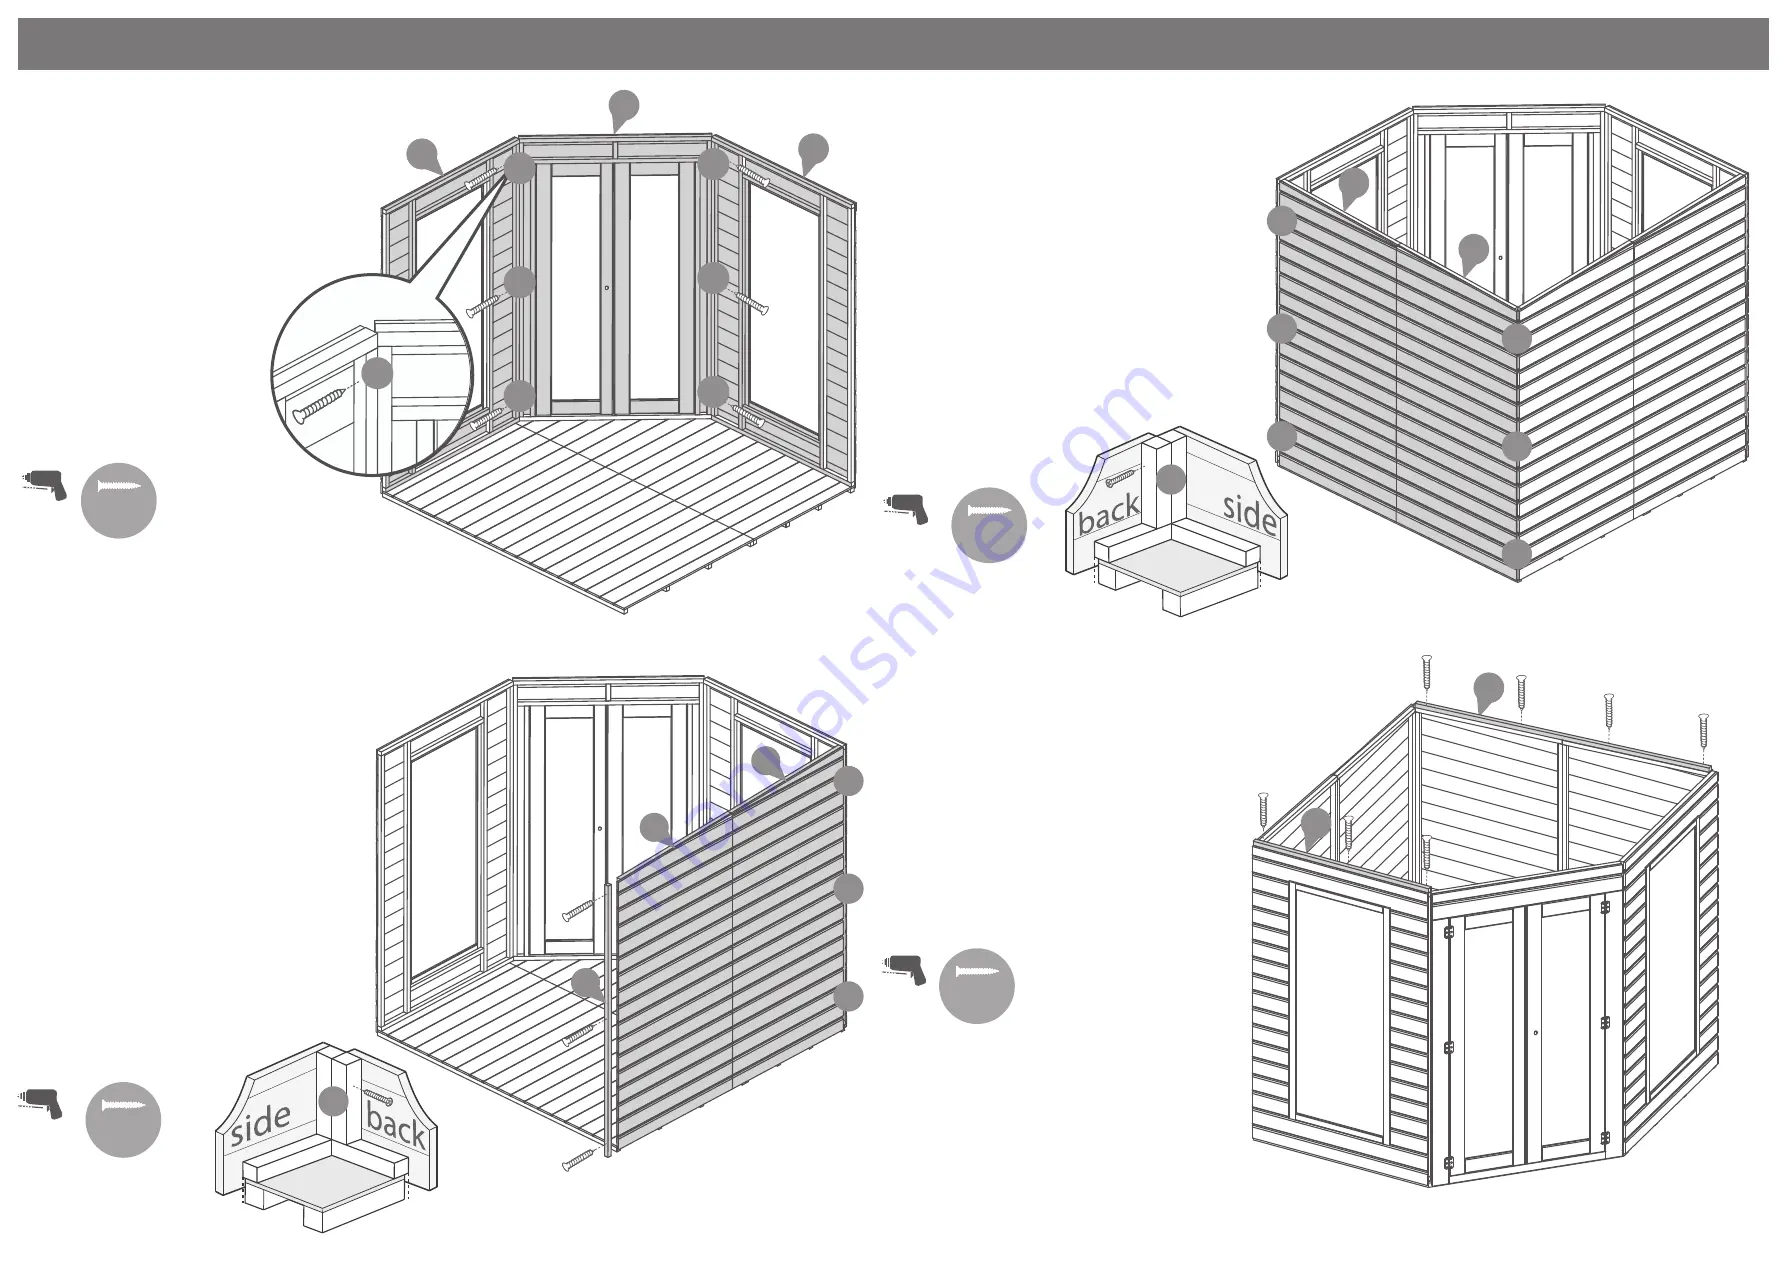
Step 4
Parts needed - No. 1 QTY 1
No. 2 QTY 2
Place the Door Panel
(No. 1)
, the
Window Panels
(No. 2)
(in which
layout is most suitable to
yourself) onto the floor.
Fix the corners with 60mm
screws as shown in the
illustration.
Do not secure the building to
the floor until the roof is fitted.
6x60mm Screws
2
2
1
a
a
a
a
a
a
a
2
26
Step 5
Parts needed - No.5 QTY 1
No.6 QTY 1
No.19 QTY 1
Place the two already assembled Left
Panels
(No.5 and No.6)
against
the floor and the Window Panel.
Fix the corners with 3x50mm screws
as shown in the illustration.
Attach the Panel Joint Frame
(No.19)
into place with 3x50mm screws
.
Do not secure the building to the
floor until the roof is fitted.
6x50mm Screws
50mm
screw
Pre drill
hole
a
a
a
19
6
5
a
Step 6
Parts needed - No. 3 QTY 1
No. 4 QTY 1
Using the same method outlined in
Step 5 place the two already assembled
Right Panels
(No.3 and No.5)
against
the floor and other Panels securing
using 6x50mm screws.
From the inside fix the corners with
3x50mm screws as shown in the illus-
tration.
Do not secure the building to the floor
until the roof is fitted.
6x50mm Screws
50mm
screw
Pre drill
hole
4
3
a
a
a
a
a
a
a
50mm
screw
Pre drill
hole
Step 7
Parts needed - No. 26 QTY 1
No. 27 QTY 1
Place the Rear Panel Framing
(No.26)
on
top of the Right Panels. Fix in place using
4x50mm screws.
Place the Front Panel Framing
(No.27)
on
top of the Window Panel. Fix in place using
3x50mm screws.
7x50mm Screws
27
Содержание 03DTSHCR0707FGD2TW-V1
Страница 9: ...2 1 3 4...
Страница 10: ...1 2...


