background image

More user manuals on 

ManualsBase.com

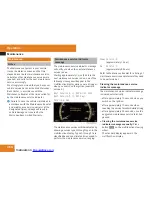
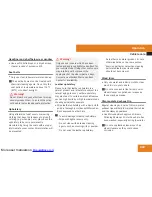
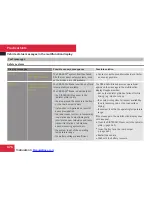
Where will I find ...?

473

1

Collapsible wheel chock

2

Vehicle tool kit box cover

3

Tool bag

4

Jack

X

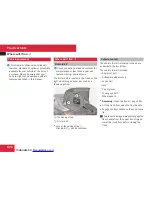
Open vehicle tool kit box cover 

2

.

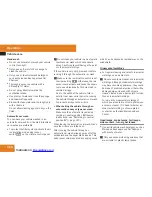
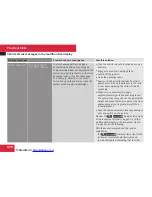
Collapsible wheel chock

The collapsible wheel chock serves to secure
the vehicle, e.g. while changing a wheel.

X

Take the collapsible wheel chock from the
vehicle tool kit (

Y

 page 472).

1

Tilt the plates upward

2

Fold the lower plate outward

3

Insert the plate

X

Setting up: Tilt both plates upward 

1

.

X

Fold the lower plate outward 

2

.

X

Guide the tabs of the lower plate all the way
into the openings of base plate 

3

.

For information on where to place wheel
chocks when changing a wheel, see “Lifting
the vehicle” (

Y

 page 547).

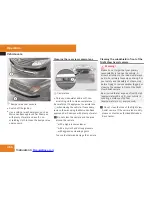
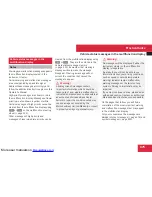
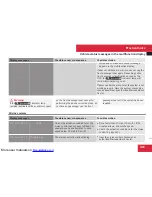
Jack

G

Warning!

Only use the jack supplied with your vehicle
to lift the vehicle briefly for wheel changes.
If you use the jack for any other purpose,

you or others could be injured, as the jack
is designed only for the purpose of
changing a wheel.
When using the jack, observe the safety
notes in the “Mounting the spare wheel”
section and the notes on the jack.

X

Take the jack from the vehicle tool kit
(

Y

 page 472).

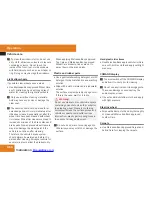
Storage position

X

Turn the crank handle in the direction of
arrow as far as it will go.

Practical hints

Z

Содержание 2008 CL 550 4MATIC

Страница 1: ...More user manuals on ManualsBase com CL Operator s Manual ...

Страница 2: ...ual G Warning Warning notices draw your attention to hazards that may endanger your health or life or the health or life of others Highlights hazards that may result in damage to your vehicle i Helpful hints or further information you may find useful X This symbol points to instructions for you to follow X A number of these symbols appearing in succession indicates a multiple step procedure Y page...

Страница 3: ...ure your driving pleasure and also the safety of you and your passengers we ask you to make a small investment of time RPlease read this manual carefully then return it to your vehicle where it will be handy for your reference RPlease follow the recommendations contained in this manual They are designed to acquaint you with the operation of your Mercedes Benz RPlease pay attention to the warnings ...

Страница 4: ...ore user manuals on ManualsBase com 2 Index 3 Introduction 19 At a glance 25 Safety and security 41 Control systems 77 Controls in detail 289 Operation 419 Practical hints 471 Technical data 563 Contents ...

Страница 5: ...ed Tire Pressure Monitoring System Advanced TPMS 438 Messages in the multifunction display 488 524 Air bags 43 Children 43 Emergency call upon deployment 406 Front driver and passenger 46 Front passenger front air bag off indicator lamp 51 538 Knee bag 47 Messages in the multifunction display 478 Safety guidelines 45 Side impact 47 Window curtain 48 Air conditioning refrigerant and lubricant 580 A...

Страница 6: ...or 338 Transmission positions 338 AUX Audio 207 Socket 206 Video 207 Axle oils 578 B Backrest see Seats Backup lamps Messages in the multifunction display 522 Replacing bulbs 543 Bar air pressure unit 449 BAS Brake Assist System 66 Batteries SmartKey Checking condition 294 Replacing 541 Battery Vehicle Charging 553 Jump starting 554 Messages in the multifunction display 487 516 Bead tire 449 Bever...

Страница 7: ...Deactivating system 387 Front defroster 391 Maximum cooling MAX COOL 391 Residual engine heat REST 392 Temperature 388 Cockpit 28 Cold tire inflation pressure 449 Collapsible wheel chock 472 COMAND Address book 170 Audio CD audio DVD MP3 PCMCIA card 195 AUX 206 Components 79 Controller 81 FM AM Radio 184 Introduction 78 Navigation 95 Operating 83 Phone book 165 Satellite radio 189 Switching on or ...

Страница 8: ...iving hints 360 Lever 355 Messages in the multifunction display 482 Resume function 359 Sensor cover 465 Speed settings 358 Stopping 357 Warning and indicator lamps 352 DISTRONIC Plus lever 355 Door control panel 39 Doors Locking unlocking KEYLESS GO 292 Locking unlocking SmartKey 290 Locking unlocking from outside 290 Messages in the multifunction display 509 Opening from inside 294 Remote door u...

Страница 9: ... unlocking the vehicle 539 Remote door unlock 411 Trunk lid emergency release 299 Trunk lid unlocking 540 Emergency Tensioning Device see ETD Emission control 459 Information label 566 System warranties 20 Engine Brake in recommendations 420 Cleaning 463 Compartment 423 Malfunction indicator lamp 536 Maximum engine speed 567 Messages in the multifunction display 513 Number 566 Starting 328 Technic...

Страница 10: ...uel tank 578 Fuel consumption statistics 235 Fuel filler flap and cap 421 Fuel tank reserve warning lamp 535 Premium unleaded gasoline 421 578 580 Refueling 421 Requirements 581 Fuel filler flap 421 Fuel gauge 346 Fuels coolants lubricants etc Capacities 577 Fuel tank Capacity 578 Fuel filler flap and cap 421 Refueling 421 Fuses 558 G Garage door opener 412 Gasoline see Fuel GAWR Gross Axle Weight...

Страница 11: ...3 Messages in the multifunction display 508 Horn 29 Hydroplaning 458 I Identification labels 565 Identification number vehicle VIN 565 Ignition 301 302 329 Immobilizer 75 Indicator lamps see Lamps indicator and warning Infant and child restraint systems see Children in the vehicle Inflation pressure see Tires Inflation pressure Infrared reflecting windshield 417 Inside door handle 39 294 Instrumen...

Страница 12: ... Messages in the multifunction display 519 Rear 543 Switching on off 316 Lamps indicator and warning ABS 31 528 Battery SmartKey 291 Distance warning lamp 352 534 Engine malfunction 536 ESP 31 533 Fog lamps 318 Front passenger front air bag off 47 538 Fuel tank reserve 535 High beam headlamps 31 Instrument cluster 527 Low tire pressure TPMS malfunction telltale 537 Seat belt telltale 31 55 531 SRS...

Страница 13: ...r 581 Motor Octane Number see MON MP3 195 Multifunction display 233 Text messages 476 Vehicle status messages 475 Multifunction display messages ABC Active Body Control 505 ABS 491 499 Advanced Parking Guidance 485 Advanced TPMS 488 524 Air bags 478 AIRMATIC 506 Alternator 487 516 Automatic transmission 486 Backrests 509 Battery 487 516 Blind Spot Assist 484 Brake fluid 490 Brake pads 498 Coolant ...

Страница 14: ...ening the seat belts 54 Front passenger front air bag off indicator lamp 49 538 Infant and child restraint systems 59 OCS 48 PRE SAFE 56 Seat belts 45 52 OCS Occupant Classification System 48 Self test 52 Odometer 235 Oil see Engine oil Oil level see Engine oil Checking level On board computer see Control system One touch gearshifting 341 Operating safety 22 Ornamental moldings cleaning 464 Overhe...

Страница 15: ...roduction options weight 450 Program mode selector switch Automatic shift program 341 Manual shift program 343 Proximity key see Key SmartKey PSI air pressure unit 450 Push start see Tow start R RACETIMER 240 Radar sensors Messages in the multifunction display 486 Radio 184 Satellite radio 189 Selecting stations 238 Radio transmitters 458 Rain sensor 323 Rear axle oil 578 Rear fog lamp see Fog lam...

Страница 16: ...Self test OCS 52 Tele Aid 405 Service see Maintenance Service parts 564 Service and warranty information 20 Service intervals see Maintenance System Service indicator Service life tires 430 Service menu 245 Settings Automatic locking 218 Display settings 92 Easy entry exit feature 219 Exterior mirror convenience settings 218 Factory setting SmartKey 291 293 Individual vehicle 246 Interior ambient ...

Страница 17: ...rigerant 579 580 Brake fluid 578 580 Capacities fuels coolants lubricants etc 577 Coolant 578 582 Dimensions 575 Electrical system 574 Engine 567 Engine oil additives 580 Engine oils 577 579 Fuel requirements 581 Gasoline additives 581 Identification labels 565 Premium unleaded gasoline 580 Rims and tires 569 Spare wheel 573 Washer and headlamp cleaning system 579 583 Weights 576 Tele Aid 405 Auto...

Страница 18: ... 569 Rotation 451 Service life 430 Sizes 569 Snow chains 453 Speed rating 443 451 Storing 431 Temperature 436 448 Terminology 449 Tire Identification Number 450 TPMS low tire pressure malfunction telltale 537 Traction 448 451 Tread 451 Tread depth 430 452 Treadwear indicators 430 451 Vehicle maximum load on 451 Wear pattern 451 Winter tires 452 569 Tire speed rating 443 451 Top tether see Children...

Страница 19: ...icle maximum load on the tire 451 Vehicle Recovery services Stolen Tele Aid 412 Vehicle status message memory 245 Vehicle tool kit 472 Vehicle washing see Vehicle care Video 209 Voice Control Address book 264 CD DVD changer MP3 269 Command list 271 Individualization 287 Introduction 248 Navigation 252 Radio 267 Settings 93 Telephone 259 Troubleshooting 283 W Warning sounds Advanced Parking Guidanc...

Страница 20: ... blades 467 Defogging 391 Infrared reflecting 417 Washer fluid 324 583 Wipers 323 Windshield wipers Rain sensor 323 Replacing wiper blades 545 Winter driving Snow chains 453 Tires 452 Winter driving instructions 453 Winter tires 452 569 Wood trims cleaning 469 Index ...

Страница 21: ...hicle we urge you to follow the instructions and warnings contained in this Operator s Manual Ignoring them could result in damage to the vehicle or personal injury to you or others Vehicle damage caused by failure to follow instructions is not covered by the Mercedes Benz Limited Warranty We continuously strive to improve our product and ask for your understanding that we reserve the right to mak...

Страница 22: ...t a reasonable number of repair attempts is presumed for a retail buyer or lessee if one or more of the following occurs 1 the same substantial defect or malfunction results in a condition that is likely to cause death or serious bodily injury if the vehicle is driven that defect or malfunction has been subject to repair two or more times and you have directly notified Mercedes Benz USA LLC in wri...

Страница 23: ...se If you sell your Mercedes please leave all literature with the vehicle to make it available to the next operator If you bought this vehicle used be sure to send in the Notice of Purchase of Used Car found in the Service and Warranty Information Booklet or call the Mercedes Benz Customer Assistance Center in the USA at 1 800 FOR MERCedes or Customer Service in Canada at 1 800 387 0100 Operating ...

Страница 24: ... sudden significant vibration or ride disturbance or you suspect that damage to your vehicle has occurred you should turn on your hazard warning flashers carefully slow down and drive with caution to an area which is a safe distance from the road Inspect the vehicle underbody and tires wheels for possible damage If the vehicle appears unsafe have it towed to the nearest authorized Mercedes Benz Ce...

Страница 25: ...anufacturers under Title 49 Code of U S Federal Regulations Part 575 pursuant to the National Traffic and Motor Vehicle Safety Act of 1966 Reporting safety defects If you believe that your vehicle has a defect which could cause a crash or could cause injury or death you should immediately inform the National Highway Traffic Safety Administration NHTSA in addition to notifying Mercedes Benz USA LLC...

Страница 26: ...le systems after a collision and to continuously improve vehicle safety Daimler may access the information and share it with others Rfor safety research or vehicle diagnosis purposes Rwith the consent of the vehicle owner or lessee Rin response to an official request by law enforcement or other government agency Rfor use in dispute resolution involving Daimler its affiliates or sales service organ...

Страница 27: ... manuals on ManualsBase com 25 Exterior view 26 Cockpit 28 Instrument cluster 30 Storage compartments 32 Control systems 34 Center console 37 Overhead control panel 38 Driver s door control panel 39 At a glance ...

Страница 28: ...More user manuals on ManualsBase com Exterior view 26 Exterior view At a glance ...

Страница 29: ... window defroster 393 4 Fuel filler flap 421 Fuel requirements 581 5 Doors Locking and unlocking 290 Opening 294 Function Page Locking and unlocking manually 539 541 6 Exterior rear view mirrors 311 Parking position 313 Power folding 313 7 Towing eye 556 8 Tires and wheels 429 569 Checking tire inflation pressure 437 Spare wheel 474 Flat tire 547 9 Hood 423 Function Page Engine oil 424 Coolant 427...

Страница 30: ...More user manuals on ManualsBase com Cockpit 28 Cockpit At a glance ...

Страница 31: ...bility Program ESP switch 70 Parktronic Park Assist deactivation switch 368 372 Swivel COMAND display 81 COMAND display illumination 80 Instrument cluster display illumination 345 9 COMAND display 345 a Overhead control panel 38 b Climate control 385 Center console 37 c Glove box lock 398 d Cover of compartment with Function Page CD DVD changer 198 PCMCIA card slot 200 e Control systems 34 f Start...

Страница 32: ...More user manuals on ManualsBase com Instrument cluster 30 Instrument cluster At a glance ...

Страница 33: ...g lamp Canada only 528 Seat belt telltale 531 H Combination low tire pressure TPMS malfunction telltale USA only 537 H Low tire pressure telltale Canada only 537 L Left turn signal indicator lamp K Right turn signal indicator lamp v ESP warning lamp 531 Function Page l Distance warning lamp1 534 5 Parktronic Park Assist warning indicator for right front area 368 371 6 Gear position range indicator...

Страница 34: ...More user manuals on ManualsBase com Storage compartments 32 Storage compartments At a glance ...

Страница 35: ... compartment between rear seats 399 Function Page 7 Rear storage box 399 8 Side storage pocket in trunk Retainer for Operator s Manual pouch 9 Storage spaces under trunk floor 400 a Side storage pocket in trunk b Door pocket c Driver s seat storage compartment 398 Function Page d Cup holder in the front center console 401 e Ashtray 402 Cigarette lighter 403 f Parcel net in front passenger footwell...

Страница 36: ...More user manuals on ManualsBase com Control systems 34 Control systems At a glance ...

Страница 37: ...on Page Press and hold button or within Audio to select previous or next station in station list or wave band within Telephone menu to start the quick search in the phone book to confirm selection or messages 3 Multifunction display 233 4 Press button s to take a call 160 to dial 161 to redial Function Page Press button t to end a call 164 to reject an incoming call 160 Press button F to mute Pres...

Страница 38: ...r switch for Automatic transmission shift program 340 AIRMATIC suspension tuning 363 ABC suspension tuning 364 f Shortcut button for CD DVD 202 Radio 185 g Back button 86 h Hazard warning flasher switch 320 j Seat menu button 227 Function Page k Shortcut button for Telephone 79 Navigation 102 l COMAND on off button 79 m Volume control 88 n Mute button 88 o Telephone keypad 154 p COMAND controller ...

Страница 39: ...djustment driver s side 390 6 Front defroster 391 7 Air recirculation 392 8 Climate control on off 387 9 Residual engine heat and ventilation REST 392 a Rear window defroster 393 b Manual fan speed adjustment passenger side 390 Function Page c Temperature control passenger side 388 d Air distribution and air volume passenger side automatic mode 388 e Alarm system indicator lamp 76 f Cup holder 401...

Страница 40: ...interior lighting on off 321 4 Front interior lighting on off 321 5 Power tilt sliding sunroof switch 394 6 Tele Aid emergency call system button 405 7 Interior lighting control 321 8 Right reading lamp on off 321 9 Rear view mirror 311 a Garage door opener 412 b Hands free microphone for Tele Aid emergency call system 405 Telephone 404 Voice Control 248 At a glance ...

Страница 41: ...ch 304 4 Memory function for storing seat exterior mirror and steering wheel settings 314 Selector button for front passenger seat 304 5 Seat heating 309 Seat ventilation 309 6 Exterior rear view mirror adjustment 311 Power folding exterior rear view mirrors 313 7 Switches for opening closing front and rear door windows 325 Function Page 8 Remote trunk opening closing switch 296 9 Override switch ...

Страница 42: ...More user manuals on ManualsBase com 40 ...

Страница 43: ...More user manuals on ManualsBase com 41 Vehicle equipment 42 Occupant safety 42 Panic alarm 64 Driving safety systems 65 Anti theft systems 75 Safety and security ...

Страница 44: ...cupant safety PRE SAFE RAir bag system components with Front passenger front air bag off indicator lamp Front passenger seat with Occupant Classification System OCS Although the systems are independent their protective functions work in conjunction with each other G Warning Modifications to or work improperly conducted on restraint system components or their wiring as well as tampering with interc...

Страница 45: ...tes a risk of rendering the SRS inoperative or causing unintended air bag deployment Work on the SRS must therefore only be performed by qualified technicians Contact an authorized Mercedes Benz Center If it is necessary to modify an air bag system to accommodate a person with disabilities contact an authorized Mercedes Benz Center or call our Customer Assistance Center at 1 800 FOR MERCedes 1 800...

Страница 46: ...he steering wheel rim Placing hands and arms inside the rim can increase the risk and potential severity of hand arm injury when the driver front air bag inflates RAdjust the front passenger seat as far as possible rearward from the dashboard when the seat is occupied ROccupants especially children should never place their bodies or lean their heads in the area of the door where the side impact ai...

Страница 47: ... supplemental protection In case of other types of impacts and impacts below air bag deployment thresholds air bags will not deploy The driver and passengers will then be protected to the extent possible by a properly fastened seat belt A properly fastened seat belt is also needed to provide the best possible protection in a rollover Air bags are not a substitute for seat belts Always wear your se...

Страница 48: ...ed Do not touch them RNever place your feet on the instrument panel dashboard or on the seat Always keep both feet on the floor in front of the seat RIn addition improper repair work on the SRS creates a risk of rendering the SRS inoperative or causing unintended air bag deployment Work on the SRS must therefore only be performed by qualified technicians Contact an authorized Mercedes Benz Center ...

Страница 49: ... will then be protected by the fastened seat belts The front air bags will not deploy in the event of a rollover unless the vehicle s rate of longitudinal deceleration or acceleration exceeds the preset deployment threshold for the front air bags The front passenger front air bag 2 will only be deployed if Rthe system based on OCS weight sensor readings detects that the front passenger seat is occ...

Страница 50: ...tes see page 45 1 Window curtain air bag When deployed window curtain air bags 1 are designed to provide increased protection for the head but not the chest or arms of the occupants on the side of the vehicle on which the impact occurs Window curtain air bags 1 are deployed Ron the impacted side of the vehicle Rin side impacts exceeding a preset deployment threshold Rindependently of the front air...

Страница 51: ...lassified as being up to or less than the weight of a typical 12 month old child in a standard child restraint the 59 indicator lamp will illuminate when the engine is started and remain illuminated indicating that the front passenger front air bag is deactivated When the OCS senses that the front passenger seat is classified as being empty the 59 indicator lamp will illuminate when the engine is ...

Страница 52: ...operly and use an appropriately sized infant restraint toddler restraint or booster seat recommended for the size and weight of the child Children can be killed or seriously injured by an inflating air bag Note the following important information when circumstances require you to place a child in the front passenger seat RYour vehicle is equipped with air bag technology designed to deactivate the ...

Страница 53: ...onth old child seated in a standard child restraint both instances where the system suppresses deployment of the front passenger front air bag even though the impact met the criteria and was of sufficient severity to deploy the driver front air bag Rthat the seat was occupied by a small individual such as a young teenager or a small adult or a child who weighs more than the weight of a typical 12 ...

Страница 54: ... seating any child on the front passenger seat For more information see the Practical hints section Y page 538 G Warning Never place anything between seat cushion and child seat e g pillow since it reduces the effectiveness of the OCS The bottom and back of the child seat must make full contact with the passenger seat cushion and backrest If necessary adjust the tilt of the passenger seat backrest...

Страница 55: ...e been subjected to stress in an accident must be replaced and their anchoring points must also be checked Only use seat belts which have been approved by Mercedes Benz Do not make any modifications to the seat belts This can lead to unintended activation of the ETDs or to their failure to activate when necessary Do not bleach or dye seat belts as this may severely weaken them In a crash they may ...

Страница 56: ...ull width of the seat belt to distribute impact forces The twisted seat belt against your body could cause injuries RPregnant women should also always use a lap shoulder belt The lap belt portion should be positioned as low as possible on the hips to avoid any possible pressure on the abdomen RPlace the seat backrest in a position that is as upright as possible RCheck your seat belt during travel ...

Страница 57: ...ht or pinched in the door or in the seat mechanism This can damage the seat belt and impair its effectiveness and or cause damage to the door and or door trim panel Such damage is not covered by the Mercedes Benz Limited Warranty Damaged seat belts must be replaced Contact an authorized Mercedes Benz Center Enhanced seat belt reminder system When the engine is started the seat belt telltale will a...

Страница 58: ...unctioning correctly see indicator lamp Y page 43 The ETDs for the front seats will only activate if the front seat belts are fastened latch plate properly inserted into buckle The ETDs for the rear seats will activate with or without the respective seat belts fastened In an impact the ETDs remove slack from the seat belts in such a way that the seat belts fit more snugly against the body Seat bel...

Страница 59: ...ackrest of the drive dynamic multicontour front seats RIf the vehicle is in a critical dynamic driving situation the front side windows and the tilt sliding sunroof also closes until only a small gap remains If the closing procedure of the side windows or tilt sliding sunroof is blocked the side windows or tilt sliding sunroof will stop and open slightly Once the hazardous situation is over withou...

Страница 60: ...G Observe Safety notes see page 303 X Position seat 3 Y page 304 and head restraint properly Y page 306 Observe the following points RAlways be in a properly seated position RThe position should be as far rearward from the front air bag in steering wheel 1 as possible while still permitting proper operation of vehicle controls RAdjust seat 3 to a comfortable seating position that still allows you ...

Страница 61: ...cause an accident with vehicle equipment that can be operated even if the SmartKey is removed from the starter switch or removed from the vehicle such as seat adjustment steering wheel adjustment or the memory function If children open a door they could injure other persons or get out of the vehicle and injure themselves or be injured by following traffic Do not expose the child restraint system t...

Страница 62: ... Vehicle Safety Standards 213 and 210 2 A statement by the child restraint manufacturer of compliance with these standards can be found on the instruction label on the restraint and in the instruction manual provided with the restraint When using any infant restraint toddler restraint or booster seat make sure to carefully read and follow all manufacturer s instructions for installation and use Pl...

Страница 63: ...the system has been repaired A child in a rear facing child restraint on the front passenger seat will be seriously injured or even killed if the front passenger front air bag inflates RIf you have to place a child in a forward facing child restraint on the front passenger seat move the seat as far back as possible use the proper child restraint recommended for the age size and weight of the child...

Страница 64: ...ust be positioned such that top tether strap 4 can pass freely between the head restraint and top of the seat backrest X Make sure top tether strap 4 is not twisted X Securely fasten hook 3 which is part of top tether strap 4 to anchorage ring 2 X For safety make sure hook 3 is attached to anchorage ring 2 beyond the safety catch as illustrated Once hook 3 is attached the child restraint itself ca...

Страница 65: ...t belt system Install child seat according to the manufacturer s instructions The LATCH type anchors are covered with upholstery blends 1 Indicates the position of the anchors 2 Anchors 3 Upholstery blend 4 Installation device X Fold upholstery blend 3 upward to access anchors 2 X Turn installation device 4 to a vertical position so that upholstery blend 3 does not fold down X Install a LATCH type...

Страница 66: ... not cause harmful interference and 2 this device must accept any interference received including interference that may cause undesired operation Any unauthorized modification to this device could void the user s authority to operate the equipment i Canada only This device complies with RSS 210 of Industry Canada Operation is subject to the following two conditions 1 This device may not cause inte...

Страница 67: ...ve and skillful driver can prevent accidents The capabilities of a vehicle equipped with the driving safety systems described in this section must never be exploited in a reckless or dangerous manner which could jeopardize the user s safety or the safety of others Always adjust your driving style to the prevailing road and weather conditions and keep a safe distance to other road users and objects...

Страница 68: ...The Brake Assist System BAS operates in emergency situations If you apply the brakes very quickly the BAS automatically provides full brake boost thereby potentially reducing the braking distance X Apply continuous full braking pressure until the emergency braking situation is over The ABS will prevent the wheels from locking When you release the brake pedal the brakes function again as normal The...

Страница 69: ...l in an emergency braking situation BAS Plus automatically regulates the brake power boost to a level that is suitable for the traffic situation If BAS Plus requires a particularly high brake power boost PRE SAFE is activated at the same time X Keep constant pressure on the brake pedal until the emergency braking situation is over During this process the ABS prevents the wheels from locking up The...

Страница 70: ... quick intervals while you are braking hard at a speed of more than 30 mph 50 km h or when you are braking with the aid of BAS or BAS Plus This helps to alert drivers behind you If you bring the car to a complete stop by hard braking at a speed of more than 40 mph 70 km h the hazard warning flasher automatically comes on as soon as the vehicle is at a standstill While the vehicle is stationary the...

Страница 71: ...delines could cause the vehicle to skid The ESP cannot prevent accidents resulting from excessive speed Vehicles with 4MATIC Only conduct operational or performance tests on a two axle dynamometer If such tests are necessary contact an authorized Mercedes Benz Center You could otherwise seriously damage the brake system or the transfer case which is not covered by the Mercedes Benz Limited Warrant...

Страница 72: ...g The ESP should not be switched off during normal driving other than in the circumstances described below Disabling the system will reduce vehicle stability in driving maneuvers Do not switch off the ESP when a spare wheel is mounted To improve the vehicle s traction switch off the ESP in driving situations in which it would be advantageous to have the drive wheels spin and thus cut into surfaces...

Страница 73: ...sult in the following Rno restriction to engine torque Rloss of system supported traction control ESP OFF is designed for driving on closed tracks when the vehicle s natural oversteer and understeer characteristics are desired and requires a highly skilled and experienced driver able to handle these critical driving situations You could lose control of your vehicle and cause an accident Please be ...

Страница 74: ...ence system designed to assist the driver during vehicle operation The responsibility for the vehicle speed and the distance to the vehicle ahead including most importantly brake operation to assure safe stopping distance always remains with the driver Always pay attention to traffic conditions even while PRE SAFE is switched on Otherwise you may not be able to recognize dangerous situations until...

Страница 75: ... has clearly detected an object Detection can be impeded by Rdirty or covered sensors Rsnowfall or heavy rain Rdisturbance from other radar sources Rstrong radar reflection such as in parking garages PRE SAFE uses radar signals that are not reflected well by narrow objects and absorptive materials For this reason PRE SAFE will not react to persons animals and approaching traffic or cross traffic P...

Страница 76: ...on that you have not interceded with your own braking inputs to avoid a potentially dangerous situation Do not wait for the operation of the warning signal to intercede with your own braking as that will result in potentially dangerous emergency braking which will not always result in an impact being avoided Tailgating increases the risk of an accident PRE SAFE Brake can react to stationary obstac...

Страница 77: ... immobilizer In the event that the engine cannot be started yet the vehicle s battery is charged the system is not operational Contact an authorized Mercedes Benz Center or call 1 800 FOR MERCedes in the USA or 1 800 387 0100 in Canada Anti theft alarm system Once the alarm system has been armed a visual and audible alarm is triggered when someone opens Ra door Rthe trunk Rthe hood The alarm will ...

Страница 78: ...ck the vehicle with the SmartKey or with KEYLESS GO The turn signal lamps flash once to indicate that the alarm system is disarmed i The vehicle will lock and the alarm system will rearm automatically again after approximately 40 seconds unless you open a door or the trunk Canceling the alarm To cancel the alarm do one of the following X Insert the SmartKey in the starter switch X Press button k o...

Страница 79: ... tination memory 145 COMAND navigation system last destinations 150 COMAND telephone 151 COMAND FM AM radio 184 COMAND satellite radio 189 COMAND audio CD audio DVD MP3 195 COMAND AUX 206 COMAND video DVD 209 COMAND vehicle menu 216 COMAND automatic climate control 223 COMAND seats 227 Instrument cluster control system 231 Voice Control introduction 248 Voice Control navigation 252 Voice Control t...

Страница 80: ... have any service work on electronic components carried out by an authorized Mercedes Benz Center G Warning In order to avoid distraction which could lead to an accident the driver should enter system settings while the vehicle is at a standstill and operate the system only when permitted by road weather and traffic conditions Bear in mind that at a speed of just 30 mph approximately 50 km h your ...

Страница 81: ... playing audio source During a telephone call you cannot switch off COMAND COMAND components In your vehicle COMAND can be used to operate Raudio functions Rthe navigation system Rthe telephone and communication functions SMS Rexternal audio and video sources Rvideo DVD Rvarious vehicle settings COMAND consists of the following RCOMAND shortcut buttons RCOMAND display Rtelephone keypad RCOMAND con...

Страница 82: ... main area 3 is active i The layout of the menus may vary depending on your vehicle s equipment This manual shows the menus for a fully equipped vehicle Instrument cluster multifunction display This section describes features and controls via the COMAND controller display and shortcut buttons only Please refer to the Instrument cluster control system section of this manual Y page 231 for function ...

Страница 83: ...al characters RReject accept connect and end calls Y page 151 RSelect preset radio stations and enter the frequency manually Y page 187 RSelect preset satellite radio stations and enter the channel number Y page 193 RSelect a medium from the DVD changer Y page 203 RSelect a track from CD DVD Audio or MP3 Y page 204 RSelect a scene chapter from a video DVD Y page 213 RSelect a street in the navigat...

Страница 84: ...unction n X Press briefly RConfirming the selection of a menu item or list entry RExiting full screen image with Navi X Press and hold until the selected action has been carried out RSaving a station RAccepting a destination for navigation ymz X Rotate RMoving through vertical or horizontal menus RMoving through text RSelecting program settings qmr X Slide RMoving through vertical menus RExiting h...

Страница 85: ...n map Operating COMAND Menu overview The table below shows the structure of the main functions and their main menus Each main function has a main menu Each menu item in the main menu in turn has several submenu items Commands menus Navi RMap Display Y page 104 RMode Y page 106 Audio RFM AM Radio Y page 184 RSat Radio Y page 189 RCD Y page 195 RDVD Audio Y page 195 RMP3 Y page 195 RAudio OFF Y page...

Страница 86: ...ch off Y page 220 RInterior Ambient Light Y page 220 Commands menus RRear Window Sunshade Y page 221 RTrunk Opening height Restriction Y page 222 Calling up the main menu Example illustration Audio main menu You can call up the main menu of a main function in the following manner X Moving to the main function line Slide qm X Selecting a main function Slide omp or rotate ymz X Confirming selection ...

Страница 87: ...D completes your entry as soon as it can be clearly identified In this case you do not need to switch to the list Deleting individual characters X Select and press repeatedly in the bottom line Deleting entire words or numbers X Press and hold in the bottom line until the word or number is deleted Exiting character entry X Select and press Back in the bottom line or X Press back button L in the ce...

Страница 88: ...tive operating mode X Switching to the main menu Press and hold back button L You will hear a signal and COMAND switches to the main menu of the currently active operating mode Example of how to use COMAND In the descriptions below the main functions always serve as the starting point for locating the individual menu items Example Audio Audio FM AM Radio Radio Save Station i In the COMAND display ...

Страница 89: ...ions of the Audio main menu appears X Selecting FM AM Radio Slide qm or rotate ymz X Confirming selection Press n The FM AM Radio menu appears X Selecting Radio Slide mr and rotate ymz X Confirming selection Press n The Radio submenu appears X Select Save Station from selection list by rotating ymz or sliding qmr X Press n X Select desired position Control systems Z ...

Страница 90: ... press shortcut button F during an announcement X Switching off navigation messages Press and hold F during an announcement until the announcement is switched off You will see the message The driving instructions have been muted for a short while i The announcements remain switched off even if you start a new route guidance or if COMAND is switched off on with the o button If you switch COMAND off...

Страница 91: ...bass 1 Setting last selected 2 Current setting X Changing setting Slide qmr or rotate ymz until desired treble or bass setting is reached X Exiting menu Press n L or slide omp The setting is saved Adjusting balance or fader Balance is used to determine whether the sound focus should be shifted toward the driver s side or the passenger s side Fader is used to determine whether the sound focus shoul...

Страница 92: ...C7 converts all two channel stereo sound material into multi channel surround sound With the help of LOGIC7 surround information stored during the original recording are read out and distributed through the 13 channels No effects are created during this process only that which was already there becomes audible In addition harman kardon LOGIC7 moves the perceived sound source away from the individu...

Страница 93: ...d occur resulting in temporary sound distortion RWith some stereo recordings the resulting sound may deviate from conventional stereo playback Switching off on the audio source i When you insert an audio CD or audio DVD it automatically becomes the active audio source X Switching off Select Audio Audio Audio OFF The audio source is switched off Audio OFF appears in the display X Switching on Selec...

Страница 94: ... time dependent traffic guidance RCalculation of estimated arrival time X Select Vehicle System Settings Time Time X Selecting hour or minute s Slide omp X Setting value Rotate ymz or slide qmr X Saving setting Press n i The increment value for setting the minutes depends on the situation If GPS reception is available it is 30 minutes If GPS reception is not available it is one minute Setting the ...

Страница 95: ...ystem Settings Time Date X Selecting month day or year Slide omp X Setting value Rotate ymz or slide qmr X Saving setting Press n Setting the time date format X Select Vehicle System Settings Time Format The format list appears The dots R in front of the list entries indicate the current setting X Changing format setting Select desired format X Saving setting and exit the menu Slide omp Voice Cont...

Страница 96: ...the second part is saved automatically Canceling during the first or second part of individualization X Select Cancel A prompt appears asking whether you really do want to cancel X Select Yes or No If you select Yes individualization will be canceled The data from the part at which you exited is not saved If you select No the part at which you stopped begins again Deleting existing individualizati...

Страница 97: ... things are deleted X Select Vehicle System Settings Reset A prompt appears asking whether you really want to reset X Select Yes or No If you select Yes another prompt will appear asking whether you really want to reset X Select Yes or No If you select Yes COMAND will be reset and restarted COMAND navigation introduction Safety notes G Warning For safety reasons only enter a destination when the v...

Страница 98: ...m an authorized Mercedes Benz Center Updating the map software You can update the map software yourself using a DVD Notes about handling DVDs ROnly hold discs by the edge RHandle discs carefully to prevent read problems RAvoid getting scratches fingerprints and dust on discs RUse a commercially available cleaning cloth to clean discs Do not wipe them with a circular motion but only in straight lin...

Страница 99: ...ning Only carry out the following when the vehicle is stationary RInserting a disc REjecting a disc There is a risk of accident by being distracted from road and traffic conditions if you load a CD DVD while the vehicle is in motion Bear in mind that at a speed of just 30 mph approximately 50 km h your vehicle is covering a distance of 44 feet approximately 14 m every second 1 Disc slot 2 Magazine...

Страница 100: ... the slot If you select Yes the map data is updated Map data is already installed You will see a message that the map data is already installed and a prompt will appear asking you whether you want to continue with the update X Select Yes or No If you select No COMAND automatically ejects the DVD and the map data is not updated Take DVD out of slot If you select Yes the existing map data is saved a...

Страница 101: ...em You will see a message that the update is not possible X Confirming message Press n COMAND ejects the DVD X Take DVD out of slot X Load a DVD which is compatible with the vehicle s navigation system Map software is not compatible with the current system software You will see a message that the system software and the map software are not compatible X Confirming message Press n COMAND ejects the...

Страница 102: ...stricted as follows during vehicle positioning RNavigation announcements route guidance displays and displayed street names are not consistent with the actual location of the vehicle RCOMAND does not generate navigation announcements RInstead of the route guidance displays you see the Off Road display and a direction arrow The direction arrow shows the compass heading to the destination When posit...

Страница 103: ...nt in navigation mode are identical to those set in the instrument cluster Y page 247 Input restrictions The input restrictions are imposed starting at a particular vehicle speed The restrictions are canceled as soon as the speed drops below a certain value When the restriction is active certain operations or entries are not possible You will notice this by the fact that some menu items cannot be ...

Страница 104: ...tion RCentering the map on the destination position Repeating the current navigation announcement Selecting Ra destination Rstopover Rsave destination Rcancel route guidance Calling up the map display and switching to navigation mode X In the main function line select Navi or X Press the N shortcut button once or twice i The number of times you have to press the N shortcut button depends on the op...

Страница 105: ...le to adjust the map scale with the menu system hidden full screen map display X Rotate ymz until the desired map scale is set 1 Currently set map scale as number 2 Scale 3 Currently set map scale as a needle on the scale 4 Previously set value before calling up the scale As soon as you rotate ymz scale 2 appears Rotating clockwise zooms in rotating counterclockwise zooms out Saving current vehicl...

Страница 106: ...he last destinations list Y page 151 Hiding the cross hair X Press back button L in the center console Y page 86 The cross hair disappears and the map is centered on the vehicle position or X Set the map to the vehicle or destination position see the explanation below Centering the map on the vehicle or destination position i If you have moved the map you can use this function to rapidly return th...

Страница 107: ...s for example i Depending on the map scale on the map POI symbols may not be visible on the map although their display is activated In addition POI symbols may be covered by the map s labels The following settings are possible RStandard symbols symbol determined by the factory settings RPersonal symbols you can determine the symbols yourself RNo symbols X Adjusting Select Navi Navi Map Display The...

Страница 108: ...sufficient GPS reception for displays 1 2 and 3 to be shown Height display 1 is an approximation because the navigation system uses the GPS signals for the calculation Display options with geocoordinate display switched on If the cross hair is displayed on the map view map was moved manually only display 3 is visible It shows either the coordinates of the cross hair or other data on the cross hair...

Страница 109: ...ode is switched on or off A checkmark indicates that the mode is switched on It is possible to switch on more than one mode X Exiting menu Slide omp or press back button L in the center console Y page 86 COMAND will verify whether it can incorporate the modes if you select them with route guidance active If it can COMAND calculates a new route while incorporating the modes selected If it cannot yo...

Страница 110: ...he street entry you can enter either a house number or an intersection A zip code entry replaces the city entry Calling up the address input menu X Select Navi Destination Address Entry The address input menu appears It shows a state USA or a province Canada Which state or province is shown depends on the vehicle s location 1 State USA or province Canada Menu items in the address input menu Some m...

Страница 111: ...t the same time COMAND automatically supplements characters 2 entered by the user with other likely input characters 3 X Selecting characters Slide omp or rotate ymz X Confirming character selection Press n X Deleting individual characters Select in the bottom line and press n X Deleting an entire entry Select in the bottom line and press n until the entire entry is deleted X Canceling an entry Se...

Страница 112: ...rovince The following menu items are now available RMap Entering a destination from the map Y page 126 RState Prov Reenter state USA or province Canada RCity Entering a city Y page 112 RStreet Entering a street Y page 115 RZip Code Entering the zip code Y page 111 i It is not possible to enter a zip code if the digital map does not contain any zip codes for the selected province Canada X Continuin...

Страница 113: ... Currently non selectable numbers 8 List of zip codes i In the list of input characters 4 you can only select numbers which can be currently entered Which characters are included depends on the sequence in which you have entered your destination and the data version of the digital map While the numbers are being selected as described below the top list entry 1 always shows the zip code which best ...

Страница 114: ... or province Canada and zip code i The street and if necessary the house number will then appear as soon as COMAND can attribute the zip code to an appropriate address Which of the following menu items are now available depends on the situation or may depend on the data version of the digital map The menu items which are not available cannot be selected RMap Using the map to enter a destination Y ...

Страница 115: ...y non selectable characters 6 Currently selectable character 7 List of cities 8 Currently selected character i In the list of input characters 4 you can only select currently selectable characters Which characters are included depends on the sequence in which you have entered your destination and the data version of the digital map The top list entry 1 at first shows either the city in which the v...

Страница 116: ...otate ymz X Canceling selection Select Back and press n or X Press back button L in the center console Y page 86 X Confirming selection Press n Cities with symbol 1 mean that there is more than one in the selected state USA or province Canada Confirming one of these cities will take you to a further sub selection If there are no other selection options the address input menu appears again It shows...

Страница 117: ...racters Y page 116 Whether or not the input characters appear depends on how many streets are available for the selected city Street list with input characters When this list appears the input characters 6 are automatically activated 1 Top list entry based on the input data up to that point 2 Characters entered by the user 3 Characters automatically added by the system 4 Currently non selectable c...

Страница 118: ...l for more selection options X Selecting a street Slide qmr or rotate ymz or X Enter a street number with the telephone keypad using the R 9 buttons Y page 81 i Example Pressing button 2 jumps to the 2nd Avenue X Canceling selection Select Back and press n or X Press back button L in the center console Y page 86 X Confirming selection Press n Streets with symbol 1 run through several suburbs Confi...

Страница 119: ... COMAND can clearly attribute to an address You can only enter those centers which are saved on the digital map Depending on the previous entry centers are available either for the city entered or the zip code area entered X In the address input menu select Center The list of centers appears either with or without the input characters Y page 118 Whether or not the input characters appear depends o...

Страница 120: ...e you can confirm the current entry or make another selection During character entry you can also manually switch to the list of centers without input characters at any time X Switching manually to the list of centers without input characters Slide qm or X Select d in the second line from the bottom and press n List of centers without input characters X Selecting a center Slide qmr or rotate ymz X...

Страница 121: ...rs 3 Currently selected number X Selecting numbers Slide omp or rotate ymz X Confirming number selection Press n or X Entering a number with the telephone keypad using the R 9 buttons Y page 81 X Deleting individual numbers Select in the bottom line and press n X Deleting an entire entry Select in the bottom line and press n until the entire entry is deleted X Canceling an entry Select Back in the...

Страница 122: ... Numbers entered by the user 2 Numbers automatically added by the system 3 Top list entry based on the input data up to that point 4 Input characters 5 Currently non selectable numbers 6 Currently selected number 7 Currently selectable numbers 8 List of house numbers i In the list of input characters 4 you can only select currently selectable characters Which characters are included depends on the...

Страница 123: ...or X Press back button L in the center console Y page 86 X Confirming selection Press n After the confirmation the address input menu appears again It shows the house number street city and state USA or province Canada Which of the following menu items are now available may depend on the data version of the digital map The menu items which are not available cannot be selected RMap Using the map to...

Страница 124: ...are being selected as described below the top list entry 1 always shows the intersection which best corresponds to the input data as it has been entered up to that point At the same time COMAND automatically supplements characters 2 entered by the user with appropriate characters 3 X Selecting characters Slide omp or rotate ymz X Confirming character selection Press n X Deleting individual charact...

Страница 125: ...enu items which are not available cannot be selected RMap Using the map to enter a destination Y page 126 i In this case using the map for destination entry is based on the city seen in the address input menu RPOI Entering a point of interest Y page 128 i In this case entering a POI is based on the city seen in the address input menu RSave Saving a destination in the destination memory Y page 145 ...

Страница 126: ...ve the notes about the digital map Y page 96 Entering a destination from the destination memory X Select Navi Destination From Memory The destination memory list appears either with or without the input characters Y page 125 Whether the input characters appear depends on the number of entries in the destination memory i The destination memory always contains an entry called My Address You can save...

Страница 127: ... and press n until the entire entry is deleted X Canceling an entry Select Back in the bottom line and press n or X Press back button L in the center console Y page 86 As soon as COMAND can clearly attribute the characters entered to a destination the input characters 4 disappear You see the destination memory list without input characters Here you can confirm the current entry or make another sel...

Страница 128: ... in the address input menu or X Select Navi Destination Via Map You will see the map with a cross hair 1 Cross hair 2 Details of the cross hair position 3 Map scale i Display 2 may be the name of a road for example provided the digital map contains the necessary data If no data is available display 2 shows Rthe coordinates if the geocoordinate display is switched on Y page 106 Rno display if the g...

Страница 129: ...e and near the vehicle s route If there are no destinations available there COMAND searches for destinations in an area around the vehicle position If COMAND does not find any destinations you will see a message to this effect Select OK You can now select a different category If COMAND finds destinations you will see a list of the destinations and details of how far away they are in the right hand...

Страница 130: ...Deleting the stopover If a stopover has already been entered you can delete it X Select Navi Destination Stopover Delete Stopover COMAND deletes the stopover and calculates the route to the main destination COMAND navigation system Point of interest entry Entering a POI in the surrounding area X In the map view while the menu system is displayed select Destination From POIs Current Position Y page...

Страница 131: ...lected state USA or province Canada you will see a corresponding message Closing message Select OK You can again select a state province If there are POIs you will see the category list again X Proceed as described in the Selecting a category paragraph in the Main category list without input characters section Y page 131 Designating a POI category The categories and POIs available depend on the di...

Страница 132: ...racters are being selected as described below the top list entry 1 always shows the category which best corresponds to the input data as it has been entered up to that point At the same time COMAND automatically supplements characters 2 entered by the user with appropriate characters 3 X Selecting characters Slide omp or rotate ymz X Confirming character selection Press n X Deleting individual cha...

Страница 133: ... of example the RESTAURANT main category with available subcategories 4 1 Main category 2 To show all POIs for all subcategories under category 1 3 Symbol for available POIs 4 Subcategory X Selecting a subcategory Slide qmr or rotate ymz X Canceling selection Select Back and press n or X Press back button L in the center console Y page 86 X Confirming selection Press n After selecting a subcategor...

Страница 134: ...the center console Y page 86 X Starting route calculation Select Start see also Y page 123 Entering name of POI X Select Options Spell The POI list appears with input characters the input characters are automatically activated POI list with input characters i For POIs in other regions this list also shows the compass heading to the destination as well as the linear distance to the destination as i...

Страница 135: ...thout input characters Here you can confirm the current entry or make another selection You can also manually switch to the POI list without input characters at any time X Switching manually to the POI list without input characters Slide qm or X Select d in the second line from the bottom and press n POI list without input characters X Selecting a destination Slide qmr or rotate ymz X Canceling se...

Страница 136: ...on the map depending on whether POIs are available and which map scale is set The scale at which the symbols are displayed on the map varies according to the symbol You can set which symbols COMAND should display Y page 105 The POI closest to the center of the screen is automatically marked If there are no POIs available the Back menu item is automatically highlighted and you cannot select other m...

Страница 137: ...tains the relevant information Examples of displays and announcements for a driving maneuver Driving maneuvers have three phases RPreparation phase RAnnouncement phase RManeuver phase Preparation phase COMAND prepares you for the upcoming driving maneuver Based on the example display below the driving maneuver is announced with the Prepare to turn left message The display is not split and shows th...

Страница 138: ...vehicle s direction of travel shown in both the left and right displays 8 Street on which you are currently driving if included on the digital map 9 Destination i The filled in section of distance graphic 3 gets shorter the nearer you get to the announced driving maneuver Maneuver phase COMAND announces the next driving maneuver Based on the example display below the driving maneuver is announced ...

Страница 139: ...d 1 Destination on the map 2 Destination flag Partially digitized areas i The digital map may contain areas that are only partially digitized although they are within a digitized region G Warning Due to incomplete digitization the route shown on the map may differ from the actual road traffic situation If you follow the route shown on the map for example it is possible that you could drive the wro...

Страница 140: ...y in an area where turn by turn guidance cannot be provided During route guidance the display is divided On the right hand side you will see the direction arrow showing the compass heading to the destination On the left hand side of the display you will see the map with the suggested route The suggested route is highlighted blue However it may not be possible to follow the suggested route because ...

Страница 141: ...s showing the compass heading to the destination guide you You will also see the Direction to destination display Route guidance from an off road location to a destination If there is no road available on map at current position of the car vehicle is off road COMAND is also able to guide you to a destination from such a location At the start of the route guidance you will see the Off Road message ...

Страница 142: ...avigation announcements are in English You will find how to set the system language on Y page 94 Navigation announcements are muted during telephone calls You can however call up a current announcement at any time You can also call up a current announcement at any time if you have missed an announcement Route guidance is already active X Calling up a current announcement Select Navi RPT or X Press...

Страница 143: ...ion 2 Current vehicle position the triangle indicates the vehicle s direction of travel 3 Information about the highlighted route section i Information 3 about the marked route section shows the street name and the length of the route section Marked route section 1 is always highlighted in white and outlined in red X Displaying next or previous route section Select Next or Previous X Increasing or...

Страница 144: ...mated arrival time 9 REstimated remaining travel time 8 Displaying route information X Select Route Route Info in map view with the menu system displayed Y page 103 The route information appears 1 Highlighted portion of route 2 Info for highlighted portion of route 3 Next portion of route X Closing route info Slide omp or press back button L in the center console Y page 86 X Displaying next or pre...

Страница 145: ...then be viewed in the COMAND display Events displayed are those within receivable range of the vehicle s location i Actual road and traffic conditions may be different from the received messages Real time traffic notifications in the map COMAND can display certain traffic events in the map The notifications are shown at the map scales from 0 05 mi 50 m to 500 mi 500 km X Set the map scale Turn ymz...

Страница 146: ...n no traffic reports are present you will see a display to this effect List for inactive route guidance When route guidance is inactive the list displays all streets for which messages are present 1 Affected street list i Instead of a street an area or a region can also be affected by a message for example when visibility is limited due to fog X Read a message Select a street You can find an examp...

Страница 147: ...nts are shown in the following 1 Traffic jam symbol 2 Stop and go traffic symbol 3 Warning message symbol 4 Blocked section symbol X Scroll through the contents or to the next message Turn ymz or slide qmr COMAND navigation system destination memory Saving a destination in the destination memory i This function also saves the destination in the address book There COMAND creates an address book ent...

Страница 148: ... 1 Selected data field with input mark cursor 2 Input characters X Entering data Proceed as described in the Changing the data field operating step in the Creating a new address book entry section Y page 171 Assigning a destination to an address book entry i This function assigns the complete navigable address data to an already existing address book entry You can then select this entry in the add...

Страница 149: ... A prompt appears asking whether you want to delete the destination X Select Yes or No If you select Yes COMAND deletes the destination i If the navigable address data of the destination to be deleted has also been assigned to an address book entry COMAND deletes the data there as well If the corresponding address book entry does not contain any further data such as telephone numbers COMAND delete...

Страница 150: ...acters from the list of input characters Rotate ymz or slide qm repeatedly until the list entry My Address is highlighted X Press n Further operation depends on whether you want to enter the address manually or use an address book entry as your own address Entering an address manually X If you want to assign your own address for the first time Select Save new entry or X If you want to change your ...

Страница 151: ...r cannot be found on the digital map you must now either Rselect a state USA or province Canada Ror enter a city Ror enter a street Ror enter a house number X Selecting a state USA or province Canada Select desired state USA or province Canada from the list X Entering a city Proceed as described for destination entry in the Entering a city section Y page 112 X Entering a street Proceed as describe...

Страница 152: ...s from the list of input characters Rotate ymz or slide qm repeatedly until the list entry My Address is highlighted X Press n If your own address has already been assigned you will see the menu for starting route guidance with your own address data X Exiting menu Select Back COMAND navigation system last destinations i COMAND automatically saves the last destinations for which the route calculati...

Страница 153: ...ars X Select desired destination The address of the destination appears X Select Delete X Select Yes or No COMAND telephone Safety notes G Warning Some jurisdictions prohibit the driver from using a cellular telephone while driving Whether or not prohibited by law for safety reasons the driver should not use the cellular telephone while the vehicle is in motion Stop the vehicle in a safe location ...

Страница 154: ...er s authority to operate the equipment Calls disconnected while the vehicle is in motion A call may be disconnected if Rthere is insufficient network coverage Ryou move from one transmitter receiver area cell into another and no channels are free or the cell is full Operating options i The components and operating principles of COMAND can be found on Y page 78 i Various mobile phone cradles can b...

Страница 155: ...one or you may have to wait a while in the following situations RIf the telephone has not yet logged into the network The telephone automatically tries to log into a network If no network is available you will also not be able to make a 911 emergency call If you attempt to make an outgoing call the No Service message will appear for a short while RIf the mobile phone is not inserted in the cradle ...

Страница 156: ...eject accept connect and end calls X Entering characters Select Telephone X Fold up cover 2 X Enter characters using the A buttons i You can enter the character by pressing once Pressing this button again within 1 5 seconds enters the character X Deleting individual characters Press X Deleting an entire word or number Press and hold until the word or number is deleted 911 emergency call i The 911 ...

Страница 157: ...rgency call After the digits have been entered you will see the question Do you want to dial the 911 emergency number X Use COMAND controller to select Yes The telephone makes the connection X Wait until the emergency call center answers and describe the emergency situation Entering the PIN i Your PIN code Personal Identification Number code prevents unauthorized persons from using your GSM mobile...

Страница 158: ...t is necessary to enter the PUK PUK2 to unlock it The PUK and or PUK2 are provided by your telephone service provider X Enter PUK PUK2 digits into mobile phone Entering the unlock code Many mobile phones can be protected from unauthorized use with an unlock code see mobile phone operating instructions If you wish to use the phone functions when the unlock code is active a screen appears requesting...

Страница 159: ...up main menu Select Telephone or X Press s on the telephone keypad Y page 154 i If you press s when the main telephone menu has already been called up the Calls Dialed list will appear Y page 158 1 Numbers characters to enter telephone number 2 Symbol ò for new voice message in mailbox 3 Symbol ð for unread SMS messages in SMS inbox Y page 182 4 Signal strength and network status display RNetwork ...

Страница 160: ... in separate lists RCalls received RCalls dialed Calling up a list X Select Call Lists from main telephone menu X Select Calls Received or Calls Dialed The corresponding list appears i The Calls Received and Calls Dialed menu items do not function if the respective list has no entries The Call Lists menu item does not function if neither list has any entries Example illustration List of calls rece...

Страница 161: ... Y page 158 X Slide omp and select Options Details The detailed view appears X Closing detailed view Slide qmr or omp or press n Saving a list entry in the address book i List entries that show a telephone number are neither saved in the COMAND address book nor in the phone book on the mobile phone You can save such entries in the COMAND address book You can also save list entries in the COMAND ad...

Страница 162: ... an address book entry section Y page 172 X Press n when you have finished searching COMAND saves the data if there are fewer than four numbers assigned to the entry you are searching for in the selected number category If four numbers are saved for the entry you are searching for a prompt will appear asking whether you want to overwrite one of the existing numbers X Select Yes or No If you select...

Страница 163: ...l as long as the provider and the mobile phone support this function see mobile phone operating instructions While the call is connecting you can also send character strings Y page 163 Entering the telephone number using the COMAND controller X Switching screen to telephone mode Call up main telephone menu Y page 157 X Entering digits Select desired digits by rotating ymz or sliding omp and press ...

Страница 164: ...lephone menu Y page 157 X Entering number of a speed dial preset Select all the digits in sequence Deleting individual digits Select and briefly press n Deleting entire number Select and press n until the number is deleted X Connecting a call speed dial presets 1 99 Select S or X Connecting a call speed dial presets 100 999 Select after the digits S In both cases the telephone connects the call to...

Страница 165: ...o transmits it Switching the hands free microphone on or off X Switching screen to telephone mode Call up main telephone menu Y page 157 X Switching off microphone Select Mic OFF and press n or X Press F shortcut button If the microphone is switched off the symbol appears in the main area X Switching on microphone Select Mic ON or X Press F shortcut button The symbol disappears Sending a character...

Страница 166: ... activated and the Bluetooth headset to be authorized Y page 180 The call transfer is controlled by pressing the PTT button on the Bluetooth headset see headset operating instructions Normally it is sufficient to press the PTT button once but under certain circumstances you may have to press it a second time Once the call has been transferred to the Bluetooth headset all the functions will be avai...

Страница 167: ... book X Select Telephone Name The COMAND phone book appears Example illustration Phone book with name display and smart speller activated 1 Category symbol 2 Upper entry from address book without category symbol 3 Symbol for several telephone numbers subentries under the main entry 4 Symbol y for summarized entries from the mobile phone with the same name but different telephone numbers 5 Smart sp...

Страница 168: ...e 167 RCreating a new entry in the address book Y page 167 RDeleting an entry Y page 168 RSaving a phone book entry from mobile phone in the address book Y page 169 RAdding a telephone number to an address book entry Y page 170 X Switching from the list to the smart speller Select Back from the list or X Press back button L in the center console Y page 86 X Changing phone book display in the list ...

Страница 169: ...e ymz or slide qmr until the desired subentry is highlighted Displaying details of an entry COMAND can also show a shortened entry in its entirety For entries featuring subentries the detailed view is only available for the subentries and not for the main entry X Select entry Y page 166 X Select Options Details The detailed view appears X Closing detailed view Slide qmr or omp or press n or back b...

Страница 170: ...Select Symbols X Returning input characters to normal characters Select the desired language X Moving cursor in the data field Select Y or Z X Deleting individual characters Select and briefly press n The character to the left of the cursor is deleted X Deleting an entire entry Select and press and hold n until the entry is deleted X Saving an entry Select d X Canceling an entry Select Back If one...

Страница 171: ...elect a category e g Land Line X Confirming selection Select Save The input menu appears with the data fields The data field for the telephone number is filled in automatically The data field for the last name is also filled when the entry to be saved contains a name 1 Data field 2 Input mark cursor 3 Input characters X Proceed as described in the Changing data field paragraph in the Assigning a N...

Страница 172: ... appear asking whether one of the existing numbers should be overwritten Select Yes or No If you select Yes a selection list will appear containing the four existing numbers Select number to be overwritten The input menu appears with the data field for entering the new telephone number X Entering digits Select all digits one by one from the input characters X Moving cursor in the data field Select...

Страница 173: ...ress book X Select Telephone Data Connections Address Book The main address book display appears i For phone book entries in the mobile phone that contain a name and a telephone number you will see the name and the number If a phone book entry in the mobile phone contains several telephone numbers you will see the message Multiple Numbers instead of a telephone number Selecting an entry in the mai...

Страница 174: ...elect desired characters one by one from the input characters X Toggling upper and lower case for the input characters Select or X Changing language for the input characters Select X Select desired language X Changing character set for the input characters Select Depending on the previous setting you will change to letters with special characters or to numbers with special characters X Moving curs...

Страница 175: ...with the symbol contain a voice entry Y page 178 Entries with the symbol contain complete navigable address data from the navigation system that correspond to digital map data It is possible to quickly start route guidance to these types of entry Y page 177 Switching from the smart speller to the list X Slide qm repeatedly or press n until the smart speller is hidden or X Select d Switching from t...

Страница 176: ...tration Detailed view for private data 1 To go back to the previous menu 2 To switch between work and home data symbol or 3 Selected data field 4 Display of set data type in example display home data is set symbol and Home display 5 To call up options i The options available under Options menu item 5 depend on which data field 3 is selected The following options may be available RDisplaying abbrev...

Страница 177: ...n the mobile phone has more than one telephone number you will see all telephone numbers with the respective category symbol 2 in the detailed view i The options available under Options menu item 4 depend on which data field 3 is selected The following options may be available RCalling a number saved in an entry Y page 177 RSaving a phone book entry from mobile phone in the address book Y page 169...

Страница 178: ...details of an entry and highlight the telephone number data field Y page 174 X Select Options Add Number X Select a number category e g Home X Select a telephone category e g Land Line X Select Save COMAND adds the data field to the entry if there are fewer than four numbers assigned to the entry in the selected number category You can now enter a number into the data field X Proceed as described ...

Страница 179: ...lation Address data is incomplete or does not match digital map i For the route calculation the navigation system requires the correct spellings of the state province the city or zip code the street and under some circumstances the house number The city and street must be spelled in the same manner as the destination entry The state province can be spelled as an entire name or as an abbreviation E...

Страница 180: ...Control guides you through the dialogs Deleting a voice entry X Search for the address book entry with a voice entry Y page 172 X Select Options Voice Name Delete A deletion prompt appears X Select Yes or No COMAND deletes the voice entry depending on your selection Listening to a voice entry X Search for the address book entry with a voice entry Y page 172 X Select Options Voice Name Read Aloud Y...

Страница 181: ...ected number category Otherwise you will see a prompt asking whether one of the existing numbers should be overwritten X Select Yes or No If you select Yes a selection list will appear containing the four existing numbers X Select the number to be overwritten COMAND overwrites the selected number with the new data Importing data from external Bluetooth devices You can import vCards from external B...

Страница 182: ...instructions for the Bluetooth device It is possible to establish a Bluetooth connection between COMAND and the following types of device RMobile phone only for transferring business cards RHeadset RLaptop PDA You can connect up to twelve devices to COMAND but only one device can be active at a time The connection process includes searching for the device and its subsequent authorization Calling u...

Страница 183: ...ooth device list Y page 180 X Select unauthorized device X Select Authorize The input menu for the passkey appears i The passkey is any one to sixteen digit number which you can set yourself You must enter the same number in COMAND and also in the device to be authorized i On devices which do not have an input keypad e g headsets the passkey is predetermined In this case it is not necessary to ent...

Страница 184: ...p the SMS inbox X Select Telephone The main telephone menu appears 1 Symbol ð for unread messages in the SMS inbox i The ð symbol only appears for those messages which are received while the mobile phone is inserted in the cradle X Select Text Message The SMS inbox appears i Text Message does not function if the SMS inbox contains no SMS messages The SMS inbox only shows the messages which are rec...

Страница 185: ...Land Line X Saving Select Save The input menu appears with the data fields The data field for the telephone number is filled in automatically 1 Data field 2 Input mark cursor 3 Input characters X Proceed as described in the Changing data field paragraph in the Assigning a New Entry in the Address Book section Y page 167 Adding an SMS sender s telephone number to an existing address book entry X Se...

Страница 186: ...r New Entry X Proceed as described in the Selecting a number category paragraph in the Saving SMS sender as new COMAND address book entry section Y page 183 Adding an SMS sender s telephone number to an existing address book entry X Press n Save Number Add X Proceed as described in the Selecting a number category paragraph in the Adding a telephone number to an existing address book entry section ...

Страница 187: ... have switched to radio mode You will hear the station channel last tuned in in the previously selected wave band provided that the station channel can be received i The number of times you have to press the M shortcut button depends on the operating mode currently selected Example illustration Radio mode in FM wave band 1 Main area with frequency display 2 Preset position of selected station 3 Fr...

Страница 188: ...y indicates the preset position in the station preset memory X Select a station by rotating ymz or sliding qmr and press n Selecting stations channels using the search function X Slide omp or rotate ymz when the main area is selected Depending on the direction in which the controller is being slid or rotated the system searches upward or downward and stops at the next receivable station channel Se...

Страница 189: ...ND tunes in to the frequency entered Selecting channels using the channel list i This function is only available for Weather Band X Select Audio Audio FM AM Radio WB Channel or X Press n when the main area is selected The channel list appears The dot R in front of a list entry indicates the currently selected channel X Select channel by rotating ymz or sliding qmr and press n Saving stations i Twe...

Страница 190: ...an 20 stations for example 9 then the stations saved in preset positions 1 9 will be over written Option 1 X Press n when the main area is selected X Select Autostore Option 2 X Select Audio Audio FM AM Radio FM or AM X Select Presets Autostore Option 3 X Select Audio Audio FM AM Radio Radio Save Station Autostore Station name display i In the FM wave band COMAND can show the name of the station c...

Страница 191: ...functions Only use the COMAND when road and traffic conditions permit you to do so Otherwise you could be involved in an accident in which you or others could be injured Submenu overview i The components and operating principles of COMAND can be found on Y page 78 Sat Radio Presets Info Category Sound Channel List Station presets Showing program info Selecting category Treble Save Channel Bass Cha...

Страница 192: ...technologies In such situations the satellite radio s main menu shows the Acquiring signal screen At this point the radio s functions are restricted Switching to satellite radio X Select Audio Audio Sat Radio or X Press the M shortcut button once or twice The Satellite radio menu appears if it was the last active radio mode The screen which then appears depends on the activation status of the sate...

Страница 193: ...o select program category 7 Artist and song title 8 Other channel information 9 Preset options a Satellite radio options i Main area 1 can show all channels included in your subscription Which channels are shown depends on the selected program category 4 Note that categories and channels shown in illustrations are dependent on programming content delivered by the service provider Programming conte...

Страница 194: ...hen the main area is selected Depending on the direction in which the controller is being pressed or rotated the system searches upward or downward and stops at the next receivable channel i Which channels are found by the channel search function depends on which channels you have subscribed to and the program category you have selected Y page 191 Tuning in channels using channel presets X Select ...

Страница 195: ...her operation depends on whether the selected channel number is valid or if the channel is included in your subscription Channel number is valid and channel is included in subscription COMAND tunes in the channel entered Channel number is invalid You will see the message Invalid Channel X Closing message Press n Channel number is valid but channel is not included in subscription You will see the s...

Страница 196: ...the Info menu item cannot be selected You will see a screen that may contain the following information RSelected program category RSelected channel RArtist of the track currently being played RName of current track i The program provider determines what information is displayed on the screen COMAND shows no more than two lines per item of information If an item of information is too long COMAND sh...

Страница 197: ... the vehicle is stationary RInserting a disc REjecting a disc There is a risk of accident by being distracted from road and traffic conditions if you load a CD DVD while the vehicle is in motion Bear in mind that at a speed of just 30 mph approximately 50 km h your vehicle is covering a distance of 44 feet approximately 14 m every second Notes about MP3 mode Permissible media for MP3 WMA files RCD...

Страница 198: ... directory itself uppermost directory on storage medium the root directory will also be treated as a folder COMAND will then show the name of the root directory as the folder name You must observe the following when assigning track names RTrack names must have at least one character RTrack names must have the extension mp3 or wma RThere must be a period between the track name and the extension Exa...

Страница 199: ... operation COMAND can playback commercially available prerecorded audio DVDs that bear the following label You will usually find the label on the DVD booklet the inlay or the DVD itself i Audio DVDs differ from recordable DVD R and DVD RW discs Data on audio DVDs are stored either in uncompressed format or in lossless compressed format The sound quality on audio DVDs is therefore better than on re...

Страница 200: ...RClean discs from time to time with a commercially available cleaning cloth Do not wipe them with a circular motion but only in straight lines from the center outwards ROnly use a pen designed for such a purpose to label discs RPlace discs back in their boxes after use RProtect discs from heat and direct sunlight Inserting CDs and DVDs G Observe Safety notes see page 195 i If the CD DVD has a prin...

Страница 201: ...Repeat last two steps until all trays are loaded The DVD changer will play the last disc you have loaded if Rit has been loaded correctly Rit is a permissible type of disc Ejecting CDs and DVDs G Observe Safety notes see page 195 1 Disc slot 2 Magazine tray buttons 1 6 3 Eject button all discs i If you eject one disc while playing another disc the DVD changer interrupts playback Playback continues...

Страница 202: ...from the vehicle when not in use since extreme temperatures could damage these devices 1 Eject button 2 Slot for PCMCIA card X Inserting Insert PCMCIA card into slot 2 The side with the contact must point towards the slot If the PCMCIA card contains a storage medium with MP3 tracks COMAND switches to MP3 mode X Ejecting Press eject button 1 twice The PCMCIA card is ejected X Take PCMCIA card out o...

Страница 203: ... Changer Sound Normal Track Sequence Pausing playback Showing track list audio CD mode and audio DVD mode Selecting folder Selecting medium Treble Random Tracks Stopping playback Displaying alphabetical track listing MP3 mode only Bass Random folder MP3 mode only Restarting playback Balance Fader Repeat folder MP3 mode only Group DVD Audio mode only 3D Sound Control systems Z ...

Страница 204: ...ode Example display in audio CD mode 1 Current playback option 2 Track number 3 Disc number 4 Disc name only if saved on the disc 5 Track name only if saved on the disc 6 Track time 7 Graphic time and track display 8 Sound settings 9 Medium selection a To call up track listing b Disc type c Playback options Example display in audio DVD mode 1 Current playback option 2 Track number 3 Disc number 4 ...

Страница 205: ...se function In audio CD audio DVD and MP3 mode X Pausing playback Press F briefly X Continuing playback Press F again briefly Only in audio DVD mode X Pausing playback Select Audio Audio DVD Audio Pause The Pause screen changes to Play X Continuing playback Select Audio Audio DVD Audio Play The Play screen changes to Pause Selecting CD DVD MP3 media X Select Audio Audio X Select CD DVD Audio or MP...

Страница 206: ...X Select Audio Audio X Select CD DVD Audio or MP3 Selecting a track using the COMAND controller X Select Tracks Tracks A Z or Track list or X Only in MP3 mode Press n when the main area is selected The track list of the current folder appears The dot R indicates the current track X Select a track by rotating ymz or sliding qmr i In MP3 mode the list shows all the tracks in alphabetical order Selec...

Страница 207: ...The track is played and the corresponding folder is now the active folder Setting the audio format This function lets you choose the audio format that you would like COMAND to play and is only available in DVD Audio mode i The tracks on an audio DVD can be stored in various audio formats The number of audio formats depends on the audio DVD X Select Audio Audio DVD Audio Group i The Group menu item...

Страница 208: ...VD Audio or MP3 The option list appears A dot R indicates which option is switched on X Select an option and press n The option is switched on For all options except Normal Track Sequence you will see a corresponding indicator in the main area i The Normal Track Sequence option is automatically activated when you select a different medium If an option is activated it remains activated after COMAND...

Страница 209: ...e It is possible that a device connected as an external audio source will sound quieter or louder in the vehicle or that the usual maximum volume cannot be achieved On certain devices the volume can be set separately In this case start at a moderate volume and increase it slowly In this way you can determine whether the system is capable of playback without distortion even at high volume Video AUX...

Страница 210: ...trast and color X Show the menu system if necessary Y page 211 X Select Video AUX AUX The menu appears X Select a setting Slide qmr or turn ymz X Press n X Changing settings Slide qmr or turn ymz until you reach the desired setting X Saving settings Press n Changing the picture format X Show the menu system if necessary Y page 211 X Select Video AUX AUX The DVD V menu appears The dot R in front of...

Страница 211: ...available This variety means that there is no guarantee that the system will be able to play discs that you have written copied yourself Some DVDs may not comply with the NTSC or PAL TV playback standards Sound picture and other playback problems may occur when you play such DVDs COMAND can playback video DVDs meeting the following requirements RCorrect regional code RNTSC or PAL TV standard The a...

Страница 212: ...ending on the DVD it is possible that certain functions or actions may be temporarily or permanently unavailable If you try to utilize such functions or carry out such actions you will see the 7 symbol in the display Inserting or ejecting DVDs G Observe Safety notes see page 198 X Inserting a DVD Y page 198 or X Ejecting a DVD Y page 199 Submenu overview of video DVD DVD V Pause Play Stop Changer ...

Страница 213: ...DVD MP3 CD DVD or video DVD The number of times you have to press the shortcut button depends on the previously set mode Hiding showing the DVD control menu X Hiding the menu Slide qmr X Showing the menu Slide qmr or X Wait for approximately 8 seconds Control menu 1 Disc type 2 Current track 3 Current scene 4 Elapsed track time 5 Show the menu system Hiding showing the menu system X Showing the me...

Страница 214: ... changes to Play X Continue playback Select Play Play is continued from the point at which it was stopped X Stop playback Select Stop again while playback is stopped or X Select Stop twice in quick succession during playback X Resume playback Select Play Playbacks starts again from the beginning Pause playback X Select Video Video Video DVD X Show the menu system if necessary Y page 211 X Pause pl...

Страница 215: ...ng settings Slide qmr or turn ymz until you reach the desired setting X Saving settings Press n Changing the picture format X Select Video Video Video DVD X Show the menu system if necessary Y page 211 X Select DVD V The DVD V menu appears The dot R in front of a menu item 16 9 Optimized 4 3 or Widescreen indicates the current format X Changing the format Slide qmr or turn ymz until you reach the ...

Страница 216: ...e Select H X Skipping to the beginning of a scene Select G i Depending on the DVD it is possible the menu items H and G either have no function or have no function in certain parts of the DVD menu Switching to the next highest DVD menu level X Press the L back button in the center console or X Select the corresponding menu item in the DVD menu or X Select a menu item of your choice from the DVD me...

Страница 217: ...z until you reach the desired setting X Saving a setting Press n X Exiting the menu Slide omp Subtitles and camera angles i This function is not available for all DVDs The number of settings you can make is determined by the content of the DVD It may also be possible to make the settings in the DVD menu Y page 213 X Select Video Video Video DVD X Show the menu system if necessary Y page 211 X Sele...

Страница 218: ...page 78 Use this function to set whether and how long you would like the exterior lighting to illuminate during darkness after exiting the vehicle and all doors closed The exterior lighting automatically goes out after the delayed switch off time has expired You can select R0 sec the delayed switch off feature is deactivated R15 sec 30 sec 45 sec or 60 sec the delayed switch off feature is activat...

Страница 219: ...witch on during darkness when the vehicle is unlocked from the outside RParking lamps RTail lamps RLicense plate lamps RFront fog lamps RDoor entry lamps in the mirror RSide marker lamps The locator lighting switches off when the driver s door is opened If you do not open a door after unlocking the vehicle with the SmartKey the lamps will switch off automatically after approximately 40 seconds X S...

Страница 220: ...Settings menu Slide omp or rotate ymz X Confirming selection Press n X Selecting Fold in automatically when locking or Lower mirror when reversing Rotate ymz X Confirming selection Press n X Slide omp to exit or X Select Vehicle Vehicle Exterior mirror Convenience Settings A selection list appears X Selecting a function Slide qmr or rotate ymz A checkmark appears in the corresponding box when the ...

Страница 221: ...lumn Seat Both the steering column and the driver s seat are moved G Warning You must make sure no one can become trapped or injured by the moving steering wheel and driver s seat when the easy entry exit feature is activated To stop seat steering wheel movement do one of the following RPress seat adjustment switch RMove steering wheel adjustment stalk RPress one of the memory position buttons or ...

Страница 222: ...g on a scale of 0 off to 5 bright X Select Vehicle The main area is active X Selecting Interior Ambient Light menu Slide omp or rotate ymz X Confirming selection Press n X Adjusting brightness Slide omp or rotate ymz X Confirming selection Press n or X Select Vehicle Vehicle Interior Ambient Light X Adjusting brightness Slide qmr or rotate ymz X Confirming selection Press n Setting interior lighti...

Страница 223: ...ming selection Press n or X Select Vehicle Vehicle Interior Lighting Delayed Switch off A selection list appears The current setting is indicated by a dot R X Selecting length of time Slide qmr or rotate ymz X Confirming selection Press n Extending or retracting rear window sunshade i The components and operating principles of COMAND can be found on Y page 78 This function is used to extend or ret...

Страница 224: ...re Press n again Trunk opening height restriction on off i The components and operating principles of COMAND can be found on Y page 78 You can select whether the trunk lid should open fully or only to the height of the roof X Select Vehicle The main area is active X Selecting Trunk Opening height Restriction function Slide omp or rotate ymz X Confirming selection Press n X Switching on or off Pres...

Страница 225: ...emperature Y page 223 RAir distribution Y page 224 RAir volume Y page 224 RSwitching off cooling Y page 225 RCentral climate control Mono Y page 226 RFootwell temperature Y page 226 RAir flow from air vents Y page 226 The climate control menu is called up via the climate control settings Climate control settings with functions submenus 1 Temperature driver s side 2 Air distribution driver s side 3...

Страница 226: ...ibution Rotate ymz The symbol for air distribution changes The direction and size of the arrows represent the air distribution or X Switching back to automatic mode Rotate ymz and select AUTO X Exiting menu Press n back button L in the center console Y page 79 or slide omp The setting is saved Adjusting air volume Use rocker switches Q Y page 385 in the center console or COMAND climate control set...

Страница 227: ...le interior down to the selected temperature The cooling function also dehumidifies the air in the vehicle interior thus preventing the windows from fogging up i Condensation may drip out from underneath the vehicle This is normal and not an indication of a malfunction G Warning If you switch off the cooling function the vehicle will not be cooled when weather conditions are warm The windows can f...

Страница 228: ...e control for the front passenger side Roperate one of the buttons for the rear climate control system Adjusting footwell temperature i In automatic mode this setting optimizes the footwell temperature when outside temperatures are low The Footwell Temperature function is used to adjust the temperature difference between the footwell and the rest of the passenger compartment The higher the selecte...

Страница 229: ...ol menu Airflow A selection list appears The current setting is indicated by a dot R X Changing air flow Slide qmr or rotate ymz X Confirming selection Press n COMAND seats Operating seats via COMAND G Observe Safety notes see page 303 i The components and operating principles of COMAND can be found on Y page 79 The following seat adjustments can be made via COMAND Settings Lumbar support CL 550 4...

Страница 230: ... main function from the main menu line Lumbar support CL 550 4MATIC only To support the spine you can adjust the curvature of the front seat backrests X Press O The main area of the COMAND display is active A scale appears 1 Scale 2 Cursor 3 Current seat 4 Current setting X Select seat Y page 227 X Adjusting lumbar support Slide omp or rotate ymz until desired setting is reached X Confirming selec...

Страница 231: ...ir chambers The settings are made on the COMAND display You can adjust the following air chambers Rsides of seat cushion Rsides of seat backrest Rseat backrest curvature in lumbar area Rseat backrest curvature in shoulder area Adjusting sides of seat cushion This function is used to adjust the air chambers in the sides of the seat cushion X Select seat Y page 227 X Selecting Seat sides Slide omp o...

Страница 232: ...justing seat backrest curvature in shoulder area This function is used to adjust the air chambers in the shoulder area of the seat backrest X Select seat Y page 227 X Selecting Shoulders Slide omp or rotate ymz X Confirming selection Press n A scale appears X Slide qmr or rotate ymz until desired setting is reached X Saving setting Press n Drive dynamic function The drive dynamic multicontour seat...

Страница 233: ...ter switch is in position 2 Y page 301 The control system enables you to call up information about your vehicle and to change vehicle settings For example you can use the control system to find out when your vehicle is next due for maintenance service to call up statistical data on your vehicle and much more G Warning A driver s attention to the road and traffic conditions must always be his her p...

Страница 234: ...ol System 4 Press button briefly L to cancel the Voice Control System back confirm messages Press and hold button L to select the standard display 5 Press button to select menus Press button briefly to select function or scroll through lists within Audio menu to select previous or next track scene or stored station within Telephone menu to switch to the phone book and select a name or number Press...

Страница 235: ... helpful to think of the menus and the functions within each menu as being arranged in a circular pattern X Press or repeatedly to switch menus The number of menus available in the system depends on which optional equipment is installed in your vehicle X Press button L to return to the next highest menu level From a menu s highest level you will always see the screen from the Trip menu that was la...

Страница 236: ...More user manuals on ManualsBase com Instrument cluster control system 234 Menus Control systems ...

Страница 237: ...lues Y page 236 RDistance to empty Y page 236 RDigital Speedometer Y page 236 Standard display In the standard display the trip odometer and the main odometer appear in the multifunction display X Press or to select the Trip menu 1 Main odometer 2 Trip odometer Fuel consumption statistics since start X Press or to select the Trip menu X Press or to select From Start 1 Distance driven since start 2...

Страница 238: ...ct the Trip menu X Press or to select the function you wish to reset X Press Example illustration Reset trip odometer X Press to select Yes X Press to confirm i The fuel consumption statistics reset automatically to 0 after 99999 miles or 9999 hours whichever occurs first Distance to empty X Press or to select the Trip menu X Press or to select Range The calculated remaining driving range based on...

Страница 239: ...driving maneuver Example illustration 1 Distance to destination 2 Symbol for follow the course of the road 3 Distance to next driving maneuver 4 Street you are currently driving on Notification of driving maneuver Example illustration 1 Street into which the driving maneuver leads 2 Symbol for driving maneuver 3 Distance to driving maneuver and visual distance display When you are being notified o...

Страница 240: ...functions in the Audio menu operate the audio equipment which you have currently switched on The following functions are available RSelecting radio station Y page 238 ROperating DVD changer audio CD audio DVD MP3 Y page 239 ROperating video DVD Y page 239 If no audio equipment is currently switched on the message Audio OFF appears in the multifunction display X To adjust the volume Press æ or ç on...

Страница 241: ...you play a CD or DVD with text the multifunction display shows the name and number of the track For MP3s only the track is shown Operating video DVD X Switch on the COMAND system and select Video Video Video DVD Y page 211 X Press or to select the Audio menu 1 Current scene 2 Disc number X Press or to select a scene AMG menu This function is only available in AMG vehicles The main screen of the AM...

Страница 242: ...cannot adjust the audio volume using buttons æ or ç X Starting Press button æ X Displaying intermediate time Press button ç while the timer is running The intermediate time is shown for 5 seconds X Stopping Press button æ When you stop the vehicle and turn the SmartKey to position 1 Y page 301 or in vehicles with KEYLESS GO turn off the engine and do not open the driver s door the RACETIMER stops ...

Страница 243: ...play X Press to select Yes and confirm with The saved laps are deleted Overall analysis This function is only available if you have saved at least one lap and have stopped the RACETIMER X Press button repeatedly until the overall analysis appears in the multifunction display 1 Overall analysis of RACETIMER 2 Overall driving time 3 Maximum speed 4 Overall distance driven 5 Average speed Lap analysi...

Страница 244: ...smitters equipped with a built in or attached antenna i e without being connected to an external antenna from inside the vehicle while the engine is running Doing so could lead to a malfunction of the vehicle s electronic system possibly resulting in an accident and or personal injury You can use the functions in the Telephone menu to operate your telephone provided it is connected to a hands free...

Страница 245: ...g call X Press button t Dialing a number from the phone book When your telephone is ready to receive calls you may select and dial a number from the phone book at any time i When you insert a Mercedes Benz approved mobile phone into the cradle the control system reads in the phone book that is saved on the SIM card or in the phone book of the mobile phone This can take several minutes depending on...

Страница 246: ...elephone menu X Press button s X Press button or to select the desired number and or name X Press button s or The control system dials the selected phone number Assistance menu In the Assistance menu you can change the settings of your driving systems The following functions are available RDisplaying distance graphic DISTRONIC Plus Y page 353 RActivating deactivating PRE SAFE Brake vehicles with D...

Страница 247: ...e Blind Spot Assist function X Press X Press again if you would like to change the current status Service menu In the Service menu the following functions are available RCalling up messages Y page 245 RChecking tire inflation pressure electronically with the Advanced TPMS Y page 438 RCalling up the maintenance service indicator display Y page 461 RChecking engine oil level CL 600 and CL 65 AMG Y p...

Страница 248: ... to scroll through the messages If you turn the SmartKey in the starter switch to position 0 and then back to position 2 all messages will be deleted from the message memory Settings menu In the Settings menu the following functions are available RSetting daytime running lamp mode USA only Y page 246 RShowing or hiding additional speedometer Y page 247 RSelecting speedometer display mode Y page 24...

Страница 249: ... be switched to miles or km The additional speedometer Y page 247 will be shown in the other unit Switching the radar sensors on or off If your vehicle is equipped with DISTRONIC Plus BAS Plus or Park Assist it is equipped with a radar sensor system which you can switch on and off When traveling in Canada in a vehicle not registered in Canada you must switch off the radar sensor system Canadian la...

Страница 250: ...ed off and restarted The following message appears in the multifunction display if the radar sensors are switched off and you attempt to activate DISTRONIC Plus Park Assist or PRE SAFE Brake Radar Sensors See Oper Manual Disabled Voice Control introduction Safety notes G Warning Only use the Voice Control System when road and traffic conditions permit you to do so Otherwise you could be involved i...

Страница 251: ...hone call in a timely manner This could distract you in an emergency situation and cause you to be involved in an accident General information The Voice Control System gives you the capability to control the following systems on your vehicle using spoken commands RTelephone Y page 259 RNavigation Y page 252 RAddress book Y page 264 RAudio Y page 267 AM FM radio CD DVD changer MP3 player You contro...

Страница 252: ...when they sound very similar d or e Command types The Voice Control System commands can be categorized as RGeneral Commands These are commands always available to you as soon as the Voice Control System is activated for example Help commands RLocal Commands These are commands specific to the currently active system shown in the COMAND display for example commands to control the CD DVD changer For ...

Страница 253: ...ss L or X Speak the command Cancel except for speaking voice entries entering a city or carrying out individualization or X Press any COMAND button Setting volume level X Activate the Voice Control System X Speak a command for example Help X Press æ or ç The volume is increased or decreased during voice output or X Set volume for voice output using the COMAND volume thumbwheel on the lower part of...

Страница 254: ...t This symbol stands for voice output by the Voice Control System u This symbol indicates that information is available on the COMAND display Voice Control navigation Important notes Safety notes for using the Voice Control System G Observe Safety notes see page 248 Safety notes for using the navigation system G Observe Safety notes see page 95 Navigation operation The Voice Control System allows ...

Страница 255: ... or Help to read out an option list of available functions and commands that can be used in conjunction with the navigation system Enter state Enter province Use the command Enter state or Enter province to select a different state or province on the navigation DVD Sample dialog s Enter state t Please say the name of the state s New York u The system shows a numbered list of states recognized by t...

Страница 256: ...t is available on the navigation DVD i The selection appearing on the COMAND display is sorted based on your recognized voice input and a matching algorithm You can use the commands Continue or Back to scroll up or down in the list Use the command Correction to start over by again spelling the name Speak each character as clearly as you can especially when they sound very similar d or e Points of ...

Страница 257: ...and Save destination to save the current destination in the address book i The Voice Control System may recognize names even if not saved in your voice For best possible call up performance however you should speak and save the names you intend to use yourself If an entry is already available in the address book the system will ask you if you would like to add the address to the available entry Sa...

Страница 258: ...viously muted using this command will deactivate the muting of the voice output Guidance instructions off Use the command Guidance instructions off to mute the system s guidance voice output Cancel route guidance Use the command Cancel route guidance to cancel route guidance Sample dialog s Cancel route guidance t Are you sure you want to cancel route guidance s Yes Route guidance is canceled or s...

Страница 259: ...y again Sample dialog s Enter town t Please spell the name of the town s E A S T O N u The system displays a numbered list of available city names t Please select a line number s Number one t Number one town accepted The city selected is adopted for route guidance Spell town Use the command Spell town to enter a city name by spelling mode and see if it matches an entry available on the navigation ...

Страница 260: ...d Speak the characters as a continuous string five to seven characters The system then displays a list of available street names on the COMAND display Select the desired street name from that list Sample dialog s Street t Please spell the name of the street s F O R E S T u The system displays a numbered list of available street names t Please select a line number s Number one t Number one street a...

Страница 261: ...pabilities REntering a telephone unlock code RDialing a phone number by speaking the telephone number RStoring names and numbers in the COMAND address book RDialing a phone number by speaking the name of an COMAND address book entry RDeleting an address book entry from the address book RHaving the system read out the phone book of the address book entry by entry RManaging and accessing an automate...

Страница 262: ...proximately 0 5 second pause the Voice Control System repeats the recognized digits and waits until you continue speaking Sample dialog s Enter PIN t Please say the PIN s Zero zero one one t Zero zero one one s OK Dial number You can dial a phone number using the command Dial number Digits from Zero to Nine may be used The phone number must be spoken Ras a continuously spoken string of digits or R...

Страница 263: ...One two three s Four five six seven t Five five six seven s Correction t One two three please continue s Four five six seven t Four five six seven s OK t Dialing Delete Using the command Delete will erase all digits entered The system then prompts you to start your input again Sample dialog s Dial number t Please say the number s One two three t One two three s Four five six seven t Four five six ...

Страница 264: ...seven t Four five six seven s OK t Please say the name s John Smith t Please repeat the name s John Smith t Do you want to save the number in a category s No t Name and number saved Dial name COMAND address book Use the command Dial name to place a phone call by selecting a name previously saved in your personal address book Sample dialog s Dial name t Please say the name s John Smith If several t...

Страница 265: ... entries in the phone book with a phone number stored and select an entry and dial that number Sample dialog s List phone book The system reads out the complete phone book entry by entry Selecting an entry and dialing that number X For the desired entry press during or immediately after voice output If more than one phone number exists for a given entry the Voice Control System prompts t Do you wa...

Страница 266: ...s stored in the address book Available commands are dependent on the status of the address book The address book can be in one of the following status RAddress book not open RAddress book open Operation with address book not open global The Voice Control System gives you the following capabilities RStoring a name Y page 261 RDialing a name Y page 262 RDeleting a name Y page 263 RNavigating to an e...

Страница 267: ... want to delete John Smith s Yes t The voice name is deleted Navigate to voice entry address book For information to Navigate to voice entry see Y page 255 List address book Use the command List address book to have the system read out all available address book entries and if desired select an entry when it is being read Sample dialog s List address book The system reads out all available address...

Страница 268: ...y in your address book Sample dialog s Select entry t Please say the name s John Smith u The entry John Smith appears on the COMAND display Spell entry Use the command Spell entry to open an address book entry by spelling the name Speak the name as a continuous string five to seven characters The system will display a list of possible matches on the COMAND display from which you can select the des...

Страница 269: ...g the Voice Control System the Voice Control System must be activated Y page 251 Selecting radio mode X Press X Speak the command Radio X Press X Speak one of the radio commands The system switches to the last tuned station in the selected band Radio commands For a complete list of commands Y page 271 Help Radio Use the commands R FM R AM R Weatherband to select the desired frequency band or switc...

Страница 270: ...s Use the command Select station AM and FM only to select a saved station name from your station list Sample dialog s Select station t Please say the station name s Smooth Jazz The Voice Control System tunes to the corresponding frequency Station Smooth Jazz List saved stations Use this command AM and FM only to directly select a saved station name from your station list Sample dialog s Station Sm...

Страница 271: ...of the selected station is read out once more t Do you want to delete Smooth Jazz s Yes t Station deleted The station is erased and the remaining station entries are read out or t No The system continues reading the station list entry by entry Voice Control CD DVD changer MP3 Safety notes G Warning Please devote your attention first and foremost to the traffic situation you are in Before your jour...

Страница 272: ...ailable commands for the CD DVD or MP3 CD DVD Medium 1 to CD DVD Medium 6 Use commands CD DVD Medium 1 to CD DVD Medium 6 to select one of up to six mediums in your DVD changer Next CD DVD Medium Use the command Next CD DVD Medium to select the next available medium in the DVD changer Track 1 to Track 39 Use the commands Track 1 to Track 39 to select one of up to 39 title numbers of a loaded mediu...

Страница 273: ... the Voice Control System Which commands are available for use depends on the equipment level in your vehicle i Some functions can be operated using several different commands In the following list these commands are grouped in one cell Choose your preferred command from those available General commands Ryes Rright Rok Rcancel Rstop Rquit Rabort Rterminate Rno Rno thank you Raddress book RMP3 RCD ...

Страница 274: ... Rcontinue Rgo forward Rnext page Rback Rgo back Rprevious page Rhelp radio Rhelp tuner Rradio help Rtuner help Rhelp telephone Rhelp phone Rhelp address book Rhelp CD Rhelp disc Rhelp CD player Rhelp CD changer Rhelp audio DVD Rhelp DVDA Rhelp DVD audio Rhelp DVD audio player Rhelp DVD audio changer Rhelp navigation Rhelp nav Rhelp navi Rhelp route guidance Rhelp routing Rhelp destination guidanc...

Страница 275: ...number Rdial password Rdial unlock code Rconfirm Rconfirm PIN Rconfirm number Rconfirm PIN number Rconfirm PIN code Rconfirm phone number Rconfirm telephone number Rconfirm password Rconfirm unlock code Rrepeat PIN Rrepeat number Rrepeat PIN number Rrepeat PIN code Rrepeat phone number Rrepeat telephone number Rrepeat password Rrepeat unlock code Renter PIN Renter PIN code Renter PIN number Renter...

Страница 276: ...outing Rdestination guidance Rguidance instructions on Rswitch guidance instruction on Rswitch guidance instructions on Rswitch route guidance instruction on Rswitch route guidance instructions on Rswitch on guidance instruction Rswitch on guidance instructions Rswitch on route guidance instruction Rswitch on route guidance instructions Rguidance instructions off Rswitch guidance instructions off ...

Страница 277: ... Rspell city Rspell name of town Rspell name of city Renter town Renter city Renter name of town Renter name of city Rdistrict Rcenter Rspell district Rspell center Renter district Renter center Rpoints of interest Renter points of interest Renter point of interest Renter POI Renter POIs Rstreet Rspell street Rspell name of street Renter street Renter name of street Renter destination Rdestination...

Страница 278: ...ation guidance Rexit route guidance Rexit navigation Rexit nav Rexit routing Rexit destination guidance Rterminate route guidance Rterminate navigation Rterminate nav Rterminate routing Rterminate destination guidance Rnext gas station Rnext Mercedes Benz service Rnext workshop Rnext MB service Rnext MB service point Rnext MB service center Rnext Mercedes service Rnext Mercedes service point Rnext...

Страница 279: ... Ropen item Ropen name Ropen voice name Rdelete name Rdelete Rlist destination memory Rread out destination memory Rplay destination memory Rget destination memory Rrecall destination memory R voice name R voice name car R voice name car phone R voice name land line R voice name phone R voice name telephone R voice name cell phone R voice name mobile phone R voice name cellular phone Rcall voice n...

Страница 280: ...home car phone Rcar home Rcar phone home Rhome land line Rhome land line phone Rland line home Rland line phone home Rhome cell phone Rhome mobile Rcell home Rcell phone home Rmobile home Rmobile phone home Rcellular home Rcellular phone home Rcall voice name work car Rcall voice name work land line Rcall voice name work cell phone Rcall voice name home car Rcall voice name land line phone Rcall v...

Страница 281: ...o Raudio off Radio Rradio on RAM RMW RFM Rweatherband Rnext station Rstation search Rgoing up Rother station Rradio seek Rstation voice entry Rgo to voice entry R voice entry Rdelete station Rsave station Rstore station Rselect station Rselect channel Rlist station list Rlist saved stations Rread out station list Rplay station list Rget station list Rrecall station list Rdelete station list Rprevi...

Страница 282: ...ndred forty kilohertz Rfrequency five hundred forty Rfrequency five hundred forty kilohertz Satellite radio Rsat radio Rsatellite radio CD RCD on RCD player on RCD changer on Rnext CD Rother CD Rnext medium Rother medium Rprevious CD Rlast CD Rpreceding CD Rreplay CD Rreplay medium Rrepeat medium Rlast medium Rprevious medium Rnext track Rother track Rprevious track Rlast track Rrepeat track Rrepl...

Страница 283: ...r Rprevious directory Rprevious folder Rlast directory Rlast folder Rrepeat directory Rrepeat folder Rnext track Rother track Rprevious track Rlast track Rrepeat track Rreplay track Rtrack 1 39 Rload track 1 39 Rload track number 1 39 Rselect track 1 39 Rselect track number 1 39 RMP3 1 6 RMP3 number 1 6 Rmedium 1 6 Rmedium number 1 6 Rdrive Rmemory card DVD Raudio DVD RDVDA player on Raudio DVD pl...

Страница 284: ...DVD Rreplay audio DVD Rreplay medium Rrepeat medium Rlast medium Rprevious medium Rnext directory Rother directory Rnext folder Rother folder Rprevious directory Rprevious folder Rlast directory Rlast folder Rrepeat directory Rrepeat folder Rnext group Rother group Rprevious group Rprevious repeat group Rprevious replay group Rlast group Rlast repeat group Rlast replay group Rgroup 1 9 Rselect gro...

Страница 285: ...ow to best use the Voice Control System Help In a main menu help can be accessed at any time by saying the command Help The Voice Control System will then read out the available functions and commands of all systems In a submenu help can also be accessed at any time by saying the command Help The Voice Control System will then read out an option list of all available functions and commands availab...

Страница 286: ...tters in blocks of 5 7 letters at a time RSpeak each individual letter clearly What to do if Problem Possible cause consequence Suggested solution Voice Control System does not recognize a station list entry The voice entries for the station names sound too similar X When you create your address book entries select names with the greatest possible acoustic differences X Speak the command List stat...

Страница 287: ...er X Pronounce the voice entries both times in the same manner Voice Control System does not recognize commands You have not operated the system from the driver s seat X Operate the Voice Control System only by the driver as the microphone is geared to the driver side You have spoken unclearly too loudly or too quietly X Speak the commands in a continuous manner using a normal tone A blower is set...

Страница 288: ...similar X When you create your address book entries select names with the greatest possible acoustic differences If for example you have the names Smith and Schmidt choose for example Smith work or Schmidt John X Speak the command List phone book The system reads out the address book entry by entry X Press when the desired entry is being read out The entry is selected and the corresponding number ...

Страница 289: ...t affect the speech recognition of other users Individualization consists of two stages RDigits RCommands You can activate individualization in the COMAND system settings Y page 93 A dialog and screen displays will guide you through the individualization process The system can be reset to the factory settings at any time i You may wish to complete only a portion of the individualization process Co...

Страница 290: ...More user manuals on ManualsBase com 288 ...

Страница 291: ...tion steering wheel 310 Mirrors 311 Memory function 314 Lighting 316 Wipers 322 Power windows 325 Driving and parking 328 Automatic transmission 335 Instrument cluster 345 Driving systems 346 Climate control system 385 Rear window defroster 393 Power tilt sliding sunroof 394 Loading and storing 396 Useful features 401 Controls in detail ...

Страница 292: ... locking the vehicle all turn signal lamps flash three times an acoustic signal sounds three times the locking knobs in the doors move down and the anti theft alarm system is armed All doors and the trunk must be closed If you cannot lock or unlock the vehicle with the SmartKey the batteries in the SmartKey are discharged the SmartKey is malfunctioning or the vehicle battery is drained RCheck the ...

Страница 293: ...mplies with RSS 210 of Industry Canada Operation is subject to the following two conditions 1 This device may not cause interference and 2 this device must accept any interference received including interference that may cause undesired operation of the device Any unauthorized modification to this device could void the user s authority to operate the equipment Factory setting X Global unlocking Pr...

Страница 294: ... void the user s authority to operate the equipment i Canada only This device complies with RSS 210 of Industry Canada Operation is subject to the following two conditions 1 This device may not cause interference and 2 this device must accept any interference received including interference that may cause undesired operation of the device Any unauthorized modification to this device could void the...

Страница 295: ...ked if the SmartKey is within 3 ft 1 m of the vehicle and an outside door handle is splashed with water or you attempt to clean an outside door handle RRemember that the engine can be started by anyone with a SmartKey that is left inside the vehicle Possibility 1 One SmartKey in the vehicle one SmartKey outside the vehicle If you leave the SmartKey behind when exiting and locking the vehicle no me...

Страница 296: ...nter i If the batteries are checked within signal range of the vehicle pressing button j or k will lock or unlock the vehicle accordingly Loss of the SmartKey If you lose your SmartKey or mechanical key you should do the following X Have the SmartKey deactivated by an authorized Mercedes Benz Center X Report the loss of the SmartKey or the mechanical key to your car insurance company immediately X...

Страница 297: ...Safety notes see page 59 You can lock or unlock the vehicle from inside using the central locking switches This can be useful for example if you want to lock the vehicle before starting to drive The central locking switches do not lock or unlock the fuel filler flap or the interior storage compartments such as the glove box 1 Central unlocking switch 2 Central locking switch X Locking Press centra...

Страница 298: ... the outside 1 Handle X Press and hold button i on the SmartKey until the trunk unlocks and begins to open or X Pull on handle 1 In vehicles without KEYLESS GO The vehicle must be unlocked X Stopping the opening procedure Press button i on the SmartKey Opening the trunk from the inside 1 Remote trunk opening closing switch X Press and hold switch 1 until the trunk begins to open X To interrupt the...

Страница 299: ...u are carrying a second SmartKey with KEYLESS GO with you you can still lock the vehicle Closing the trunk from the outside manually 1 Handle X Lower trunk lid by pulling firmly on handle 1 X Close trunk with hands placed flat on trunk lid The power closing assist automatically ensures that the trunk lid is pulled completely close Y page 300 Closing the trunk from the inside automatically G Warnin...

Страница 300: ...hildren are around To stop the closing procedure do one of the following RPress button i on the SmartKey RPress the remote trunk opening closing switch on the driver s door RPress the trunk closing switch RPress the KEYLESS GO locking closing switch RPull the trunk lid handle Even with the SmartKey removed from the starter switch or the SmartKey with KEYLESS GO removed from the vehicle the remote ...

Страница 301: ... once the trunk has closed completely RAn acoustic signal sounds three times RThe anti theft alarm system is armed If the trunk lid comes into contact with an object while closing e g luggage that has been piled too high in the upper motion sequence the closing procedure is stopped and the trunk lid reopens slightly Trunk lid emergency release With the emergency release button the trunk lid can be...

Страница 302: ...runk lid closed An electrical power assisted mechanism draws doors and trunk lid closed quietly and automatically once door and trunk lid has been latched When the electrical power assisted mechanism has stopped doors and or trunk can be reopend G Warning To prevent possible personal injury always keep hands and fingers away from the door or trunk opening when closing a door or the trunk lid Be es...

Страница 303: ...vehicle battery discharge or a completely discharged vehicle battery always remove the SmartKey from the starter switch when the engine is not in operation KEYLESS GO G Observe Safety notes see page 59 Vehicles equipped with the KEYLESS GO feature are supplied with a SmartKey with integrated KEYLESS GO function and a removable KEYLESS GO start stop button With the KEYLESS GO start stop button inse...

Страница 304: ...ics have status 0 as with SmartKey removed Position 1 X Press the KEYLESS GO start stop button once This supplies power for some electrical consumers such as radio functions i If you now press the KEYLESS GO start stop button Ronce more the ignition position 2 is switched on Rtwice more the power supply is again switched off Ignition or position 2 X Press the KEYLESS GO start stop button twice Thi...

Страница 305: ...he controls properly RAdjust the head restraint so that it is as close to the head as possible and the center of the head restraint supports the back of the head at eye level RNever place hands under the seat or near any moving parts while a seat is being adjusted Failure to do so could result in an accident and or serious personal injury G Warning The power seats can be operated at any time There...

Страница 306: ...ill be moved to a more favorable seat position i The memory function Y page 314 lets you store the settings for the seat position together with the settings for the steering wheel and the exterior rear view mirrors X Seat height Press the switch up or down in direction of arrow 2 X Seat cushion tilt Press the switch up or down in direction of arrow 3 until your upper legs are lightly supported X S...

Страница 307: ...otwell Items in the net may be damaged You can adjust the front passenger seat using the seat switches on the driver s side 1 Selector button for front passenger seat X Press button 1 When the indicator lamp in button 1 is on you can operate the following features of the front passenger seat Rseat adjustment Rseat heating ventilation Rmemory function Folding front seat backrests forward 1 Release ...

Страница 308: ...horized Mercedes Benz Center immediately The automatic seat slide is provided with a safety feature The automatic process is interrupted if the seat backrest of the sliding seat is pushed against an occupant or object The seat will slide forward and stop Investigate and correct the cause of interruption Now use memory button or seat adjustment switch to bring the seat into the desired position Whe...

Страница 309: ...osition as an extreme forward position Instead the driver s seat will remain at or move to a factory set maximum forward position To again fully return the driver s seat to your last set position or to memory position adjust the seat to the desired position or press and hold the respective memory position button Y page 315 i The last set driver s seat and steering wheel positions are stored when t...

Страница 310: ...straint up from the lowest non use position and have the occupant adjust the head restraint properly Do not drive the vehicle without the seat head restraints installed when the rear seats are occupied Head restraints are intended to help reduce injuries during an accident G Warning Make sure the rear seat head restraints engage when placing them upright manually Otherwise their protective functio...

Страница 311: ...ation level is set X Switching off Press button 1 repeatedly until all indicator lamps go out If one or more of the indicator lamps in the seat ventilation button 1 are flashing there is insufficient voltage available since too many electrical consumers are turned on The seat ventilation switches off automatically The seat ventilation will switch back on again automatically as soon as sufficient v...

Страница 312: ...uld cause the driver to lose control of the vehicle The electrical steering wheel adjustment feature can be operated at any time Therefore do not leave children unattended in the vehicle or with access to an unlocked vehicle A child s unsupervised access to a vehicle could result in an accident and or serious personal injury Make sure Ryou can reach the steering wheel with your arms slightly bent ...

Страница 313: ...tomatically Rwhen you remove the SmartKey from the starter switch Ron vehicles with KEYLESS GO when you switch off the ignition and open the driver s door Rwhen the temperature of the vehicle interior is above 86 30 Rafter approximately 24 minutes For more information on the steering wheel see Multifunction steering wheel Y page 232 Mirrors Notes Adjust the interior and exterior rear view mirrors ...

Страница 314: ...xterior rear view mirror button illuminated If an exterior rear view mirror was forcibly hit from the front manually snap it back into place i At low ambient temperatures the exterior rear view mirrors will be heated automatically Auto dimming rear view mirrors The exterior rear view mirror on the driver s side and the interior rear view mirror will respond automatically to glare when the ignition...

Страница 315: ...for folding exterior rear view mirrors in and out X Folding in Briefly press button 1 Both exterior rear view mirrors fold in X Folding out Briefly press button 1 Both exterior rear view mirrors fold out If an exterior rear view mirror housing is forcibly pushed forward hit from the rear reposition it manually by applying firm pressure until it snaps back into place If an exterior rear view mirror...

Страница 316: ...ar R Rimmediately once your vehicle exceeds a speed of approximately 6 mph 10 km h Rimmediately when you press button 1 for driver s side exterior rear view mirror i If you adjust the exterior mirrors while they are in the parking position the new mirror position is stored as a new parking position Memory function Notes With the memory function you can store up to three different configurations pe...

Страница 317: ... 2 or 3 until the seat has completely moved to the stored position On the driver s side also wait for the steering wheel and exterior rear view mirrors to move to the stored position i Releasing the memory position button stops movement to the stored positions immediately The multicontour seat and or lumbar support CL 550 4MATIC will continue to be adjusted Storing exterior rear view mirror parkin...

Страница 318: ...e vehicle is registered you must have the headlamps modified for symmetrical low beams Relevant information can be obtained at any authorized Mercedes Benz Center i The active Bi Xenon headlamps monitor the vehicle s steering angle and speed then automatically shift their beams to either side to better follow the curvature of the road ahead increasing usable illumination over conventional headlamp...

Страница 319: ...eam headlamps RTail lamps RParking lamps RLicense plate lamps RSide marker lamps G Warning If the exterior lamp switch is set to the headlamps will not automatically come on under foggy conditions To minimize risk to you and to others activate headlamps by turning exterior lamp switch to B when driving or when traffic and or ambient lighting conditions require you to do so In low ambient lighting ...

Страница 320: ...k position P with the vehicle at a standstill or the electronic parking brake is engaged the low beam headlamps will go out with a delay of 3 minutes Rturn the exterior lamp switch to position C the low beam headlamps the tail and parking lamps the license plate lamps and the side marker lamps come on Rturn the exterior lamp switch to position B the manual headlamp mode has priority over the dayti...

Страница 321: ... security illumination are described in the COMAND vehicle menu section under Locator lighting on off Y page 217 and Setting night security illumination Y page 216 Combination switch 1 High beam 2 High beam flasher High beam X Turn the exterior lamp switch to position B Y page 316 X Switching on Push the combination switch in direction of arrow 1 The high beam headlamp indicator lamp A in the inst...

Страница 322: ...omatically press hazard warning flasher switch 1 once to switch off Headlamp cleaning system The headlamps will be cleaned with a high pressure water jet automatically when the engine is running and you have Rswitched on the headlamps and Rthe windshield wipers have wiped the windshield with washer fluid five times The counter resets when you switch off the ignition For information on filling up t...

Страница 323: ...ds with the vehicle standing still It then goes out even if the turn signal is still switched on or if you have turned the steering wheel to full lock Switching off X Switch off the left or right turn signal or X Steer straight ahead The corner illuminating lamp goes out i There may be a brief delay before the corner illuminating lamps go out Interior lighting i Even with the SmartKey being remove...

Страница 324: ...OMAND Y page 220 Emergency lighting The interior lighting is activated automatically if the vehicle is involved in an accident X Switching off Press hazard warning flasher switch Y page 320 or X Press switch or X Unlock the vehicle Wipers Notes Do not operate the wipers when the windshield is dry Dust that accumulates on a windshield might scratch the glass and or damage the wiper blades when wipi...

Страница 325: ...The rain sensor sets a suitable wiping interval depending on the wetness of the sensor surface automatically Do not leave windshield wipers on an intermittent setting when the vehicle is taken to an automatic car wash or during windshield cleaning Windshield wipers will operate in the presence of water sprayed on the windshield and windshield wipers may be damaged as a result If you have set inter...

Страница 326: ...e Washer system and headlamp cleaning system Y page 428 For information on cleaning the headlamps with washer fluid see Headlamp cleaning system Y page 320 Problems with wipers If anything blocks the windshield wipers leaves snow etc switch them off immediately For safety reasons stop the vehicle in a safe location and R remove the SmartKey from the starter switch or turn off the engine by pressin...

Страница 327: ...n this chapter for details The closing of the door windows can be immediately halted by releasing the switch or if the switch was pulled past the resistance point and released by either pressing or pulling the respective switch The closing of the rear side windows can be immediately halted by releasing the switch Activate the override switch when children are riding in the back seats of the vehicl...

Страница 328: ...window will exert greater force before reversing than when the door window is closed in express operation Please exercise caution X Immediately after the window has stopped because it was blocked pull the respective switch upwards until the window is fully closed If the door window is blocked again and opens slightly X Immediately after the window was blocked pull the respective switch upwards unt...

Страница 329: ...s and the tilt sliding sunroof make sure there is no danger of anyone being harmed by the closing procedure If potential danger exists proceed as follows RRelease button j to stop the closing procedure To open press and hold button k To continue the closing procedure after making sure that there is no danger of anyone being harmed by the closing procedure press and hold button j Vehicles with KEYL...

Страница 330: ...ng maneuvers the objects could get caught between the pedals You could then no longer brake or accelerate This could lead to accidents and injury G Warning With the engine not running there is no power assistance for the brake and steering systems In this case it is important to keep in mind that a considerably higher degree of effort is necessary to brake and steer the vehicle Adapt your driving ...

Страница 331: ...en unattended in the vehicle as they could otherwise accidentally start the engine When leaving the vehicle always take the SmartKey with you and lock the vehicle Do not leave children unattended in the vehicle or with access to an unlocked vehicle A child s unsupervised access to a vehicle could result in an accident and or serious personal injury You can start your vehicle without the SmartKey i...

Страница 332: ...sistance The engine does not start You cannot hear the starter The battery may not be sufficiently charged X Get a jump start Y page 554 If the engine will not start despite a jump start X Contact an authorized Mercedes Benz Center or call Roadside Assistance The starter has been exposed to excessive temperatures X Let the starter cool for about 2 minutes X Repeat the starting procedure If the eng...

Страница 333: ...e pedal the vehicle could accelerate quickly forward or in reverse You could lose control of the vehicle and hit someone or something Only shift into gear when the engine is idling normally and when your right foot is firmly on the brake pedal Only shift the automatic transmission into reverse gear R or park position P when the vehicle is stopped Otherwise the automatic transmission could be damag...

Страница 334: ...ay X Notify local fire and or police authorities If the extent of the damage cannot be determined X Contact an authorized Mercedes Benz Center or call Roadside Assistance If no damage on major assemblies fuel system and engine mount can be determined X Start the engine in the usual manner Parking G Warning Do not park this vehicle in areas where combustible materials such as grass hay or leaves ca...

Страница 335: ... only in the instrument cluster goes out Releasing electronic parking brake automatically Your vehicle s electronic parking brake releases automatically when RThe engine is running RThe automatic transmission is in drive position D or reverse gear R With the automatic transmission in reverse gear R the trunk lid must be closed RThe hood is closed RYou have fastened your seat belt RYou press on the...

Страница 336: ...ake The longer you keep the handle for the electronic parking brake pressed the more strongly your vehicle will be braked This method occurs on all four wheels not just the rear wheels During the braking procedure Ran acoustic warning sounds Rthe message Please Release Parking Brake appears in the multifunction display Rthe red indicator lamp for the electronic parking brake 0 USA only or Canada o...

Страница 337: ...nto park position P before turning off the engine Otherwise the vehicle could roll away which could result in an accident and or serious personal injury i In an emergency you can turn off the engine while driving by pressing and holding the KEYLESS GO start stop button for approximately 3 seconds If you have started the engine with the KEYLESS GO start stop button and cannot turn it off as describ...

Страница 338: ...be damaged The vehicle must be stopped when you shift the automatic transmission Rdirectly between drive position D and reverse gear R Rdirectly between reverse gear R and drive position D Rdirectly into park position P Otherwise the automatic transmission could be damaged When trying to free a vehicle stuck in mud or snow see Rocking the vehicle Y page 339 i Shifting the automatic transmission ou...

Страница 339: ...ress the brake pedal and move the gear selector lever up or down to the resistance point to select neutral position N When you turn off the engine the automatic transmission will shift into neutral position N automatically SmartKey Removing the SmartKey from the starter switch or opening a front door after turning off the engine will shift the automatic transmission into park position P automatica...

Страница 340: ... position D X With the vehicle at a standstill depress the brake pedal and move the gear selector lever down past the resistance point to select drive position D Shifting procedure The automatic transmission selects individual gears automatically depending on Rthe selected gear range Y page 340 Rthe selected program mode C S Y page 340 or M AMG vehicles only Y page 342 Rthe position of the acceler...

Страница 341: ...ral position N while driving Exception If the ESP is deactivated or malfunctioning shift the automatic transmission into neutral position N if the vehicle is in danger of skidding Coasting the vehicle or driving for any other reason with the automatic transmission in neutral position N can result in transmission damage that is not covered by the Mercedes Benz Limited Warranty ê Drive position Effe...

Страница 342: ...ransmission in drive position D and driving in automatic program mode C or S you can limit or extend the gear range see One touch gearshifting Y page 341 The current gear range appears in the multifunction display 1 Gear range indicator Effect è With this selection you can use the braking effect of the engine ç Allows the use of engine s braking power when driving Ron steep downgrades Rin mountain...

Страница 343: ... until the letter of the desired program mode appears in the multifunction display Selecting program mode C means RThe vehicle starts out more gentle both forward and reverse except when driving off with full throttle RTraction and driving stability are improved on icy roads RUpshifts occur earlier even when you give more gas The engine then operates at lower revolutions and the wheels are less li...

Страница 344: ... automatic transmission will shift into the next higher gear as permitted by the shift program This action simultaneously extends the gear range of the automatic transmission i If you press on the accelerator pedal when the engine has reached the revolution limit of the current gear range the automatic transmission will upshift beyond any gear range limit selected Canceling gear range limit X Pull...

Страница 345: ...be stored When the engine is turned off with manual program mode M selected the automatic transmission will go to automatic program mode C or S when the engine is restarted Upshifting In manual program mode M the automatic transmission will not upshift even if the engine has reached its overrevving range Shift up into the next gear before the engine has reached its overrevving range Make absolutel...

Страница 346: ...lerate or take off Kickdown Using the kickdown when driving in manual program mode M is not possible Deactivating manual shift program X Press the program mode selector switch repeatedly until C or S appears in the multifunction display or X Restart the engine The automatic transmission will go to automatic program mode C or S Manual program mode M is not stored Emergency operation limp home mode ...

Страница 347: ...n 1 Knob i The instrument cluster illumination is dimmed or brightened automatically to suit ambient light conditions The instrument cluster illumination will also be adjusted automatically when you switch on the vehicle s exterior lamps X To brighten illumination Turn knob 1 clockwise X To dim illumination Turn knob 1 counterclockwise Coolant temperature gauge The coolant temperature gauge is loc...

Страница 348: ... Y page 30 G Warning The outside temperature indicator is not designed to serve as an ice warning device and is therefore unsuitable for that purpose Indicated temperatures just above the freezing point do not guarantee that the road surface is free of ice The road may still be icy especially in wooded areas or on bridges Fuel gauge The fuel gauge is on the left hand side of the instrument cluster...

Страница 349: ...e driving at a constant speed RThe use of the cruise control can be dangerous on slippery roads Rapid changes in tire traction can result in wheel spin and loss of control RDeactivate the cruise control when driving in fog The Resume function should only be operated if the driver is fully aware of the previously set speed and wishes to resume this particular preset speed G Warning The cruise contr...

Страница 350: ...rking brake In this case the speedometer segments in the multifunction display will go out The cruise control also switches off automatically when Rthe vehicle speed falls below 20 mph 30 km h Rthe ESP is in operation Rthe ESP is switched off with the ESP switch Rthe ESP has switched off due to a malfunction Ryou shift the automatic transmission into neutral position N while driving The speedomete...

Страница 351: ...d stored in memory should only be set again if prevailing road conditions and legal speed limits permit Possible acceleration or deceleration differences arising from returning to the preset speed could cause an accident and or serious injury to you and others X Briefly pull the cruise control lever in direction of arrow 4 If no speed is stored the current speed is set and stored X Remove your foo...

Страница 352: ...n to ensure a safe stopping distance always remains with the driver The DISTRONIC Plus cannot take street and traffic conditions into account Complex driving situations are not always fully recognized by the DISTRONIC Plus This could result in wrong or missing distance warnings G Warning The DISTRONIC Plus adaptive cruise control is not a substitute for active driving involvement It does not react...

Страница 353: ...nd traffic conditions is imperative at all times regardless of whether or not the DISTRONIC Plus is activated Use of the DISTRONIC Plus can be dangerous on winding roads or in heavy traffic because conditions do not allow safe driving at a constant speed The DISTRONIC Plus will not react to stationary objects in the roadway e g a stopped vehicle in a traffic jam or a disabled vehicle The DISTRONIC...

Страница 354: ...his device complies with RSS 210 of Industry Canada Operation is subject to the following two conditions 1 This device may not cause interference and 2 this device must accept any interference received including interference that may cause undesired operation of the device Removal tampering or altering of the device will void any warranties and is not permitted Do not tamper with alter or use in a...

Страница 355: ... DISTRONIC Plus brakes your vehicle with a maximum deceleration of 13 ft s2 4 m s2 This corresponds to approximately 40 of the maximum deceleration of your vehicle You must also apply the brakes yourself to avoid a collision The DISTRONIC Plus brakes the vehicle in an effort to restore the preset distance or to maintain the set speed The brake pedal is automatically applied as this happens which r...

Страница 356: ...set speed in the multifunction display for approximately 5 seconds The following display appears in the multifunction display 1 DISTRONIC Plus activated 2 Your vehicle 3 Preset distance threshold to the preceding vehicle 4 Preceding vehicle if detected DISTRONIC Plus deactivated When the DISTRONIC Plus is deactivated you will see the standard DISTRONIC Plus display in the multifunction display 1 P...

Страница 357: ...owed You can activate the DISTRONIC Plus when the vehicle speed is above 20 mph 30 km h It is also possible to activate the DISTRONIC Plus when the vehicle speed is below 20 mph 30 km h and the DISTRONIC Plus has detected a preceding vehicle The maximum vehicle speed you can set is 120 mph Canada 200 km h When the DISTRONIC Plus is activated the set speed is indicated with a marker in the speedome...

Страница 358: ...en approaching a stationary vehicle If the preceding vehicle is stationary you can only switch on the DISTRONIC Plus if your vehicle is also at a standstill X Tap the DISTRONIC Plus lever up 1 or down 2 until desired speed is set The DISTRONIC Plus is switched on or X Pull the DISTRONIC Plus lever briefly in direction of arrow 4 to call up the last set speed or if no speed is stored to set and sto...

Страница 359: ...for the electronic parking brake and may not be used for parking When you get out of the vehicle or switch off the engine deactivate the DISTRONIC Plus and secure the vehicle from rolling away by engaging the electronic parking brake When the DISTRONIC Plus detects that the preceding vehicle is stopping the vehicle brakes until it also stops Once the DISTRONIC Plus has stopped the vehicle and it i...

Страница 360: ...IC Plus lever The vehicle set speed increases in increments of 5 mph Canada 10 km h each time you lift the DISTRONIC Plus lever up past the resistance point The new speed is set and the vehicle will accelerate Keep in mind that it may take a brief moment until the vehicle has reached the set speed Setting a lower speed G Warning Keep in mind that it may take a brief moment until the vehicle has ma...

Страница 361: ...e 355 The last set speed is stored for later use The last stored speed is deleted from memory when the engine is turned off The DISTRONIC Plus switches off automatically when Rthe vehicle is secured with the electronic parking brake Rthe vehicle speed falls below 20 mph 30 km h and no preceding vehicle is detected Rthe ESP is in operation or switched off with the ESP switch Y page 70 or the ESP ha...

Страница 362: ...t distance X Increasing distance Turn distance setting switch 1 in direction of arrow 2 Increasing the distance setting tells the DISTRONIC Plus to maintain a greater following distance to the preceding vehicle X Decreasing distance Turn distance setting switch 1 in direction of arrow 3 Decreasing the distance setting tells the DISTRONIC Plus to maintain a shorter following distance to the precedi...

Страница 363: ...ently Unavailable See Oper Manual appears in the multifunction display For cleaning and care of the sensors see Y page 465 i If the message DISTRONIC PLUS Currently Unavailable See Oper Manual disappears during driving and the last speed stored flashes for approximately 5 seconds the dirt e g slush has dissolved the DISTRONIC Plus is available again Another cause might be that the radar sensors ha...

Страница 364: ...ent distance to the preceding vehicles Obstacles and stationary vehicles The DISTRONIC Plus does not brake for obstacles or stationary vehicles If for example the vehicle detected in front of you changes lanes to bypass an obstacle or stationary vehicle in front of it the DISTRONIC Plus will not brake for the obstacle or stationary vehicle Cross traffic The DISTRONIC Plus may inadvertently detect ...

Страница 365: ... when lowering the vehicle chassis Your vehicle automatically adjusts its ride height to increase vehicle safety and to reduce fuel consumption You can choose between raised or normal level The vehicle chassis ride height is raised or lowered according to the selected level setting and to the vehicle speed With increasing speed ride height is reduced by up to approximately 0 8 in 20 mm With decrea...

Страница 366: ... height for your vehicle G Warning When you turn off the engine the entire vehicle is lowered You should therefore make sure that no one is near the wheel housing or under the vehicle when you turn off the engine Otherwise parts of the individuals body could be trapped When you turn off the engine the entire vehicle is lowered When parking position your vehicle in such a way that it will not scrap...

Страница 367: ...ntrol switch 2 Indicator lamp X Start the engine Selecting a higher level If indicator lamp 2 is off X Press switch 1 Indicator lamp 2 comes on The vehicle is raised to a higher level Selecting a normal level If indicator lamp 2 is on X Press switch 1 Indicator lamp 2 goes out The vehicle is adjusted to a normal level Suspension tuning The suspension tuning is set according to Ryour driving style ...

Страница 368: ...the vehicle and an obstacle visually and audibly The Parktronic system is activated automatically when you Rswitch on the ignition and Rrelease the electronic parking brake or Rstart the engine and Rshift the automatic transmission into drive position D reverse gear R or neutral position N The Parktronic system deactivates at speeds above approximately 11 mph 18 km h At lower speeds the Parktronic...

Страница 369: ...jects at close range and damage to your vehicle or the object may result Ultrasonic signals from outside sources e g truck air brakes car wash or jackhammers may impair the operation of the Parktronic system Range of the sensors Front sensors Center approx 40 in 100 cm Corners approx 24 in 60 cm Rear sensors Center approx 48 in 120 cm Corners approx 32 in 80 cm Minimum distance Center approx 8 in ...

Страница 370: ... segments will illuminate depending on the distance When the seventh distance segment illuminates you have reached the minimum distance RFront area An intermittent acoustic warning will sound as the first red distance segment illuminates and a constant acoustic warning lasting a maximum of 2 seconds will sound for the second red distance segment The signal is canceled when the automatic transmissi...

Страница 371: ... signals Park Assist G Warning The Park Assist is a supplemental system It is not intended to nor does it replace the need for extreme care The responsibility during parking and other critical maneuvers always remains with the driver G Warning Make sure no persons or animals are in the area in which you are maneuvering You could otherwise injure them Special attention must be paid to objects with ...

Страница 372: ... can switch off the Park Assist using the Park Assist button or switch off the radar sensors with the instrument cluster control system to prevent possible malfunction The Park Assist is an electronic parking aid with radar sensors that helps you while parking It visually and audibly indicates the relative distance between the vehicle and an obstacle The Park Assist is automatically activated when...

Страница 373: ...bstacle The warning indicator for the front area is in the instrument cluster The warning indicator for the rear area is on the roof liner in the rear 1 Left side of the vehicle 2 Right side of the vehicle 3 Readiness indicators Each warning indicator is divided into five yellow and two red distance segments for either side of the vehicle If yellow readiness indicators 3 under the distance segment...

Страница 374: ...r example by water splashing into the area of the sensors Collision warning The Park Assist can detect obstacles from a considerable distance If you drive in reverse towards an obstacle you will hear a warning tone You must then brake in order to avoid a collision The warning tone for a collision will not sound when the vehicle is at a standstill very close to the obstacle In this case you will he...

Страница 375: ...ngs painted posts elevated crossbars or road curbs Such objects may not be detected by the system and can damage the vehicle i USA only This device has been approved by the FCC as a Vehicular Radar System The radar sensor is intended for use in an automotive radar system only Removal tampering or altering of the device will void any warranties and is not permitted by the FCC Do not tamper with alt...

Страница 376: ...etected correctly RAlso observe the Park Assist warning indicator Y page 369 while the Advanced Parking Guidance is active RHow well your vehicle will be parked after completion of the Advanced Parking Guidance depends on the position and shape of the vehicles parked in front of and behind the parking space as well as the conditions of the immediate surroundings In certain cases the Advanced Parki...

Страница 377: ...s is possible to do in a safe manner If the Advanced Parking Guidance no longer detects any obstacles the display in the instrument cluster stops blinking You may continue the parking procedure G Warning The Advanced Parking Guidance is only an aid and may not detect all obstacles At corners or near smooth surfaces the Advanced Parking Guidance may not detect an object correctly The Advanced Parki...

Страница 378: ...reen If the parking space is located within the display range a white bracket with an arrow for the target position is shown at the end of the green lane Driving into the parking space 1 Green lane indicates the correct steering wheel position X Maintain the steering wheel position and carefully back up X Stop as soon as you hear the audible warning The vehicle has reached the position for counter...

Страница 379: ... by maneuvering as needed X Observe the Park Assist display Y page 369 Canceling the Advanced Parking Guidance X Press the Park Assist button Y page 372 The Advanced Parking Guidance is immediately canceled and the Park Assist is deactivated No message is shown in the multifunction display The Advanced Parking Guidance is automatically canceled if guidance into the parking space is no longer possi...

Страница 380: ...e camera s field of view such as those located very close to or below the rear bumper or above the recessed grip of the luggage compartment lid Such objects may not be detected by the system and can damage the vehicle The rear view camera does not warn you about impending collisions with objects The driver is always responsible for safety and must continue to pay attention to the immediate surroun...

Страница 381: ...w camera must be activated in the instrument cluster control system in order for it to be switched on X Switch on the ignition X Switch on the COMAND system X Shift into reverse gear R The COMAND system display will show the area behind the vehicle with guide lines G Warning Please note that objects which do not touch the ground such as the bumper of a vehicle parked behind you a trailer hitch or ...

Страница 382: ...nfrared light and shows a black and white image on the multifunction display The image on the multifunction display corresponds to a road lit up by high beam headlamps G Warning The Night View Assist cannot record objects immediately in front of or next to the vehicle When maneuvering continue to look through the windshield Make sure no persons or animals are in the area in which you are maneuveri...

Страница 383: ...of the multifunction display The line for main menus is no longer available If you would like to change a setting using the steering wheel buttons you must first switch off the Night View Assist 1 Night View Assist image 2 Speedometer dial If you change the brightness of the instrument cluster while the Night View Assist is switched on only the brightness of the multifunction display is changed Ad...

Страница 384: ...s in the rear bumper G Warning The Blind Spot Assist is only a driving aid and may not detect all vehicles The Blind Spot Assist may not be able to detect narrow vehicles such as motorcycles or bicycles or it may not detect them until it is too late The monitoring function may be impaired if your sensors are dirty subject to heavy spray or if visibility is poor due to e g snow rain or fog This can...

Страница 385: ...e rear and both sides of the vehicle G Warning The Blind Spot Assist monitors certain areas in the immediate vicinity of your vehicle Vehicles approaching and passing at speeds that exceed the speed of your vehicle significantly will not be detected There will be no warning display and no audible warning When driving in a very wide lane the sensors may not be able to cover the entire width of the ...

Страница 386: ...oximately 3 seconds The Blind Spot Assist is then not active The brightness of indicator lamps warning lamps 1 is controlled automatically depending on the brightness of the ambient light G Warning The Blind Spot Assist is not active at speeds below approximately 20 mph 30 km h The yellow indicator lamps in the exterior rear view mirrors are illuminated You will not be alerted to the presence of v...

Страница 387: ...arnings will sound Climate control system Control panel Function Recommendation Notes 1 U Air distribution and air volume driver s side automatic mode i Switches on the automatic mode The indicator lamp in button U comes on Y page 388 2 Temperature control driver s side i Set the temperature to 72 22 Y page 388 3 Q Manual fan speed adjustment driver s side Y page 390 Controls in detail Z ...

Страница 388: ...The indicator lamp in button goes out Y page 387 7 T Residual heat ventilation i With the engine turned off it is possible to continue to heat or ventilate the interior Y page 392 8 Rear window defroster i At very low temperatures rear window defroster operation is delayed until the vehicle interior has warmed up Y page 393 9 Q Manual fan speed adjustment passenger side Y page 390 a Temperature co...

Страница 389: ...uld fog up impairing visibility and endangering you and others Have a clogged filter replaced as soon as possible at an authorized Mercedes Benz Center G Warning Follow the recommended settings for heating and cooling given on the following pages and in the COMAND automatic climate control section Otherwise the windows could fog up impairing visibility and endangering you and others X Keep the air...

Страница 390: ...MAND Y page 225 Automatic mode Air distribution and air volume can be adjusted automatically by the climate control system You can also adjust the settings for air distribution and air volume manually When operating the climate control system in automatic mode the interior air temperature air volume and air distribution are adjusted automatically In automatic mode cooling with dehumidification is ...

Страница 391: ... use the air distribution adjustment to direct the air to air vents in the vehicle interior that are not in the immediate area of unprotected skin For best possible performance of the climate control X Keep the air intake grille in front of the windshield free of snow leaves sticks and any other debris X Always keep all air vents and grilles in the passenger compartment free from obstruction i For...

Страница 392: ...air vent adjustable 3 Thumbwheel for air volume control for right rear center air vent 4 Thumbwheel for air volume control for left rear center air vent X Opening closing Turn thumbwheel 3 or 4 in the required direction Adjusting air distribution Air distribution in front rear passenger compartment via COMAND The air distribution can be adjusted via COMAND Y page 224 Adjusting air volume You can a...

Страница 393: ... higher lower blower speed and heating switches to the temperature that was set before the front defroster was switched on The indicator lamp in rocker switch y goes out or X Press rocker switches 2 and a Y page 385 up or down Heating switches to the temperature that was set before the front defroster was switched on The indicator lamp in rocker switch y goes out i The air conditioning compressor ...

Страница 394: ... mode is switched on automatically A quantity of outside air is added when the cooling demand is not at maximum If the air conditioning has been turned off or the outside temperature is below 41 5 the air recirculation mode will not switch on automatically X Deactivating Press rocker switch up or down The indicator lamp in the rocker switch goes out i The manually selected air recirculation mode i...

Страница 395: ...isibility could otherwise be impaired endangering you and others The rear window defroster uses a large amount of power To keep the battery drain to a minimum switch off the defroster as soon as the rear window is clear The defroster is switched off automatically after approximately 6 to 17 minutes of operation depending on the outside temperature X Switch on the ignition X Switching on Press butt...

Страница 396: ...ot wearing them properly may be thrown out of the opening Such an opening also presents a potential for injury for occupants wearing their seat belts properly as entire body parts or portions of them may protrude from the passenger compartment To avoid damaging the seals do not transport any objects with sharp edges which can stick out of the tilt sliding sunroof Do not open the tilt sliding sunro...

Страница 397: ... or open a window slightly Raising X Raising manually Press and hold the sunroof switch to the resistance point in direction of arrow 1 X Release the sunroof switch when the desired position is reached X Express operation To raise the tilt sliding sunroof completely press the sunroof switch past the resistance point in direction of arrow 1 and release X Stopping during express operation Move the s...

Страница 398: ...If the tilt sliding sunroof cannot be closed or synchronized contact an authorized Mercedes Benz Center or call Roadside Assistance X Switch on the ignition X Press and hold the sunroof switch in direction of arrow 1 Y page 395 until the tilt sliding sunroof is fully raised at the rear X Keep holding the sunroof switch in direction of arrow 1 for approximately 1 second X Check the express operatio...

Страница 399: ... or rear seat backrests and fasten them as securely as possible RThe heaviest portion of the cargo should always be kept as low as possible against front or rear seat backrests Parcel nets G Warning The parcel net is intended for storing light weight items only such as road maps mail etc Heavy objects objects with sharp edges or fragile objects may not be transported in the parcel net In an accide...

Страница 400: ... closed This will help to prevent stored objects from being thrown about and injuring vehicle occupants during Rbraking Rvehicle maneuvers Ran accident Glove box 1 Glove box lid release X Opening Press glove box lid release 1 X Closing Push glove box lid up until it engages Locking and unlocking the glove box separately You can lock the glove box separately e g when the vehicle is in the shop for ...

Страница 401: ...armrest upward Seat storage compartments Storage compartments are located in the seat base of each front seat 1 Handle 2 Storage compartment lid X Opening Pull handle 1 up X Fold storage compartment lid 2 forward Rear storage compartments Armrest with integrated storage compartment Before storing the armrest in the seat backrest close the storage compartment cover Do not sit on or lean your body w...

Страница 402: ...n your body weight against the armrest when it is folded down as you could otherwise damage it 1 Handle 2 Cover X Fold down rear armrest X Pull handle 1 upward in direction of arrow X Swing down cover 2 in direction of arrow Storage spaces under trunk floor 1 Storage space 2 Cover handle 3 Trunk floor cover X Lift up trunk floor cover 3 and engage cover handle 2 in upper edge of trunk Controls in ...

Страница 403: ...up holder may come loose during braking vehicle maneuvers or in an accident and be thrown around in the vehicle interior Objects thrown around in the vehicle interior may cause an accident and or serious personal injury Cup holder in front center console 1 Chrome label 2 Handle X Opening Press chrome label 1 X Closing Fold cover in until it engages The front cup holder can be removed for cleaning ...

Страница 404: ...isengage sun visor from mounting 2 X Pivot sun visor to the side Vanity mirror The mirror lamp only functions when the sun visor is engaged in mounting X Flip sun visor down X Lift up vanity mirror cover 5 Vanity mirror lamp 1 comes on Ashtrays G Warning Remove ashtray insert only with vehicle standing still 1 Button 2 Cover plate X Opening Press mark on cover plate 2 forward X Removing ashtray in...

Страница 405: ...rette lighter 1 X Reinsert cigarette lighter 1 in its socket after use The lighter socket can be used to accommodate 12V DC electrical accessories up to a maximum of 85 W designed for use with the standard cigarette lighter plug type Keep in mind however that connecting accessories to the lighter socket for example extensive connecting and disconnecting or using plugs that do not fit properly can ...

Страница 406: ...z Center for information on the installation of an approved external antenna Refer to the radio transmitter operation instructions regarding use of an external antenna When the mobile phone is inserted in the cradle you can operate the telephone using the following devices Rmobile phone keypad RCOMAND telephone keypad Y page 81 Rbuttons s and t on the multifunction steering wheel Y page 232 RVoice...

Страница 407: ...e signals from the GPS satellite network and pass the information on to the Response Center The Tele Aid system Telematic Alarm Identification on Demand The Tele Aid system consists of three types of response RAutomatic and manual emergency RRoadside Assistance RInformation The Tele Aid system is operational providing that the vehicle s battery is charged properly connected not damaged and cellula...

Страница 408: ...onnected appears in the multifunction display Emergency Call Activated appears in the COMAND display All information relevant to the emergency such as the location of the vehicle determined by the GPS satellite location system vehicle model identification number and color are generated i During the emergency call message Emergency Call Activated is displayed operation from audio system or COMAND s...

Страница 409: ...ce button p X Press and hold Roadside Assistance button p for longer than 2 seconds A call to a Mercedes Benz Roadside Assistance dispatcher will be initiated The indicator lamp in the Roadside Assistance button p will flash while the call is in progress The message Connecting Call will appear in the multifunction display Roadside Assistance Activated appears in the COMAND Display The audio system...

Страница 410: ...compartment Y page 399 1 Information button X Press and hold Information button for longer than 2 seconds A call to the Customer Assistance Center will be initiated The indicator lamp in the Information button will flash while the call is in progress The message Connecting Call will appear in the multifunction display Information Call Activated appears in the COMAND display The audio system or the...

Страница 411: ...e phone if installed switches off If you must use this phone we recommend that you use it only with the vehicle at a standstill in a safe location Unplug the telephone switch it on and place the call The navigation system if engaged will continue to run The multifunction display in the instrument cluster is available for use but spoken commands are not available Destination Download to the COMAND ...

Страница 412: ...ress in the address entry field X Depending on which website you are using click on the appropriate button to send the destination address to your Tele Aid account email address X Enter the email address you specified when you activated your Tele Aid account in the appropriate field when the Send dialog box appears X Click Send Retrieve Destination Address X Press the Tele Aid Information button t...

Страница 413: ... a Response Center specialist will attempt to establish voice contact with the vehicle occupants If the trunk lid handle was pulled for more than 20 seconds before door unlock authorization was received by the Response Center you must wait 15 minutes before pulling the trunk lid handle again Remote door lock If you have forgotten to lock your vehicle and are no longer near it you can have it locke...

Страница 414: ...k or some other systems G Warning Before programming the integrated remote control to a garage door opener or gate operator make sure people and objects are out of the way of the device to prevent potential harm or damage When programming a garage door opener the door moves up or down When programming a gate operator the gate opens or closes Do not use the integrated remote control with any garage...

Страница 415: ...rammed the indicator lamp will start flashing after 20 seconds X Step 5 After indicator lamp 1 changes from a slow to a rapidly flashing light release the hand held remote control button and the signal transmitter button X Step 6 Press and hold the just trained signal transmitter button 2 3 or 4 and observe indicator lamp 1 If indicator lamp 1 stays on constantly programming is complete and your d...

Страница 416: ...ming procedures replace step 4 with the following X Step 4 Press and hold the signal transmitter button 2 3 or 4 Do not release this button until it has been successfully trained X While still holding down the signal transmitter button 2 3 or 4 cycle your hand held remote control button 6 as follows Press and hold button 6 for 2 seconds then release it for 2 seconds and again press and hold it for...

Страница 417: ...sending a faster and more accurate signal to the integrated remote control RWhile performing step 3 hold hand held remote control 5 at different lengths and angles from the signal transmitter button 2 3 or 4 you are programming Attempt varying angles at the distance of 2 to 12 inches 5 to 30 cm away or the same angle at varying distances RIf another hand held remote control is available for the sa...

Страница 418: ...ipment Floormats G Warning Whenever you are using floormats make sure there is enough clearance and that the floormats are securely fastened Floormats should always be securely fastened using the fastening equipment Before driving off check that the floormats are securely in place and adjust them if necessary A loose floormat could slip and hinder proper functioning of the pedals Do not place seve...

Страница 419: ...To allow the use of these devices in the vehicle infrared transparent areas 1 and 3 are placed in the windshield You can see them from certain angles when ambient light condition permit Vehicles without Night View Assist 1 Infrared transparent area located left and right to the cover of the rain light sensor 2 Cover of the rain light sensor 3 Infrared transparent area Vehicles with Night View Assi...

Страница 420: ...More user manuals on ManualsBase com 418 ...

Страница 421: ...ualsBase com 419 Vehicle equipment 420 The first 1000 miles 1500 km 420 At the gas station 421 Engine compartment 423 Tires and wheels 429 Winter driving 452 Driving instructions 454 Maintenance 460 Vehicle care 462 Operation ...

Страница 422: ... 3 of maximum rpm in each gear RSelect C as the preferred shift program Y page 340 for the first 1000 miles 1500 km RAvoid accelerating by kickdown RDo not attempt to slow the vehicle down by shifting to a lower gear using the gear selector lever RSelect gear ranges 3 2 or 1 Y page 340 only when driving at moderate speeds for hill driving After 1000 miles 1500 km you may gradually increase vehicle...

Страница 423: ...n the ignition Otherwise the incorrect or non approved fuel will get into the fuel lines The fuel system must be drained completely Contact an authorized Mercedes Benz Center to have the fuel system drained completely To prevent damage to the catalytic converters only use premium unleaded gasoline in this vehicle Any noticeable irregularities in engine operation should be repaired promptly Otherwi...

Страница 424: ...off fuel filler cap 2 X Place fuel filler cap 2 in direction of arrow into holder 3 X Fully insert filler nozzle unit and refuel X Only fill your tank until the filler nozzle unit cuts out do not top off or overfill X Closing Turn fuel filler cap 2 clockwise until it audibly engages i Make sure to close the fuel filler flap before locking your vehicle as the flap locking pin prevents closing after...

Страница 425: ... engine cool off completely before touching any components on the vehicle Comply with all relevant safety precautions G Warning To help prevent personal injury stay clear of moving parts when the hood is open and the engine is running The radiator fan may continue to run for approximately 30 seconds or may even restart after the engine has been turned off Stay clear of fan blades G Warning The eng...

Страница 426: ...our engine needs will depend on a number of factors including driving style Increased oil consumption can occur when the vehicle is new or the vehicle is driven frequently at higher engine speeds Engine oil consumption checks should only be made after the vehicle break in period Do not use any special lubricant additives as these may damage the drive assemblies Using special additives not approved...

Страница 427: ...il see Fuels coolants lubricants etc Y page 577 For information on messages in the multifunction display concerning engine oil see the Practical hints section Y page 516 Checking engine oil level with the control system On the CL 600 and CL 65 AMG you can check the engine oil level with the control system i The menu overview can be found on Y page 234 X Switch on the ignition X Press or to select ...

Страница 428: ...the engine at normal operating temperature the following message appears in the multifunction display Reduce Engine Oil Level X Have excess oil siphoned or drained off Contact an authorized Mercedes Benz Center Excess oil must be siphoned or drained off It could cause damage to the engine and emission control system not covered by the Mercedes Benz Limited Warranty For information on messages in t...

Страница 429: ...ission Active Body Control ABC fluid level Regular fluid level check is not required If you notice fluid leaks or malfunction messages in the multifunction display have an authorized Mercedes Benz Center check the ABC system Coolant level The engine coolant is a mixture of water and anticorrosion antifreeze When checking the coolant level the vehicle must be parked on level ground and the coolant ...

Страница 430: ...olant see the Technical data section Y page 578 and Y page 582 Washer system and headlamp cleaning system G Warning Washer solvent antifreeze is highly flammable Do not spill washer solvent antifreeze on hot engine parts because it may ignite and burn You could be seriously burned Always use washer solvent antifreeze where temperatures may fall below freezing point Failure to do so could result in...

Страница 431: ...the tires may no longer be correct G Warning Worn old tires can cause accidents If the tire tread is worn to minimum tread depth or if the tires have sustained damage replace them When replacing rims only use genuine Mercedes Benz wheel bolts specified for the particular rim type Failure to do so can result in the bolts loosening and possibly an accident Retreaded tires are not tested or recommend...

Страница 432: ...he tire tread is worn to minimum tread depth or if the tires have sustained damage replace them Check the tire inflation pressure at least every other week For more information on checking tire inflation pressure see Recommended tire inflation pressure Y page 435 Tire inspection Every time you check the tire inflation pressure you should also inspect your tires for the following Rexcessive treadwe...

Страница 433: ...depth for winter tires is 1 6 in 4 mm 1 TWI Tread Wear Indicator The treadwear indicator appears as a solid band across the tread Storing tires Keep unmounted tires in a cool dry place with as little exposure to light as possible Protect tires from contact with oil grease and fuels Cleaning tires Never use a round nozzle to power wash tires The intense jet of water can result in damage to the tire...

Страница 434: ...WR for either the front axle or rear axle 1 Driver s door B pillar Following is a discussion on how to work with the information contained on the Tire and Loading Information placard with regards to loading your vehicle Tire and Loading Information G Warning Do not overload the tires by exceeding the specified load limit as indicated on the Tire and Loading Information placard on the driver s door...

Страница 435: ...tement The combined weight of occupants and cargo should never exceed XXX kg or XXX lbs on your vehicle s Tire and Loading Information placard X Step 2 Determine the combined weight of the driver and passengers that will be riding in your vehicle X Step 3 Subtract the combined weight of the driver and passengers from XXX kilograms or XXX lbs X Step 4 The resulting figure equals the available amoun...

Страница 436: ...lbs 1500 lbs 540 lbs 960 lbs 3 1500 lbs 1 front 1 Occupant 1 150 lbs 150 lbs 1500 lbs 150 lbs 1350 lbs The higher the weight of all occupants the less cargo and luggage load capacity is available For more information see Trailer tongue load Y page 435 Certification label Even after careful determination of the combined weight of all occupants cargo and the trailer tongue load if applicable Y page ...

Страница 437: ...use they are more likely to become punctured or damaged by road debris potholes etc Do not overload the tires by exceeding the specified load limit as indicated on the Tire and Loading Information placard on the driver s door B pillar Overloading the tires can overheat them possibly causing a blowout Overloading the tires can also result in handling or steering problems or brake failure Your vehic...

Страница 438: ...ion pressure label on the inside of the fuel filler flap contact an authorized Mercedes Benz Center for proper tire inflation pressure i Driving comfort may be reduced when the tire inflation pressure is adjusted to the value for speeds above 100 mph 160 km h as specified on the tire inflation pressure label located on the inside of the fuel filler flap Make sure to readjust the tire inflation pre...

Страница 439: ...bris potholes etc Do not overload the tires by exceeding the specified load limit as indicated on the Tire and Loading Information placard on the driver s door B pillar Overloading the tires can overheat them possibly causing a blowout Overloading the tires can also result in handling or steering problems or brake failure Check the tire inflation pressure at least every other week Check and adjust...

Страница 440: ...t able to issue a warning due to a sudden dramatic loss of pressure e g tire blowout caused by a foreign object In this case bring the vehicle to a halt by carefully applying the brakes and avoiding abrupt steering maneuvers G Warning Each tire including the spare if provided should be checked every other week when cold and inflated to the inflation pressure recommended by the vehicle manufacturer...

Страница 441: ...minutes driving if the malfunction has been corrected Tire pressure inquiries are made using the multifunction display The current tire inflation pressure for each tire appears in the multifunction display after a few minutes of driving i Possible differences between the readings of a tire pressure gauge of an air hose e g gas station equipment and the vehicle s control system can occur The tire p...

Страница 442: ...ation The respective tire and the corresponding tire inflation pressure are indicated in yellow Restarting Advanced TPMS G Warning It is the driver s responsibility to set the tire inflation pressure to the recommended cold tire inflation pressure Underinflated tires affect the ability to steer or brake the vehicle You might lose control over the vehicle When you restart the TPMS the system sets n...

Страница 443: ...ng message appears in the multifunction display Tire Pressure Monitor Reactivated After driving a few minutes the system verifies that the current tire inflation pressures are within the system s specified range Afterwards the current tire inflation pressures are accepted as reference values and then monitored X If you wish to cancel Press button L X or X Press button to exit the menu screen i Whe...

Страница 444: ...4 Rim diameter 5 Tire load rating 6 Tire speed rating i For illustration purposes only Actual data on tires are specific to each vehicle and may vary from data shown in above illustration General Depending on the design standards used the tire size molded into the sidewall may have no letter or a letter preceding the tire size designation No letter preceding the size designation as illustrated abo...

Страница 445: ...imit as indicated on the Tire and Loading Information placard on the driver s door B pillar Overloading the tires can overheat them possibly causing a blowout Overloading the tires can also result in handling or steering problems or brake failure Tire load rating 5 is a numerical code associated with the maximum load a tire can support For example a load rating of 91 corresponds to a maximum load ...

Страница 446: ...ignation AND the service description must be placed in parenthesis Example 275 40 ZR 18 99Y The Y speed rating in parenthesis designates the maximum speed capability of the tire as being above 186 mph 300 km h Consult the tire manufacturer for the actual maximum permissible speed of the tire All season and winter tires Index Speed rating Q M S7 up to 100 mph 160 km h T M S7 up to 118 mph 190 km h ...

Страница 447: ...load tire RC D E designates load range associated with the maximum load a tire can carry at a specified pressure DOT Tire Identification Number TIN U S tire regulations require each new tire manufacturer or tire retreader to mold a TIN into or onto a sidewall of each tire produced The TIN is a unique identifier which facilitates efforts by tire manufactures to notify purchasers in recall situation...

Страница 448: ...ard on the driver s door B pillar Overloading the tires can overheat them possibly causing a blowout Overloading the tires can also result in handling or steering problems or brake failure 1 Maximum tire load rating i For illustration purposes only Actual data on tires are specific to each vehicle and may vary from data shown in above illustration The maximum tire load is the maximum weight the ti...

Страница 449: ... sale in North America have these grades branded on the sidewall 1 Treadwear 2 Traction 3 Temperature resistance i For illustration purposes only Actual data on tires are specific to each vehicle and may vary from data shown in above illustration Quality grades can be found where applicable on the tire sidewall between tread shoulder and maximum section width For example Treadwear Traction Tempera...

Страница 450: ... characteristics On packed snow they can reduce your stopping distance compared to summer tires Stopping distance however is still considerably greater than when the road is not covered with snow or ice Exercise appropriate caution Avoid spinning of a drive wheel This may cause serious damage to the drivetrain which is not covered by the Mercedes Benz Limited Warranty Temperature G Warning The tem...

Страница 451: ...s that hold the tire onto the rim Cold tire inflation pressure Tire inflation pressure when your vehicle has been sitting for at least 3 hours or driven no more than 1 mile 1 6 km Curb weight The weight of a motor vehicle with standard equipment including the maximum capacity of fuel oil and coolant and if so equipped air conditioning and additional optional equipment but without passengers and ca...

Страница 452: ... those standard items which they replace not previously considered in curb weight or accessory weight including heavy duty brakes ride levelers roof rack heavy duty battery and special trim PSI Pounds per square inch A standard unit of measure for air pressure Recommended tire inflation pressure The recommended tire inflation pressure for normal driving conditions is listed on the Tire and Loading...

Страница 453: ...ction temperature and treadwear Ratings are determined by tire manufacturers using U S government testing procedures The ratings are molded into the sidewall of the tire Vehicle maximum load on the tire Load on an individual tire that is determined by distributing to each axle its share of the maximum loaded vehicle weight and dividing it by two Rotating tires G Warning Rotate front and rear wheel...

Страница 454: ...e characteristics may very well impair turning stability and that overall driving stability may be reduced Adapt your driving style accordingly Have the spare wheel replaced by regular road wheel with a winter tire at the nearest authorized Mercedes Benz Center Always use winter tires at temperatures below 45 7 and whenever wintry road conditions prevail Not all M S rated tires provide special win...

Страница 455: ...Any authorized Mercedes Benz Center will be glad to advise you on this subject RUse of snow chains may be prohibited depending on location Always check local and state laws before installing snow chains RDo not use snow chains on the spare wheel i When driving with snow chains you may wish to switch off the ESP Y page 69 before setting the vehicle in motion This will improve the vehicle s traction...

Страница 456: ...pedal periodically when traveling at length on salt strewn roads can bring road salt impaired braking efficiency back to normal If the vehicle is parked after being driven on salt treated roads the braking efficiency should be tested as soon as possible after driving is resumed G Warning Make sure not to endanger any other road users when carrying out these braking maneuvers Driving instructions D...

Страница 457: ... you could lose control of the vehicle and cause an accident as a result Do not turn off the engine while the vehicle is in motion Brakes Downhill grades When driving down long and steep grades relieve the load on the brakes by shifting into a lower gear to use the engine s braking power This helps prevent overheating of the brakes and reduces wear When using the engine s braking power a drive whe...

Страница 458: ...ppear Brake pad wear or a leak in the system may be the reason for low brake fluid in the reservoir Have the brake system inspected immediately Contact an authorized Mercedes Benz Center All checks and service work on the brake system should be carried out by qualified technicians only Contact an authorized Mercedes Benz Center Only install brake pads and use brake fluid recommended by Mercedes Be...

Страница 459: ...djust your driving and braking accordingly during this break in period Excessive high demand braking will cause correspondingly high brake wear Please be attentive to the brake warning lamp in the instrument cluster and brake condition messages in the multifunction display Especially for high performance driving it is important to maintain and have the brake system checked regularly The high perfo...

Страница 460: ... result in water being ingested by the engine through the air intake causing severe internal engine damage Any such damage is not covered by the Mercedes Benz Limited Warranty Driving abroad If you plan to drive the vehicle outside the U S or Canada you should request dealer network information for your destination from any authorized Mercedes Benz Center Control and operation of radio transmitter...

Страница 461: ...ions regarding use of an external antenna Emission control Certain systems of the engine serve to keep the toxic components of the exhaust gases within permissible limits required by law These systems will function properly only when maintained strictly according to factory specifications Any adjustments on the engine should therefore be carried out only by qualified Mercedes Benz Center authorize...

Страница 462: ...f the following messages will appear in the multifunction display while you are driving or when you switch on the ignition example service A Next Service A in XXX miles km Next Service A in XXX days Service A Due The maintenance services will be indicated by showing a service type A through type H in the multifunction display Types A through H are classified based on estimated time needed to perfo...

Страница 463: ...i If the battery is disconnected the days of disconnection will not be included in the count shown by the maintenance service indicator To arrive at the true maintenance service deadline you will need to subtract these days from the days shown in the maintenance service indicator message or maintenance service indicator display Resetting the maintenance service indicator In the event that the main...

Страница 464: ... resins etc Frequent washing reduces and or eliminates the aggressiveness and potency of the above adverse influences More frequent washings are necessary to deal with unfavorable conditions Rnear the ocean Rin industrial areas smoke exhaust emissions Rduring winter operation You should check your vehicle from time to time for stone chipping or other damage Any damage should be repaired as soon as...

Страница 465: ... the paintwork Mercedes Benz approved Paint Care should be applied when water drops on the paint surface do not bead up This should normally be done every 3 to 5 months depending on the climate and washing detergent used Mercedes Benz approved Paint Cleaner should be applied if the paint surface shows signs of embedded dirt i e loss of gloss Do not apply any of these products or wax if your vehicl...

Страница 466: ...he vehicle fold in exterior rear view mirrors prior to running the vehicle through an automatic car wash to prevent damage to the mirrors X When taking the vehicle through an automatic conveyor type car wash Make sure the automatic transmission remains in neutral position N Observe instructions see Remaining in neutral position N Y page 337 When leaving the automatic car wash make sure the mirrors...

Страница 467: ... X Clean a wide area of the bumpers surrounding the sensors 2 X Restart the engine after cleaning sensor cover 1 and sensors 2 Cleaning the Parktronic system sensors Parktronic system sensors are located in the front and rear bumper 1 Parktronic system sensors in front bumper Only visible without DISTRONIC Plus X Only clean sensors 1 by hand X Use a mild vehicle wash detergent such as Mercedes Ben...

Страница 468: ...mera Rwith a high pressure cleaner Rwith a dry cloth and strong pressure Rwith aggressive cleaning agents You could otherwise damage the camera Cleaning the windshield in front of the Night View Assist camera G Warning Please do not forget that your primary responsibility is to drive the vehicle A driver s attention to the road must always be his her primary focus when driving For your safety and ...

Страница 469: ...tical position switch off the ignition G Warning For safety reasons switch off wipers and remove SmartKey from starter switch vehicles with KEYLESS GO Make sure the vehicle s on board electronics have status 0 before cleaning the windshield and or the wiper blades Otherwise the wiper motor could suddenly turn on and cause injury Do not pull on the wiper blade inserts They could tear X Fold the wip...

Страница 470: ...proved Tire Care and Mercedes Benz approved Wheel Care products take care not to spray them on the brake disks Plastic and rubber parts X Use a gentle dishwashing detergent or mild detergent for delicate fabrics as a washing solution X Wipe with a cloth moistened in a lukewarm solution The surface may temporarily change color If this is the case wait for it to dry G Warning Do not use cleaners or ...

Страница 471: ...tery Please note that leather upholstery is a natural product and is therefore subject to a natural aging process Leather upholstery may also react to certain ambient influences such as high humidity or high temperature by showing wrinkles for example X Wipe leather upholstery with a damp cloth and dry thoroughly or clean with Mercedes Benz approved Leather Care To avoid damage to leather upholste...

Страница 472: ...More user manuals on ManualsBase com 470 ...

Страница 473: ...472 Vehicle status messages in the multifunction display 475 What to do if 527 Unlocking locking manually 539 Replacing SmartKey batteries 541 Replacing bulbs 543 Replacing wiper blades 545 Flat tire 547 Battery 551 Jump starting 554 Towing the vehicle 555 Fuses 558 Practical hints ...

Страница 474: ...ated in the trunk on the right side storage pocket secured by a tensioning strap 1 Tensioning strap 2 First aid kit X Loosen tensioning strap 1 First aid kit 2 can be removed Vehicle tool kit The vehicle tool kit is located in the space underneath the trunk floor The vehicle tool kit includes RAlignment bolt RCollapsible wheel chock RFuse chart RJack RPair of gloves RTowing eye bolt RWheel wrench ...

Страница 475: ... Guide the tabs of the lower plate all the way into the openings of base plate 3 For information on where to place wheel chocks when changing a wheel see Lifting the vehicle Y page 547 Jack G Warning Only use the jack supplied with your vehicle to lift the vehicle briefly for wheel changes If you use the jack for any other purpose you or others could be injured as the jack is designed only for the...

Страница 476: ...runk lip and lower the trunk floor before closing the trunk 1 Spare wheel 2 Vehicle tool kit box 3 Spare wheel mounting X Remove spare wheel mounting 3 by turning it counterclockwise i Vehicle tool kit box 2 can only be removed together with spare wheel mounting 3 After removing spare wheel mounting 3 you can disengage vehicle tool kit box 2 from spare wheel mounting 3 X Remove spare wheel 1 The s...

Страница 477: ... message will not correct the condition that caused the message to appear G Warning All categories of messages contain important information which should be taken note of and where a malfunction is indicated addressed as soon as possible at an authorized Mercedes Benz Center Failure to repair the condition noted may cause damage not covered by the Mercedes Benz Limited Warranty or result in proper...

Страница 478: ...is impaired as a result of heavy precipitation Rthe radar sensor system is temporarily inoperative due to electromagnetic interference near television and radio transmitter stations toll stations speed measuring systems etc Rthe system is out of the operating temperature range Rthe battery voltage is insufficient The PRE SAFE Brake becomes operational again and the message in the multifunction dis...

Страница 479: ...play 477 Display messages Possible cause consequence Possible solution PRE SAFE Function Limited See Oper Manual The PRE SAFE Brake is unavailable due to a malfunction The BAS Plus may also be unavailable X Contact an authorized Mercedes Benz Center as soon as possible Practical hints Z ...

Страница 480: ...ion X Open the passenger door X Remove child and child restraint from front passenger seat and properly secure the child in rear seat employing the child restraint if necessary X Make sure no objects which apply supplemental weight to the seat are present The system may recognize such supplemental weight and sense that an occupant on the front passenger seat is of a greater weight than actually pr...

Страница 481: ...ary check cycles and to make sure neither message appears in the multifunction display If above conditions are met you can occupy the front passenger seat again Depending on the front passenger classification sensed by the OCS the 59 indicator lamp will remain illuminated or go out If above conditions are not met the system is not working properly Have the system checked as soon as possible at an ...

Страница 482: ...ate the seat and exit the vehicle X Keep the seat unoccupied close the passenger door and switch on the ignition Monitor the 59 indicator lamp right of the instrument cluster Y page 51 and the multifunction display in the instrument Y page 30 cluster for the following With the seat unoccupied and the ignition switched on Rthe 59 indicator lamp right of the instrument cluster should illuminate and ...

Страница 483: ...arning If the 59 indicator lamp remains illuminated with an adult occupant on the front passenger seat even after performing the above corrective steps do not have any passenger use the front passenger seat until the system has been repaired Driving systems Display messages Possible cause consequence Possible solution Cruise Control mph One of the activation conditions for the cruise control has n...

Страница 484: ...s out of the operating temperature range Rthe battery voltage is insufficient X If necessary clean the DISTRONIC Plus cover in the radiator grille Y page 465 X Restart the vehicle X Try activating the DISTRONIC Plus again later X Wait until the system is within the operating temperature range or the battery recovers The DISTRONIC Plus becomes operational again without the engine being restarted wh...

Страница 485: ...k Assist is deactivated because the area around the sensors in the front or the rear bumper is dirty X Clean the front and rear bumper Y page 465 The Park Assist is deactivated because the battery voltage is insufficient X Have the battery checked at an authorized Mercedes Benz Center The Park Assist is switched off because the radar sensor system is temporarily inoperative due to electromagnetic ...

Страница 486: ... Assist is deactivated because the battery voltage is insufficient X Have the battery checked at an authorized Mercedes Benz Center The Blind Spot Assist is switched off because the radar sensor system is temporarily inoperative due to electromagnetic interference near television and radio transmitter stations toll stations speed measuring systems etc X Wait until the message in the multifunction ...

Страница 487: ...radar sensor system is temporarily inoperative due to electromagnetic interference near television and radio transmitter stations toll stations speed measuring systems etc X Wait to see if the interference is temporary or do not use Advanced Parking Guidance Try in a location where the interfering transmission might not be present Parking Guidance Canceled The Advanced Parking Guidance has been ca...

Страница 488: ...e consequence Possible solution Apply Brake to Shift from P You have attempted to shift the automatic transmission into drive position D reverse gear R or neutral position N without depressing the brake pedal X Depress the brake pedal Door Open Vehicle Not in Park You have opened the driver s door and the automatic transmission is still in drive position D reverse gear R or neutral position N X Be...

Страница 489: ...ions X Stop the vehicle in a safe location or as soon as it is safe to do so X Engage the electronic parking brake X Do not drive any further X Contact an authorized Mercedes Benz Center or call Roadside Assistance Service Required Do Not Shift Gears The automatic transmission cannot be shifted out of the set position because of a malfunction If the automatic transmission is in drive position D X ...

Страница 490: ...ice indicator at the designated times mileage will result in vehicle damage not covered by the Mercedes Benz Limited Warranty Tires Display messages Possible cause consequence Possible solution Tire Pressures Displayed After Driving A Few Minutes The tire inflation pressure is being checked X Drive the vehicle for a few minutes Tire Pressure Monitor Inoperative The Advanced TPMS or a wheel sensor ...

Страница 491: ...rning Do not drive with a flat tire A flat tire affects the ability to steer or brake the vehicle You may lose control of the vehicle Continued driving with a flat tire will cause excessive heat build up and possibly a fire G Warning Follow recommended tire inflation pressures Do not underinflate tires Underinflated tires wear excessively and or unevenly adversely affect handling and fuel economy ...

Страница 492: ...uthorized Mercedes Benz Center or call Roadside Assistance Do not add brake fluid This will not solve the problem G Warning Driving with the message Check Brake Fluid Level displayed can result in an accident Have your brake system checked immediately Do not add brake fluid before checking the brake system Overfilling the brake fluid reservoir can result in spilling brake fluid on hot engine parts...

Страница 493: ...m rolling away before getting out of it Y page 333 USA only Canada only EBR ABS and ESP Inoperative See Oper Manual The brake system is still functioning normally but due to a malfunction the ABS the BAS the BAS Plus the EBP the ESP the PRE SAFE and the PRE SAFE Brake are unavailable X Continue driving with added caution Wheels may lock during hard braking reducing steering capability X Adjust dri...

Страница 494: ...sible solution USA only Canada only Service See Oper Manual CL 600 and CL 65 AMG only The brake system sensors are malfunctioning The brake system continues to function normally with full brake force boost X Continue driving with added caution X Have the system checked at an authorized Mercedes Benz Center as soon as possible Practical hints ...

Страница 495: ...ning To release X Pull handle of electronic parking brake or X Drive off carefully X Contact an authorized Mercedes Benz Center as soon as possible To engage X Switch off ignition and press handle for electronic parking brake for at least 10 seconds until the warning message in the multifunction display disappears If the warning message does not disappear X Shift the automatic transmission to park...

Страница 496: ...ed X Pull handle of electronic parking brake or X Drive off carefully or X Press handle for electronic parking brake until the warning message in the multifunction display disappears USA only Canada only Parking Brake See Oper Manual In addition the red indicator lamp for the electronic parking brake flashes and the yellow warning lamp for the electronic parking brake comes on The electronic parki...

Страница 497: ...ng or overheated for example due to overvoltage or undervoltage X Drive off carefully X Contact an authorized Mercedes Benz Center as soon as possible In the event of overvoltage or undervoltage X Remove the cause of the overvoltage or undervoltage e g charge the battery or restart the engine X Switch ignition off and back on again and engage or release electronic parking brake If the electronic p...

Страница 498: ...nic parking brake If the electronic parking brake cannot be engaged X Shift the automatic transmission to park position P Y page 336 X Protect vehicle from rolling away while parked by using a chock from the vehicle tool kit Y page 473 X Contact an authorized Mercedes Benz Center as soon as possible USA only Canada only Please Release Parking Brake In addition the red indicator lamp for the electr...

Страница 499: ...lectronic parking brake is malfunctioning braking action is restricted While driving X Release the handle for electronic parking brake While at a standstill X Switch off ignition and press handle for electronic parking brake until the warning message disappears from the multifunction display If the warning message does not disappear X Shift the automatic transmission to park position P Y page 336 ...

Страница 500: ...the red indicator lamp for the electronic parking brake comes on You have tried to release the electronic parking brake but the ignition was not switched on X Switch on the ignition Check Brake Pad Wear The brake pads have reached their wear limit X Have the brake pads replaced as soon as possible Brake pad thickness must be visually inspected by a qualified technician at the intervals specified i...

Страница 501: ...ee Oper Manual The brake system is still functioning normally but due to a malfunction the ABS the BAS the BAS Plus the ESP the PRE SAFE system and the PRE SAFE Brake are unavailable The self diagnosis may not be completed yet X Drive a short distance with added caution at a vehicle speed of above 12 mph 20 km h When the message disappears the ABS and the ESP are available again ABS and ESP Curren...

Страница 502: ...o a malfunction In addition the yellow ESP warning lamp v comes on The ABS may not be operational and the following systems are not available RBAS and BAS Plus RPRE SAFE Brake RDISTRONIC Plus RCruise control RHill start assist system X Continue driving with added caution X Have the system checked at an authorized Mercedes Benz Center as soon as possible Failure to follow these instructions increas...

Страница 503: ...sating effect at the brake pedal while braking The BAS Plus and the PRE SAFE Brake are also not available X Continue driving with added caution X Have the system checked at an authorized Mercedes Benz Center as soon as possible Failure to follow these instructions increases the risk of an accident Currently Unavailable See Oper Manual The ESP and the PRE SAFE system are temporarily unavailable It ...

Страница 504: ...ing lamp v flashes while driving and this message appears the Electronic Traction System ETS 4 ETS has switched off to prevent overheating of the drive wheel brakes The BAS Plus and the PRE SAFE Brake are also not available As soon as the brakes have cooled off the Electronic Traction System ETS 4 ETS switches on again The message in the multifunction display disappears and the ESP warning lamp v ...

Страница 505: ...equired Components of the left rear passenger s supplemental restraint system may not work properly X Drive with added caution to the nearest authorized Mercedes Benz Center Rear Center SRS Malfunction Service Required Components of the center rear passenger s supplemental restraint system may not work properly X Drive with added caution to the nearest authorized Mercedes Benz Center Rear Right SR...

Страница 506: ...o the nearest authorized Mercedes Benz Center G Warning In the event a malfunction of the SRS is indicated as outlined above the SRS may not be operational For your safety we strongly recommend that you contact an authorized Mercedes Benz Center immediately to have the system checked Otherwise the SRS may not be activated when needed in an accident which could result in serious or fatal injury or ...

Страница 507: ...e The vehicle is losing oil The ABC message is continuously shown X Stop your vehicle in a safe location or as soon as it is safe to do so X Engage the electronic parking brake X Call Roadside Assistance or X Contact an authorized Mercedes Benz Center Malfunction Stop Vehicle The ABC is malfunctioning The ABC message is continuously shown X Avoid large steering maneuvers The fenders or tires could...

Страница 508: ...ic parking brake X Wait until the message disappears from the multifunction display You may then drive off STOP Car Too Low The AIRMATIC is malfunctioning X Stop and press the vehicle level control switch to select a higher vehicle level Y page 363 X Avoid large steering maneuvers The fenders or tires could otherwise be damaged Listen for scraping noises X Do not drive faster than 50 mph 80 km h X...

Страница 509: ... camera is too high Y page 380 X Wait until the message Night View Assist Available Again appears In addition you can X Swing the camera cover down Y page 466 X Adjust the air distribution of the climate control so that air flows upward Y page 224 Night View Assist Lights Must Be Set to AUTO or ON You have tried to switch on Night View Assist but the exterior lamp switch is not set to or B X Turn ...

Страница 510: ...is in reverse gear R X Turn the exterior lamp switch to or B Y page 316 X Shift the automatic transmission to park position P neutral position N or drive position D Y page 335 Night View Assist Only When It Is Dark You have tried to switch on Night View Assist by daylight You can only switch on Night View Assist when it is dark Vehicle Display messages Possible cause consequence Possible solution ...

Страница 511: ...seat cushion and seat backrest audibly engage into the driving position Shift to P You have attempted to turn off the engine with the KEYLESS GO start stop button and opened the driver s door with the automatic transmission not shift to park position P X Shift the automatic transmission to park position P Y page 335 or X Close the driver s door Key Not Detected The SmartKey with KEYLESS GO is not ...

Страница 512: ...tKey in the starter switch Key Not Detected The SmartKey with KEYLESS GO is momentarily not detected X Change the position of the SmartKey in the vehicle X If necessary remove KEYLESS GO button from the starter switch Y page 302 X Operate the vehicle with the SmartKey in the starter switch Close Doors to Lock Vehicle You wanted to lock the vehicle but not all doors were closed X Close doors and lo...

Страница 513: ...Detected In Vehicle A SmartKey with KEYLESS GO left in the vehicle was recognized while trying to lock the vehicle from the outside X Take the SmartKey out of the vehicle Key Not Detected The SmartKey with KEYLESS GO is momentarily not detected X Change the position of the SmartKey in the vehicle X If necessary remove KEYLESS GO button from the starter switch Y page 302 X Operate the vehicle with ...

Страница 514: ...ge 302 X Operate the vehicle with the SmartKey in the starter switch Obtain a New Key The SmartKey with KEYLESS GO must be replaced X Contact an authorized Mercedes Benz Center as soon as possible Key Does Not Belong to Vehicle The SmartKey or SmartKey with KEYLESS GO in the starter switch does not belong to the vehicle X Remove the SmartKey from the starter switch Check Washer Fluid The water lev...

Страница 515: ...ized Mercedes Benz Center G Warning Do not spill antifreeze on hot engine parts Antifreeze contains ethylene glycol which may burn if it comes into contact with hot engine parts You could be seriously burned Do not ignore the low engine coolant level warning Extended driving with the message and symbol displayed may cause serious engine damage not covered by the Mercedes Benz Limited Warranty Do n...

Страница 516: ... and go city traffic the coolant temperature may rise close to 248 120 G Warning Driving when your engine is overheated can cause some fluids which may have leaked into the engine compartment to catch fire You could be seriously burned Steam from an overheated engine can cause serious burns which can occur just by opening the engine hood Stay away from the engine if you see or hear steam coming fr...

Страница 517: ...ngine will overheat due to an inoperative water pump which may result in damage to the engine Contact an authorized Mercedes Benz Center X If it is intact Do not continue to drive the vehicle with this message displayed Doing so could result in serious engine damage that is not covered by the Mercedes Benz Limited Warranty X Observe the coolant temperature gauge in the instrument cluster X Restart...

Страница 518: ...n in the electronic system X Stop immediately in a safe location or as soon as it is safe to do so and check the poly V belt X If it is broken Do not continue to drive Otherwise the engine will overheat due to an inoperative water pump which may result in damage to the engine Contact an authorized Mercedes Benz Center X If it is intact Drive to the nearest authorized Mercedes Benz Center immediate...

Страница 519: ...e the engine checked for possible leaks When the message Check Engine Oil at Next Refueling CL 550 4MATIC and CL 63 AMG only or Check Engine Oil Level Add 1 quart Canada 1 Liter CL 600 and CL 65 AMG appears while the engine is running and at operating temperature the engine oil level has dropped to approximately the minimum level The message will be stored in the vehicle status message memory afte...

Страница 520: ...uch engine oil There is a risk of damaging the engine or the catalytic converter X Have oil siphoned or drained off Observe all legal requirements with respect to its disposal Reserve Fuel The fuel level has dropped below the reserve mark X Refuel at the next gas station Gas Cap Loose A loss of pressure has been detected in the fuel system The fuel cap may not be closed properly or the fuel system...

Страница 521: ... Mercedes Benz Center as soon as possible Check Left Cornering Light or Check Right Cornering Light The left or right corner illuminating lamp is malfunctioning X Contact an authorized Mercedes Benz Center as soon as possible Check Left Low Beam or Check Right Low Beam The left or right low beam lamp is malfunctioning X Contact an authorized Mercedes Benz Center as soon as possible Active Headlamp...

Страница 522: ...he instrument cluster control system Y page 246 X Switch off the headlamps using the exterior lamp switch Y page 316 Check Rear Left Turn Signal or Check Rear Right Turn Signal The left or right rear turn signal lamp is malfunctioning A substitute bulb is being used X Contact an authorized Mercedes Benz Center as soon as possible Check Left Mirror Turn Signal or Check Right Mirror Turn Signal The ...

Страница 523: ...eck Right High Beam The left or right high beam lamp is malfunctioning X Contact an authorized Mercedes Benz Center as soon as possible Check Left License Plate Lamp or Check Right License Plate Lamp The left or right license plate lamp is malfunctioning X Contact an authorized Mercedes Benz Center as soon as possible Please Switch Off Lights You are getting out of the vehicle and the lights are s...

Страница 524: ...g Lamp The rear fog lamp is malfunctioning A substitute bulb is being used X Contact an authorized Mercedes Benz Center as soon as possible Check Front Left Parking Lamp or Check Front Right Parking Lamp The left or right front parking lamp is malfunctioning A substitute bulb is being used X Contact an authorized Mercedes Benz Center as soon as possible Check Left Reverse Lamp or Check Right Rever...

Страница 525: ...r as soon as possible Check Rear Left Sidemarker Lamp or Check Rear Right Sidemarker Lamp The rear left or right side marker lamp is malfunctioning X Contact an authorized Mercedes Benz Center as soon as possible Check Left Tail and Brake Lamp or Check Right Tail and Brake Lamp The left or right tail lamp brake lamp is malfunctioning This message will only appear if a critical number of LEDs have ...

Страница 526: ...play X Carefully bring the vehicle to a halt avoiding abrupt steering and braking maneuvers X Engage the electronic parking brake X Check and correct tire inflation pressure as required Y page 437 X If necessary change the wheel Y page 547 Wheel Sensor s Missing One or more sensors malfunction e g battery in one or more wheel sensor is empty One or more wheels without wheel sensors mounted e g spa...

Страница 527: ... to a halt avoiding abrupt steering and braking maneuvers X Engage the electronic parking brake X If necessary change the wheel Y page 547 Check Tire Pressure The tire pressure is too low in one or more tires X Carefully bring the vehicle to a halt avoiding abrupt steering and braking maneuvers X Engage the electronic parking brake X Check and correct tire inflation pressure as required Y page 437...

Страница 528: ...ar excessively and or unevenly adversely affect handling and fuel economy and are more likely to fail from being overheated Do not overinflate tires Overinflated tires can adversely affect handling and ride comfort wear unevenly increase stopping distance and result in sudden deflation blowout because they are more likely to become punctured or damaged by road debris potholes etc Practical hints ...

Страница 529: ...k when switching on the ignition have the respective bulb checked and replaced if necessary When you switch on the ignition all lamps except high beam headlamp indicator lamp and turn signal indicator lamps unless activated in the instrument cluster come on If a lamp in the instrument cluster fails to come on when the ignition is switched on have it checked and replaced if necessary Practical hint...

Страница 530: ...ion may also be malfunctioning X Continue driving with added caution Wheels may lock during hard braking reducing steering capability X Read and observe messages that may appear in the multifunction display Y page 475 X Have the system checked at an authorized Mercedes Benz Center as soon as possible Failure to follow these instructions increases the risk of an accident The yellow ABS indicator la...

Страница 531: ...or lamp and the yellow ESP warning lamp come on and an acoustic warning sounds The Electronic Brake Proportioning EBP switched off due to a malfunction The ABS the BAS the ESP and PRE SAFE are also switched off The brake system continues to function normally but without electronic support X Continue driving with added caution Wheels may lock during hard braking reducing steering capability X Read ...

Страница 532: ...tifunction display Y page 475 X Contact an authorized Mercedes Benz Center Do not add brake fluid This will not solve the problem G Warning Driving with the brake warning lamp illuminated can result in an accident Have your brake system checked immediately if the brake warning lamp stays on Do not add brake fluid before checking the brake system Overfilling the brake fluid reservoir can result in ...

Страница 533: ...engine You hear a warning chime for a maximum of 6 seconds after starting the engine You have forgotten to fasten your seat belt X Fasten your seat belt The warning chime stops sounding The red seat belt telltale comes on while the vehicle is standing still and the engine is running or during driving You and or your front passenger have forgotten to fasten your seat belts X Fasten your seat belts ...

Страница 534: ... them in a safe place The seat belt telltale goes out and the warning chime stops sounding i After 60 seconds with an unfastened seat belt the warning chime stops sounding and the seat belt telltale illuminates continuously The seat belt telltale will only go out if both the driver and front passenger s seat belt are fastened or the vehicle is standing still and a door is opened Problem Possible c...

Страница 535: ...o skid or that a wheel is spinning The cruise control is deactivated and cannot be switched on X Switch the ESP back on Exceptions Y page 70 X If leaving the ESP switched off adapt your speed and driving to the prevailing road and weather conditions X If the ESP cannot be switched back on Have the system checked at an authorized Mercedes Benz Center as soon as possible v The yellow ESP warning lam...

Страница 536: ...lure to follow these instructions increases the risk of an accident Driving systems Problem Possible cause consequence Suggested solutions l PRE SAFE Brake The red distance warning lamp comes on while driving You are too close to the vehicle in front of you to maintain selected speed X Apply the brakes immediately to increase the following distance l DISTRONIC Plus or PRE SAFE Brake The red distan...

Страница 537: ...if 535 Vehicle Problem Possible cause consequence Suggested solutions The yellow fuel tank reserve warning lamp in the fuel gauge comes on while driving The fuel level has gone below the reserve mark X Refuel at the next gas station Practical hints Z ...

Страница 538: ...ncy operation mode X Have the vehicle checked as soon as possible at an authorized Mercedes Benz Center i Some states may by law require you to visit a workshop as soon as the engine malfunction indicator lamp comes on Check local requirements The yellow engine malfunction indicator lamp comes on when the engine is running A loss of pressure has been detected in the fuel system The fuel cap may no...

Страница 539: ... seconds and then stays illuminated There is a malfunction in the Advanced TPMS X Read and observe messages in the multifunction display Y page 475 X Have the Advanced TPMS checked by an authorized Mercedes Benz Center After the malfunction has been remedied the combination low tire pressure TPMS malfunction telltale goes out after a few minutes of driving G Warning Each tire including the spare i...

Страница 540: ...elltale will flash for approximately 1 minute and then remain continuously illuminated This sequence will continue upon subsequent vehicle start ups as long as the malfunction exists When the malfunction indicator is illuminated the system may not be able to detect or signal low tire pressure as intended TPMS malfunctions may occur for a variety of reasons including the installation of replacement...

Страница 541: ... are present X If the front passenger front air bag off indicator lamp remains out have the system checked as soon as possible at an authorized Mercedes Benz Center Do not transport a child on the front passenger seat until the system has been repaired X Read and observe messages in the multifunction display and follow corrective steps Y page 475 G Warning If the 59 indicator lamp does not illumin...

Страница 542: ...tance point until the locking knob moves up The driver s door is unlocked X Pull the door handle once more to open the driver s door X Turn mechanical key 2 back and remove it from the driver s door lock Unlocking the trunk A minimum height clearance of 5 9 ft 1 8 m is required to open the trunk lid Unlocking 2 Mechanical key X Insert mechanical key 2 into the trunk lid lock until it stops X Turn ...

Страница 543: ...300 X Close the passenger door i This procedure does not arm the anti theft alarm system nor does it lock the fuel filler flap Replacing SmartKey batteries If the batteries in the SmartKey are discharged the vehicle can no longer be locked or unlocked It is recommended to have the batteries replaced at an authorized Mercedes Benz Center G Warning Batteries contain poisonous and corrosive substance...

Страница 544: ...chanical key from the SmartKey Y page 540 1 Mechanical key 2 Battery compartment X Insert mechanical key 1 into opening X Press mechanical key 1 in direction of arrow Battery compartment 2 is unlatched X Pull battery compartment 2 out of the SmartKey housing 3 Batteries 4 Contact springs X Pull out batteries 3 X Insert new batteries 3 under contact springs 4 with the positive terminal side facing ...

Страница 545: ...zed gas A bulb can explode if you Rtouch or move it when hot Rdrop the bulb Rscratch the bulb Wear eye and hand protection Because of high voltage in Xenon lamps it is dangerous to replace the bulb or repair the lamp and its components We recommend that you have such work done by a qualified technician G Warning The bulbs in the tail lamps cannot be replaced individually The tail lamp bulbs are un...

Страница 546: ...s RAlways use a clean lint free cloth when handling bulbs RYour hands should be dry and free of oil and grease RIf the newly installed bulb does not come on contact an authorized Mercedes Benz Center i Mercedes Benz recommends using Longlife LL bulbs Do not replace LEDs and bulbs yourself You could otherwise damage the LEDs the bulbs or parts of the vehicle Only have the LEDs and bulbs replaced at...

Страница 547: ...tear Replace the wiper blades twice a year preferably in the spring and fall Otherwise the windows will not be properly wiped As a result you may not be able to observe surrounding traffic conditions and could cause an accident To avoid damage to the hood the wiper arms should only be folded forward when in the vertical position Never open the hood when a wiper arm is folded forward Hold on to the...

Страница 548: ...art stop button when the wiper arms are in a vertical position Removing wiper blades Do not pull on the wiper blade inserts They could tear X Fold the wiper arm forward until it snaps into place 1 Turning wiper blade 2 Removing X Turn the wiper blade in direction of arrow 1 X Slide the wiper blade sideways out of the retainer in the direction of arrow 2 Installing wiper blades X Slide the wiper bl...

Страница 549: ...king brake X Shift the automatic transmission into park position P X Turn off the engine X Remove the SmartKey from the starter switch or X Vehicles with KEYLESS GO Open the driver s door this puts the starter switch in position 0 same as with the SmartKey removed from the starter switch The driver s door can then be closed again Open doors only when conditions are safe to do so X Vehicles with KE...

Страница 550: ...o achieve its load bearing capacity if it is not at its full height Never start the engine when the vehicle is raised Also observe the notes on the jack X Prevent the vehicle from rolling away by blocking wheels with wheel chocks or other sizeable objects One wheel chock is included with the vehicle tool kit Y page 472 For information on setting up the collapsible wheel chock see Y page 473 When c...

Страница 551: ...ke up bracket 2 so that it is always vertical as seen from the side even if the vehicle is parked on an incline X Turn crank 4 clockwise until jack 3 is fully seated in take up bracket 2 and the jack base evenly meets the ground X Jack up the vehicle until the wheel is a maximum of 1 2 in 3 cm from the ground Removing the wheel 1 Alignment bolt X Unscrew uppermost wheel bolt and remove it X Replac...

Страница 552: ...jack 1 Wheel bolt for light alloy rims 2 Wheel bolt for Minispare wheel located in trunk with Minispare wheel Wheel bolts 2 must be used when mounting the Minispare wheel The use of any wheel bolts other than wheel bolts 2 for the Minispare wheel will damage the vehicle s brakes G Warning Make sure to use the original length wheel bolts when remounting the original wheel after it has been repaired...

Страница 553: ...tire inflation pressure monitor until a full size wheel tire with functioning sensor has been placed back into service on the vehicle Battery Safety notes A battery should always be sufficiently charged in order to achieve its rated service life Refer to Maintenance Booklet for battery maintenance intervals If you use your vehicle mostly for short distance trips you will need to have the battery c...

Страница 554: ...ning Do not place metal objects on the battery as this could result in a short circuit Use leak proof batteries only to avoid the risk of acid burns in the event of an accident Take care that you do not become statically charged e g by wearing synthetic clothing or rubbing against textiles For this reason you also should not pull or push the battery over carpets or other synthetic materials Never ...

Страница 555: ... when you turn off the engine and no longer require any electrical consumers The vehicle then uses very little power and the battery is spared If the battery is discharged you must use the mechanical key to unlock the vehicle Charging the battery G Warning Never charge a battery while still installed in the vehicle unless the accessory battery charge unit approved by Mercedes Benz is being used Ga...

Страница 556: ...mpts may damage the catalytic converter and may present a fire risk Make sure the jumper cables do not have loose or missing insulation Make sure the cable clamps do not touch any other metal part while the other end is still attached to a battery If the battery is discharged the engine can be started with jumper cables and the fully charged battery of another vehicle or an equivalent starter pack...

Страница 557: ... starting attempt is succeed X While the engine is running switch off several electrical consumers such as the blower X Remove the jumper cables first from negative clamp 1 from ground point and negative terminal 2 then from positive terminals 4 and 3 X Have the battery checked at the nearest authorized Mercedes Benz Center Towing the vehicle Safety notes Mercedes Benz recommends that the vehicle ...

Страница 558: ... Installing towing eye bolt Depending on whether you are towing a vehicle or you are being towed the towing eye bolt can be screwed into threaded holes which are located behind covers on each bumper The towing eye bolt is supplied with the vehicle tool kit located underneath the trunk floor Y page 472 X Take the vehicle tool kit out of the trunk Removing cover in front bumper 1 Cover X Press mark ...

Страница 559: ...there is a malfunction in the brake system Rthere is a malfunction in the power supply or in the vehicle s electrical system This is necessary to adequately control the towed vehicle Prior to towing the vehicle with all wheels on the ground make sure the SmartKey is in starter switch position 2 G Warning With the engine not running there is no power assistance for the brake and steering systems In...

Страница 560: ...ke system which is not covered by the Mercedes Benz Limited Warranty Keep in mind that it is important for the SmartKey to be left in starter switch with the ignition switched off As soon as the SmartKey is removed from the starter switch the automatic transmission will shift to park position P The vehicle may be towed only for distances up to 30 miles 50 km and at a speed not to exceed 30 mph 50 ...

Страница 561: ...transmission position indicator in the multifunction display should be on P X Switch off all electrical consumers X Turn off the engine Fuse box in passenger compartment Do not use sharp objects such as a screwdriver to open the fuse box cover in the dashboard You could damage the fuse box cover or the dashboard Fuse box on driver s side 1 Fuse box cover Fuse box on passenger side 1 Fuse box cover...

Страница 562: ...screws 2 Fuse box cover 3 Bracket X CL 63 AMG Remove the control box above the fuse box X Removing cover Take the crank from the Operator s Manual pouch X Loosen screws 1 with crank X Remove bracket 3 X Remove fuse box cover 2 X Installing cover Attach fuse box cover 2 X Attach bracket 3 X Tighten screws 1 with crank The fuse box cover must be installed properly to prevent moisture and or dirt fro...

Страница 563: ...od after checking or replacing fuses Emergency engine shutdown If the engine cannot be turned off as described Y page 334 you may use the following emergency procedure X Take the fuse chart from the vehicle tool kit Y page 472 X Find row Emergency engine shutdown in the fuse chart table to identify the fuses that have to removed as well as their locations X Remove the respective fuses Practical hi...

Страница 564: ...More user manuals on ManualsBase com 562 ...

Страница 565: ...se com 563 Vehicle equipment 564 Parts service 564 Warranty coverage 564 Identification labels 565 Engine 567 Rims and tires 569 Electrical system 574 Main dimensions 575 Weights 576 Fuels coolants lubricants etc 577 Technical data ...

Страница 566: ...Mercedes Benz Parts should be installed Do not use non genuine Mercedes Benz parts and accessories not authorized by Mercedes Benz Doing so could damage the vehicle which is not covered by the Mercedes Benz Limited Warranty Also it could compromise the vehicle s durability or safety Warranty coverage Your vehicle is covered under the terms of the warranties printed in the Service and Warranty Info...

Страница 567: ...iled to you Identification labels 1 Certification label on driver s door B pillar The Vehicle Identification Number VIN can be found in the following locations Ron the certification label Rembossed underneath a cover behind the rear center armrest Y page 566 Ron the lower edge of the windshield Y page 566 Example certification label U S vehicles 2 VIN 3 Paintwork code Example certification label C...

Страница 568: ...derneath a cover behind the rear center armrest X Open the cover VIN 4 is now visible All models except AMG vehicles 5 Engine number engraved on engine 6 VIN on lower edge of windshield 7 Emission control information label includes both federal and California certification exhaust emission standards AMG vehicles 5 Engine number engraved on engine 6 VIN on lower edge of windshield 7 Emission contro...

Страница 569: ...tput acc to SAE J 1349 382 hp 6000 rpm 285 kW 6000 rpm 11 510 hp 5000 rpm 380 kW 5000 rpm 11 Maximum torque acc to SAE J 1349 391 lb ft 2800 rpm 4800 rpm 530 Nm 2800 rpm 4800 rpm 612 lb ft 1800 rpm 3500 rpm 830 Nm 1800 rpm 3500 rpm Maximum engine speed 6500 rpm 5950 rpm Firing order 1 5 4 2 6 3 7 8 1 12 5 8 3 10 6 7 2 11 4 9 Poly V belt 2404 mm 2370 mm 10 The quoted data apply only to the standard...

Страница 570: ...t acc to SAE J 1349 518 hp 6800 rpm 386 kW 6800 rpm 13 603 hp 4800 rpm 5100 rpm 450 kW 4800 rpm 5100 rpm 13 Maximum torque acc to SAE J 1349 465 lb ft 5200 rpm 630 Nm 5200 rpm 738 lb ft 2000 rpm 4000 rpm 1000 Nm 2000 rpm 4000 rpm Maximum engine speed 7200 rpm 5950 rpm Firing order 1 5 4 2 6 3 7 8 1 12 5 8 3 10 6 7 2 11 4 9 Poly V belt 2360 mm 2370 mm 12 The quoted data apply only to the standard v...

Страница 571: ...zed Mercedes Benz Center A placard with the recommended tire inflation pressures is located on the driver s door B pillar Some vehicles may have supplemental tire inflation pressure information for driving at high speeds or for vehicle loads less than the maximum loaded vehicle condition If such information is provided it can be found on the placard located on the inside of the fuel filler flap Th...

Страница 572: ...t Package Rims light alloy 8 5 J x 18 H2 8 5 J x 18 H2 Wheel offset 1 69 in 43 mm 1 69 in 43 mm All season tires14 15 255 45 R18 99H M S Winter tires14 15 16 255 45 R18 99V M S 255 45 R18 99V M S 14 Radial ply tires 15 For use with snow chains contact an authorized Mercedes Benz Center 16 Not available as factory equipment Technical data ...

Страница 573: ... in 43 mm Winter tires17 18 19 255 45 R18 99V M S AMG rims light alloy 8 5 J x 19 H2 8 5 J x 19 H2 Wheel offset 1 69 in 43 mm 1 69 in 43 mm All season tires17 255 40 R19 100V XL Extra Load M S Winter tires17 18 19 255 40 R19 100V XL Extra Load M S 17 Radial ply tires 18 For use with snow chains contact an authorized Mercedes Benz Center 19 Not available as factory equipment Technical data Z ...

Страница 574: ...t 1 69 in 43 mm 1 69 in 43 mm 1 69 in 43 mm All season tires20 255 45 R18 99H M S 255 40 R19 100V XL Extra Load M S 255 35 ZR20 XL Extra Load Rear axle Rims light alloy 9 5 J x 18 H2 9 5 J x 19 H2 AMG rims light alloy 9 5 J x 20 H2 Wheel offset 1 69 in 43 mm 1 69 in 43 mm 1 69 in 43 mm All season tires20 21 275 45 R18 103H M S 275 40 R19 101V M S 275 35 ZR20 XL Extra Load 20 Radial ply tires 21 Mu...

Страница 575: ... differs from the values given in this Operator s Manual inflate the tire to the recommended tire inflation pressure given on the yellow label on the spare wheel rim i Please note that the tire inflation pressure of the spare wheel differs from the tire inflation pressure of the road tires Model All models Rim 4 5 B x 19 H2 Wheel offset 1 38 in 35 mm Minispare tire22 T 155 70 R19 113M Recommended ...

Страница 576: ...r battery 12 V 35 Ah 12 V 35 Ah 12 V 35 Ah 12 V 35 Ah Battery for electrical consumers 12 V 95 Ah 12 V 95 Ah 12 V 95 Ah 12 V 95 Ah Spark plugs Type NGK PLKR 7A Bosch Y 7 MPP33 NGK IFR 6Q G NGK ILZKAR 7A10 NGK IFR 6Q G Electrode gap 0 031 in 0 8 mm 0 028 in 0 7 mm 0 039 in 1 0 mm 0 028 in 0 7 mm Tightening torque 15 lb ft 18 lb ft 20 Nm 25 Nm 15 lb ft 22 lb ft 20 Nm 30 Nm 18 lb ft 22 lb ft 25 Nm 30...

Страница 577: ...folded out 84 2 in 2139 mm 84 2 in 2139 mm Overall vehicle height vehicles with 18 in rims 58 5 in 1485 mm Overall vehicle height vehicles with 19 in rims 56 1 in 1426 mm Overall vehicle height vehicles with 20 in rims 56 2 in 1428 mm Wheelbase 116 3 in 2955 mm 116 3 in 2955 mm Track front 63 0 in 1601 mm 63 0 in 1601 mm Track rear 63 3 in 1607 mm 63 3 in 1607 mm Turning circle 38 1 ft 11 6 m 38 1...

Страница 578: ...More user manuals on ManualsBase com Weights 576 Weights Model All models Trunk load max 220 lb 100 kg Technical data ...

Страница 579: ... endanger persons or the environment Keep service fluids out of the reach of children For health reasons you should prevent service fluids from coming into direct contact with your skin or clothing If a service fluid is swallowed contact a physician immediately Model Capacity Fuels coolants lubricants etc Engine with oil filter CL 550 4MATIC 9 0 US qt 8 5 l Approved engine oils CL 600 CL 65 AMG 9 ...

Страница 580: ... MB Power Steering Fluid Chevron Texaco PSF 9109 CL 600 CL 65 AMG 1 3 US qt 1 2 l Brake system 0 63 US qt 0 6 l MB Brake Fluid DOT 4 Cooling system CL 550 4MATIC approx 12 7 US qt 12 0 l MB 325 0 Anticorrosion Antifreeze CL 600 approx 15 9 US qt 15 0 l CL 63 AMG approx 11 3 US qt 10 7 l CL 65 AMG approx 14 7 US qt 13 9 l Low temperature cooling system CL 600 approx 2 8 US qt 2 6 l MB 325 0 Anticor...

Страница 581: ...ne oils and oil filters of a specification other than those expressly required for the Maintenance System or changing of oil and oil filter at change intervals longer than those called for by the Maintenance System will result in engine or emission control system damage not covered by the Mercedes Benz Limited Warranty Please follow Maintenance System recommendations for scheduled oil changes Fail...

Страница 582: ... in the system thus reducing the system s efficiency Therefore the brake fluid must be replaced regularly Refer to your vehicle s Maintenance Booklet for replacement interval Only brake fluid approved by Mercedes Benz is recommended Any authorized Mercedes Benz Center will provide you with additional information Premium unleaded gasoline G Warning Gasoline is highly flammable and poisonous It burn...

Страница 583: ...ements such as resistance to spark knock boiling range vapor pressure etc Gasoline additives A major concern among engine manufacturers is carbon build up caused by gasoline Mercedes Benz recommends only the use of quality gasoline containing additives that prevent the build up of carbon deposits After an extended period of using fuels without such additives carbon deposits can build up especially...

Страница 584: ...de important corrosion protection the solution must be at least 50 anticorrosion antifreeze equivalent to freeze protection to approximately 35 37 If you use a solution that is more than 55 anticorrosion antifreeze freeze protection to approximately 49 45 the engine temperature will increase due to the lower heat transfer capability of the solution Therefore do not use more than this amount of ant...

Страница 585: ...s highly flammable Do not spill washer solvent antifreeze on hot engine parts because it may ignite and burn You could be seriously burned X Use MB Windshield Washer Concentrate MB SummerFit X Mix with water for temperatures above freezing point X Mix with commercially available premixed washer solvent antifreeze for temperatures below freezing point Washer fluid mixing ratio For temperatures abov...

Страница 586: ...More user manuals on ManualsBase com 584 ...

Страница 587: ...or www mercedes benz ca Canada only G Warning To help avoid personal injury be extremely careful when performing any service work or repairs Improper or incomplete service or the use of incorrect or inappropriate parts or materials may damage the vehicle or its equipment which may in turn result in personal injury If you have any questions about carrying out any type of service turn to the advice ...

Страница 588: ...Order no 6515 2274 13 Part no 216 584 36 81 Edition A 2009 É2165843681 ËÍ 2165843681 ...

Отзывы: