DMU380ZA Series
User’s Manual
________________________________________________________________________
Doc# 7430-3810 Rev. 02
Page 82
Setting up NAV-VIEW
With the DMU380ZA Series product powered up and connected to your PC serial port,
open the NAV-VIEW software application.
1. NAV-VIEW should automatically detect the DMU380ZA Series product and
display the serial number and firmware version if it is connected.
2. If NAV-VIEW does not connect, check that you have the correct COM port
selected. You will f
ind this under the “Setup” menu. Select the appropriate COM
port and allow the unit to automatically match the baud rate by leaving the
“Auto: match baud rate” selection marked.
3. If the status indicator at the bottom is green and states,
, you’re ready
to go. If the status indicator doesn’t say connected and is red, check the
connections between the DMU380ZA Series product and the computer, check
the power supply, and verify that the COM port is not occupied by another
device.
4. Under the “View” menu yo
u have several choices of data presentation. Graph
display is the default setting and will provide a real time graph of all the
DMU380ZA Series data. The remaining choices will be discussed in the
following pages.
Data Recording
NAV-VIEW allows the user to log data to a text file (.txt) using the simple interface at
the top of the screen. Customers can now tailor the type of data, rate of logging and can
even establish predetermined recording lengths.
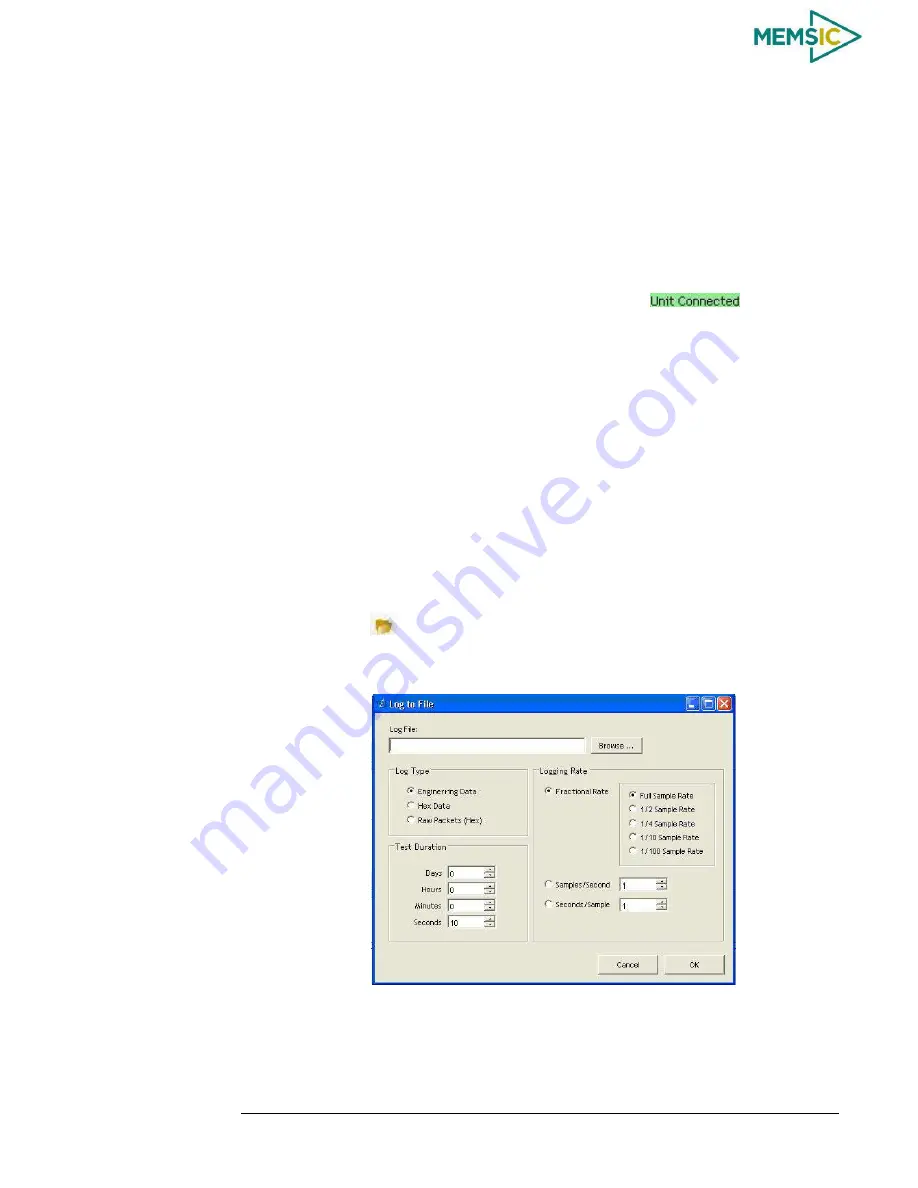
To begin logging data follow the steps below (See Figure 20):
1.
Locate the
icon at the top of the page or select “Log to File” from the “File”
drop down menu.
2.
The following menu will appear.
Figure 20 Log to File Dialog Screen
3.
Select the “Browse” box to enter the file name and location that you wish to save
your data to.
4.
Select the type of data you wish to record. “Engineering Data” records the
converted values provided from the system in engine
ering units, “Hex Data”


