53
5. Final Settings
TOOLS: Pliers, 13mm socket & wrench
Once the SolarBee is in final position, the last
step is to properly set and start it.
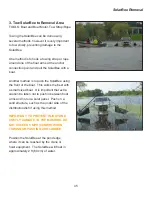
STEP 1: Connect the SolarBee unit to the
mooring block anchors or tether line. Utilize
the float arm as shown in the photo as the tie
off point(s) to the anchor system.
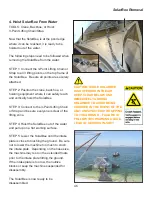
STEP 2: Using the proper hose setting
procedure, adjust the hose/intake into correct
position by slowly and evenly lowering the
hose chain.
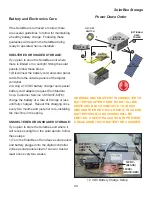
STEP 3: Using the correct startup order, power
up the SolarBee unit.
STEP 4: If the SolarBee contains leg
extensions, add these at this time.
STEP 5: Adjust all turnbuckles to achieve the
proper distribuition dish depth setting.
STEP 6: Do a rotational speed check.
The SolarBee should now be completely
operational. If you have questions or concerns
about it being properly installed, please
contact Medora Corporation Customer Service
(1-866-437-8076).
SolarBee Installation
Anchor Chain Connection Point
MOTOR
MOTOR
CONTROLLER
BATTERY
ON / OFF
SWITCH
1
2
3
4
5
6
(OPTIONAL)
GRID
POWER
PV
MODULE(S)
DIGITAL
CONTROLLER
Power Up Order
Содержание SolarBee SB10000DM
Страница 2: ...1 Carefully read safety information when you see any safety symbols...
Страница 31: ...30 Maintenance and Field Adjustment...
Страница 38: ...37...


