


50
9-1-2.
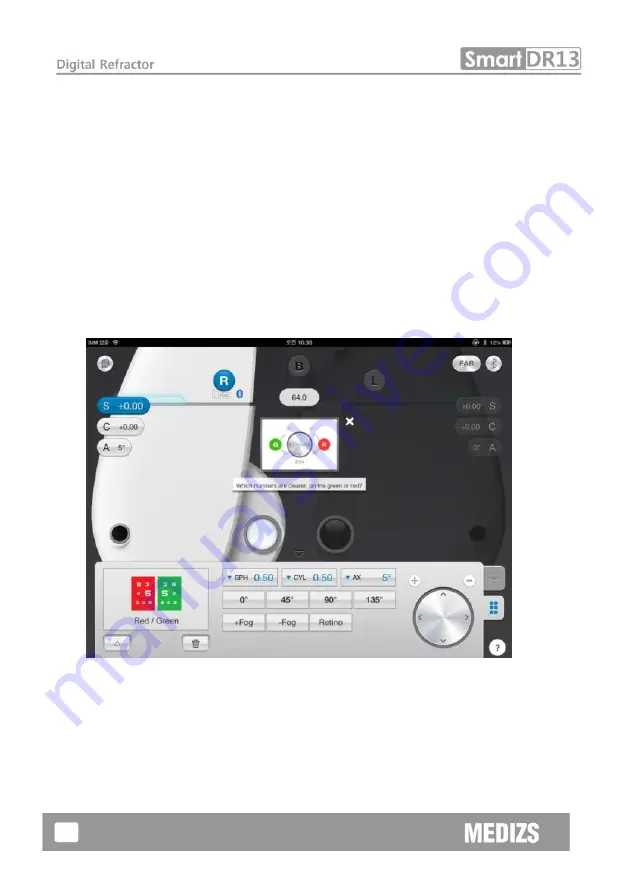
Red/Green Balance Test for Monocular
The 2
nd
step of the System-Defined Program is to revise the value of SPH
for the right eye more elaborately, based on the result of 1st step SPH-
CYL-AXIS test. After questioning the patient with which letter does he
sees more clearly, between the letter in green background and red
background respectively. When he says the letter in green background is
clearer, turn the dial in + direction (counterclockwise) because that is
over revised. While one in the red background in – direction (clockwise),
because that is not revised. Continue this until the patient says that he
sees both letters with similar clarity.
[Fig 36] Red/Green Balance Test for Monocular
Содержание Smart DR13
Страница 1: ......
Страница 33: ...32 Fig 21 Controller View Screen...
Страница 37: ...36 Fig 25 List View and Detailed View Received data...
Страница 44: ...43 Fig 31 Set the Risley prism left and the Jackson cross cylinder Right...
Страница 46: ...45 Fig 33 Pop up selecting Auxiliary lens and CP Operation penal...
Страница 50: ...49 Fig 35 Adjustment of the SPH CYL AXIS Value...
Страница 61: ...60 Fig 50 Near Horizontal Von Graefe Test...
Страница 85: ...84...


