background image

34 

EDIT NAME

This function enables you to rename the currently selected 
channel. Press the 

O K

 button and select the desired charac-

ters with the 



 buttons. If you then press the 

O K

 but-

ton, the new name is applied directly.

LOCK/UNLOCK

This function enables you to lock or unlock the currently 
selected channel (or all marked channels). You can use the 
lock function to password protect access to certain chan-
nels. Press the 

O K

 button and then enter the required pass-

word (factory default: 

0000

). A lock icon appears after the 

channel name. Do the same to unlock the channel.

To lock a channel, you must know the password 
(factory default: 

0000

, it can be changed in the 

SET

TINGS > SYSTEM >  PARENTAL

 menu).

ADD/REMOVE FA
VOURITES

You can create up to four favourites  lists that you can call up la-
ter. If you press the 

O K

 button, you can add the currently selec-

ted channel (or all marked channels) to one or more favourites 
lists. To do this, select 

ON

 for the desired list and press the 

O K

 (or 

E X I T

) button. To remove a channel from a favourites list, select 

the 

OFF


entry accordingly. If a channel is assigned to the favouri-

tes list, a corresponding symbol appears after the channel name. 
For more information, read the section “Opening the favourites 
list” on page 27.

TAG/UNTAG CHAN
NEL

This function enables you to mark the currently selec-
ted channel. A check mark then appears after the channel 
name. If the current channel has previously been selected, 
this option removes the check mark.

TAG/UNTAG ALL

You can use this button to mark all channels. A check mark 
then appears after the channel name. You can remove the 
check mark from all channels in the same way.

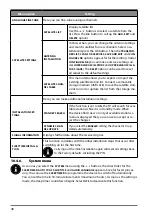
FILTER

This is where you will find the filter functions for adapting the presentation of the 
channel list:

CHANNEL TYPE

 Only the channels for the selected reception type will be 
displayed.

TV/RADIO

 Select here whether only TV, only radio, only text or all 
channels are to be displayed in the list.

FREE/PAY

Select here whether you want to display only free channels, 
only encrypted channels or all channels in the list.

A Z

Here you can individually select each letter of the alphabet, 
at which point only the channels beginning with the appro-
priate letter will be displayed in the channel list.

SORT

Select the type of sorting (

ALPHABETIC

 or 

NUMERIC

).

HD/SD

Select whether only HD, SD or all channels are displayed.

FAVOURITES

Select whether one of the four possible  favourites lists is to 
be displayed.

PROFILE OPTIONS

Here you can make pay TV settings (is not, however, cur-
rently supported by the pay TV providers).

Содержание LIFE P13225

Страница 1: ...Operating instructions P13225 MD 31425 P14026 MD 31426 P14327 MD 31427 MEDION LIFE Smart TV ...

Страница 2: ...tenna 19 6 5 Connecting the power supply 19 6 6 Switching the smart TV on and off 19 6 7 Channel search when switching on for the first time 20 6 8 Using the multimedia connections 24 7 Operation 26 7 1 Channel selection 26 7 2 Sound settings 26 7 3 Screen settings 26 7 4 Displaying information 27 7 5 Opening the favourites list 27 7 6 Selecting the source 28 7 7 Wireless display 28 8 Teletext 29 ...

Страница 3: ...ixel faults 68 15 Cleaning 69 16 Storing the device when not in use 69 17 Disposal 70 18 Technical specifications 71 19 Product data sheet 73 19 1 Trademark information 74 20 Service information 74 21 Legal Notice 75 22 Privacy statement 75 23 Index 76 ...

Страница 4: ...otential consequences described there from occurring DANGER Warning risk of fatal injury WARNING Warning risk of possible fatal injury and or serious irreversible injuries CAUTION Warning risk of minor and or moderate injuries NOTICE Follow with these instructions to prevent damage to the device More detailed information about using the device Comply with the notes in the operating instructions Du...

Страница 5: ...es of improper use Do not modify the device without our express agreement and do not use any accessories that have not been supplied or approved by us Only use replacement parts or accessories that we have supplied or approved Comply with all the information in these operating instructions especially the safety information Any other use is considered improper and can cause personal injury or prope...

Страница 6: ...the slots and openings WARNING Overheating Risk of fire Overheating may result in damage to the Smart TV and the risk of fire The slots and openings on the TV set are for ventilation purposes Do not cover these openings for example with newspapers table cloths curtains etc Do not subject the display to pressure There is a risk of the screen glass breaking The remote control has a Class 1 infrared ...

Страница 7: ...ot place any liquid filled containers vases or similar on or next to the device Such containers could tip over and the liquid could impair the electrical safety of the device NOTICE Risk of damage Risk of injury due to candles and other open flames Keep candles and other open flames away from this product at all times to pre vent fire from spreading Make sure that there is enough clearance between...

Страница 8: ...p the device at least one metre away from sources of high frequency or magnetic interference televisions loudspeakers mobile telephones etc to avoid malfunctions Remove the plug from the mains outlet and the antenna cable from the antenna so cket during a thunderstorm or if the device is not going to be used for a long period NOTICE Risk of damage Major changes in temperature or fluctuations in hu...

Страница 9: ...protect your Smart TV against damage due to voltage spikes or lightening strike from the power supply Position the cables so that no one can tread on them or trip over them Do not place any objects on the cables as they may be damaged Never touch the plug with wet hands Always hold the housing and never pull on the cable when removing the plug from the socket Please note that the TV set continues ...

Страница 10: ...ery fluid rinse the affected area with plenty of water and consult a doctor immediately Avoid heavy impacts and vibrations Always observe the correct polarity Take care to ensure that the plus and minus poles are correctly inserted to avoid short circuits Do not mix up new and old batteries or different types of batteries This could cause your remote control to malfunction In addition the weaker b...

Страница 11: ...y Due to the 5 GHz frequency range of the integrated wireless LAN solution the device may only be used inside buildings in the EU see table AT BE BG CZ DK EE FR DE IS IE IT EL ES CY LV LI LT LU HU MT NL NO PL PT RO SI SK TR FI SE CH UK HR AT Austria BE Belgium CZ Czech Republic DK Denmark EE Estonia FR France DE Germany IS Iceland IE Ireland IT Italy EL Greece ES Spain CY Cyprus LV Latvia LT Lithu...

Страница 12: ...12 5 Overview of the device 5 1 Front MD 31425 1 3 2 MD 31426 3 1 ...

Страница 13: ...ly press the button again to select the desired function Press and hold the button to open the menu for the selected function In the case of the standby function the device then switches to standby mode You can change the setting in the menu by briefly pressing the button Then press and hold the button to apply the settings made The function menu closes automatically after a few seconds of inactiv...

Страница 14: ...r channel switching input source selection or volume adjustment Settings are made by tilting upwards or downwards Pressing the button briefly switches between functions A long press switches the device into standby mode or operating mode 6 HDMI 2 3 HDMI connection for devices with a HDMI output HDMI 2 can be used for CEC ARC 7 LNB 13 V 18 V 300 mA max For connecting the antenna satellite 8 ANT For...

Страница 15: ... exceed a height of 2 m The device need to be mounted on rigid surfaces such as cement or concrete 5 3 Remote control MEDION 1 1 21 2 3 4 6 8 9 11 12 13 14 15 17 18 20 7 16 5 19 10 1 Wall mount not supplied When mounting the device make sure that you use M4 MD31424 M4 screws The length of the screws corresponds to the thickness of the wall bracket plus 10 mm MD31425 7 mm ...

Страница 16: ...l up subpages Direction button Move right in menu Teletext Call up subpages 8 E X I T Exiting the menu 9 M E D I O N Open the MEDION portal 10 P R I M E V I D E O Open the Amazon Prime Video portal 11 Red button For teletext or menus Green button For teletext or menus Yellow button For teletext or menus Blue button For teletext or menus 12 Media buttons Fast rewind Fast forward Start recording PVR...

Страница 17: ... be sure to read the section Safety instructions 6 1 Unpacking Select a suitable place for setting up the device before unpacking Open the box very carefully to avoid damaging the device The device could be damaged if you use a knife with a long blade to open the box The box contains a number of small items including batteries Keep these out of the reach of children as they represent a choking haz...

Страница 18: ...18 6 2 Mounting Attach the stand as shown in the illustration Carry out this step before connecting the smart TV MD 31425 MD 31427 2 x MD 31426 2x 2x 1 2 ...

Страница 19: ...ystem to the connection labelled LNB Screw the F connector of a coaxial antenna cable onto the connection on the smart TV To receive encrypted subscription channels you will need to use a CI module and an appropriate card Insert a CI module available in specialist shops into the slot provided for this purpose on the left hand side of the device Common Interface You can then insert the card from yo...

Страница 20: ... begin OK BACK EXIT HOME Choose your country You can configure country settings to activate country specific features 1 2 3 4 5 Hungary Israel Luxembourg Norway San Marino Italy Macedonia Iran KingdomofSau India Jordan Malta Poland Serbia Iraq Latvia Montenegro Portugal Slovakia Ireland Lebanon Netherlands Romania Slovenia Turkey Isle of Man Lithuania New Zealand Russia South Africa Spain Sweden Swi...

Страница 21: ... word select OK on the keyboard and confirm with the O K button PRESS WPS ON YOUR WI FI ROU TER only for WLAN This option enables you to quickly establish a WPS connection via a wireless network Wi Fi Hold down the WPS button on your router and confirm this option OK using the O K button Then the WPS connection will be made INTERNET SPEED TEST Press the O K button in order to test the Internet spe...

Страница 22: ...Receptiom method OK BACK EXIT HOME Select BroadcastType 1 2 3 4 5 Scan Encrypted Channels Select favourite network type D Aerial D Cable Satellite Analogue On None Next Before the station search starts select the following options SCAN ENCRYPTED CHANNELS Use to select whether encrypted channels should also be sear ched for SELECT FAVOURITE NETWORK TYPE Use to select the preferred reception method ...

Страница 23: ...the blue button Afterwards press the O K button again to start the search After that decide whether or not the channel list should be loaded DISEQC SWITCH Select this antenna type if you have multiple satellite antennas and a DiSEqC switch Press the O K button and activate the desired DISEQC switch 1 4 here you can also call up the corresponding transponder list using the blue button Afterwards pr...

Страница 24: ...rd HDMI cable Connect the corresponding HDMI ports of the devices used with an HDMI cable 6 8 3 HDMI ARC Audio Return Channel If you want to use a TV set as a signal receiver AND signal source to transmit an audio signal to an audio receiver you must use the HDMI2 port with audio return channel ARC The HDMI connec tion to the TV then works in both directions It can receive image and sound signals ...

Страница 25: ...8 VGA YPbPr The VGA connection of your TV can be used for the video transmission of the YPbPr signal Use a suitable YPbPr adapter Connect the VGA port of your TV to the YPbPr cinch connections red blue green of the video device Use the supplied YPbPr adapter optional Use the AV audio connections of your TV set red white for audio transmission and connect them with the YPbPr audio connections of th...

Страница 26: ...the formats 4 3 or 16 9 As soon as the PICTURE menu is selected using the buttons three direct links appear above it Here you can navigate directly to the aspect ratio settings and adjust the screen format AUTO The format displayed is automatically adjusted to match the input signal FULL Only in HDMI mode and with HD TV channels received via cable and satellite Pixel perfect reproduc tion of the i...

Страница 27: ...utton when the device is in use the list of channels opens Above the list then use the buttons to select EDIT and use the buttons to select a sta tion to be added to the favourites list and press O K A menu then opens Here use the but tons to select TAG UNTAG CHANNEL A check mark then appears after the station To add further stations to the list use the buttons to select them and press O K To then...

Страница 28: ...for several seconds this controls the television again The source can also be selected using the multifunction switch MODE on the device For this press the switch briefly several times until you reach the source selection menu Then select the desired source by moving upwards or downwards In addition you can call up all activated sources in the menu SOURCES SOURCE SETTINGS 7 7 Wireless display Via ...

Страница 29: ...e as a three digit number using the number but tons The selected page number is displayed in the top left corner of the screen The teletext counter searches as long as it takes to find the selected page number 8 1 3 Scrolling through pages The channel selection buttons or and direction buttons can be used to scroll forwards or backwards through the teletext pages 8 1 4 Colour buttons If coloured f...

Страница 30: ...ing on the source you selected If VGA PC is selected as the source other options will appear in the screen settings 10 The menu system in detail 10 1 Home page The home page allows you to compile preferred menu options and applications for quick access To add additional options to the home page proceed as follows Select the desired menu option application in the OSD menu Press the button The ADD T...

Страница 31: ...rm your selection by pressing the O K button Afterwards the home page of the media portal appears where a shortlist of cer tain apps is displayed The following options can be selected here The start view of the media portal appears only on first use or after a re set of the media portal via the yellow button SETTINGS If you press the M E D I O N button on your remote control you are directed strai...

Страница 32: ...y which language areas the apps should be selected from In addition you can reset the portal so that the portal home page is reset to the factory default YOUTUBE Direct link to YouTube Alternatively the 1 button can be used for direct access preset AMAZON PRI ME VIDEO Direct link for Amazon Prime Video Alternatively the P R I M E V I D E O button can be used for direct access preset NETFLIX Callin...

Страница 33: ...urther stations to the list use the buttons to select them and press O K The channels with a check mark can be edited with the following options If you have not selected any channels the currently selected channel is edited If you press the B AC K button the following options appear ADD TO HOME Press the O K button to select the selected channel from the HOME menu The channels are then listed ther...

Страница 34: ...r more information read the section Opening the favourites list on page 27 TAG UNTAG CHAN NEL This function enables you to mark the currently selec ted channel A check mark then appears after the channel name If the current channel has previously been selected this option removes the check mark TAG UNTAG ALL You can use this button to mark all channels A check mark then appears after the channel n...

Страница 35: ...channel list The previously filtered results are not retained RESET Press the O K button to start resetting the filter settings 10 1 3 Programme guide EPG Electronic Programme Guide menu You can use the E P G button to open the programme guide directly OK BACK EXIT HOME 1 Das Erste HD Now Next Filter Previous Day Next Day Extras 1 Das Erste 2 ZDF HD 3 arte HD 4 1 2 3 tv connect 5 1 2 3 tv 6 3sat H...

Страница 36: ...running the following options are available by pressing the O K button SELECT CHANNEL Select this option and press the O K button to switch to the selected channel MORE INFO Select this option and press the O K button to display information about the current programme RECORD Select this option and press the O K button to start recording the selected channel After ending the recording by pressing t...

Страница 37: ...medium optional USB2 USB storage medium optional AUDIO VIDEO SHARING Network service for data exchange between devices optional The SOURCE SETTINGS is where you can activate deactivate and rename signal sources TV BACK AV HDMI1 HDMI2 HDMI3 YPbPr VGA PC Wireless Display System Sources Enabled Enabled Enabled Enabled Enabled Enabled Enabled Enabled TV Enabled These settings can also be made under SE...

Страница 38: ... contrast on a scale of 0 to 100 BRIGHTNESS Increase or reduce brightness on a scale of 0 to 100 SHARPNESS Increase or reduce sharpness on a scale of 0 to 100 COLOUR Increase or reduce colour saturation on a scale of 0 to 100 ENERGY SAVING This is where you can activate the energy saving mode Select OFF MINI MUM MEDIUM MAXIMUM SCREEN OFF AUTO or CUSTOM to set the brightness of the TV set or switch...

Страница 39: ...t ON to acti vate the blue stretch function MICRO DIMMING Micro dimming technology divides the screen into smaller zones The contrast settings for individual screen zones can then be optimised differently accor ding to the content This adds more depth to dark and bright zones without losing the details and compro mising other parts of the image Select between OFF LOW MEDIUM and HIGH NOISE REDUCTIO...

Страница 40: ...duce sharpness on a scale of 0 to 100 COLOUR Increase or reduce colour saturation on a scale of 0 to 100 ENERGY SAVING This is where you can activate the energy saving mode Select OFF MINI MUM MEDIUM SCREEN OFF AUTO or CUSTOM to set the brightness of the TV set or switch off the screen As soon as the PICTURE menu is selected using the buttons this menu appears above and can be selected directly PI...

Страница 41: ...L CUSTOM BLUE STRETCH Cooler white tones are commonly perceived as bright white The blue stretch function adjusts the white ba lance and allows mid and high greyscales to appear in a cooler colour temperature th rough the addition of blue tones Select ON to activate the blue stretch function MICRO DIMMING Micro dimming technology divides the screen into smaller zones The contrast settings for indi...

Страница 42: ...le the Bluetooth function of the device With Audio Link enabled it is possible to pair the TV set wirelessly with Bluetooth speakers e g a soundbar Select AUDIO LINK and press the O K button DEVICE Select the ENABLED setting if you want to connect the device to an external speaker via Bluetooth Then press the O K button to search for available Bluetooth connec tions All found connections are then ...

Страница 43: ...rk via the HDMI2 port The internal speakers are muted in this case The volume buttons on the remote control now control the device connec ted to the HDMI2 port no OSD display of the volume bar The ARC function works exclusively via the HDMI2 port Due to the great variety of different devices faultless functionality cannot be guaranteed AVL This function sets the sound so that a constant output vol...

Страница 44: ...nal language and dubbed language DIGITAL OUT Set the audio type for the digital output here PCM is the standard format for stereo signal output Select PASSTH ROUGH to output a digital data stream e g on an end sta ge with Dolby Digital decoder With the AUTO setting the digital output is automatically set to the external devices HEADPHONE Set the headphone volume here This can only be chan ged if S...

Страница 45: ... confirm DISCONNECT Disable network connection PRESS WPS ON YOUR WIFI ROU TER only for WLAN This option enables you to quickly establish a WPS connection via a wireless network WLAN Press and hold the WPS button on your router and confirm with the O K button Then the WPS connection is established INTERNET SPEED TEST Press the O K button to test the speed of the internet connection ADVANCED SET TIN...

Страница 46: ... The control fun ction only works when the TV is in standby mode 10 4 5 Installation menu Automatic channel scan Manual channel scan Network channel scan Analogue fine tune Satellite Settings Installation Settings Signal Information First time installation Installation Menu option Setting AUTOMATIC CHANNEL SCAN The automatic station search function helps you to search for and save new channels on y...

Страница 47: ...plays the frequency of the current station The number buttons can be used to specify the frequency to be searched D AERIAL CHANNEL Select the channel number for which you want to carry out a search FREQUENCY Displays the frequency of the current station The number buttons can be used to specify the frequency to be searched NETWORK CHAN NEL SCAN Activate deactivate the network scan D CABLE FREQUENC...

Страница 48: ...ATION SET TINGS Here you can make additional installation settings STANDBY SEARCH If the function is set to ON the TV will search for avai lable stations while it is in standby mode When the device finds new or not yet available stations a menu is displayed that you can use to accept or re ject the changes DYNAMIC CHAN NEL UPDATE If you select the ENABLED setting the channel list is up dated autom...

Страница 49: ...GUAGES the PREFERRED LANGUAGE and the RELATIVE VOLUME The RELATIVE VOLUME describes the volume ba lance between normal audio signals and the special audio signals for visually impaired users DIALOGUE ENHAN CEMENT You can select settings to enhance dialogue here OFF LOW MEDIUM HIGH This function emphasises the clarity of the dialogue signal to achieve better speech quality SPOKEN SUBTITLES Activate...

Страница 50: ...spoken language here e g original language SECONDARY AUDIO LAN GUAGE Select your second preferred audio language here PRIMARY SUBTITLE LANGUAGE If the programme includes subtitles for hearing im paired users you can set the preferred language here SECONDARY SUBTITLE LANGUAGE Select your second preferred subtitle language here TELETEXT Select your preferred teletext language here GUIDE If there are...

Страница 51: ...rt the card Please note only insert or remove the CI module after you have dis connected the device from the power supply NOTICE Risk of damage The CI module or the television could be damaged if you attempt to insert the CI module by force The CI module must be inserted correctly it cannot be inser ted if it is the wrong way round Connect the television to the power supply switch it on and wait f...

Страница 52: ...DATES Activate deactivate automatic software updates INTERNET CONNECTI ON Activate deactivate the Internet connection SHOW ALL COOKIES You can retrieve a list of all cookies here To delete a cookie select it using the direction buttons and press O K DELETE ALL COOKIES All cookies listed can be deleted here Please note If you delete all cookies the initial installati on of the media portal must be ...

Страница 53: ...activated the TV can only be operated via the remote control In this case the multifunction but ton MODE is deactivated To switch the TV back on you will need the remote cont rol When a button is pressed the message CHILD LOCK IS ON appears on the screen while the menu remains hidden GUIDANCE If the child lock is activated the TV can only be controlled using the remote control In this case the MOD...

Страница 54: ...button or in the SOURCES menu If EDIT NAME is selected a virtual keyboard is displayed This can be used with the help of the direction buttons to amend the name of the relevant source If the CEC function is activated the HDMI inputs are if necessary rena med through the connected device NETFLIX Calling up the Netflix app enables numerous films and series to be streamed directly over the Internet T...

Страница 55: ...hen controls the TV again Pressing and holding again then enables the control of the de vice connected by HDMI CEC AUTO POW ER ON This function allows you to turn on the TV with the connected HDMI CEC compatible device and automatical ly switch to the input source Select ENABLED if you want to use this function INPUT DEVICE You can enable disable the input device under MODE VOICE ASSISTANT Alexa o...

Страница 56: ... closes automatically STANDBY MODE LED Enable disable the standby LED SOFTWARE UPGRADE You can search for the latest software for the television here and update it AUTOMATIC SCANNING Activate deactivate the automatic search function EDIT UPGRA DE FOR SATEL LITE You can change the satellite upgrade set tings here SCAN FOR UPGRADE Start the Internet search for updated soft ware The update takes appr...

Страница 57: ...ING function it will no longer be possible to display audio video or photo files on the Smart TV The DMR function Di gital Media Renderer is then switched off POWER UP MODE Select the power on mode STANDBY or LAST STATE As soon as the device is connected to the mains the device then switches to standby mode or calls up the last selected set ting VIRTUAL REMOTE Activate deactivate the virtual remot...

Страница 58: ...tart End Duration Repeat Change Delete Playback All Timer 2 arte Time 17 09 2018 11 00 12 00 60 min Once Allowed Use parental settings ChannelType All All The following options are available if you want to edit or add a timer Menu option Settings CHANNEL TYPE Set the reception type DVB T DVB T2 DVB C DVB S or analogue Only reception types set up during the installation are displayed here TIMER TYP...

Страница 59: ...ack it continues from this point PLAY FROM OFFSET This option enables you to specify the exact point at which playback of the selected recording is to start EDIT Information regarding the currently selected recording is available here Under RECORDING you can change the name of the selected recording using a virtu al keyboard In addition you can specify under DELETE whether the recording may be del...

Страница 60: ... Select YES if you want to start the formatting or NO to cancel the process Confirm with OK Recording via media buttons You can operate the recording and playback using the media buttons Press this button to start recording the current programme From the recording list you can start playback of the selected recording using this but ton Pause and restart playback with this button Stop the recording...

Страница 61: ...rt TV itself Do not insert and then remove the USB device repeatedly in quick succession As soon as a USB storage medium is connected the device opens the media browser automatically As soon as the USB storage medium is removed the note USB DEVICE 0 DISCONNECTED appears and the device automatically switches back to normal TV mode again If several USB drives are connected a drive query appears afte...

Страница 62: ... SUBTITLE FONT SIZE Select the font size for the subtitles OPTIONS When playing back videos you can still make further adjustments SUBTITLE AUDIO Activate additional audio voiceover here SUBTITLE TIME CORRECTION Specify a time delay for the subtitle functionality here JUMP TO SECOND Specify a position in the current video that you want to skip to Press the I N F O button during playback to display...

Страница 63: ...r buttons on the remote control but this can vary depending on the channel and the programme Observe the messages within the applications 12 MEDION Life Remote app The MEDION Life Remote app is the innovative way to operate your MEDION television from your smartphone via your home network The MEDION Life Remote application makes use of the features of your mobile phone such as touch screen capabil...

Страница 64: ...call up EPG Yellow button Various functions depending on the menu TV mode after pressing the red button call up media library Blue button Various functions depending on the menu TV mode after pressing the red button call up Teletext Internet button Number buttons TV Channel selection teletext Page selection SWAP Set previous TV channel TIMER Activate deactivate delay timer Switch Smart TV on off s...

Страница 65: ... and the MAC address of the device to en sure software updates run correctly This data is required to make use of the software update service Access to applications in the portal or via HbbTV may depending on the provider require a registration setting up a user account and or a subscription when using certain services Registration may require the provision of your perso nal data and the selection...

Страница 66: ... and no sound I can hear noise though The reception might be poor Check if the antenna is connec ted properly The picture is not clear The reception might be poor Check if the antenna is connected properly The picture is too bright or too dark Check the settings for contrast and brightness The picture is not sharp The reception might be poor Check if the antenna is connected properly Check the set...

Страница 67: ...s the menu of the device connected via HDMI2 opens This is dependent on the source device and must be supported accordingly Change the input source No Bluetooth connection Make sure that all settings have been correctly specified on the device and that the Bluetooth function is enabled Check whether the device to be connected is switched on and is in discoverable mode Make sure that all settings h...

Страница 68: ...26 1366 x 768 pixels which are each made up of three sub pixels red green blue there are a total of approx 6 2 MD31426 3 1 million control elements in use Occasionally pixels or individual sub pixels can fail or become incorrectly controlled because of this very high number of transistors and the extremely complex manu facturing process used in this context Pixel fault class Defect type 1 Continuo...

Страница 69: ...e off the dust first or wipe the high gloss finish too vigorously you could scratch the high gloss finish Do not use solvents corrosive or gaseous cleaning agents Clean the screen with a soft lint free cloth Take care to ensure that no water droplets remain on the Smart TV Water can cause permanent discolouration To avoid damage to the device water must not penetrate into the interior of the devic...

Страница 70: ... take them to a separate collection point for used batteries Contact your local waste disposal company or your local authority for more information on this subject Batteries Proper disposal of used batteries protects the environment and your personal health Do not dispose of used batteries with normal household rubbish Batteries must be disposed of correctly For this purpose retailers that sell ba...

Страница 71: ...atellite connection 13 V 18 V 300 mA max Screen size 97 9 cm 39 LCD 16 9 display Power consumption max 75 Watt Power consumption in standby mode 0 50 W Power consumption in networked standby mode WAKE ON mode 2 00 W Speaker output 2 x 8 Watt RMS DTS HD compatible Physical resolution 1366 x 768 TV system Pal Channel positions 199 ATV 10 000 DTV Smart TV P14327 MD 31427 Device name P14327 MD 31427 R...

Страница 72: ...nch Headphone output 3 5 mm jack Digital Audio Out SPDIF optical Drives storage media Drives USB Common Interface CI Slot Supported formats via USB 2 Photo JPG JPEG JPE BMP PNG Music MP3 WMA WAV Film MPEG 1 2 4 MKV MOV MP4 DAT VOB H263 FLV HEVC Xvid Capacities USB max 1 TB Remote control Transmission type Infrared LED classification 1 Battery type 2 x 1 5V AAA R03 LR03 Ambient temperatures Permiss...

Страница 73: ...pprox 973 x 570 x 83 mm Dimensions with foot W x H x D Approx 973 x 627 x 250 mm Weight without foot Approx 6 7 kg Weight with foot Approx 7 0 kg Mounting on the wall Vesa standard hole spacing 100 x 100 mm3 WLAN Frequency range 2 4 GHz 5 GHz WLAN standard 802 11 a b g n Encryption WEP WPA WPA2 Frequency range MHz Channel Transmitting power dBm 2400 2483 5 1 13 19 9 5150 5250 36 48 22 4 5250 5350 ...

Страница 74: ...it to There are several ways for you to contact us In our Service Community you can meet other users as well as our staff and you can exchange your experiences and pass on your knowledge there You will find our Service Community at http community medion com Alternatively use our contact form at www medion com contact You can also contact our Service team via our hotline or by post Opening times Ho...

Страница 75: ...refore rely on processing your data for the sales contract concluded with us Your data will be provided to repairers contracted to us for the purpose of warranty processing and associated processes We generally store your personal data for a period of three years in order to fulfil your legal warranty rights You have the right to be informed of the personal data concerned as well as the right to r...

Страница 76: ...3 M Media browser 61 Media portal 63 Multimedia connections AV 24 HDMI 24 HDMI ARC 24 HDMI CEC 24 LAN 25 SPDIF 25 USB 25 VGA PC 25 VGA YPbPr 25 Music 44 72 N Network search 47 O Operating safety 6 Operation 26 OSD menu 30 Applications 37 Channels 33 Home page 30 Installation 46 Media browser 61 Media portal 31 Network 45 Picture 38 Programme guide 35 58 Settings 38 48 Sound 42 Sources 37 TV 58 P P...

Страница 77: ...EN 77 T Technical data 73 Technical specifications 71 Teletext 29 U USB 14 61 V VGA 28 40 Videos 72 ...

Страница 78: ......

Отзывы: