Care
Point:
The brake bleeding procedure is
carried out using the MDS. The
below steps reference the
procedure stored on the MDS tool.
1
.
!
Connect MDS to vehicle.
2
.
!
Open brake reservoir cap (1).
Care
Point:
Tool must deliver 2.2 bar pressure
(2) and have a minimum of 2 Litres
of brake fluid to carry out
procedure correctly.
3
.
!
Connect pressure bleeding tool.
Care
Point:
Pump the brake pedal during each
phase of the brake bleeding
procedure.
Care
Point:
Pedal pump frequency = 3
seconds applied to 0.5 seconds
released.
4
.
!
Fit bleed bottle to rear left calliper and open
both inner and outer bleed screws (3, 4). M10
17 Nm
5
.
!
Pump pedal until no air is present.
6
.
!
Close bleed screws on rear left calliper (3, 4).
Care
Point:
Pedal pump frequency = 3
seconds applied to 0.5 seconds
released.
7
.
!
Fit bleed bottle to front left calliper and open
both inner and outer bleed screws (5, 6).
8
.
!
Pump pedal until no air is present.
9
.
!
Close bleed screws on front left calliper (5, 6).
Care
Point:
Pedal pump frequency = 3
seconds applied to 0.5 seconds
released.
10
.
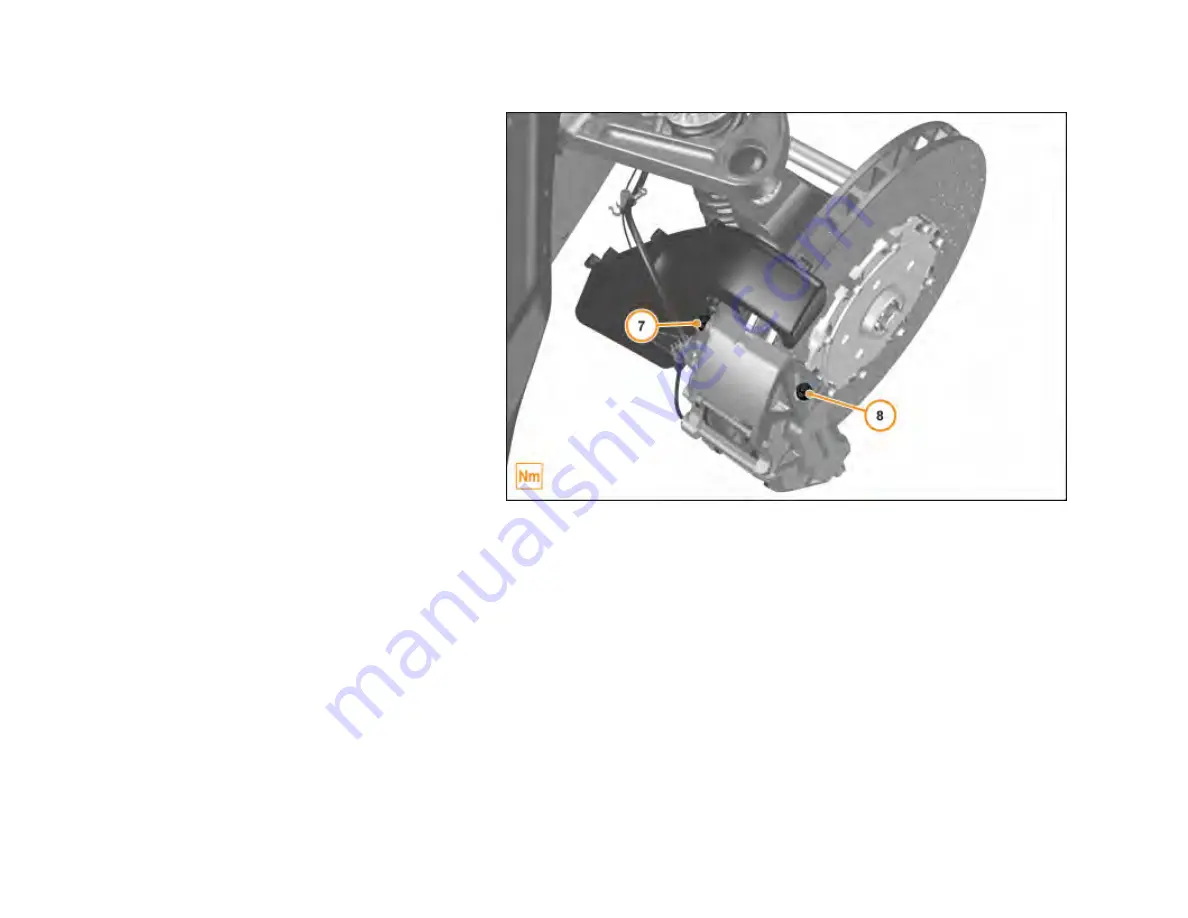
Fit bleed bottle to front right calliper and open
both inner and outer bleed screws (7, 8).
11
.
Pump pedal until no air is present.
12
.
Close bleed screws on front right calliper (7,
8).
Care
Point:
Pedal pump frequency = 3
seconds applied to 0.5 seconds
released.
13
.
Fit bleed bottle to rear right calliper and open
both inner and outer bleed screws (9, 10).
14
.
Pump pedal until no air is present.
15
.
Close bleed screws on rear right calliper (9,
10).
Care
Point:
If process needs to be repeated
allow the system to rest for a
minimum of 5 minutes to prevent
damage being caused to the
braking system.
16
.
Disconnect pressure bleeding tool.
17
.
Check brake fluid level and fill to the correct
level. Pentosin 5.1 or Mobil 1.5.1
18
.
Close brake fluid reservoir cap (1).
19
.
Check functionality.
85
Содержание MP4-12C
Страница 1: ......
Страница 33: ...3 Disc Cross Drilled Hole Chip on used disc Renew disc 1 4 Disc Edge Chip on disc Do not renew disc 1 32 ...
Страница 34: ...4 Disc Edge Chip on disc Do not renew disc 1 5 Disc Cross Drilled Hole Chip on disc Do not renew disc 1 33 ...
Страница 35: ...5 Disc Cross Drilled Hole Chip on disc Do not renew disc 1 34 ...
Страница 52: ...2 Detach union nut 2 M10 17 Nm 3 Loosen nut 3 4 Remove front brake hose 4 51 ...
Страница 69: ...2 Detach union nut 2 M10 17 Nm 3 Loosen nut 3 4 Remove rear brake hose 4 68 ...
Страница 98: ...Description Dimension Value Bolt Floor panel tunnel M6 x 16 10 Nm 97 ...
Страница 104: ...1 Remove bolts 1 M6 x 20 4 Nm 2 Remove tyre spoilers 2 Remove front guide vanes 103 ...
Страница 105: ...1 Remove screws 1 M6 x 16 6 Nm 2 Remove front guide vanes 2 Remove rear guide vanes 104 ...
Страница 125: ...Description Dimension Value Track rod steering rack M14 30 Nm 124 ...
Страница 159: ...Bolt Oil drain pipe Turbo charger engine M6 x 16 10 Nm Bolt Oil drain pipe Turbo charger engine M6 x 16 10 Nm 158 ...
Страница 193: ...1 Open door 2 Use tape to prevent paint damage arrows 3 Prise out cover door shut 1 4 Remove bolts 2 M6 x 20 8 Nm 192 ...
Страница 194: ...4 Remove bolts 2 M6 x 20 8 Nm 5 Remove bolts 3 M6 x 16 8 Nm 193 ...
Страница 195: ...5 Remove bolts 3 M6 x 16 8 Nm 6 Remove bolts 4 M6 x 16 8 Nm 194 ...
Страница 196: ...6 Remove bolts 4 M6 x 16 8 Nm 7 Remove bodyside lower rear arrows 195 ...
Страница 197: ...7 Remove bodyside lower rear arrows Install bodyside lower Rear 1 Install components in reverse order 196 ...
Страница 203: ...Description Dimension Value Clamp ISG to Throttle M6 5 Nm 202 ...


