36
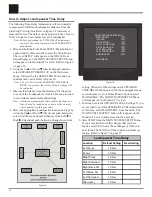
select SOURCE INPUT from the On-Screen Menu,
followed by pressing the Left or Right directional
push-buttons to select the TV Input, Number 7. Using
the Up
or Down
directional push-buttons, select
HDMI VIDEO on the On-Screen Menu, followed by
pressing the Left or Right directional push-but-
tons to select NONE.
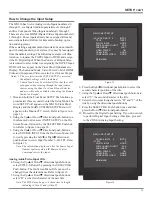
31. Using the Up
or Down
directional push-buttons,
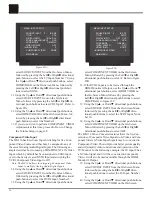
select SOURCE INPUT from on the On-Screen
Menu, followed by pressing the Left or Right di-
rectional push-buttons to select CD2 Input 3. Refer to
figure 22A.
32. Using the Up
or Down
directional push-buttons,
select HDMI VIDEO from the On-Screen Menu, fol-
lowed by pressing the Left or Right directional
push-buttons to select the Number 2.
33. If you do not wish to perform COMPONENT VIDEO
Adjustments at this time, proceed to How to Change
the Volume Setup on page 38.
Component Video Input
The MX136 has Electronic Input Switching for five Com-
ponent Video Sources and they may be assigned to any of
the eleven Analog Audio/Digital Inputs. The following ex-
ample describes how to reassign COMPONENT 4 IN Video
Input, which by default has been assigned to VCR2 Input,
over to the newly created DVD2 Input and switching the
VCR2 Component Video Input to Off.
Note: The MX136 allows for assigning a Component Video
Input to multiple Analog Audio/Digital Inputs.
34. Using the Up
or Down
directional push-buttons,
select SOURCE INPUT from the On-Screen Menu,
followed by pressing the Left or Right directional
push-buttons to select the DVD2 Input, Number 5.
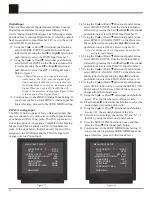
35. Using the Up
or Down
directional push-buttons,
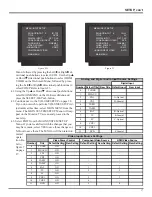
select COMPONENT VIDEO on the On-Screen
Menu, followed by pressing the Left or Right
directional push-buttons to select 4. Refer to figure
22B.
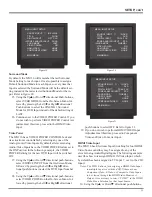
36. If the DVD2 Input is to be viewed through the
HDMI Monitor A Output, use the Up
or Down
directional push-buttons, select HDMI VIDEO on
the On-Screen Menu, followed by pressing the
Left or Right directional push-buttons to select
COMP. Refer to figure 22C.
37. Using the Up
or Down
directional push-buttons,
select SOURCE INPUT from the On-Screen Menu,
followed by pressing the Left or Right direc-
tional push-buttons to select the VCR2 Input, Num-
ber 10.
38. Using the Up
or Down
directional push-buttons,
select COMPONENT VIDEO on the On-Screen
Menu, followed by pressing the Left or Right
directional push-buttons to select OFF.
The MX136 Video Converter feature allows the Up-Con-
versions of Composite Video Signals to S-Video and Com-
ponent Video; S-Video Input Signals may be converted to
Component Video. This will provide better picture quality
and will simplify video connections and operation of the
TV/Monitor. In the following example, the LV Input 8 has
a S-Video Signal and it will be converted to Component
Video. It will also be made available through the HDMI
Monitor A Output.
39. Using the Up
or Down
directional push-buttons,
select SOURCE INPUT from the On-Screen Menu,
followed by pressing the Left or Right direc-
tional push-buttons to select the LV Input, Number
8.
40. Using the Up
or Down
directional push-buttons,
select COMPONENT VIDEO on the On-Screen
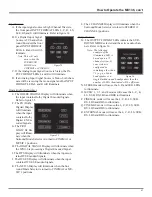
Figure 22B
MENU: INPUT SETUP
SOURCE INPUT
5
-
IR-TP2
TITLE
DVD2
DIGITAL INPUT
OPT C LK
ZONE A ANALOG INPUT
RCA
SURR MODE
CINEMA 1
VIDEO POWER
OFF
HDMI VIDEO
NONE
Æ
COMPONENT VIDEO
4
MAIN MENU
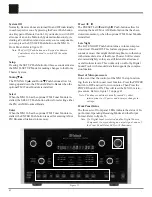
Figure 22A
MENU: INPUT SETUP
SOURCE INPUT
3
-
IR-CD2
TITLE
CD2
DIGITAL INPUT
COAX D LK
ZONE A ANALOG INPUT
RCA
SURR MODE
CINEMA 1
VIDEO POWER
OFF
Æ
HDMI VIDEO
2
COMPONENT VIDEO
NONE
MAIN MENU
Содержание MX136
Страница 23: ...23 Notes ...

