9
(1)
Remove the paper feed tables and support tables.
While holding the paper feed shaft, push it in to the left, then pull it toward the front.
(2)
After removing the paper feed shaft, clean its three rubber rollers.
(3)
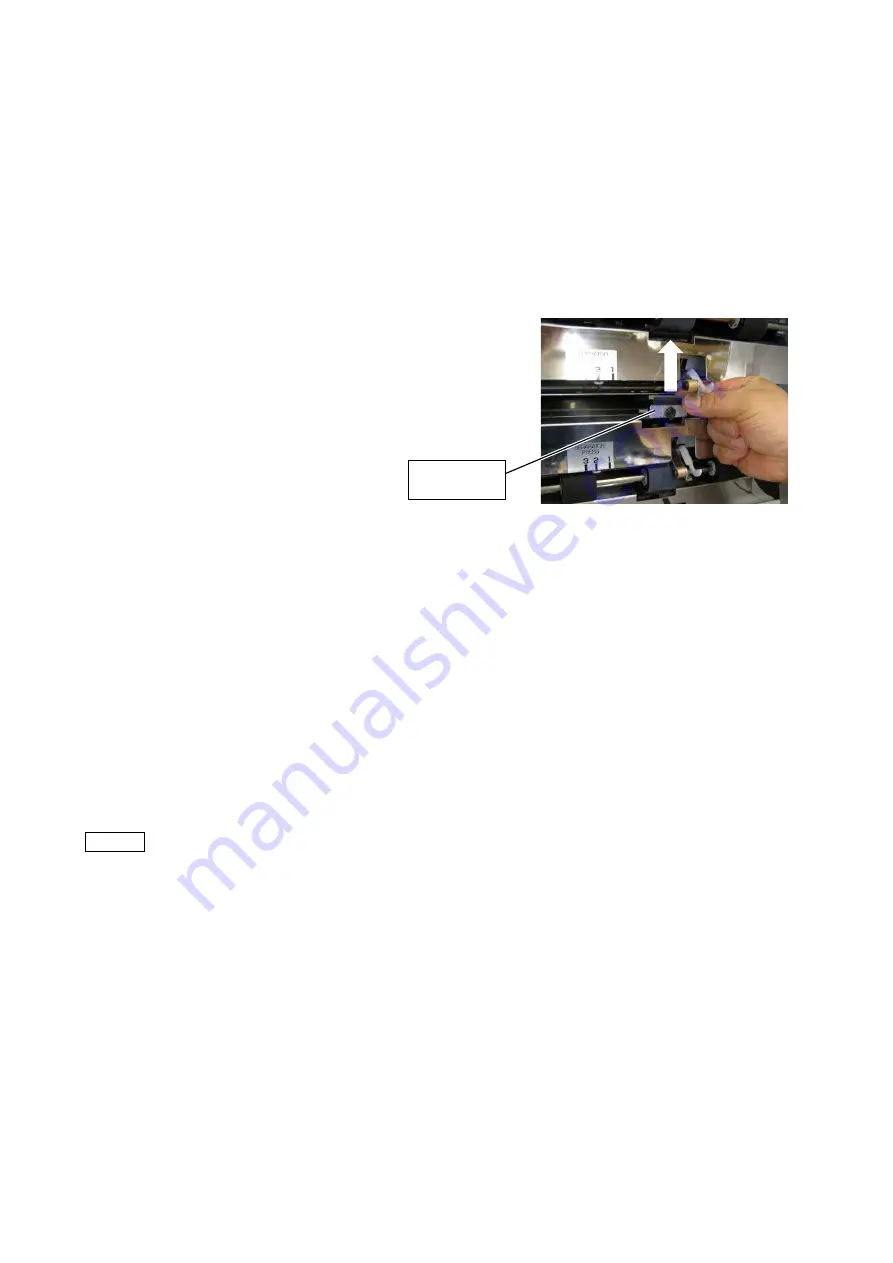
Draw out the separator in the direction of the white arrow shown in the figure below, and clean the
rubber portion.
(4)
Install the paper feed shaft in the way reverse to how it was removed.
Should trouble such as double feed, no feed, etc. occur after cleaning, the rubber paper feed
rollers and separator is worn. Replace them with new ones referring to the previous page.
When the paper feed rubber rollers are replaced, mount them on the paper feed rollers holders
so that the white dot of the rubber rollers is on the right-hand side. In addition, after mounting
the paper feed rollers on their holders, roll them on a flat surface such as a desktop to make sure
they are mounted horizontally. If mounted askew, problems like paper feed failure or double
feed may occur. Be watchful of the paper detection wire when replacing the feed rollers.
Cleaning the exterior
Wipe off any stains using a cloth dampened with diluted neutral detergent and wrung tightly.
Remarks
Do not use solvent cleaning liquids as they may cause discoloring.
Separator
Содержание FC 10 PLUS
Страница 1: ... 0 SERVICE MANUAL MBM TABLETOP COLLATOR MODEL FC 10 PLUS R e v 1 0 㻌 㻌 㻌 㻌 Sep 09 2016 ...
Страница 5: ...4 䐤㻌 䐥㻌 䐨㻌 䐩㻌 䞣㻌 䞤㻌 1 COMPONENTS 1 1 Overview 䐠㻌 䐡㻌 䐢㻌 䐦㻌 䐣㻌 䐲㻌 䐱㻌 䐰㻌 䐭㻌 䐧㻌 䐯㻌 䞡㻌 䞢㻌 䐬㻌 䐫㻌 䐮㻌 䐪㻌 䐟㻌 ...
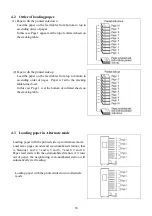
Страница 7: ...6 䐟㻌 䐠㻌 䐡 䐢 䐣 䐤 䐥 䐦 䐧 䐨 䐩 䐪 䐫 䐯 䐰 䞣 䞢 䞡 䐲 䐱 䞧 䞦 䞥 䞤 䞨 䐬 䐭 䐮 䞪 䞩 䞫 1 2 Operation Panel ...
Страница 20: ...19 ...
Страница 21: ...20 6 MAIN PRINTED CIRCUIT BOARD ...
Страница 22: ...21 7 Wiring Diagram ...
Страница 33: ...32 Dismount the clutch holder Dismount the paper feed clutch ...
Страница 35: ...34 Lift up the flat idler pulley and slip off the timing belt ...
Страница 56: ...55 10 DIAGRAM FOR BELT INSTALLATION ...


