


12
1030658 Rev.A 09/05
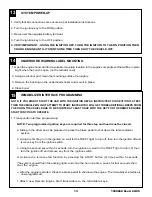
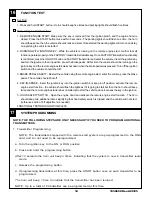
RE-ASSEMBLY
1. Re-install the following components:
a. Plug the ignition key light back into the lower steering
column shroud, carefully snap the steering column shroud
halves together and re-install the (3) phillips screws (all
three are the same type). Verify operation of the tilt/tele-
scoping steering wheel. (FIGURE SS & TT)
b. Carefully pull the weather seal away from the door jamb
along the driver’s side of the dashboard. Re-install the
driver’s lower dashboard panel and re-secure the weather
seal.
c. Secure the center console panel and re-install the (3)
phillips screws around the shifter assembly and (1)
phillips screw on each side of the lower center console
panel. (FIGURE UU & VV)
d. Re-install the automatic shifter bezel and screw the shifter
knob on to the shift lever making sure that the shifter knob
is tight and lined up straight. (FIGURE WW)
e. Re-install the lower center console kick panels on both
driver and passenger sides. (FIGURE XX)
f. Re-install (1) phillips screw on the lower left side of the
driver’s dashboard and re-install the hood release handle.
(FIGURE YY)
12
FIGURE TT
FIGURE YY
FIGURE XX
FIGURE VV
FIGURE UU
FIGURE WW
FIGURE SS
Содержание MAZDA5 2006
Страница 8: ...8 1030658 Rev A 09 05 SYSTEM LAYOUT...