Paragraphs
1 1 3-1 14
unit and headlights, then pull all wires
out of the way. Disconnect throttle rod,
fuel shut-off cable, engine oil pressure
gage line, tachometer cable, air cleaner
hose and ground strap. On models so
equipped, disconnect hydraulic oil lines,
power steering lines, drag links, radius
rods
and/or horizontal mufller. On all
models, remove screws attaching the
rear
fuel tank mounting bracket and
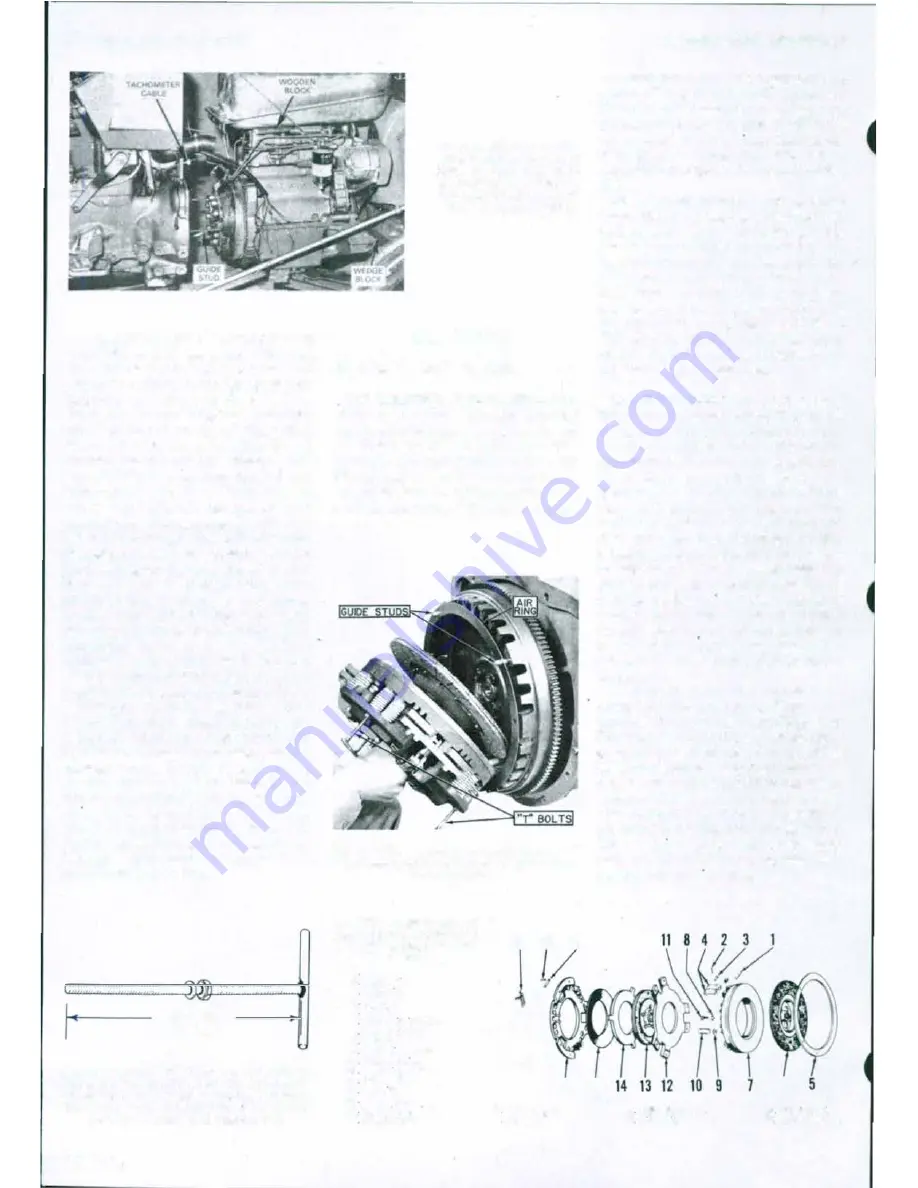
block tank up as shown in Fig. 115 us·
ing a wooden block. On models with
steering drag links, secure drag links
so
wheels are straight and will not turn.
Support engine and transmission in
dependently so engine and front system
can be moved forward away from
transmission. Remove screws securing
engine to transmission housing, remove
starting motor and install guide studs.
Carefully move engine and front
assembly forward
as
shown in Fig. 115.
When rejoining tractor,
be
sure to use
a guide stud in each side of transmission
housing to assist in alignment. Turn
flywheel to align clutch plate splines
with transmission and pto input shaft
splines. When engine and transmission
flanges meet, install retaining cap
sc
r
ews and remove guide studs. Do not
use
cap screws to force units together as
damage to clutch and transmission may
result. Complete installation by revers
ing the splitting procedure. Check clutch
linkage adjustment as outlined in
paragraph 110 or 111.
150
nm
(6 i n . )
F
i
g
.
116-Specle/
"
T
"
bolts
can
be
made to
facilitate clutch remove/, repair end Instillation.
Weld e cro81 handle toe alx-lnch place of 114 1nch
UNC threaded rod. A forcing nut end washer Is
uted to comprus the clutch springs.
48
Fig. 115-V/ew ol tntctorspllt
showing location of wooden
block to hold luel tenlt,
wedge block to prevent
lip
ping and guide studs to aid In
sale separation end joining.
DUAL CLUTCH
All Models So Equipped
113. REMOVE AND REINSTALL.
Refer to paragraph 112 and separate
engine from transmission. Punch mark
the clutch cover (16-Fig. 118), pressure
plate (14), drive plate (12), pressure plate
(7) and engine flywheel
so
parts can
be
reinstalled in their original positions. In
stall the three special bolts shown in Fig.
Fig. 117-Vlew showing removel/lnstel/11/on of
typical dual clutch assembly. Air ring Is not used
on later models.
Fig. 1 18-Exploded view of
typical dual clutch assembly.
Air ring (5) Is not used on later
models.
I
Ptn
2
Cou�r pm
3 Llnk
ptn
4 L10k
6
A1r nng
6
'J'ranontDIOn
dlJC
7 Pnau�
plau-
8
l«knut
9
lnaulaltng wa$her
10
Clutch
apnna
22 21 20
ni
19 18 17
MASSEY -FERGUSON
116 and tighten nuts to compress clutch
springs. Three
%
inch UNC cap screws
that are 2-1
8
inches (54 mm) long can
also
be
used instead of special "T" bolts
to compress clutch spnngs. Remove re·
taining cap screws and Lift clutch
assembly from flywheel as shown in Fig.
117.
'Ib
reinstall clutch, first position
transmission friction disc (6-Fig. 118)
in flywheel with hub side facing away
from flywheel. Position air ring (5) on
flywheel if
so
equipped. Use a suitable
pilot shaft to align clutch discs and in·
stall clutch assembly while aligning
previously made assembly punch
marks.
Tighten retaining cap screws to 41 N
·
m
(30 ft.-lbs.) torque. Remove "T" bolts and
pilot shaft. Adjust clutch,
if
necessary,
as
outlined in paragraph 115.
114. OVERHAUL. Before disassem
bling clutch, punch mark the clutch
cover, pto pressure plate, drive plate and
transmission pressure plate
so
parts can
be
reasse
mbled in the same relative posi·
tions.
Unhook
release lever torsion
springs (22-Fig. 118). Back off"T" bolt
nuts until pivot pin retainer pins (21),
early style clutch, can
be
driven free of
pivot pins (20). Do not attempt to drive
retaining pins completely out of cover.
On late style clutches, remove retaining
clips from release lever pivot pins. On all
models, remove p1vot pins and lever
springs. Disconnect release levers (17)
from links (4 ). Loosen
"T"
bolt nuts even
ly to release spring pressure, then
remove
"T"
bolts and separate clutch
components.
Thoroughly clean and examine all
parts for wea1· or damage. Renew any
parts which are questionable. Flywheel
friction surface may be resurfaced up to
a maximum depth of 1.0 mm (0.040
inch). An equal amount of material must
also be removed from clutch mounting
surface of flywheel to maintain correct
clutch spring tension. It is not permissi
ble to resurface pressure plates (7 and
14) or dnve plate !12). Insulating
washen;
(9)
should
be
renewed when new
springs OOl are mstalled.
II
A<IJuattl\ll
ocrew
12 Dnvt
plate
13
Pto ciuw:
16 15
6
14 Pre&Oure
plate
16
Sellevtlle
spnng
16
Clutch cover
17
Rrleu" lr•·•r
18
Locknut
19
A<IJu•tonR "'"
'
"
20 Povot
pon
21
RetAtnt•r pin
22. Tonoon
oprtn�


