background image

FR

DE

ES

SHIVER

25

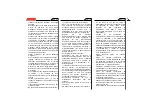
2.2 Bestandteile der Gabel

Die Gabel besteht in der Hauptsache aus
folgenden Komponenten:

8

) Verschlusskappe

11

) Vorspannring

12

) Feder

13

) Staubabstreifer

14

) Haltering

15

) Dichtring

16

) Teller

17

) Kolbensegment

18

) Pumpenelement

19

) Gegenfeder

22

) Kupferscheibe 

Bodenschraube

23

) Bodenschraube

26

) Tauchrohr

28

) Bodenpuffer

29

) Gleitrohr

50

)

Ventil

Zum besseren Verständnis der Funktionsweise
der Gabel, sind in der anliegenden Abbildung,
die mit dem Rad verbundenen beweglichen
Teile (hervorgehobener Hintergrund) und die
fest mit dem Rahmen des Motorrads
verbundenen Teile (heller Hintergrund) in
unterschiedlichen Farben dargestellt.

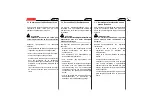
2.2 Componentes de la horquilla

La horquilla está formada principalmente por los
siguientes componentes:

8

Tapón de cierre

11

Tubo de precarga

12

) Muelle

13

)

Guardapolvo

14

)  Anillo de seguridad

15

) Retén

16

)  Asiento del muelle

17

)


Segmento pistón

18

)  Elemento de bomba

19

) Muelle 

antagonista

22

)  Arandela  de cobre tornillo de fondo

23

)  Tornillo de fondo

26

)

Barra  de horquilla

28

)

Tampón de fondo

29

) Botella

50

)

Válvula

Para comprender mejor el uso de la horquilla, se
indican en la figura al lado, con colores
diferentes, las partes en movimiento vincoladas
a la rueda (fondo evidenciado), de las que están
integradas en el chasis de la motocicleta (fondo
claro).

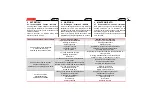
2.2 Composants de la fourche

La fourche est composée principalement des
éléments suivants:

8

)

Bouchon de fermeture

11

)

Tube de pré-charge

12

)

Ressort

13

)

Cache-poussière

14

)

Jonc d’arrêt

15

)

Joint d’étanchéité

16

)

Cuvette

17

Segment du piston

18

) Tige 

amortisseur

19

)

Contre-ressort

22

)

Rondelle en cuivre pour vis de fond

23

)

Vis de fond

26

) Plongeur

28

Tampon de fond

29

) Porte-fourreau

50

)

Vanne

Pour mieux comprendre le fonctionnement de la
fourche, dans le schéma à côté on a différencié
les pièces en mouvement liées à la roue (fond en
évidence) des pièces demeurant solidaires au
cadre du motocycle (fond clair).

Содержание SHIVER

Страница 1: ...RUZIONI PER L USO E LA MANUTENZIONE USE AND MAINTENANCE INSTRUCTION MANUAL MODE D EMPLOI ET ENTRETIEN BETRIEBS UND WARTUNGSANLEITUNG INSTRUCCIONES PARA EL USO Y MANTENIMIENTO 32 Factory Works SHIVER SHIVER ...

Страница 2: ...nt of your suspension system NORME DI SICUREZZA PER L UTILIZZATORE DEL MANUALE ATTENZIONE La non corretta osservazione delle procedure indicate nel presente manuale può provocare danni al prodotto incidenti infortuni o addirittura la morte del motociclista 1 USO DEL MANUALE Leggere attentamente comprendere e seguire scrupolosamente le istruzioni presenti in questo manuale E una parte essenziale de...

Страница 3: ...miento incorrecto de las instrucciones de uso y mantenimiento o cualquier otra indicación puede causar accidentes lesiones graves o la muerte Tenga en cuenta que la instalación y reparación de cualquier sistema de suspensión requiere conocimiento específico herramientas y experiencia Las nociones generales de mecánica pueden no ser suficientes Todos los trabajos de instalación o reparación deben l...

Страница 4: ...si tratti conviene immediatamente rivolgersi ad centro autorizzato Marzocchi prima di utilizzarla di nuovo A GENERAL SAFETY RECOMMENDATIONS Be sure to use the correct suspension system for the terrain on which you ride Check with your motorcycle retailer or Marzocchi for assistance in selecting the correct suspension system Please note that there are inherent risks associated with off road motorcy...

Страница 5: ...i depende de muchos factores como el estilo de pedaleo y las condiciones Los golpes caídas uso inadecuado o extremo en general pueden comprometer la seguridad de la estructura Por favor revise su horquilla regularmente y que un mecánico cualificado compruebe si tiene pérdidas de aceite golpes deformaciones o cualquier otro tipo de irregularidad La frecuencia de la revisión depende de muchos factor...

Страница 6: ... quali non è stata progettata Anche l atterrare impropriamente dopo un salto sottopone la forcella a stress che non è in grado di assorbire Salti o balzi sono consentiti solo nel Always wear a properly fitted and fastened helmet that has been approved by the Department of Transportation DOT SNELL or CE and any other safety equipment necessary for your riding style B BEFORE EVERY RIDE Check that no...

Страница 7: ...les y obedezca todas las señales de tráfico y las leyes cuando salga Las horquillas no deben someterse a falta de uso o abuso Aprenda como utilizarla y siempre dentro de sus posibilidades Utilizarla sin control sólo unas pocas veces supondrá el equivalente a años de mal uso Debe aprender como evitar los obstáculos que surjan durante el recorrido Chocar directamente con rocas árboles o agujeros pue...

Страница 8: ...avi talvolta mortali In caso di suggerimenti richieste o dubbi contattare il distributore Marzocchi locale not designed to absorb You should only perform jumps or drops when a transition is available to help absorb the impact forces generated during the landing and both wheels should smoothly make contact with the transition at the same time Any other type of landing is dangerous as it could resul...

Страница 9: ...te o descienda Cada situación es diferente para cada corredor PRECAUCION No evitar los obstáculos que surjan durante el recorrido o realizar un aterrizaje incorrecto después de un salto o descenso puede dañar cualquier pieza de la motocycleta causando pérdida de control fuertes lesiones o la muerte Si tiene cualquier comentario o duda por favor contacte con el revendedor Marzocchi más cercano deve...

Страница 10: ...i serraggio 68 5 2 Tabella 2 Olio e quantità 68 5 3 Tabella 3 Molle 68 6 Garanzia 70 CONTENTS 1 Introduction 12 1 1 Conventions 16 1 1 1 Orientation of the fork 16 1 1 2 Editorial pictograms 16 1 1 3 Equipment 18 2 General information 20 2 1 Characteristics 20 2 2 Components of the fork 22 3 General safety regulations 26 3 1 Instructions for clamping in the vice 30 4 Maintenance 32 4 1 Problems Po...

Страница 11: ...s Einspannen 31 4 Wartung 33 4 1 Störungen Ursachen Abhilfe 33 4 2 Tabelle für turnusmäßige Wartung 37 4 3 Reinigung Staubabstreifer 39 4 4 Ölablass 41 4 5 Zerlegung Holm Gleitrohr Pumpenelement 45 4 6 Entfernung Dichtringe 49 4 7 Einbau Dichtringe 53 4 8 Zusammenbau Holm Gleitrohr Pumpenelement 57 4 9 Einfüllen des Öls 63 4 10 Montage der Gabel am Motorrad 67 5 Tabellen 68 5 1 Tabelle 1 Anzugsmom...

Страница 12: ...REMESSE Il presente manuale contiene informazioni importanti relative al montaggio all utilizzo e alla manutenzione del sistema di sospensione da voi scelto e deve quindi essere letto con estrema attenzione Prima di iniziare la lettura occorre leggere attentamente e apprendere quanto contenuto nella sezione Norme di sicurezza per l utilizzatore del manuale Quanto contenuto nella sezione Norme di s...

Страница 13: ...uidado y mantenimiento de tu suspensión por favor contacte con el centro autorizado más cercano que puede encontrar en la página de Internet www marzocchi com PRECAUCION El presente manual no sirve para explicar el montaje desmontaje de la horquilla de la motocicleta de la rueda del grupo de freno de las piezas de la dirección o de cualquier otro componente directa o indirectamente relacionado con...

Страница 14: ... setting upgrade kits and overhauling kits visit our website www marzocchi com in the section Products aftermarket moto ATTENZIONE L utilizzatore e il manutentore sono gli unici responsabili della corretta applicazione delle istruzioni di assemblaggio contenute nel presente manuale Guidate sempre nel pieno rispetto delle norme di sicurezza e prestando sempre la massima attenzione NOTA Per ulterior...

Страница 15: ...plicación de las instrucciones de ensamblaje contenidas en el presente manual Conduzca siempre respetando las normas de seguridad y prestando siempre la máxima atención NOTA Para más informaciones sobre specificaciones kit de upgrade kit de revisión de la horquilla visite nuestra pagina web www marzocchi com bajo productos aftermarket moto ATTENTION L utilisateur et le réparateur sont les seuls re...

Страница 16: ...ore utilizzo della forcella 1 1 2 Editorial pictograms WARNING Descriptions preceded by this symbol contain information instructions or procedures which if not respected can cause damage or bad function to the fork accidents to the user even fatal ones or damage to the environment REMEMBER Descriptions preceded by this symbol contain information prescriptions or procedures recommended by MARZOCCHI...

Страница 17: ...der Umweltschäden verursachen können WICHTIG Die Beschreibungen die von diesem Symbol vorgegangen sind enthalten Informationen Vorschriften oder Prozeduren die von MARZOCCHI zur besseren Benutzung der Gabel empfohlen werden SUPERIEUR INFERIEUR A R R I E R E A V A N T GAUCHE DROITE 1 1 Konventionen 1 1 1 Richtungsangaben Gabel OBEN UNTEN H I N T E N V O R N LINKS RECHTS 1 1 Convenciones 1 1 1 Orien...

Страница 18: ...l equipment Attrezzature specifiche Specific equipment Brush Pennello Vice with padded jaws Morsa con ganasce in materiale tenero Millimetre ruler Righello millimetrato Graduated container Misurino graduato Container with wide mouth Contenitore con imboccatura larga Grease Grasso Silicone grease spray Grasso siliconato spray 24 mm spanner Chiave fissa da 24 mm 8 mm Allen wrench Chiave a brugola da...

Страница 19: ... spray Llave fija de 24 mm 24 mm Maulschlüssel Clé de 24 mm Llave Allen de 8 mm 8 mm Inbusschlüssel Clé Allen de 8 mm Destornillador Kreuzschlitzschraubendreher Tournevis plat Martillo de goma Gummihammer Marteau en caoutchouc Trapo blando Weicher Lappen Chiffon souple Introductor Marzocchi Cód R5113AC Einschubzylinder Marzocchi Art R5113AC Introducteur Marzocchi Code R5113AC 1 1 3 Werkzeug Am Anf...

Страница 20: ...caratteristiche di viscosità in ogni condizione di lavoro esente da attrito di primo distacco Per informazioni più dettagliate fare riferimento alla Tabella 2 Olio e quantità 2 GENERAL INFORMATION The MINICROSS Ø32 suspension system is a telescopic hydraulic fork with advanced axle static load spring and valve damping system 2 1 Characteristics Stanchion tubes Made of special chromed high resistan...

Страница 21: ...bajadas con CNC Juntas Retenes proyectados con el ordenador que aseguran la máxima hermeticidad en compresión y el mínimo roce en extensión patente MARZOCCHI Muelles De acero disponibles con diferentes constantes de rigidez K Para informaciones más detalladas consulte la Tabla 3 Muelles Aceite MARZOCCHI de especial fórmula elimina la formación de espuma y mantiene inalteradas las características d...

Страница 22: ...om those that remain fixed to the motorcycle frame light background 2 2 Componenti della forcella La forcella risulta essere composta principalmente dai seguenti componenti 8 Tappo di chiusura 11 Tubetto di precarica 12 Molla 13 Raschiapolvere 14 Anello di fermo 15 Anello di tenuta 16 Scodellino 17 Segmento pistone 18 Pompante 19 Contromolla 22 Rondella in rame vite di fondo 23 Vite di fondo 26 Tu...

Страница 23: ...SHIVER 23 8 11 12 13 15 17 19 18 29 28 50 23 26 14 16 22 MZ018002 ...

Страница 24: ...24 MZ018002 8 11 12 13 15 17 19 18 29 28 50 23 26 14 16 22 ...

Страница 25: ...Asiento del muelle 17 Segmento pistón 18 Elemento de bomba 19 Muelle antagonista 22 Arandela de cobre tornillo de fondo 23 Tornillo de fondo 26 Barra de horquilla 28 Tampón de fondo 29 Botella 50 Válvula Para comprender mejor el uso de la horquilla se indican en la figura al lado con colores diferentes las partes en movimiento vincoladas a la rueda fondo evidenciado de las que están integradas en ...

Страница 26: ...chiavi metriche e non in pollici Le chiavi con misure in pollici possono avere dimensioni simili a quelle in millimetri ma possono danneggiare le viti e rendere poi impossibile la svitatura Per svitare le viti con impronta a taglio o a 3 GENERAL SAFETY REGULATIONS After a complete breakdown always use new original Marzocchi seals when reassembling To tighten two bolts or nuts that are near each ot...

Страница 27: ... biodegradables Antes del montaje lubrique siempre con aceite para horquillas todas las partes en contacto Si no va a utilizar la horquilla durante un tiempo lubrique siempre los componentes de la horquilla que estén en contacto con aceite No esparcir en el ambiente lubricantes solventes o detergentes no completamente biodegradables estos deben ser recogidos y conservados en recipientes especiales...

Страница 28: ...a la moto e in particolare della forcella Verificare rigorosamente che nella zona di lavoro non vi sia presenza di trucioli metallici o polvere È consigliabile procedere alla revisione di uno stelo alla volta Non modificare i componenti della forcella Use the correct size and sort of screwdriver to unscrew slotted or crosshead screws When using a screwdriver to assemble or disassemble metal stop r...

Страница 29: ...orquilla restableciéndola a las condiciones originales de un producto nuevo Utilice solamente partes de recambio originales Antes de efectuar operaciones de mantenimiento revisión asegúrese de poseer los recambios necesarios para la revisión completa de ambas barras n 2 retenes n 2 guardapolvos n 2 segmentos pistón Trabaje en ambientes limpios ordenados y bien iluminados y si es posible evite efec...

Страница 30: ...finitivamente il pezzo e compromettere il buon funzionamento della sospensione è consigliato fissare la forcella alla morsa nella parte del piede portaruota come evidenziato in figura 3 1 Instructions for clamping in the vice For some maintenance procedures you may have to use the vice to clamp some components of the fork WARNING The incorrect use of the vice can cause irreparable damage to the fo...

Страница 31: ...tzung des Spannstocks auf die Arbeiten beschränken bei denen sie unerlässlich ist den Spannstock mit Spannbacken aus weichem Material bestücken beim Anziehen des Spannstocks nicht übertreiben keine Gabelteile im Spannstock befestigen bei denen auch eine minimale Unrundheit oder Quetschung das Teil unwiderruflich unbrauchbar machen und das einwandfreie Funktionieren der Federung beeinträchtigen wür...

Страница 32: ...ken or worn Sostituire la rondella in rame Replace the copper washer Vite di fondo lenta Foot screw loose Serrare la vite di fondo Tighten the foot screw Perdita di sensibilità Loss of sensitivity Boccole di scorrimento usurate Sliding bushes worn Sostituire le boccole di scorrimento Replace the sliding bushes Olio esausto Old oil Sostituire l olio Change the oil La forcella si dimostra troppo mor...

Страница 33: ... Tornillo de fondo flojo Serrer la vis de fond Bodenschraube anziehen Apriete el tornillo de fondo Perte de sensibilité Sensibilitätsverlust Pérdida de sensibilidad Les bagues de glissement sont détériorées Gleitbuchsen verschlissen Casquillos guía gastados Remplacer les bagues de glissement Gleitbuchsen auswechseln Sustituya los casquillos guía L huile est usée Öl verbraucht Aceite consumido Vida...

Страница 34: ...l level Olio eccessivamente viscoso Oil too viscous Sostituire l olio con quello raccomandato Replace the oil with the recommended type Scarsa scorrevolezza degli steli Fork legs not sliding properly Steli non correttamente allineati Fork legs not aligned correctly Allentare il perno ruota ed eseguire il corretto allineamento vedi Par 4 10 Loosen the wheel axle and align the fork see Par 4 10 ...

Страница 35: ... ersetzen Sustituya el aceite con el aconsejado La fourche est trop dure en toute condition Die Gabel zeigt sich in allen Situationen zu hart La horquilla es demasiado dura en cualquier condición Le niveau d huile est trop haut Ölstand zu hoch Nivel de aceite alto Vérifier le niveau d huile Ölstand kontrollieren Compruebe el nivel de aceite L huile est trop visqueuse Öl zu zäh Aceite demasiado vis...

Страница 36: ... gara After every race Dopo ogni uso After every use Dopo ogni uso After every use Sostituzione olio Change the oil 6 ore Every 6 hours 20 ore Every 20 hours 30 ore Every 30 hours 60 ore Every 60 hours Sostituzione anelli di tenuta Replace the sealing rings 6 ore Every 6 hours 20 ore Every 20 hours 30 ore Every 30 hours 60 ore Every 60 hours 4 2 Periodical maintenance table Quando la sospensione v...

Страница 37: ...e cada utilización Vidange de l huile Ölwechsel Sustitución aceite Toutes les 6 heures 6 Stunden Cada 6 horas Toutes les 20 heures 20 Stunden Cada 20 horas Toutes les 30 heures 30 Stunden Cada 30 horas Toutes les 60 heures 60 Stunden Cada 60 horas Remplacement des joints d étanchéité Auswechslung der Dichtringe Sustitución retenes Toutes les 6 heures 6 Stunden Cada 6 horas Toutes les 20 heures 20 ...

Страница 38: ... la superficie visibile dell anello di tenuta Rimontaggio Rimontare in sede il raschiapolvere 13 facendo pressione con le mani 4 3 Cleaning the dust seal REMEMBER This operation can be carried out with the fork installed on the motorcycle Dismantling Carefully clean the stanchion tube 26 before carrying out this operation With a small screwdriver prize the dust seal 13 off the slider 29 without sc...

Страница 39: ...t verkratzt wird Den Staubabstreifer entlang dem Tauchrohr nach unten führen und mit einem Druckluftstrahl den Innenbereich des Staubabstreifers und den Sitz am Gleitrohr säubern ACHTUNG Die Verwendung von Metallwerkzeugen für das Abtragen von Schmutzteilchen ist unbedingt zu vermeiden Die Holme einen kurzen Hub ausführen lassen dann die eventuell an den Tauchrohren vorhandenen Verunreinigungen en...

Страница 40: ... la chiave da 24 mm Rimuovere il tappo di chiusura 8 Abbassare lentamente il tubo portante 26 sul portastelo 29 24 mm 4 4 Draining the oil WARNING This operation cannot be carried out with the fork installed on the motorcycle REMEMBER We recommend loosening the fork cap a little before removing the fork leg from the fork yokes Remove the fork leg from the fork yokes according to the procedure in t...

Страница 41: ...Verschluss etwas zu lockern bevor der Holm von den Gabelbrücken abgenommen wird Den Holm nach der vom Hersteller des Motorrads vorgesehenen Prozedur von den Gabelbrücken abnehmen Den Holm am Radaufnahmefuß in senkrechter Position in den Spannstock einspannen Die Verschlusskappe 8 mit dem 24mm Schlüssel vollständig aufschrauben Die Verschlusskappe 8 abnehmen Das Gleitrohr 29 langsam vom Tauchrohr 2...

Страница 42: ...particelle solide è necessario procedere alla sostituzione degli elementi di tenuta NOTA Nel paragrafo 4 9 è illustrata la procedura per il riempimento olio Remove the pre load tube 11 and the spring 12 Free the fork leg from the vice and tip it into a container of a suitable size so that all of the oil runs out pump the fork to help the oil flow out REMEMBER Check appearance density and quality o...

Страница 43: ... einige vollständige Ausschubbewegungen ausführen WICHTIG Wenn man das Aussehen die Dichte und die Qualität des verbrauchten Öls betrachtet kann man Rückschlüsse auf den Zustand der Dichtelemente ziehen Wenn das Öl dickflüssig und dunkel ist und Festkörperchen aufweist ist eine Auswechslung der Dichtelemente erforderlich WICHTIG In Paragraf 4 9 ist die Prozedur für das Einfüllen des Öls erläutert ...

Страница 44: ...la vite 23 e la relativa rondella di tenuta in rame 22 Sfilare il tubo portante completo 26 dal portastelo 8 mm 4 5 Dismantling the fork leg slider and pumping element WARNING This operation must be done only after having drained all of the oil out of the slider Clamp the fork leg in the vice in a vertical position by the wheel axle clamp Unscrew the foot screw 23 with an 8 mm Allen key Remove scr...

Страница 45: ...n nachdem das Öl im Inneren des Holms vollständig abgelassen ist Den Holm am Radaufnahmefuß in den Spannstock einspannen Mit einem 8mm Inbusschlüssel die Bodenschraube 23 aufschrauben Die Schraube 23 und den zugehörigen Kupferdichtring 22 abnehmen Das komplette Tauchrohr 26 aus dem Gleitrohr ziehen 8 mm 4 5 Descomposición barra de horquilla botella elemento de bomba PRECAUCION Esta operación debe ...

Страница 46: ...ile rimuoverlo aiutandosi con un piccolo cacciavite a taglio e provvedere alla sostituzione NOTA Nel paragrafo 4 8 è illustrata la procedura per la ricomposizione stelo portastelo Remove the foot stopper 28 REMEMBER The foot stopper may stick on the slider To remove it simply turn the slider and use a rubber hammer to lightly tap the wheel axle clamp and free the stopper Rotate the stanchion tube ...

Страница 47: ...ar Mal auf den Bereich des Radaufnahmefußes geklopft zu werden um das Ablösen zu erleichtern Das Tauchrohr so drehen dass das Pumpenelement 18 mit Gegenfeder 19 herauskommt Die Gegenfeder 19 vom Pumpenelement 18 abnehmen Wenn das Segment 17 des Kolbens verschlissen ist kann es mit Hilfe einer kleinen Schraubendrehers abgenommen und ausgetauscht werden WICHTIG In Paragraf 4 8 ist die Prozedur für d...

Страница 48: ...ilizzando un piccolo cacciavite a taglio Con il medesimo cacciavite rimuovere l anello metallico di fermo 14 4 6 Removing the oil seals WARNING This operation must be done only after having dismantled the fork leg slider and pumping element Remove the dust seal 13 from its seat using a small flat tip screwdriver With the same screwdriver remove the metal stop ring 14 13 MZ004019 14 MZ004020 ...

Страница 49: ...inge ACHTUNG Dieser Arbeitsschritt darf erst ausgeführt werden nachdem Holm Gleitrohr Pumpenelement zerlegt wurden Den Staubabstreifer 13 mit einem kleinen Schraubendreher abnehmen Mit demselben Schraubendreher den metallenen Haltering 14 abnehmen 4 6 Eliminación de los retenes PRECAUCION Esta operación debe ser efectuada sólo después de haber descompuesto barra botella y elemento de bomba Saque e...

Страница 50: ...e rimossi non devono essere riutilizzati NOTA Nel paragrafo 4 7 è illustrata la procedura per il montaggio degli elementi di tenuta Protect the top part of the slider with a soft cloth A Use a screwdriver to remove the oil seal 15 Remove oil seal 15 and cup 16 WARNING The old oil seals and the dust seals must not be used again REMEMBER Paragraph 4 7 describes the procedure for assembling the seali...

Страница 51: ...ützen A Den Dichtring 15 mit einem Schraubendreher heraushebeln Den Dichtring 15 und den Teller 16 entnehmen ACHTUNG Die abgenommenen Dichtringe und Staubabstreifer dürfen nicht wiederverwendet werden WICHTIG In Paragraf 4 7 ist die Prozedur für den Einbau der Dichtelemente erläutert Proteja la parte superior de la botella con un trapo blando A Ayudándose con un destornillador afloje el retén 15 S...

Страница 52: ...ll interno del portastelo Applicare alcuni colpi di martello sull introduttore A fino a portare a battuta l anello di tenuta con la sede nel portastelo GREASE R5113AC 4 7 Fitting the oil seals WARNING The old oil seals and the dust seals must not be used again Smear the dust seal and the oil seal with some grease Insert cup 16 on the slider Insert the oil seal 15 in its seat using the specific int...

Страница 53: ... en su sede el retén 15 ayudándose con el especial introductor A hasta que el retén se apoye contra el alojamiento en la botella PRECAUCION El retén debe ser introducido de modo que el lado con muelle se encuentre en el interior de la botella Remache con el martillo el introductor A hasta introducir el retén hasta el fondo del alojamiento en la botella GREASE R5113AC 4 7 Montage des joints d étanc...

Страница 54: ...e replaced after having reassembled the stanchion tube on the slider see paragraph 4 8 Montare l anello di fermo 14 servendosi di un piccolo cacciavite a taglio verificando che risulti perfettamente inserito nell apposita gola e facendo molta attenzione a non rigare le parti circostanti NOTA Il raschiapolvere andrà rimontato dopo avere rimontato il tubo portante nel portastelo vedi Par 4 8 14 MZ00...

Страница 55: ... seguridad 26 ayudándose con un destornillador pequeño comprobando que se introduzca perfectamente en su ranura y prestando mucha atención a no rayar las partes alrededor NOTA El guardapolvo debe ser montado después de haber ensamblado barra de horquilla y botella véase par 4 8 Monter le jonc d arrêt 14 à l aide d un petit tournevis plat et vérifier qu il est parfaitement en place dans la gorge sp...

Страница 56: ... tube Fit foot stopper 28 on the end of the pumping element rod 8 mm 4 8 Ricomposizione stelo portastelo pompante ATTENZIONE Non montare per alcun motivo i componenti di uno stelo nell altro Inserire la contromolla 19 nell asta del pompante 18 Inserire il pompante 18 e contromolla 19 all interno del tubo portante NOTA Nel pompante è presente un segmento di tenuta 17 prima del rimontaggio verificar...

Страница 57: ...9 en la barra de horquilla NOTE En el elemento de bomba se encuentra un segmento de retención 17 antes de volver a montarlo compruebe que éste no esté gastado o dañado si fuera necesario sustitúyalo Preste la máxima atención y eventualmente ayúdese con un destornillador pequeño para facilitar la introducción del elemento de bomba en la barra de horquilla Monte el tampón de fondo 28 a la extremidad...

Страница 58: ...9 until the foot stopper touches the bottom of the slider Inserire il raschiapolvere 13 sul tubo portante facendo la massima attenzione a non danneggiare i labbri di tenuta Inserire delicatamente il tubo portante 26 nel portastelo 29 fino a portare a battuta il tampone di fondo con la parte inferiore del portastelo 13 MZ004026 MZ018007 26 29 ...

Страница 59: ... la barra el guardapolvo 13 prestando atención a no dañar los labios de hermeticidad Introduzca delicadamente la barra 26 en la botella 29 hasta colocar el tampón de fondo en contacto con la parte inferior de la botella Introduire le cache poussière 13 dans le plongeur en faisant attention à ne pas endommager les lèvres d étanchéité Introduire avec soin le plongeur 26 dans le porte fourreau 29 jus...

Страница 60: ... alla coppia prescritta vedi Tabella 1 Coppie di serraggio con una chiave a brugola da 8 mm Re assemble the dust seal 13 in its seat pressing it home with your hands Insert the foot screw 23 and a new copper washer 22 tighten to the recommended tightening torque see Table 1 Tightening torques with an 8 mm Allen wrench 13 MZ004029 22 23 MZ004028 ...

Страница 61: ... Staubabstreifer 13 durch Drücken mit den Händen wieder einsetzen Die Bodenschraube 23 und eine neue Kupferscheibe 22 einsetzen mit einem 8mm Inbusschlüssel mit dem vorgeschriebenen Anzugsmoment anziehen siehe Tabelle 1 Anzugsmomente Introduzca en su alojamiento el guardapolvo 13 presionando con las manos Introduzca el tornillo de fondo 23 y una arandela nueva de cobre 22 apriete al par de torsión...

Страница 62: ...llo prescritto possono modificare il comportamento della forcella in ogni sua fase Sollevare il tubo portante sul portastelo 24 mm 4 9 Filling with oil Slowly lower the slider on the stanchion tube Prepare the quantity of oil to pour into the fork leg see Table 2 Oil and quantity in a graduated container Pour roughly 1 3 of the oil required into the stanchion 26 then pump the fork a few times to r...

Страница 63: ... dann einige Pumpbewegungen ausführen um die Luft auszutreiben Die restliche Ölmenge einfüllen Das Gleitrohr vom Tauchrohr nach unten ziehen Einige Minuten warten dann das Luftvolumen kontrollieren siehe Tabelle 2 Öl und Füllmengen und gegebenenfalls Öl nachfüllen WICHTIG Ein geringeres oder höheres Luftvolumen oder ein anderes als das vorgeschriebene Öl können das Verhalten der Gabel in jeder Pha...

Страница 64: ...rrare il tappo di chiusura 8 con la chiave da 24 mm alla coppia prescritta vedi Tabella 1 Coppie di serraggio Insert spring 12 and the pre load tube 11 Fit fork cap 8 Tighten fork cap 8 with the 24 mm spanner to the recommended tightening torque see Table 1 Tightening torques 12 11 MZ004009 8 MZ004032 ...

Страница 65: ...de serrage Die Feder 12 und den Vorspannring 11 einsetzen Die Verschlusskappe 8 ganz zuschrauben Mit dem 24mm Schlüssel die Verschlusskappe 8 mit dem vorgeschriebenen Anzugsmoment anziehen siehe Tabelle 1 Anzugsmomente Introduzca el muelle 12 y el tubo de precarga 11 Apriete hasta el fondo el tapón de cierre 8 Con la llave de 24 mm apriete el tapón de cierre 8 al par de torsión indicado véase Tabl...

Страница 66: ...steli della forcella Nel caso in cui la forcella sia corredata da testa e crociera fa fede la procedura di installazione contenuta nel manuale del costruttore della moto 4 10 Fitting the fork back on the motorcycle WARNING Fit the fork back onto the frame following the instructions in the motorcycle manufacturer s manual as for the steering elements brakes and wheel The incorrect assembly of these...

Страница 67: ...n einwandfreies Funktionieren der Gabel muss das Rad folgendermaßen auf die Gabel montiert werden Den Bolzen durch die rechte Radaufnahme das Rad und die linke Radaufnahme schieben Die Bolzenmutter auf der linken Seite anschrauben und fest anziehen Die Gabelholme ein paar Mal vollständig ausfahren lassen Falls die Gabel aus oben und unten Gabelbrücke ausgerüstet wird bitte folgen das Prozedurverfa...

Страница 68: ...is té supérieur Schrauben Lenkerkopf Tornillos puente de horquilla 25 Viti base di sterzo Steering crown screws Vis té inférieur Schrauben Lenkerfuß Tornillos cabeza de horquilla 10 Stelo Fork leg Fourreau Holm Barra de horquilla Tipo Type Type Typ Tipo Quantità Quantity Quantité Menge Cantidad Volume aria Air volume Volume d air Luftvolumen Volumen aire Destro Right Droit Rechts Derecha Olio MARZ...

Страница 69: ...SHIVER 69 MARZOCCHI Forc Shiver 32 Factory Works 13 9 11 12 8 26 17 18 19 28 14 15 16 20 21 13 14 15 22 23 16 29 31 ...

Страница 70: ...anty also does not include any expenses related to the transportation of the 6 GARANZIA Nel caso in cui vengano riscontrati difetti attinenti a materiali o lavorazione su uno qualsiasi dei componenti del sistema di sospensione Marzocchi entro i termini stabiliti dalla presente garanzia 2 anni il medesimo componente difettoso dovrà essere riparato o sostituito a facoltà della Marzocchi S p A gratui...

Страница 71: ...aje anómalo reparaciones ejecutadas de manera incorrecta o instalación impropia de los repuestos uso de repuestos o acesorios que no correspondan à las características establecidas por Marzocchi S p A ejecución de modificaciones no recomendadas o aprobadas por escrito por Marzocchi S p A desarrollo de actividades como virtuosidades acrobáticas saltos acrobáticos subidas y o normal desgaste y deter...

Страница 72: ...tuire i suddetti componenti La presente garanzia inoltre non copre le eventuali spese sostenute per il trasporto del sistema di sospensione Marzocchi a o da un rivenditore autorizzato Marzocchi i costi della manodopera richiesta per rimuovere dal veicolo il suddetto sistema di sospensione Marzocchi oppure l indennizzo richiesto per porre riparo al disagio dovuto al mancato utilizzo del sistema di ...

Страница 73: ... el número de serie del sistema de suspensión Marzocchi sea alterado borrado no se pueda leer o haya sido dañado de alguna manera 2 COMPRADOR esta garantía se concede únicamente al comprador original del sistema de suspensión Marzocchi y no se entiende extendida a terceros Los derechos que pertenecen al comprador según los términos de esta garantía no se pueden ceder 3 DURACIÓN esta garantía empez...

Страница 74: ...sed on alleged negligence or other tortious implicite od esplicite dichiarazione od impegni stipulati precedentemente e rappresenta il contratto indivisibile tra le parti con riferimento alla garanzia di questo sistema di sospensione Marzocchi Tutte le garanzie implicite od esplicite non contenute nel presente documento sono espressamente escluse 6 DANNI Salvo espressamente prescritto dalla presen...

Страница 75: ...TES ASOCIADOS A UNA RECLAMACIÓN SEGÚN LOS TÉRMINOS DE ESTE ACUERDO DONDE LA RECLAMACIÓN SE BASE SOBRE EL CONTRATO ILÍCITO U OTRO Las declaraciones de garantía sobredichas son exclusivas y en lugar de todos los otros remedios Hay estados donde no se permite la exclusión o la limitación de daños indirectos o emergentes por lo tanto esta limitación o exclusión no se puede aplicar 7 RENUNCIA LAS EVENT...

Страница 76: ...hi S p A il solo ed esclusivo rimedio per l acquirente sarà costituito dalla riparazione o sostituzione dei materiali risultati difettosi sulla base di quanto precedentemente stabilito Nessun rivenditore e nessun altro agente o dipendente della Marzocchi S p A è autorizzato ad apportare variazioni estendere od ampliare la presente garanzia 8 AVVERTENZA Installare riparare ed usare sempre il sistem...

Страница 77: ...iamente Ningun revendedor y ningun otro agente o dependiente de Marzocchi S p A es autorizado a hacer variaciones a prolongar o extender esta garantía 8 ADVERTENCIA instalar reparar y utilizar siempre el sistema de suspensión Marzocchi en conformidad a las instrucciones contenidas en el respectivo Manual de instrucción provisto por Marzocchi S p A 9 OTROS DERECHOS esta garantía les asegura específ...

Страница 78: ...under licence by Marzocchi S p A fattura o scontrino fiscale In tal caso Vi preghiamo di aver cura di riportare nome cognome indirizzo data di acquisto specificando il tipo di problema o difetto rilevato La filosofia di Marzocchi S p A è quella di offrire un servizio all insegna della cortesia ed efficienza in riferimento ai reclami sottoposti nel corso della garanzia Trattate con cura il sistema ...

Страница 79: ... un revendedor autorizado o bien un centro de asistencia Marzocchi adjuntando copia de la factura o del talón fiscal En este caso les rogamos indicar nombre apellido dirección fecha de compra y especificar el tipo de problema o defecto observado La filosofía de Marzocchi S p A es la de ofrecer un servicio de cortesía y eficiencia con referencia a las reclamaciones sometidas en el curso de la garan...

Страница 80: ...Cod 900884 Cod 9001014 MARZOCCHI S p A Via Grazia 2 40069 Lavino di Zola Predosa Bologna ITALY Ph 39 0 51 61 68 711 Fx 39 0 51 75 88 57 Settembre 2003 Edizione 00 ...

Отзывы: