background image


16


Marker Configuration Submenu 


  Markers  


Use this setting to enable or disable all on-screen markers. This setting affects the center marker, full screen markers, 
16:9 markers and 4:3 markers. 


  Center Marker 


Use this setting to display a center marker on the screen.  


  16:9 Markers 

 
Use these settings to superimpose one of 12 markers on the screen when in 16:9 mode. This setting is disabled when 
the aspect ratio is in Full Screen or 4:3 mode, or Pixel-to-Pixel, Underscan, or H/V Delay is enabled.   


4:3 


13:9 


14:9 


1.85:1 


2.35:1 


95% Safe 


93% Safe 


90%Safe 


88% Safe 


85% Safe 


80% Safe 


User


16:9 Marker Examples: 


Marker Configuration Submenu 
 

90% Safe Area 

OFF (No Marker) 

4:3 Aspect Ratio Marker 

2.35:1 Aspect Ratio 


13


  Check Field 


Use the check field modes for monitor calibration or to analyze individual color components of an image. In 
Monochrome mode, all color is disabled and only a grayscale image is shown. In Blue, Green, and Red check field 
modes, only the selected color will be shown. 


Use the following procedure when calibrating the monitor to SMPTE color bars with the following procedure: 
 

1. 

Allow the monitor to warm up for at least 5-10 minutes. 

 
2. 

Display SMPTE split-field color bars on the monitor using an external source. 

 
3. 

Enable Monochrome mode

 
4. 

Locate the pluge pattern (super black, black, and gray bars) at the lower-right corner of the screen. Adjust the Brightness knob until 
there is no visible difference between the super black and black bars, but the gray bar is still visible. 

 
5. 

Adjust the Contrast knob until an even grayscale appears along the top bars. 

 
6. 

Disable Monochrome mode

 
7. 

Enable Blue Check Field mode and adjust the Color knob so that the outermost bars (white and blue) appear to match in brightness. 

 
8. 

Composite NTSC only: Adjust the Tint knob until the third bar from the left (cyan) and the third bar from the right (magenta) appear to 
match in brightness. 

 
9. 

Disable Blue Check Field mode


  Ratio 


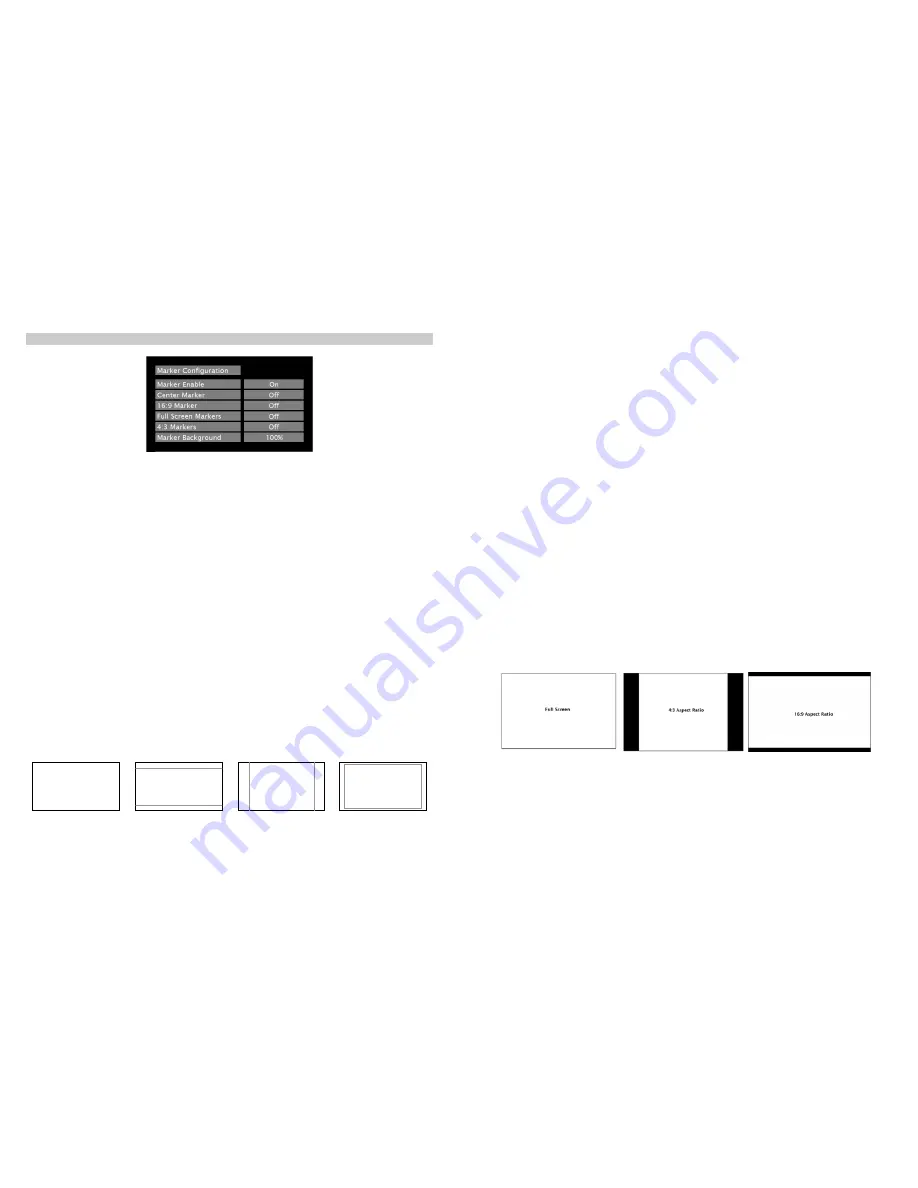
Use to switch between Full Screen, 4:3 and 16:9 aspect ratios. 


As the V-LCD70XHB-HDA monitor has a native resolution of 800 x 480 RGB pixels, incoming images are automatically 
scaled to fit the screen: 
 
• 

In Full Screen mode, images are scaled to fill the entire screen (800 x 480).   

 
• 

In 4:3 mode, images are scaled to fill the center 4:3 portion of the screen (640 x 480).  With a 16:9 source, images 
will be centered with a black letter-box added on the left and right sides.  


• 

In 16:9 mode, images are scaled to a 16:9 portion of the screen (800 x 450), with a black letter-box added top and 
bottom. 


Note: The aspect ratio setting is ignored when Pixel-to-Pixel mode is enabled. 


  Pixel-to-Pixel Mode 


Use this setting to enable Pixel-to-Pixel mode.  You have the option of viewing the center 800 x 480 (Centered Pixel-
to-Pixel mode) or selecting any 800 x 480 area on the screen (User Pixel-to-Pixel mode).  The User Pixel-to-Pixel 
option is not available when the incoming image is 800 x 480 or lower - only the Centered Pixel-to-Pixel mode can be 
used in this case.   
 

Содержание V-LCD70XHB-3GSDI

Страница 1: ...CA 90245 Tel 800 800 6608 310 333 0606 Fax 310 333 0688 www LCDRacks com sales lcdracks com 511v2 1 Marshall Electronics Model No V LCD70XHB HDA Model No V LCD70XHB HDMIPT Model No V LCD70XHB 3GSDI 7...

Страница 2: ...l container for a period of one year from the purchase date This warranty is extended to the first consumer only and proof of purchase is necessary to honor the warranty If there is no proof of purcha...

Страница 3: ...Compatible Input Formats 8 Menu Overview 9 Main Menu and Navigation 11 Video Configuration Submenu 11 Marker Configuration Submenu 16 Filter Configuration Submenu 19 System Configuration Submenu 20 F...

Страница 4: ...x BNC Female 75 Note The HDMIPT module will NOT pass through HDCP protected content Also the HDMIPT module will NOT pass through EDID information Video Output Active Loop Through Video 1 x BNC Female...

Страница 5: ...3GSDI V3 xx vx xx vx xx System This shows the System firmware version of your monitor Keypad This shows the Keypad firmware version of your monitor Module This shows your module version HDMIPT or 3GSD...

Страница 6: ...ion uses the 4 Pin XLR input and the center position is OFF Battery life can be preserved by setting this switch to the OFF position when the monitor is not in use Accessory Service Connector This con...

Страница 7: ...rea is intended for the Marshall Electronics V LCD70XHB modules which are factory installed Power Input Connect 12VDC to the 4 Pin XLR power input connector Power can be supplied from the included pow...

Страница 8: ...move up and down at intervals of 2 from 0 100 Freeze Input Use the Freeze function to freeze the current image on the screen Select this menu item again Unfreeze to return to the real time video inpu...

Страница 9: ...m Configuration Submenu Input Format OSD Use this option to enable on screen display of input format status in the upper left corner of the screen Curtain Color Use this option to change the curtain c...

Страница 10: ...Pixel 3 Feature enabled for HDMIPT models only 4 Feature enabled for 3GSDI model only 5 Horizon Indicator option is only applicable when you have the V LCD HI accessory connected to your monitor 19 F...

Страница 11: ...100 intensity black Example 80 Marker in 4 3 Mode Normal Background Black Background 11 Main Menu and Navigation Access the main menu by pushing and holding the MENU button on the front panel of the...

Страница 12: ...lternately the image adjustment knobs Brightness Color Tint Contrast can be used to easily adjust the bias and gain settings as shown below The knobs affect whichever row of controls gain or bias is c...

Страница 13: ...l there is no visible difference between the super black and black bars but the gray bar is still visible 5 Adjust the Contrast knob until an even grayscale appears along the top bars 6 Disable Monoch...

Страница 14: ...ll move your selected area left and right and the CONTRAST knob will move your selected area up and down 3 Press the BRIGHT or CONTRAST knob to confirm your selection The selected portion of the scree...

Отзывы: