Mammoth Fans COMMERCIAL II SERIES |
15
14
CLEANING & MAINTENANCE
1. Please read the precautions very carefully before operating.
2. Please confirm the wirings have been connected correctly, then turn the main knob to “ON”. Now it’s powered on.
3. Press the ‘start speed switch’ twice to use the ‘start speed switch’ to control the rotation speed.
4. Press the ‘rotation button’ twice to stop the motor. Then turn the main knob to OFF to completely stop the rotation.
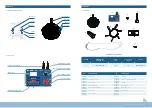
Function description:
1. LCD display: If the interface isn’t used within 1 minute, the LCD screen will turn from bright to dark. The brightness is restored
after input.
2. Main switch: When the switch points to OFF, it is powered off; when the switch points to ON, it is powered on.
3. Rotation speed button: multi-function knob. Please check the below table for details.
Cleaning & maintenance
1.
Please ensure the power to your Mammoth Fan is isolated before completing any cleaning and maintenance work.
Also ensure you follow all local regulations in regards to safe working at heights. Periodic cleaning of your ceiling fan
is the only maintenance required. Use a soft brush or lint free cloth to avoid scratching the paint finish.
2.
A damp cloth can be used to wipe down the blades, however, ensure that excess water doesn’t enter any wiring
connections as this could damage the fan and cause a safety issue.
3.
Ensure that the fitting does not come in contact with any organic solvents or cleaners.
4.
The motor has a permanently lubricated ball bearing which does not require maintenance or re-oiling.
OPERATING INSTRUCTIONS
TECHNICAL INFORMATION
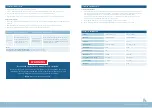
SKU#
211404 / 211405
211406 / 211407
Model no.
SHVLS-D5BAA25
SHVLS-D5BAA30
Diameter
2.5m
3.0m
Rated voltage
220-240V - 50Hz
220-240V - 50Hz
Rated power
150W
200W
Full load current
0.7A
1A
Max. speed
130RPM
110RPM
Air volume at max. speed
4200m3/min
5150m3/min
Climate class
T - Tropical
T - Tropical
Weight
41kg
44kg
WARNING
Please read the instruction manual before operation.
Ensure the fan is clear of all obstructions before operation. If the fan is unbalanced or noisy,
immediately shut it down and contact Mammoth Fans support. Ensure the power is isolated
before any maintenance work is carried out on the fan or controller.
NOTE:
Always start the fan on low speed.
Function
Adjust rotation speed
Start, stop button
Malfunction reset
Definition
Rotate the rotation speed
button clockwise to increase
speed and anticlockwise
to decrease speed.
Press the rotation
speed button once
to start and stop.
When ‘malfunction’ appears on the LCD display,
press the rotation speed button once to reset it.
If this doesn’t work, contact Mammoth following
the guide shown on screen.
Note:
Short press of the rotation speed button:
press for less than 2 seconds
Long press of the rotation speed button:
press for more than 2 seconds
Содержание COMMERCIAL II Series
Страница 13: ...C O M M E R C I A L I I S E R I E S...


