17
mOUNTiNg FiLAmENT SPOOLS & ATTAChiNg USB CABLE
B
SETTING UP YOUR MAkERBOT REPLICATOR 2X EXPERIMENTAL 3D PRINTER
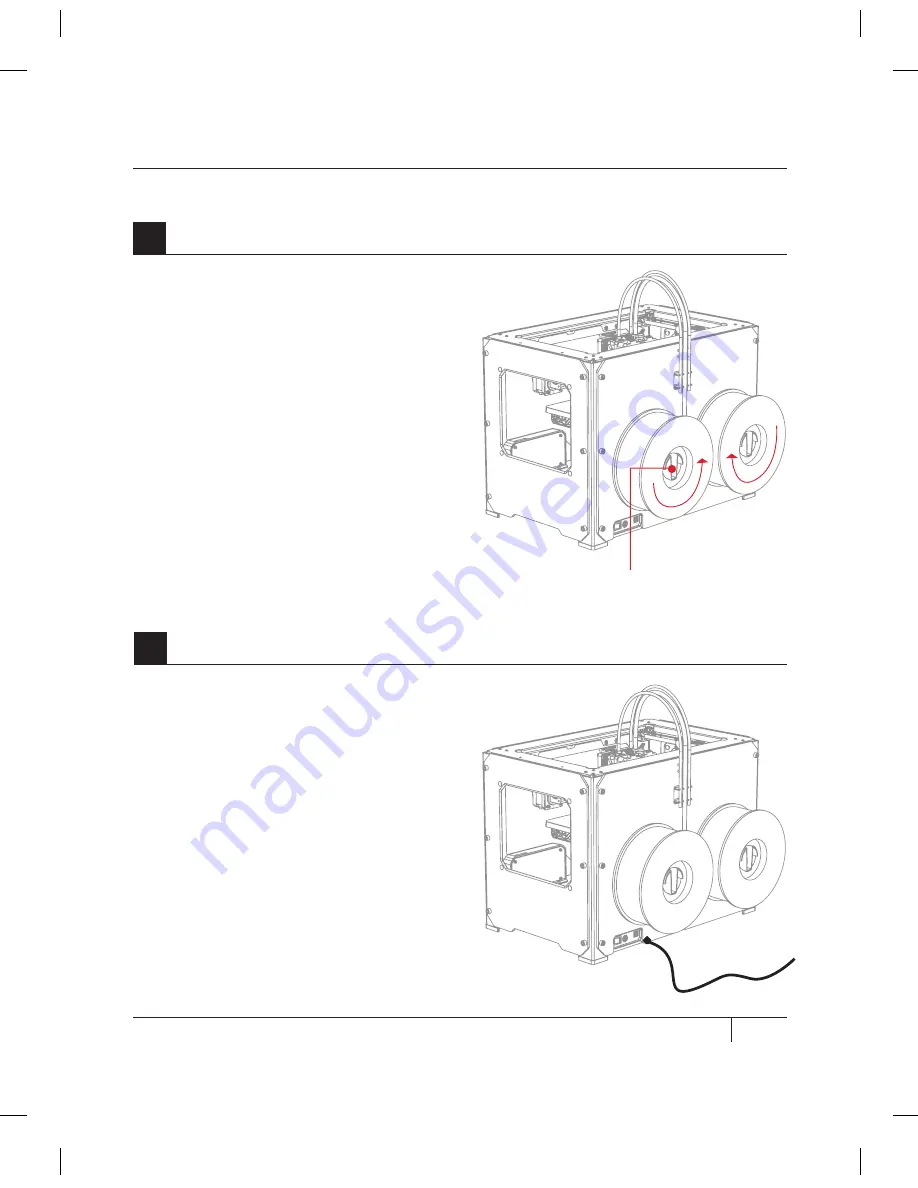
7a. Open the boxes containing the
MakerBot ABS Filament. Remove the spools
from their bags.
7b. Fit each spool onto a spool holder. Ensure
that the spool on the right [when viewed from
the back] will unwind clockwise and that the
spool on the left will unwind counterclockwise.
To install a filament spool, squeeze the spool
holder and push the spool on until it locks. Do
not let the filament uncoil or tangle as you
load the spools onto the back of the MakerBot
Replicator 2X. Both spools should spin so that
the MakerBot ABS Filament will unwind from
the bottom of the spool.
7
Mounting the Filament Spools
8a. Locate the USB-A to USB-B cable.
Insert the USB cable into the USB-B port on
the back of the MakerBot Replicator 2X. Do
not attach the other end of the USB cable to
anything yet.
8b. Do not plug the AC power cord into an
electrical outlet until step 11 of this section.
8
Attaching the USB Cable
Spool
Holder
USB cable
Содержание Replicator 2X
Страница 1: ...USER MANUAL DUAL EXTRUSION...
Страница 2: ......
Страница 4: ...Welcome Let s get started A...
Страница 8: ...Setting Up Your MakerBot Replicator 2X Experimental 3D Printer B...
Страница 20: ...Startup Process Leveling Loading Testing C...
Страница 35: ...35 NOTES C Startup PROCESS leveling loading testing...
Страница 36: ...Making an Object with MakerBot MakerWare D...
Страница 37: ...37 How to make an object using a computer and MakerBot MakerWare D MAkING AN OBJECT WITH MAkERBOT MAkERWARE...
Страница 46: ...E Troubleshooting Diagnostics and Maintenance...
Страница 64: ...MakerBot One MetroTech Center 21st Floor Brooklyn NY support makerbot com makerbot com...


