


58
Changing Parameter Settings
To change a PARAMETER, the sequence of keystrokes is as follows:
Making Changes to Parameters - Keypad Sequence:
Switch the
STOP END OF CYCLE
switch
DOWN
:
Turn
POWER ON
. Wait 5 seconds, until display says ( x)
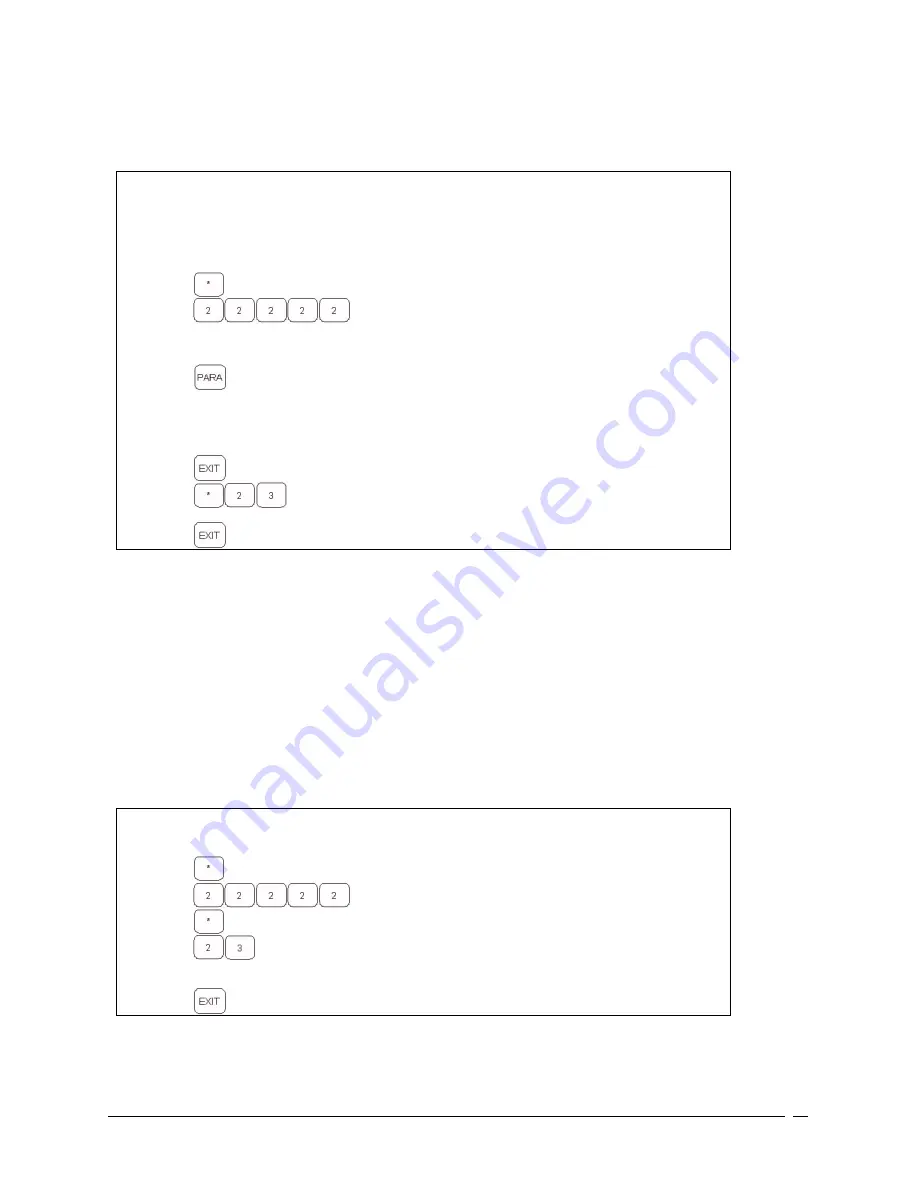
Press
Display will say: (PASSWORD)
Press
Display will say: (P x)
This is the
PROGRAM MODE
To alter a PARAMETER:
Press
Press repeatedly until the parameter you want is displayed.
If you accidentally pass it, use the * key to back up.
With the proper parameter displayed, enter the NEW number.
Enter 5 digits; use leading zeros if necessary.
For correct entries, follow specific directions given in the
PARAMETER section.
Press
Display will say: ( P x)
Press
Display will say: (SAVING )
This saves the changes made
Press
Display will say: ( P x) when settings are complete.
Additional information can be found in the KEYPAD section.
Saving Parameters in the EEPROM
If the changes you have made are PERMANENT, SAVE them in EEPROM.
Sometimes during normal operation, electrical noise or RF (Radio Frequency) noise will corrupt the processor memory. It
may be necessary to do a CLEAR to fix this problem.
A "CLEAR" will clear all data from memory and replace it with information stored in the EEPROM.
So it is a good idea to have an exact copy of RAM stored in the EEPROM for just such an emergency.
To copy and SAVE all system parameter information into the EEPROM, the sequence of keystrokes is as follows
Save Parameters Keypad Sequence:
Press
Display will say: (PASSWORD)
Press
Display will say: (P x)
Press
Display will say: (INSTR __)
Press
Display will say: (SAVING )
Wait: when done, Display will say: (P x)
Press
Display will say: ( x )
Содержание Weigh Scale Blender
Страница 12: ...12...
Страница 25: ...25 5 Additive 53 3g 5 3 parts Batch Total 1000g 100 parts...
Страница 35: ...35 21 KEYPAD Explained in next section next page...
Страница 56: ...56 CPL 00 00 PTD 20 20 MCT 00 00...
Страница 77: ...77 Replace this page with the WIRING DIAGRAM...


