background image

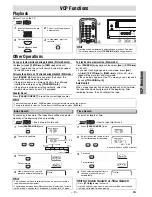
DVD Functions

EN

– 13 –

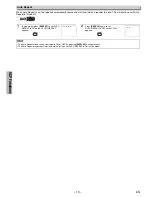
1

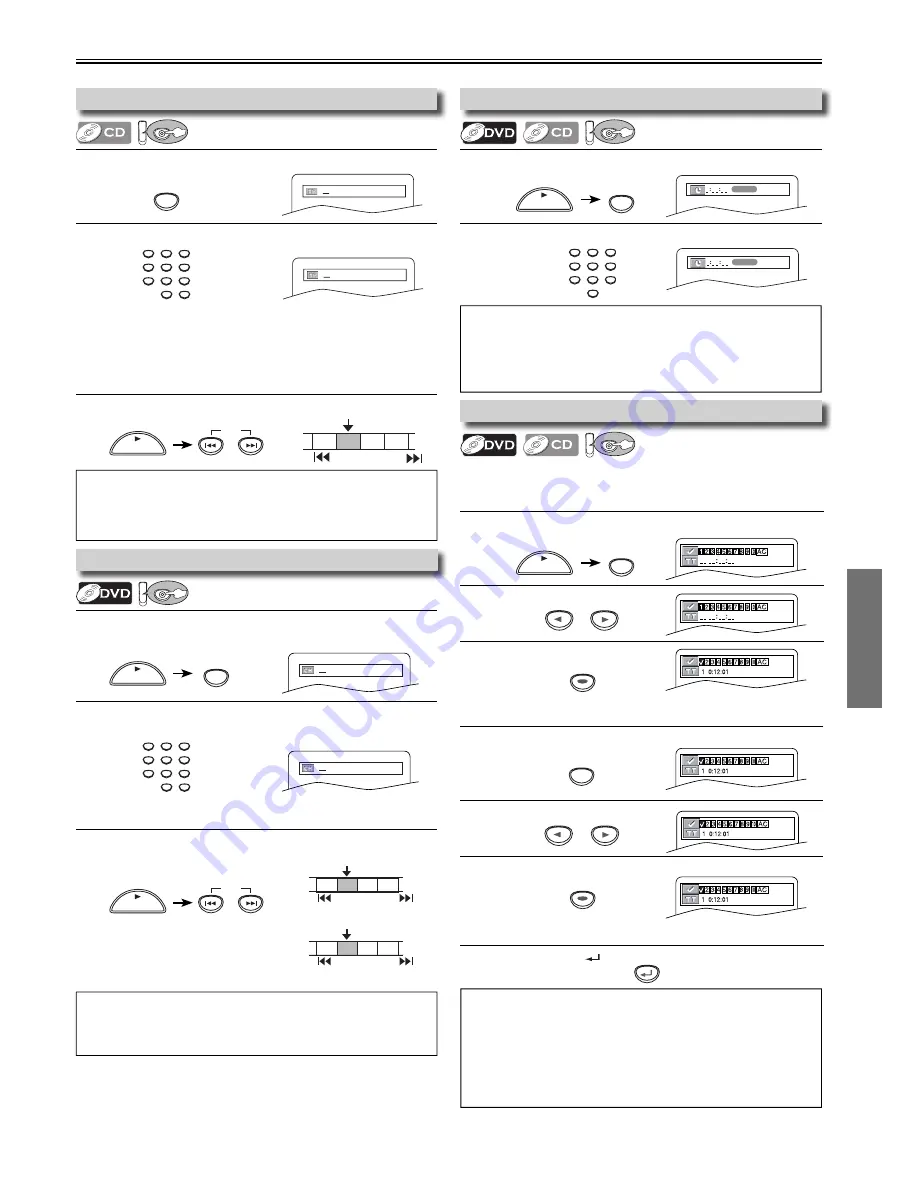
Press 

[RETURN

]

.

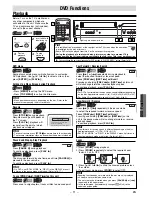
1

Press 

[SEARCH MODE]

 repeatedly until the marker display 

appears.

2

Select the marker.

3

Press 

[ENTER]

 at the desired marker.

1

Press 

[SKIP 

H

G

during playback.

1

Press 

[SEARCH MODE]

 repeatedly until the marker display 

appears.

2

Select a marker.

3

Press 

[ENTER]

.

1

Press 

[SEARCH MODE]

 repeatedly until the Time Search 

display appears.

2

Select a desired disc time by using 

the


Number buttons

 within 

30 seconds.

1

Press 

[SKIP 

H

G

during playback.

1

Press 

[SEARCH MODE]

 once for the Chapter Search.

Press

 [SEARCH MODE]

 twice for the Title Search.

2

Select title/chapter number by using 

the Number buttons


within 30 seconds.

1

Press 

[SEARCH MODE]

.

2

Select track number by using 

the Number buttons

 within 30 seconds.

Search Functions

1:29:00

TOTAL

To return to the marker later

To exit the marker screen

/29

/29

/12

/12

TR 1 TR 2 TR 3 TR 4

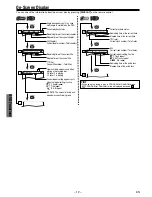
Current Track

             (TR)  

SKIP

SKIP

Using [SKIP 

H

G

]

CH 1 CH 2 CH 3 CH 4

Current Chapter

             (CH)  

or

SKIP

TT 1 TT2 TT3 TT4

Current Title
             (TT)  

SKIP

SKIP

SKIP

Using [SKIP 

H

G

]

1:29:00

TOTAL

Hint

• When there is no need to enter a number, “0” appears automatically.
  For example, “0: 0_: _ _” appears in the Time Search display if the 

total time of the title or track is less than 10 minutes.

• Press 

[CLEAR/C.RESET]

 to erase the incorrect input at step 2.

Hint

• The Marker display will disappear in about 30 seconds when there is no output.
• To clear a marker, select the marker to be cleared at step 2 in the 

section “To set a marker” or “To return to the marker later” and 
then press 

[CLEAR/C.RESET]

.

• Opening the disc tray or turning off the power will erase all markers.
• Selecting “AC” at step 2 in the section “To set a marker” or “To 

return to the marker later” will also erase all markers.

SEARCH

MODE

SEARCH

MODE

or

or

RETURN

•  For the disc with less than 10 tracks, press the track number directly.
•  For discs with more than 10 but less than 99 tracks, to play single-

digit track, press 

[0]

 first, then the track number (e.g. for track 3, 

press 

[0], [3]

). To play a double-digit track, press the track number.

(If the disc has no chapters)

Hint

• 

[+10]

 can also bring the Track search display, except for the disc 

with less than 10 tracks. For such a disc, track search can be done 
by just pressing the track number.

SEARCH MODE does not work during Programmed or Random Playback.

Using Track Search


DV

DVD

Using Time Search


DV

DVD

Marker Setup


DV

DVD

This feature allows you to assign a specific point on a disc to 
be called back later.

To set a marker

Hint

• Depending on the disc being played, this function can also be 

performed by directly entering the desired chapter number with 

the 

Number buttons

. Refer to the manual accompanying the disc.

Using Title / Chapter Search


DV

DVD

PLAY

SKIP

PLAY

SKIP

SEARCH

MODE

PLAY

SEARCH

MODE

PLAY

1

2

3

4

5

6

7

8

9

0

+10

1

2

3

4

5

6

7

8

9

0

+10

1

2

3

4

5

6

7

8

9

0

+10

SEARCH

MODE

PLAY

ENTER

ENTER

Содержание DV200MW8

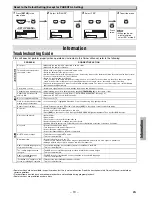
Страница 1: ...on Warning 4 About Copyright 4 Symbols Used in This Manual 4 Maintenance 4 About Video Cassettes and Discs 5 Playable Video Cassettes 5 Playable Discs 5 Unplayable Discs 5 Setup Connections 6 Connection to a TV 6 Connection to an Audio System 6 Preparation for Use 7 Front Panel Indicator Lights 7 Selecting DVD or VCP Operation 7 Rear Terminals 7 Turning on Unit for the First Time 7 Remote Control ...

Страница 2: ...t occur in a particular installation If this equipment does cause harmful interference to radio or television reception which can be determined by turning the equipment off and on the user is encouraged to try to correct the interference by one or more of the following measures 1 Reorient or relocate the receiving antenna 2 Increase the separation between the equipment and receiver 3 Connect the e...

Страница 3: ... into the outlet try reversing the plug If the plug should still fail to fit contact your electrician to replace your obsolete outlet Do not defeat the safety purpose of the polarized plug 12 Power Cord Protection Power supply cords should be routed so that they are not likely to be walked on or pinched by items placed upon or against them paying particular attention to cords at plugs convenience ...

Страница 4: ...es only unless otherwise authorized by Macrovision Reverse engineering or disassembly is prohibited Symbols Used in This Manual The following symbols appear in some headings in this manual Description refers to playback of video cassette tapes Description refers to playback of DVD Video discs Description refers to playback of Audio CDs Manufactured under license from Dolby Laboratories Dolby and t...

Страница 5: ...ear the marks above If you use non standardized discs this unit may not play them back Even if they are played back the sound or video quality will be compromised 7 Only discs recorded in the video format and finalized can be played back Unfinalized discs cannot be played back Depending on the recording status of a disc the disc may not be played back at all the picture or sound may not be smooth ...

Страница 6: ...efer to Basic TV Connection on the front page before you use this unit Audio DVD VCP or or and After connecting to your TV You will need to switch to video input on your TV This is usually marked TV VIDEO INPUT or AUX Please refer to your TV owner s manual for details INPUT MODES FOR COMMON TV BRANDS Listed below are inputs for common brand name TV s Admiral AUX Curtis Mathis LINE1 LINE2 00 90 91 ...

Страница 7: ... 2 3 4 5 6 1 DIGITAL AUDIO OUT COAXIAL Jack Connect a digital audio coaxial cable from here to the DIGITAL AUDIO IN jack of a digital audio receiver cable not included 2 DVD AUDIO OUT analog Jacks Connect an audio cable from here to the AUDIO IN jacks of your television or audio equipment cable included 3 S VIDEO OUT Jack Connect an S Video cable from here to the S VIDEO IN jack of your television...

Страница 8: ... the point for A B repeat To exit the LANGUAGE SELECT Menu To reset the tape counter DISPLAY To display the current disc mode To display the current disc mode To display the current tape counter DVD To select DVD output mode To activate DVD mode To select the DVD output mode To activate DVD mode ENTER To move the cursor and determine its position To move the cursor and determine its position To se...

Страница 9: ...or LP mode and 3 minutes for SLP mode Hint for Index Search Time Search Press STOP C to stop the search If a tape ends during a search your search will be canceled and the tape will rewind to the beginning Time Search To search by length of time INDEX SEARCH 0 3 INDEX SEARCH ss BB or SEARCH MODE TIME SEARCH PLAYB or 1 minute 9 hours and 59 minutes To rewind To fast forward ss BB To cue or review p...

Страница 10: ... playback The Auto Repeat playback will start automatically if you set AUTO REPEAT to ON in stop mode 1 In stop mode press REPEAT to set AUTO REPEAT to ON so that AUTO REPEAT appears AUTO REPEAT B REPEAT Auto Repeat When Auto Repeat is on the tape will automatically rewind and start over when it reaches the end This will continue until Auto Repeat is turned off VCP VCP REPEAT ...

Страница 11: ...st and then PLAY Resume ON Hint A prohibited icon may appear at the top right on the TV screen when the operation is prohibited by the disc or this unit Some DVDs may be played from title 2 or 3 due to specific programs During the playback of a two layered disc pictures may stop for a moment This happens while the 1st layer is being switched to the 2nd layer This is not a malfunction Hint On DVDs ...

Страница 12: ...RANDOM will be displayed instead of 2 CH Chapter Current chapter number Total chapters TT Title Current title number Total titles Current repeat setting appears only when the repeat setting is active C Chapter repeat T Title repeat A B A B repeat 11 16 0 00 00 0 03 30 1 3 0 00 00 1 23 45 T L1 BIT RATE The amount of audio and video data currently being read Elapsed time of the current chapter Remai...

Страница 13: ...r in about 30 seconds when there is no output To clear a marker select the marker to be cleared at step 2 in the section To set a marker or To return to the marker later and then press CLEAR C RESET Opening the disc tray or turning off the power will erase all markers Selecting AC at step 2 in the section To set a marker or To return to the marker later will also erase all markers SEARCH MODE SEAR...

Страница 14: ...he first track in the original order However your programmed playback can be restarted when you follow the above steps Your programs are still stored until either the disc tray is open or power is turned off To repeat the current track in the program press REPEAT repeatedly until TRACK appears during playback To repeat the entire program press REPEAT repeatedly until ALL appears during playback Hi...

Страница 15: ... subtitle language setting If you choose any other languages will be displayed instead Refer to page 20 Some discs will only allow you to change the subtitle from the disc menu Refer to the manual accompanying the discs for details Hint For DVDs when playing back 96kHz with Virtual Surround function the sound will be down sampled to 48kHz For Audio CDs Virtual Surround will not be effective if the...

Страница 16: ...DOLBY DIGITAL from the QUICK SETUP menu quickly AUDIO ORIGINAL ENGLISH FRENCH SUBTITLE OFF ENGLISH FRENCH DISC MENU ENGLISH FRENCH SPANISH PLAYER MENU ENGLISH FRANÇAIS ESPAÑOL LANGUAGE menu P16 A Step 5 P17 B Step 5 P17 C Step 5 SETUP LANGUAGE AUDIO SUBTITLE DISC MENU PLAYER MENU ORIGINAL OFF ENGLISH ENGLISH 3 Select the desired item 1 Press SETUP in the stop mode SETUP CUSTOM LANGUAGE DISPLAY AUD...

Страница 17: ...DRC Dynamic Range Control Default ON Set to ON to compress the range between soft and loud sounds DOLBY DIGITAL QUICK Default BITSTREAM Set to BITSTREAM when the unit is connected to a Dolby Digital decoder BITSTREAM Outputs Dolby Digital Signals PCM Converts the Dolby Digital into PCM 2 channel DRC ON DOWN SAMPLING ON DOLBY DIGITAL BITSTREAM OFF ON BITSTREAM DOWN SAMPLING Default ON Set to ON whe...

Страница 18: ...terial inappropriate for children Parental Levels Parental Level allows you to set the rating levels of your DVD discs Playback will stop if the ratings exceed the levels you set Follow steps 1 to 3 in the CUSTOM Menu section on page 16 To Change the Password for Parental Controls You can change your password for parental controls Follow steps 1 to 3 in the CUSTOM Menu section on page 16 D PARENTA...

Страница 19: ...n and out when making a copy of a videotape You cannot copy a copyrighted videotape You are experiencing copy guard protection Cannot remove the tape Check if this unit is in the VCP mode If not press VCP on the remote control to switch the mode DVD No picture Connect the video cable firmly Insert a correct video disc that plays on this unit Press DVD on the remote control Check if the DVD SOURCE ...

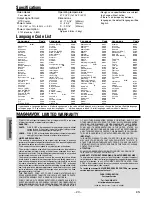
Страница 20: ...FROM STATE TO STATE IF AT ANY TIME DURING THE WARRANTY PERIOD YOU ARE UNABLE TO OBTAIN SATISFACTION WITH THE REPAIR OF THIS PRODUCT PLEASE CONTACT FUNAI CORP ATTENTION FUNAI CORP RESERVES THE RIGHT TO MODIFY ANY DESIGN OF THIS PRODUCT WITHOUT PRIOR NOTICE WARRANTY STATEMENT REGARDING NON AUTHORIZED REPAIRS To obtain warranty service you must take the product or deliver the product freight prepaid ...

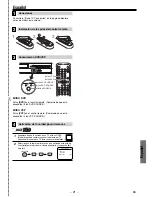
Страница 21: ...CE Luz DVD SOURCE Luz VCP SOURCE MODO DVD Pulse DVD en el control remoto Compruebe que está encendida la luz DVD SOURCE MODO VCP Pulse VCP en el control remoto Compruebe que está encendida la luz VCP SOURCE Consulte la Basic TV Connection en la página delantera antes de utilizar esta unidad VCP VCP 1 Asegúrese de que la entrada de su TV esté en VIDEO El nombre puede cambiar según el fabricante del...

Страница 22: ...ursor y determinar su posición Para ajustar el menú SELEC IDIOMA BUSCA HACIA INDICE y BUSCA HACIA HORA MENU Para llamar el menu en un disco MODE Para activar desactivar el nivel del negro Para activar desactivar el ambiental virtual Para disponer el orden de reproducción o la reproducción aleatoria Para activar desactivar el envolvente virtual OPEN CLOSE Para abrir o cerrar la bandeja del disco Pa...

Страница 23: ...s set to VIDEO name may vary with TV manufacturer See your TV manual for details 2 Select your language for the first time you turn on this unit Press K L to select your on screen menu language then press B to exit or STANDBY ON LANGUAGE SELECT B ENGLISH ON FRANCAIS ESPAÑOL SOURCE VCP OPEN CLOSE DVD PREV STOP DISC IN PLAY PLAY NEXT SOURCE VCP DVD SOURCE VCP DVD STANDBY ON OPEN CLOSE DISPLAY VCP DV...

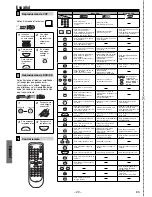
Страница 24: ...tput mode To activate DVD mode ENTER To move the cursor and determine its position To move the cursor and determine its position To set the LAN GUAGE SELECT menu Index and Time Search MENU To call up the Menu on a disc MODE To set black level on off To set virtual surround on off To arrange the playing order or play randomly To set virtual surround on off OPEN CLOSE To open or close the disc tray ...

Отзывы: