


9
H
OW TO
U
SE THE
P
ICTURE
A
DJUSTMENT
C
ONTROLS
T
o adjust your TV picture controls, select a channel and
follow these steps.
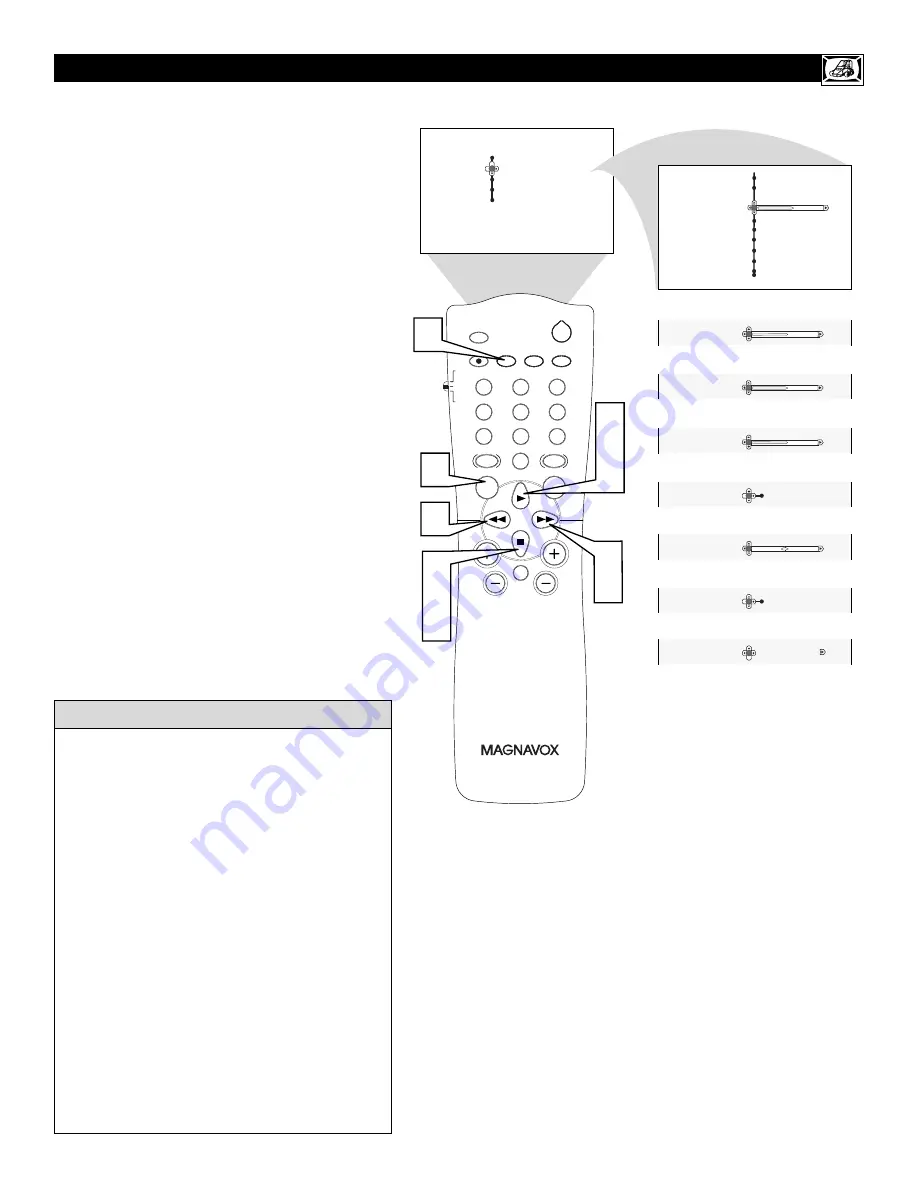
1
Press the MENU/SELECT button
on the remote
control to show the onscreen menu.
2
Press the CURSOR UP or CURSOR DOWN but-
ton
to highlight PICTURE.
3
Press the CURSOR RIGHT button
to enter the
Picture menu.
4
Press the CURSOR UP or CURSOR DOWN
button
to select the picture adjustment you want to
change: Brightness, Color, Contrast, Sharpness,
Color Temp., Tint, Dyn. Contrast, or Color Enh.
NOTE:
The menu will show only five items at a time, so
you will need to continue scrolling with the CURSOR
DOWN button to adjust the Tint, Dyn. Contrast, or Color
Enh.
5
Press the CURSOR LEFT or CURSOR RIGHT
button
to adjust the selected control. OR, if Color
Temp. or Dyn. Contrast is chosen, press the CUR-
SOR UP or CURSOR DOWN to select the pre-
ferred mode. If Color Enh. is selected press the
CURSOR RIGHT button repeatedly to toggle the
various modes.
6
Press the STATUS/EXIT button
when finished to
remove the menu from the screen.
NOTE:
The Tint Controls will not be available for
adjustments when tuned to the AV1/AV2/AV3
Inputs.
Brightness
– adds or subtracts light from the darkest
part of the picture.
Color
– adds or eliminates color.
Contrast
– improves the detail of the lightest parts of
the picture.
Sharpness
– improves the detail in the picture.
Color Temp.
offers NORMAL, COOL, or WARM
picture preferences. (Normal will keep the whites,
white; Cool will make the whites, bluish; and Warm
will make the whites, reddish.)
Tint
– adjusts the picture to obtain natural skin tones.
Dyn(
amic
) Contrast
– helps to “sharpen” the picture
quality by making the dark portions of the picture
darker and the light portions more noticeable. You can
select from the various modes: Off, Min, Med, and
Max.
Color Enh(
ancement
)
– increases the intensity of the
color when “On” is selected.
H
ELPFUL
H
INT
CH
VOL
MENU
SURF
1
3
2
4
6
5
7
9
8
0
SMART
A/CH
STATUS/EXIT
CC
CLOCK
RECORD
TV/VCR
SLEEP
SMART
SOUND
PICTURE
MUTE
POWER
TV
VCR
ACC
3
5
2
4
5
2
4
5
6
5
1
Menu
Picture
Brightness
Sound
Color
Features
Contrast
Install
Sharpness
Color Temp.
Menu
Picture
Brightness
40
Color
Contrast
Sharpness
Color Temp.
OR
Color
OR
38
Contrast
41
OR
Sharpness
41
OR
Color Temp.
Cool
OR
Tint
0
OR
Dyn. Contrast
Min
OR
Color Enh.
On
Off
Содержание 27MS5402/17
Страница 39: ...39 NOTES...


