background image


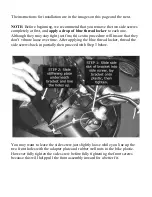
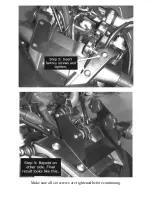
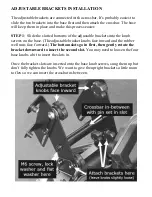
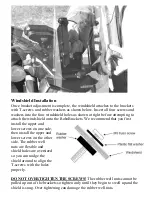
The instructions for installation are in the images on this page and the next. 
 

NOTE: 

Before beginning, we recommend that you remove the two side screws 

completely at first, and

 apply a drop of blue thread locker

 to each one. 

Although they may stay tight just fine, this extra procedure will insure that they 
don’t vibrate loose over time. After applying the blue thread locker, thread the 
side screws back in partially then proceed with Step 1 below.  


You may want to leave the side screw just slightly loose while you line up the 
two front holes with the adapter plate and rubber well nuts in the bike plastic. 
However fully tighten the side screw before fully tightening the front screws 
because this will help pull the front assembly inward for a better fit.  


Содержание Robo Knob Brackets

Страница 1: ...wo bracket options below You may have purchased only one of these so the other may not be in your order Adjustable Brackets Kit 2 adjustable bracket assemblies 1 7 8 Aluminum crossbar 2 M6 x 16 screws...

Страница 2: ...ASE KIT INSTALLATION Everything attaches to the Quick Release Base so let s get that installed first It has a 6 point attachment which are the four very visible screws on the front of the bike above t...

Страница 3: ...dure will insure that they don t vibrate loose over time After applying the blue thread locker thread the side screws back in partially then proceed with Step 1 below You may want to leave the side sc...

Страница 4: ...Make sure all six screws are tightened before continuing...

Страница 5: ...brackets into the knob screws on the base The adjustable bracket knobs face inward and the rubber well nuts face forward The bottom slots go in first then gently rotate the bracket downward to insert...

Страница 6: ...he shield REMOVING THE ADJUSTABLE BRACKETS The entire adjustable brackets and windshield assembly can be removed as one unit quickly and easily STEP 1 If your windshield is in the full down position m...

Страница 7: ...ckets We recommend that you first install the upper and lower screws on one side then install the upper and lower screws on the other side The rubber well nuts are flexible and shield holes are oversi...

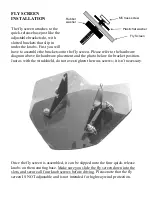
Страница 8: ...and the photo below for bracket position Just as with the windshield do not over tighten the truss screws it isn t necessary Once the fly screen is assembled it can be slipped onto the four quick rel...

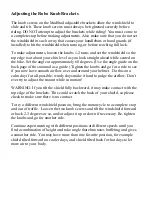
Страница 9: ...see if you now have smooth airflow over and around your helmet Do this on a calm day if at all possible windy days make it hard to judge the airflow Don t ever try to adjust the mount while in motion...

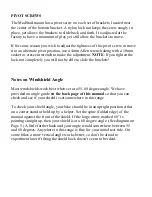
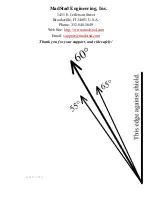
Страница 10: ...s on Windshield Angle Most windshields work best when set at a 55 60 degree angle We have provided an angle guide on the back page of this manual so that you can check and see if your shield is set so...

Страница 11: ...g any changes The user must never place the windshield in such a position as to interfere with the safe and complete movement of the handlebars and controls Returns and Warranty If you are not satisfi...

Страница 12: ...Stad Engineering Inc 1451 E Jefferson Street Brooksville Fl 34601 U S A Phone 352 848 3649 Web Site http www madstad com Email support madstad com Thank you for your support and ride safely April 12 2...

Отзывы: