SHOWBOX BATTERY POWERED ALL-IN-ONE PERFORMANCE RIG WITH BREAKAWAY MIX CONTROL
35
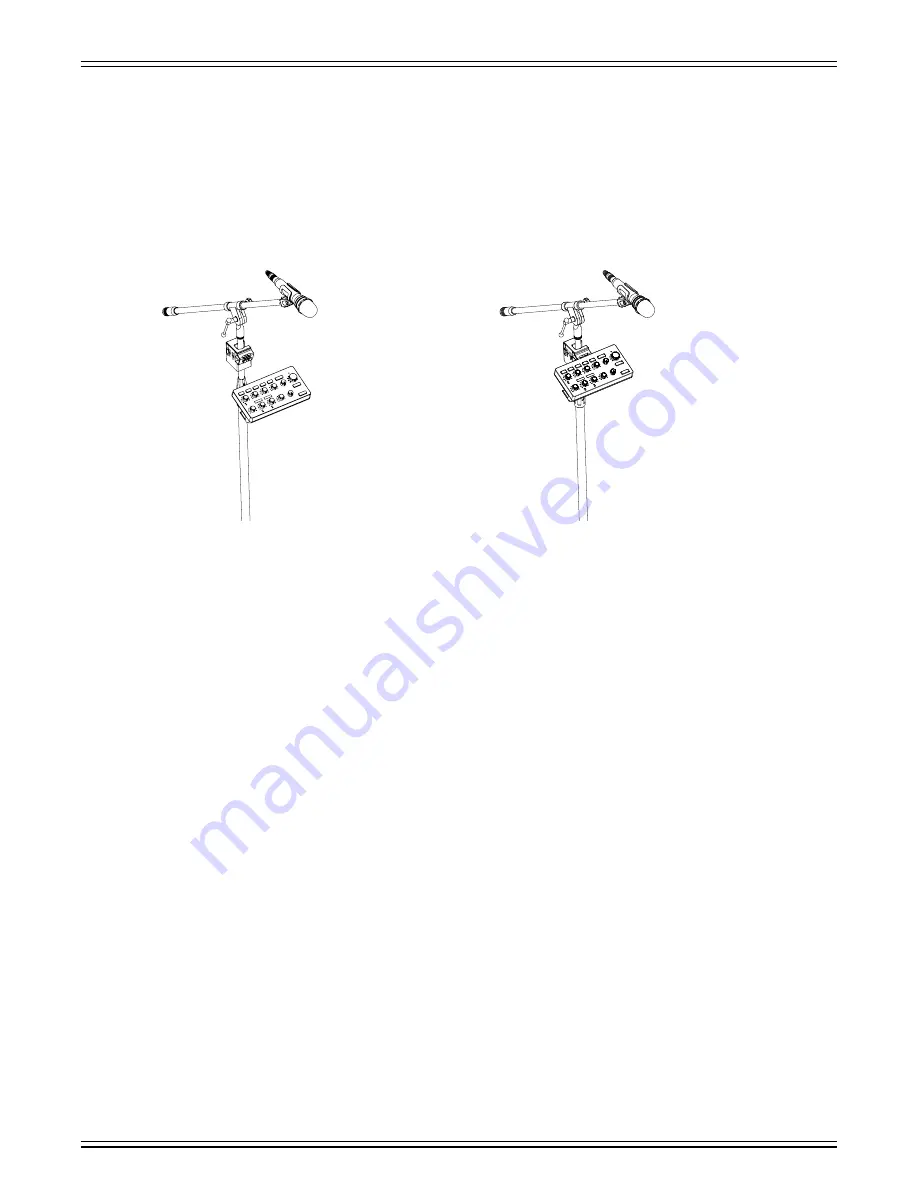
Connecting the Breakaway Mixer to a Mic Stand
Connecting the Breakaway Mixer to a mic stand is an easy two-step process.
1. Attach the included mount (for the breakaway mixer) to the mic stand. It only fits one way. Once positioned, tighten
the mount to the mic stand by rotating the adjustment knob clockwise; rotate it counter-clockwise to loosen.
2. Line up the notches between the breakaway mixer and the mount and drop it in to connect.
See below for a visual representation. Now you’re ready to play some shows!
Room Acoustics
ShowBox is designed to sound fantastic in nearly every application.
But, room acoustics play a crucial role in the overall performance of a sound system. However, the wide high-frequency
dispersion of ShowBox helps to minimize the problems that typically arise.
Here are some additional placement tips to help overcome some typical room problems that might arise:
• Placing ShowBox in the corner of a room increases the low frequency output and can cause the sound to be muddy
and indistinct.
• Placing ShowBox against a wall increases the low frequency output, though not as much as corner placement.
However, this is a good way to reinforce the low frequencies, if so desired.
• Avoid placing ShowBox directly on a hollow stage floor. A hollow stage can resonate at certain frequencies, causing peaks
and dips in the frequency response of the room. It is better to place it on a sturdy stand designed to handle the weight
of the ShowBox.
• Position the ShowBox so the high-frequency driver is two to four feet above ear level for the audience (making allowances
for an audience that may be standing/dancing in the aisles). High frequencies are highly directional and tend to be absorbed
much easier than lower frequencies. By providing direct line-of-sight from the ShowBox to the audience, you increase
the overall brightness and intelligibility of the sound system.
• Highly reverberant rooms, like many gymnasiums and auditoriums, are a nightmare for sound system intelligibility.
Multiple reflections off the hard walls, ceiling, and floor play havoc with the sound. Depending on the situation,
you may be able to take some steps to minimize the reflections, such as putting carpeting on the floors, closing
draperies to cover large glass windows, or hanging tapestries or other materials on the walls to absorb some of the sound.
The best approach is to provide as much direct sound coverage to the audience as possible. The farther away you
are from the speaker, the more prominent will be the reflected sound. Keep in mind that the feedback eliminator (page 14),
indoor/outdoor mode (page 15), and amplifer/PA mode (page 15) are other great ways to compensate for some of these issues.
The correct gain (pages 19-20), I/O volume (pages 19-20, 29), and EQ settings (pages 21-22) also play a crucial role.
Step 1
Step 2


