®
For additional information, see the complete installation and operation guide at
www.lutron.com/qs
GRAFIK Eye
®
QS Control Unit Quick Installation and Operation Guide 18
Associating the Pico
®
wireless control with a GRAFIK Eye
®
QS Wireless control unit:
(for wireless enabled GRAFIK Eye
®
QS control units only)
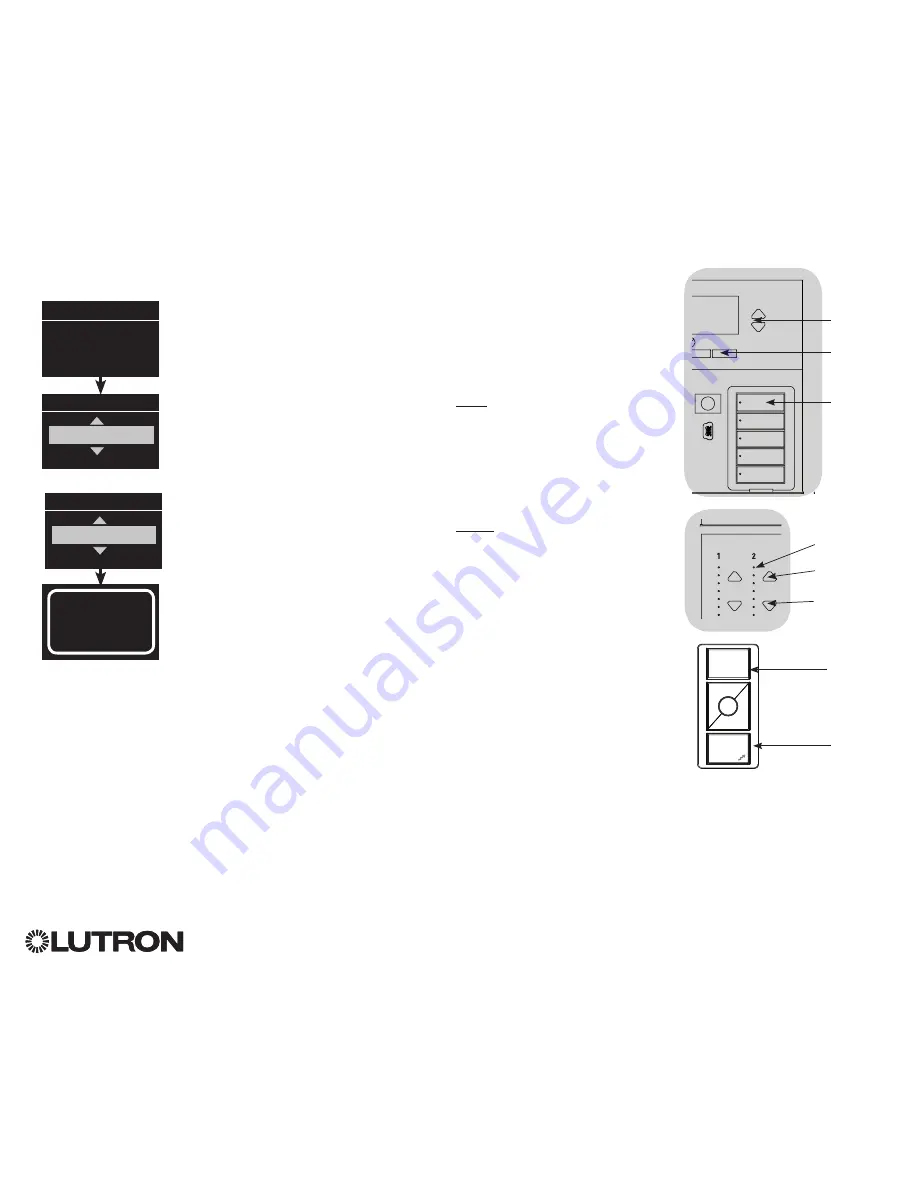
1. Make sure the wireless mode of the GRAFIK Eye
®
QS control unit is
“Enabled”.
2. On the Pico
®
wireless control, press and hold the top (on) and bottom (off)
buttons for 3 seconds. The info screen on the GRAFIK Eye
®
QS control unit
will display the Pico
®
options. Press the OK button on the GRAFIK Eye
®
QS
control unit to select the desired operation type for the Pico
®
.
3a. To assign the Pico
®
wireless control as a zone controller, use the Master
buttons to select “Zone” and press the OK button to accept. Use the zone
raise/lower buttons for a zone to select a desired preset level, and then
press the zone raise and lower buttons simultaneously for 1 second (until the
zone LEDs flash at the programmed preset level). Repeat for all zones you
wish to control with the Pico
®
wireless control.
OR
3b. To assign the Pico
®
wireless control as a scene controller, use the Master
buttons to select “Scene” and press the OK button to accept. Press and
hold the top scene button on the GRAFIK Eye
®
QS control unit for 3 seconds
(until the scene LEDs flash).
4. On the Pico
®
wireless control, press and hold the top and bottom buttons for
3 seconds until the LEDs on the GRAFIK Eye
®
control unit stop flashing.
Note:
The wireless signal has a range of 9 m through standard construction
or 18 m line of sight.
Change type?
Zone
Change type?
Scene
Saved
Saved
Pico
Change type?
Press OK
Pico
®
Wireless Control Setup
OK
Zone LEDs
Zone Raise
Zone Lower
OR
OK
1
2
3
4
5
6
9
10
11
12
13
14
7
8
15
16
9-16
1-8
Press and
hold the
top scene
button for
3 seconds
to assign
Pico
®
as
a scene
controller.
Master
buttons
OK
button
Top/On
button
Bottom/Off
button
Pico
®
Wireless
Control


