background image

Appendix A: Forms

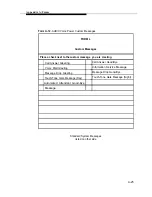
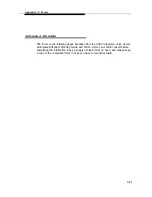
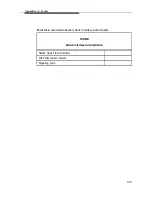
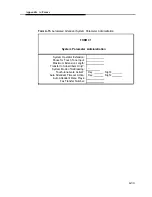
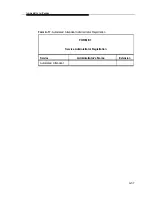
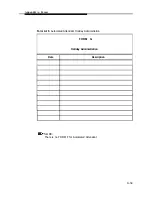
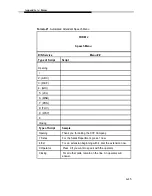
Form A-14. Automated Attendant Switch Interface Administration

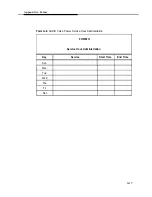
FORM B

Switch Interface Administration

Switch Hook Flash Duration

Wink Disconnect Interval

Signaling Type

A-31

Содержание Integrated Solution II

Страница 1: ...Lucent Technologies Bell Labs Innovations Integrated Solution II for MERLIN LEGEND Communications System System Manager s Guide 555 600 726 Issue 1 ...

Страница 2: ...tion AUDIX is a trademark of Lucent Technologies ORDERING INFORMATION To order copies of this manual Contact Your Lucent Technologies Account Team or your Lucent Technologies Authorized Dealer or Call Lucent Technologies at 1 800 432 6600 or Write Lucent Technologies Customer Information Center 2855 North Franklin Road P O Box 19901 Indianapolis IN 46219 1385 Order Document No 555 600 726 Intellec...

Страница 3: ...er Controller II Features Introduction Master Controller II Processor Reset Button Power Button Drive Indicators Disk Drives Diskettes Tape Drive Tape Cartridge Video Monitor Keyboard Escape Key Alphanumeric Key Group Shift Key Caps Lock Key Enter Key Tab Key Backspace Key Ctrl Key Alt Key Function Key Group 2 1 2 1 2 2 2 3 2 3 2 3 2 3 2 4 2 4 2 4 2 5 2 5 2 5 2 6 2 6 2 6 2 6 2 6 2 6 2 7 2 7 2 7 i ...

Страница 4: ...nistering IS II Applications Administration Procedure System Programming and Maintenance Utility SPM Synchronizing Time and Date Programming MERLIN LEGEND Communications System with SPM Exiting SPM Related Documentation Automated Attendant AA Accessing AA Administering AA Adding or Removing Names or Extensions Changing Subscriber Data Moving a Subscriber Updating the Database Updating Forms Printi...

Страница 5: ...oice Power Related Documentation Call Accounting System CAS Administering CAS Adding or Removing Trunks Adding or Removing Employees from a Cost Center Updating Forms Generating Reports Selecting a Standard Report Generating Selection Reports Scheduling Reports Detail and Master Commands Backing Up the Database Restoring the Database Exiting CAS Related Documentation 4 16 4 16 4 17 4 18 4 19 4 19 ...

Страница 6: ...ging Passwords Restarting the Printer Shutting Down the System Voice System Administration 5 1 5 2 5 4 5 6 5 6 5 10 5 12 5 12 5 13 6 Exiting From IS II Applications 6 1 Exiting IS II 6 1 Exiting Applications 6 2 A Appendix A Forms A 1 AUDIX Voice Power A 1 Automated Attendant A 27 Call Accounting System A 51 B Appendix B Ordering Information B 1 Manuals B 1 iv ...

Страница 7: ...Figures 2 Master Controller II Features 2 1 2 1 The Master Controller II 2 2 v ...

Страница 8: ...vi ...

Страница 9: ...pplications 4 1 4 1 4 2 4 3 4 4 4 5 4 6 4 7 4 8 4 9 4 10 4 11 4 12 4 13 4 14 4 15 4 16 4 17 IS II Main Menu IS II Main Menu SPM Main Menu System Setup Screen System Programming Screen System Screen Date Screen Time Screen IS II Main Menu Automated Attendant Menu Subscriber Administration Screen Sample Subscriber List Printout or Display IS II Main Menu AUDIX Voice Power Menu Subscriber Administrat...

Страница 10: ...able Site Screen Detail Call Accounting System CAS Main Menu CAS Reports Menu ANI Demographics Reports Menu Area Code Summary Report for Incoming Calls Generate Selection Report Screen Schedule Reports Screen Schedule Reports Report Details 4 27 4 28 4 29 4 30 4 31 4 32 4 33 4 34 4 35 4 37 4 38 4 41 4 46 4 49 4 40 4 43 5 User Maintenance 5 1 5 2 5 3 5 4 5 5 5 6 5 7 5 8 User Maintenance Menu Backup...

Страница 11: ... Assignments Automated Attendant Switch Interface Administration Automated Attendant System Parameter Administration Automated Attendant Subscriber Administration Automated Attendant Administrator Registration Automated Attendant Holiday Administration Automated Attendant Service Hour Administration Automated Attendant Edit Workspace Automated Attendant Speech Menu Automated Attendant Announcement...

Страница 12: ... but is designed to show you how to access those applications via IS II Examples of frequently used procedures are included and when necessary you will be directed to other related documents Packaged with this System Manager s Guide is the AT T Integrated Solution II Installation and Maintenance Guide which describes installation and maintenance procedures for IS II hardware Platform Software and ...

Страница 13: ...he telephone switch system programming information Call Accounting System optional With the Call Accounting System CAS you can track incoming and outgoing calls so that you can make informed decisions about your telephone needs You can monitor the cost of calls print reports of incoming and or outgoing calls track calls made on behalf of clients and identify cases of telephone abuse Automated Atte...

Страница 14: ...such as adding new employees or changing their extensions and perform routine user maintenance functions via menus and screens You can select the function s you need to perform from the main menu then using this guide in conjunction with the appropriate application guides you can perform any function on any application Once you log in the IS II main menu is displayed listing all the applications a...

Страница 15: ...tem CAS System Programming Maintenance Utility SPM User Maintenance Exit HELP Screen 1 1 IS II Main Menu Chapters in this Guide Chapter 1 Introduction This chapter offers an overview of the Integrated Solution II including basic components and software applications supported 1 4 ...

Страница 16: ...l information Chapter 5 IS II User Maintenance This chapter describes how to maintain the system through the User Maintenance menu on the system Chapter 6 Exiting from IS II Applications This chapter explains how to log off the system properly and exit menus and screens Appendix A Forms This appendix contains copies of the AVP AA and CAS forms that you need to administer these IS II applications A...

Страница 17: ...ter Controller II hardware consists of the following components Master Controller II processor with hard disk and diskette drive Video monitor monochrome or color Keyboard Optional tape drive This chapter highlights operational features of these components 2 1 ...

Страница 18: ...IX System V 386 Release 3 2 2 operating system and appropriate expansion boards already installed This unit is equipped with a hard disk and a 3 5 inch diskette drive NOTE Throughout this guide references to the Master Controller II apply to the Master Controller II as well Any information that differs between the two processors will be noted specifically for the Master Controller II ...

Страница 19: ...n is grey and located on the lower right of the system module it also illuminates green when the power is on Drive Indicators The fixed disk drive access indicator on the lower center panel illuminates amber green for the Master Controller II and located inside the door on the left when a fixed disk drive is in use The diskette drive access indicator illuminates amber green for the Master Controll...

Страница 20: ...he diskette from the disk drive CAUTION DO NOT remove a diskette from the drive when the access indicator light is on Removing the diskette while the access indicator is on can damage the diskette To remove the diskette from the disk drive press the release button after the access light goes out The diskette pops out Tape Drive The Tape Drive is optional for systems with 40MB and 80MB hard disk dr...

Страница 21: ...the drive until it clicks and then release it This causes the cartridge to disengage from the drive You may then withdraw it from the tape drive Video Monitor You have either a monochrome or color video monitor attached to your Master Controller II processor When you log onto the system information on the screen offers you prompting information allows you to see information as you key it into the ...

Страница 22: ...desired key Caps Lock Key The CAPS LOCK key again to unlock locks the alphabetic keys in uppercase mode Press the key Enter Key After typing a command or a response to a prompt press the ENTER key to the right of the alphanumeric key group to execute the command or send the response to the system Screen prompts and specific documentation will tell you when to use this key Some software will prompt...

Страница 23: ...uting System Reset from the Keyboard on the next page Function Key Group The software program or operating system determines the action of the twelve function keys F1 to F12 at the top of the keyboard More detailed information about these keys is located in the upcoming section Function Keys Edit Key Group The top three keys in this group perform software defined control functions These keys are P...

Страница 24: ...operating procedures are described in the following paragraphs Refer to your operating system and software documentation for more information about using the keyboard The keyboard sends all keystrokes to the system module as you type Some software collects these characters without processing them until you end the entry by pressing the ENTER key You can correct typing errors by using the BACKSPACE...

Страница 25: ...oftware failures prevent the soft reboot from working correctly If the soft reboot does not work or if the hardware has failed press the reset button NOTE Use reset only when prompted with You may reboot the system now Function Keys When labels appear at the bottom of a screen they correspond to function keys on the top row of the keyboard The leftmost label identifies the function of the first fu...

Страница 26: ... screen to see which function key is assigned to the function you want to perform Screen Navigation To select any item in a menu you can use the arrow keys to move the cursor or type the first few characters of the menu item until the cursor moves to it Whenever you see a screen in this guide that shows two functions in any key at the bottom of the screen it means that you can access the second ro...

Страница 27: ...you begin to enter or make changes to the applications Logging In At the console Login prompt type is and press ENTER If a password is required you will be prompted to enter it If so type the password no characters will display on the screen and press ENTER The screen displays the following 3 1 ...

Страница 28: ...Getting Started MERLIN LEGEND Integrated Solution II Screen 3 1 Login Screen 3 2 ...

Страница 29: ... Accounting System CAS System Program and Maintenance Utility SPM User Maintenance Exit HELP Screen 3 2 IS II Main Menu You can select items from the IS II Main Menu by using one of two methods Press the or key to make your selection and then press ENTER Type the first few unique letters of your option and then press ENTER After you select an application go to the appropriate section in this guide...

Страница 30: ...et the time and date for IS II perform the following procedure 1 Select User Maintenance from the IS II Main Menu A screen similar to the following appears User Maintenance Backup Files Set Time and Date Maintenance Log Password Protection System Shutdown Voice System Administration HELP CANCEL Screen 3 3 User Maintenance Menu 3 4 ...

Страница 31: ...The information in the fields reflects the most recent setting or the default setting of the time and date Set Time and Date Date Jul 06 1991 Time 03 42 AM PM PM Is Daylight Savings Time ever used Yes HELP CHOICES SAVE CANCEL Screen 3 4 Set Time and Date Screen The blinking cursor will be under the month 3 5 ...

Страница 32: ...e to the correct month then press ENTER The Change Time and Date Screen reappears with the month you selected 5 Press the key to move to the day of the month field and to advance to each of the following fields Use the key to move back to previous fields 6 After you have entered the correct information press F3 SAVE to save the information NOTE 3 6 If you answer yes to the question IS Daylight Sav...

Страница 33: ... take effect CONT CANCEL Screen 3 6 Confirm Time and Date Screen 8 Press F3 CONT to confirm the settings and return to the User Maintenance menu 9 Press F6 CANCEL to return to the IS II Main Menu 10 Exit from the IS II Main Menu then log in again for your changes to take effect 11 Refer to Chapter 4 and follow the procedure to synchronize the time and date setting with the MERLIN LEGEND Communicat...

Страница 34: ...n below Integrated Solution II AUDIX Voice Power AVP Call Accounting System CAS System Programming and Maintenance Utility SPM User Maintenance Exit HELP Screen 4 1 IS II Main Menu You can select items from the IS II Main Menu by using one of two methods Press or then press ENTER when you have made your selection Type the first few unique letters of your option then press ENTER 4 1 ...

Страница 35: ...ore the telephone switch system programming information on IS II Synchronizing Time and Date Once you have set the time and date for IS II see Chapter 3 Getting Started you must synchronize the settings with the MERLIN LEGEND Communications System as follows A sample IS II Main Menu is shown below Integrated Solution II AUDIX Voice Power AVP Call Accounting System CAS System Programming and Maintn...

Страница 36: ...ntenance Utility Main Menu appears QUIT MENU Home E n d SPM Main Menu Menu Select Sys Program Backup Boards Print Opts Function Maint Mode Restore Pass Thru Password PgUp PgDn F6 F7 F8 F9 F10 MORE INSP Screen 4 3 SPM Main Menu 3 Press F1 Sys Program to continue 4 3 ...

Страница 37: ...ars The displayed information may differ depending on the configuration QUIT MENU Home End F1 F2 F3 F4 F5 System Setup Review and Exit Size Small Type Hybrid PBX Operator 10 14 18 22 Exit PgUp PgDn F6 F7 F8 F9 F10 MORE INSP Screen 4 4 System Setup Screen 4 Press F5 EXIT to continue 4 4 ...

Страница 38: ... QUIT MENU Home E n d F1 F2 F3 F4 F5 System Programming Make a selection System Sys Renumber Operator LinesTrunks Exit Extensions Options Tables AuxEquip NightSrvce PgUp PgDn F6 F7 F8 F9 F10 MORE INSP Screen 4 5 System Programming Screen 5 Press F1 SYSTEM to continue 4 5 ...

Страница 39: ... System Screen appears QUIT MENU Home End F1 F2 F3 F4 System Make a selection Restart Mainten Busy SProg Port Date Mode Time Board Renum Exit PgUp PgDn F6 F7 F8 F9 F10 MORE INSP F5 Screen 4 6 System Screen 6 Press F7 DATE to continue 4 6 ...

Страница 40: ... e r Screen 4 7 Date Screen 7 Use F4 BACKSPACE to backspace over the date as shown then enter the date as month day year no spaces 8 Press F10 ENTER to complete the date change 9 Press F5 EXIT to return to the System Screen NOTE If you choose not to change the time exit the program by pressing CTRL F10 to return to the IS II Main Menu 10 To change the time while on the System Screen press F8 TIME ...

Страница 41: ...F4 BACKSPACE to backspace time as hour and minutes no spaces 12 Press F10 ENTER to complete the time change over the time as shown then enter the 13 To leave this screen press CTRL F10 to return to the IS II Main Menu Programming MERLIN LEGEND Communications System with SPM To fully plan and program SPM refer to the documents listed in the next selection Exiting SPM To exit SPM and return to the I...

Страница 42: ...s Doc 555 610 112 AT T MERLIN LEGEND Communications System PBX System Planning Guide and PBX System Forms Doc 555 610 113 AT T MERLIN LEGEND Communications System System Programming Guide Doc 555 610 111 AT T MERLIN LEGEND Communications System System Reference Doc 555 610 110 Automated Attendant AA Automated Attendant AA directs callers through a series of menu selections to reach a desired depar...

Страница 43: ...Attendant is installed it appears as one of your menu selections as shown below Integrated Solution II Automated Attendant AA Call Accounting System CAS System Programming Maintenance Utility SPM User Maintenance Exit HELP Screen 4 9 IS II Main Menu Select Automated Attendant from the IS II Main Menu 4 10 ...

Страница 44: ...enu Administering AA At this point you are working within the AA application The remainder of this section is intended to give you quick access to administrative functions you will perform frequently Follow the procedure on the next page if you are using subscriber administration to add or remove an employee or extension from Automated Attendant To do Automated Attendant service administrator syst...

Страница 45: ...n The following screen appears Subscriber Administration Extension Name Password Name Addressing Identifier TT Eqivalent of Name Addressing Identifier Personal Operator Does the Subscriber have Switch Call Coverage If No Call Aoverage Enter Maximum Rings Comments ADD HELP DELETE CHOICES CHANGE DB MGMT DISPLAY PREV FRM MOVE NEXT FRM CANCEL CANCEL FRM MGMT FRM MGMT CHG KEYS CHG KEYS Screen 4 11 Subs...

Страница 46: ...tions and press F3 CHANGE If you have added an incorrect extension enter that extension and press F4 DISPLAY to display the record If it is the proper record press F2 DELETE If you have mistakenly deleted an extension you must reenter all the information and press F1 ADD again The Confirm screen indicates that a subscriber has been added or removed 4 Press F6 CANCEL repeatedly until the IS II Main...

Страница 47: ...criber information associated with the specified extension number AUDIX Voice Power fills in the remainder of the Subscriber Administration form with the associated subscriber data If this is the correct subscriber press F8 MOVE to begin the move If this is not the correct subscriber return to step 2 The Move Subscriber form appears Enter the new extension and press F3 SAVE A window appears reques...

Страница 48: ...u have a working printer connected you can print a list of the current subscriber database that you can refer to as you are administering the system After you administer additions changes or deletions to the subscriber database print a hard copy for your records Then you can refer to the printout before you make further changes to the database Use the following procedure to print or display the su...

Страница 49: ...er List Printout or Display Exiting Automated Attendant To exit Automated Attendant press F6 CANCEL repeatedly until the IS II Main Menu returns Related Documentation The following documents were packaged with your Automated Attendant system and should be referred to for details on Automated Attendant administration service administrator registration subscriber and system parameter administration ...

Страница 50: ...allers on specified lines Once the message is played callers are disconnected Message Drop Allows callers on designated lines to leave a specific message such as a response to a survey without connecting them to a department or an individual Voice Mail Enables subscribers within the system to retrieve messages left by callers and allows users to send messages to individuals and groups of people Ca...

Страница 51: ...UDIX Voice Power is installed it appears as one of your menu selections as shown below Integrated Solution II AUDIX Voice Power AVP Call Accounting System CAS System Programming Maintenance Utility SPM User Maintenance Exit HELP Screen 4 13 IS II Main Menu 4 18 Select AUDIX Voice Power from the IS II Main Menu ...

Страница 52: ...ick access to administrative functions you will perform frequently Follow the upcoming procedure if you are using subscriber administration to add or remove an employee or extension from AVP To do AVP Automated Attendant outcalling service administrator system parameter and other subscriber administration refer to the AUDIX Voice Power documentation listed at the end of this section Adding or Remo...

Страница 53: ...rvice min Custom Class of Service Parameters Does the Subscriber have Seitch Call Coverage If No Call Coverage Enter Maximum Rings Coverage Service Outcalling Allowed ADD HELP DELETE CHOICES CHANGE DB MGMT DISPLAY PREV FRM MOVE NEXT FRM CANCEL CANCEL FRM MGMT FRM MGMT CHG KEYS CHG KEYS Screen 4 15 Subscriber Administration Form 2 Type the information and press ENTER after each field The Name and C...

Страница 54: ...n AVP will confirm the deletion NOTE If you make a mistake use the arrow keys to move to the field with the error then enter the correct information If you have already pressed F1 ADD enter the extension press F4 DISPLAY make your corrections and press F3 CHANGE If you have added an incorrect extension enter that extension and press F4 DISPLAY to display the record If it is the proper record press...

Страница 55: ...he correct information and press F3 CHANGE again Press F6 CANCEL repeatedly until the IS II Main Menu returns Moving a Subscriber At sometime you may need to move a subscriber from one extension to another To move a subscriber follow these steps 1 2 3 4 5 6 4 22 From the AUDIX Voice Power menu select Subscriber Administration The Subscriber Administration form appears Type the old extension number...

Страница 56: ...e extension 9999 or the maintenance Once you have administered changes to AVP perform the backup procedure described in Chapter 5 IS II User Maintenance so that you have a backup of the most recent database Updating Forms Any changes made through Subscriber Administration must be recorded on Form D Subscriber Administration which can be found in your AT T AUDIX Voice Power Planning Guide and Forms...

Страница 57: ...y select Display Subscriber Database The following represents a typical subscriber database printout or display Ext 201 202 203 204 205 206 207 208 209 210 211 212 213 214 215 Name L Andrews J Asay R Bidgood B Brown T Frissora G Jelliff J Jenkins D Jones S Norton N Nwobi C Rafferty C Smith M Tetley Sales Dept Message Drop Subscribers List Comments Sys Admin Name Recorded Yes Yes Yes Yes Yes Yes Ye...

Страница 58: ...u to track incoming and outgoing calls in order to provide costing reports and accurate records of phone usage Using menus and screens you can update and change the assignments and type of reports that CAS generates After you have read the documentation and are familiar with CAS you can better understand the relationship of the various fields on the CAS screens For example if you want to track cal...

Страница 59: ...NOTE If you need assistance while performing any CAS procedure press CTRL W for a help screen Adding or Removing Trunks To add or remove a trunk from an existing site select Call Accounting System from the IS II Main Menu The CAS menu appears Call Accounting System Reports Menu Site Configuration Menu Organizing Configuration Menu CDR Collection Configuration Menu Costing COnfiguration Menu System...

Страница 60: ...figuration Edit Site Information Edit Telephone System Configuration Edit Account Code Table Change Account Code in Call Record Install a Site Remove a Site Site Tables Menu HELP CANCEL Screen 4 18 Site Configuration Menu 2 Select Edit Telephone System Configuration 4 27 ...

Страница 61: ... The first of four edit screens appears Site Screen COMMANDS Query Next Previous Detail Exit Query for record EDIT TELEPHONE SYSTEM CONFIGURATION SITE Site YOUR COMPANY Screen 4 19 Edit Telephone System Configuration Site Screen 4 28 ...

Страница 62: ...r of Trunks Screen 4 20 Edit Telephone System Configuration Trunk Group screen NOTE The trunk group is a default that stores all unassigned calls you cannot change this field 4 Select Add to add the group for example 1 the facility for example CO and the number of trunks in the group for example 3 or select Remove to remove information from these fields Press ENTER to advance to the next field 5 P...

Страница 63: ...ystem Configuration Dial Access Code Screen 7 Select Add to add the next five columns for example Dial Access Code 11 Rate 1 Rate Type not applicable Carrier 0 Incoming Calls N or select Remove to remove information from these fields NOTE When you reach this step you can have the system provide the following defaults by typing a Dial Access Code blank you must fill this in Rate Type 1 tariff costi...

Страница 64: ...Group Facility Number of Trunks Dial Access Code Rate in cents Rate Type Carrier Incoming Calls Trunk Line Screen 4 22 Edit Telephone System Configuration Trunk Line Screen 10 11 12 13 When return NOTE The trunk line must be entered exactly as reported to your telephone system s call detail record Also repeat the facility access code in this field you have added all the trunk lines select Exit to ...

Страница 65: ...e Call Accounting System Menu appears Call Acounting System Reports Menu Site Configuration Menu Organization Configuration Menu CDR Collection Configuration Menu Costing Configuration Menu System Configuration Menu Exit HELP Screen 4 23 Call Accounting System Menu 2 Select Organization Configuration Menu to display the Organization Configuration Menu screen 4 32 ...

Страница 66: ... Table Move Cost Centers between Departments Move Extensions between Cost Centers Move Personnel between Extensions Directory Tables Menu Organization Tables Menu HELP CANCEL Screen 4 24 Organization Configuration Menu 3 Select Edit Organization Table to display the Edit Organization Table screen as shown on the next page 4 33 ...

Страница 67: ...ch field is being edited For example when you advance to the department field the header changes to EDIT ORGANIZATION TABLE DEPARTMENT 5 When you reach this step the department name is UNATTACHED Perform the appropriate step Select Add to add a record Select Update to update change a record Select Remove to remove a record NOTE Anyone not assigned a department or cost center will automatically be ...

Страница 68: ...ED Extension 99999 Name UNASSIGNED Authorization Code Credit Card Number Carrier Screen 4 26 Edit Organization Table Site Screen Detail 6 7 8 9 10 When the appropriate information has been entered press ESC NOTE If you make a mistake press CTRL C To exit select Exit The Organization Configuration Menu appears Press F6 CANCEL to return to the CAS Menu Select Exit to exit CAS Press ENTER to return t...

Страница 69: ...ystem manual After you have entered changes be sure to perform a backup so that you have an archive of the updated database Likewise if you have added changed or removed a department or employee from the company organization update the Organization Configuration worksheet that is included with your Call Accounting System manual If you need to back up your call records in addition to your administr...

Страница 70: ...s are categorized as follows ANI Demographics Account Code CDR Analysis Organization By Site To perform report generation activities do the following 1 From the IS II Main Menu select Call Accounting System and press ENTER The CAS Main menu appears MERLIN LEGEND Call Accounting System Reports Menu Site Configuration Menu Organization Configuration Menu CDR Collection Configuration Menu Costing Con...

Страница 71: ...the top of the screen Type e if Exit is indicated at the top of the screen when C is no longer indicated 2 Select the Reports The Reports Menu and press ENTER Menu appears Reports ANI Demographics Reports Menu Generate Selection Report Organization By Site Reports Menu Account Code Reports Menu CDR Analysis Reports Menu Schedule Reports HELP CANCEL Screen 4 28 CAS Reports Menu 4 38 ...

Страница 72: ...verwrite or append or display them onscreen Select Generate generate them Select Schedule any report Selecting a Standard Report Selection Report to customize reports and Reports to designate automatic generation for To generate one of the CAS standard reports follow this general procedure 1 From the Reports Menu select the standard report menu that you want and press ENTER For example select the ...

Страница 73: ...e Summary Report for Incoming Calls Generate Area Code Summary Report for Outgoing Calls Generate City State Report for Incoming Calls Generate City State Report for Outgoing Calls Generate Abandoned Call Selection Report HELP CANCEL Screen 4 29 ANI Demographics Reports Menu 2 Select the report that you want and press ENTER For example select Generate Area Code Summary Report for Incoming Calls 4 ...

Страница 74: ...e about to generate If you want to change it press u for Update and then proceed as follows a The cursor appears in the first field Reporting Period Type the code for the period that you want the report to reflect and then move the cursor to the next field b In the NOTE If you do not know the code for this or any other field read the prompts at the bottom of the screen or press CTRL W for Help Whe...

Страница 75: ...ose to send the report to a file by typing r or a type the following path with the filename of your choice usr cas cas errlogs filename NOTE By putting the files in usr cas cas errlogs you will be able to access them via the View Logs option from the System Configuration screen Press ESC to save your entries or CTRL C to cancel them When When report you are ready to generate the report type g The ...

Страница 76: ... are selecting criteria for report number 1 To select criteria for another report type n Next COMMANDS Next Previous Update Generate Exit Find next record Selection Report Report Number 1 Date Range Jan 1 1990 Time Range 0 00 Duration Range 0 00 00 Cost Range 0 00 Extension Range 0 Site Department Cost Center Trunk Carrier Type Routing Code Source Type Call Type Account Code Dialed Digits Report T...

Страница 77: ...type g 4 Before generating the report by pressing g for Generate review the information onscreen It indicates the output specifications for the report you are about to generate If you want to change it press u for Update and then proceed as follows a In the Output Method field indicate one of the following methods for report output and then move the cursor to the next field printer type p to print...

Страница 78: ... ready to generate the report type g The report is sent to the output device you specified Information appears briefly to confirm the information you just entered NOTE If you chose to display the report onscreen press ENTER to page through it 7 When you reach the end of the report press ENTER to return you to the Reports Menu Scheduling Reports You can schedule the automatic generation of any stan...

Страница 79: ...eport that you want is displayed 2 Type u to update the information onscreen and schedule automatic report generation for a particular report The cursor appears in the Report Code field 3 Type the report code for the report that you want to schedule a To find a particular report code press CTRL W and then CTRL C to display the report codes and their titles b Press ENTER to page through the list un...

Страница 80: ...e frequency codes from the bottom of the screen to indicate whether this report will be generated Y yearly Q quarterly M monthly B biweekly W weekly D daily H hourly O once N never every number of days up to 99 Example Type m for monthly Move the cursor to the Next Run Date field then type the time and date hh mm mm dd yy to indicate when the first report is to be generated NOTE If you are typing ...

Страница 81: ... a type the following path with the filename of your choice usr cas cas errlogs filename Press ESC to save your entries or CTRL C to cancel them A message appears at the bottom of the screen indicating that the scheduling criteria is now updated As prompted press ENTER until the following message appears This report has been rescheduled The report is now scheduled for automatic generation per your...

Страница 82: ... Period Dec 1 1991 Increment Period Y Screen 4 33 Schedule Reports Report Details This screen indicates the report number for the scheduled report the report title the period that the report covers and the start date within that period NOTE Selection reports do not have reporting periods therefore only the report number and title are displayed in Detail screens for selection reports 2 If you wish ...

Страница 83: ...Diagnostics Monitoring Menu and press ENTER Select Backup CAS Data and press ENTER Messages appear indicating the status of stopping When Costing stops press ENTER to continue Costing running and then as prompted A confirmation message appears indicating that the entire CAS database will be saved to diskette or tape As prompted press ENTER to continue NOTE If your system has both tape and diskette...

Страница 84: ...TE Before beginning the restore procedure make sure the tape s or diskette s are in the proper order CAUTION 1 2 3 4 Backing up the database does not save the PBX KTS interface therefore whenever you restore the database observe the following a If you reinstall CAS and restart it the PBX KTS interface will be lost To remedy this problem reinstall PBX KTS form the PBX KTS diskette after reinstallin...

Страница 85: ...ntire restoration procedure 8 Follow the onscreen instructions to remove and insert each diskette or tape a Press ENTER to continue restoration with each tape or diskette b Continue until the entire database is restored then press ENTER to conclude the backup procedure Messages appear indicating the status of Costing as it restarts 9 When prompted press ENTER You are returned to the Diagnostics Mo...

Страница 86: ...ails on this application see the following guides AT T Call Accounting System CAS Integrated Solution II User s Guide Doc 585 247 070 AT T Call Accounting System CAS Integrated Solution II Planning Guide and Forms Doc 585 247 050 AT T Call Accounting System CAS Integrated Solution II Site Installation and Implementation Guide Doc 585 247 010 4 53 ...

Страница 87: ... backing up files displaying the Disk Usage Report password protection printer restart system shutdown and voice system administration Select User Maintenance from the main menu The User Maintenance menu is shown below User Maintenance Backup Files Maintenance Log Password Protection Printer Restart Set Time and Date System Shutdown Voice System Administration HELP CANCEL Screen 5 1 User Maintenan...

Страница 88: ...alled all voice system files If you choose to back up administrative files to diskette all the above mentioned files are saved except for voice mailbox messages and system or personal greetings Prior to backing up IS II backup switch translation to the hard disk via SPM See the AT T MERLIN LEGEND Communications System System Programming Guide for SPM backup procedures You should back up your files...

Страница 89: ...Maintenance menu and the following screen appears Backup Files Administer Files Backup to Diskette Complete System backup to Tape CANCEL HELP Screen 5 2 Backup Files NOTE Complete System Backup to Tape appears only if you have a Streaming Tape Unit 5 3 ...

Страница 90: ...do the backup A system message also lets you know the approximate length of time you need to do the backup and that the diskette s is are automatically formatted prior to backup 3 When the Confirm message appears insert a diskette to be formatted then press ENTER If you If not have done everything correctly you will see this message Formatting diskette do not remove you will see this message ERROR...

Страница 91: ...top 5 If you do not want to backup your Voice System files press ESC NOTE If you exit at this point be sure to backup your voice files as soon as possible The system responds Voice System Backup aborted Strike Enter when ready 6 If you want to continue this process press ENTER The system will calculate the number of diskettes needed to do the Voice System backup The following message appears Calcu...

Страница 92: ...to the Backup Files menu Complete System Backup to Tape This procedure should be done only when there is Iittle or no traffic on the switch This option is available only to users who have a Streaming Tape Unit STU installed It will back up UNIX files and administrative fries and if you have AUDIX Voice Power or Automated Attendant all your voice files You need two blank tapes to do this 1 Select C...

Страница 93: ...stem Files and press ENTER lf you do not have AUDIX Voice Power or Automated Attendant you will be returned to the menu If you have either of those applications the following message appears Confirm A Complete Voice System Backup to Tape will backup all system voice files This will usually take one cartridge tape This tape will take less than one half hour to complete Strike ENTER when ready or ES...

Страница 94: ...X Voice Power or Call Accounting System there may be a shortage of available disk space for call records or voice messages The Disk Usage Report provides the current status of the hard disk for these applications 1 From the User Maintenance window select Maintenance Log and press ENTER The Maintenance Log is displayed Maintenance Log Disk Usage Report HELP CANCEL Screen 5 3 Maintenance Log 5 8 ...

Страница 95: ...tem Partition Remaining 3 54 MB Warning System Partition Space is Low Voice Partition Size 4 Hours 50 Minutes Voice Partition Remaining 0 Hours 25 Minutes Warning Voice Partition Space is Low HELP CANCEL Screen 5 4 Sample Disk Usage Report If the System Partition Warning is displayed the disk contains too many CAS call records Refer to the documentation supplied with your Call Accounting System fo...

Страница 96: ...g criteria Be at least six characters long Contain at least two alphabetic characters Contain at least one numeric or special character New passwords must differ from the old by at least three characters To change or add passwords select Password Protection from the User Maintenance window and press ENTER The Password Protection window is displayed showing all installed applications Password Prote...

Страница 97: ...old password and then the new one as described in step 3 If no password exists you will be prompted only for the new one 3 When you see the first message below enter the new password and press ENTER then re enter it at the next prompt and press ENTER again Old password New password Re enter new password The password has been changed Strike ENTER when ready When you have completed this you are noti...

Страница 98: ... Restart from the User Maintenance menu The Confirm Printer Restart screen is displayed 3 Press F6 CANCEL to return to the User Maintenance window Shutting Down the System To protect the data stored on the hard disk this procedure must always be performed before turning off power to the system and before moving the hardware 1 Select System Shutdown from the User Maintenance menu The following scre...

Страница 99: ...tion 1 Select Voice System Administration from the User Maintenance menu and press ENTER 2 Type the password if required and then press ENTER The following screen appears Voice System Administration Application Package Administration Configuration Management Reports Switch Interface Administration System Monitor HELP PREV FRM NEXT FRM CANCEL CMD MENU FRM MGMT CHG KEYS CHG KEYS Screen 5 8 Voice Sys...

Страница 100: ... II you will not cause the system to shut down The system continues to operate normally after you exit WARNING If you are turning off power to the system you must follow the procedure in Chapter 5 under Shutting Down the System To exit IS II select Exit from the IS II Main Menu The Confirm Exit menu appears 6 1 ...

Страница 101: ...ep Press F3 CONT to exit or Press F6 CANCEL to cancel the exit After you exit the Console Login will be displayed Exiting Applications Each application uses different function keys and options for exiting to the IS II Main Menu from screens and menus within the applications When you exit an application it continues to operate normally For information on these procedures see Chapter 4 Administering...

Страница 102: ... Accounting System AUDIX Voice Power The forms on the following pages are taken from the AT T AUDIX Voice Power Planning Guide and Forms which you should consult before completing the information Keep a supply of blank forms on hand and always keep a copy of the completed forms in case you have to reconstruct data A 1 ...

Страница 103: ...Appendix A Forms A 2 ...

Страница 104: ...AppendiX A Forms Form A 1 AUDIX Voice Power Channel Assignments FORM A Channel Assignments Channel Service Type Extension 0 1 2 3 4 5 6 7 8 9 10 11 A 3 ...

Страница 105: ...Appendix A Forms A 4 ...

Страница 106: ...Appendix A Forms Form A 2 AUDIX Voice Power Switch Interface Administration FORM B Switch Interface Administration Switch Hook Flash Duration Wink Disconnect Interval Signaling Type A 5 ...

Страница 107: ...Appendix A Forms A 6 ...

Страница 108: ...ly System Mode of Addressing Maximum Message Length General Mailbox Owner Extension Enable General Mailbox for Call Answer Allow Voice Mail Call Answer Transfers Automated Attendant Parameters Touch tone Gate Active Auto Attendant Timeout Action Auto Attendant Menu Plays Fax Transfer Number Present Options Before Leaving Message _sec sec Day Night Day Night Message Waiting Lamp Parameters Code to ...

Страница 109: ...Appendix A Forms A 8 ...

Страница 110: ...ion Name Password Name Addressing Identified Mode of Addressing Mailbox Size Personal Operator Comments Class of Service Parameters Class of Service Cuustom Class of Service Parameters Does Subscriber Have Switch Call Coverage If No Call Coverage Enter Maximum Rings Coverage Service Outcalling Allowed min A 9 ...

Страница 111: ...Appendix A Forms A 10 ...

Страница 112: ... A 5 AUDIX Voice Power Service Administrator Registration F O R M E Service Administrator Registration Service Administrator s Name Extension Automated Attendant Call Answer Information Service Message Drop Voice Mail A 11 ...

Страница 113: ...Appendix A Forms A 12 ...

Страница 114: ...UDIX Voice Power Outcalling Administration FORM F Outcalling Administration Is outcalling active Start Time End Time Retry Interval Initial Delay Maximum Number of Attempts Maximum Simultaneous Ports Maximum Number of Digits A 13 ...

Страница 115: ...Appendix A Forms A 14 ...

Страница 116: ...Appendix A Forms Form A 7 AUDIX Voice Power Holiday Administration FORM G Holiday Administration Date Description A 15 ...

Страница 117: ...Appendix A Forms A 16 ...

Страница 118: ...AppendiX A Forms Form A 8 AUDIX Voice Power Service Hour Administration FORM H Service Hour Administration Day Service Start Time End Time Sun Mon Tue Wed Thu Fri Sat A 17 ...

Страница 119: ...Appendix A Forms A 18 ...

Страница 120: ...pendix A Forms Form A 9 AUDIX Voice Power Edit Workspace FORM 1 Edit Workspace Menu Name Description Menu Path Touch tone Action Object Description 1 2 ABC 3 DEF 4 GHI 5 JKL 6 MNO 7 PRS 8 TUV 9 WXY 0 A 19 ...

Страница 121: ...Appendix A Forms A 20 ...

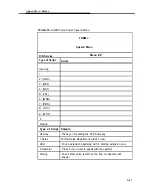
Страница 122: ...JKL 6 MNO 7 PRS 8 TUV 9 WXY 0 Closing Type of Script Sample Opening Thank you for calling the XYZ Company 1 Sales For the Sales Department press 1 now 4Ext For an extension beginning with 4 dial the extension now 0 Operator Press 0 if you want to speak with the operator Closing For all other calls remain on the line An operator will answer A 21 ...

Страница 123: ...Appendix A Forms A 22 ...

Страница 124: ...Appendix A Forms Form A 1 1 AUDIX Voice Power Automated Attendant Announcements Automated FORM K Attendant Announcements D N Service Menu Ann Announcement A 23 ...

Страница 125: ...Appendix A Forms A 24 ...

Страница 126: ...custom message Call Answer Greeting Voice Mail Greeting Message Drop Greeting Touch Tone Gate Message Day Automated Attendant Good Bye Message you are creating Call Answer Good Bye Information Service Message Message Drop Good Bye Touch Tone Gate Message Night Standard System Messages listed on other side A 25 ...

Страница 127: ...DIX Voice Power Information Service Message Drop Greeting Message Welcome to the AUDIX Voice Power Message Drop service Record at the tone Message Drop Good bye Message Good bye Touch Tone Gate Message If you have a touch tone phone press 1 now Automated Attendant Good Bye Message Good bye NOTE There is no Automated Attendant greeting message Instead If the touch tone gate is active record the wel...

Страница 128: ...e taken from the AT T Integrated Voice Power Automated Attendant Planning Guide and Forms which you should consult before completing the information Keep a supply of blank forms on hand and always keep a copy of the completed forms in case you have to reconstruct data A 27 ...

Страница 129: ...Appendix A Forms A 28 ...

Страница 130: ...annel Service Type Extension 0 Automated Attendant 1 Automated Attendant 2 Automated Attendant 3 Automated Attendant 4 Automated Attendant 5 Automated Attendant 6 Automated Attendant 7 Automated Attendant 8 Automated Attendant 9 Automated Attendant 10 Automated Attendant 11 Automated Attendant A 29 ...

Страница 131: ...Appendix A Forms A 30 ...

Страница 132: ...Appendix A Forms Form A 14 Automated Attendant Switch Interface Administration FORM B Switch Interface Administration Switch Hook Flash Duration Wink Disconnect Interval Signaling Type A 31 ...

Страница 133: ...Appendix A Forms A 32 ...

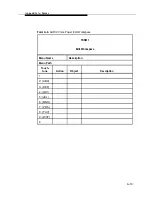
Страница 134: ...ystem Parameter Administration System Operator Extension Pause for Touch Tone Input Maximum Extension Length Transfer to Subscribers Only _ System Mode of Addressing Touch tone Gate Active Day Night Auto Attendant Timeout Action Day Night Auto Attendant Menu Plays Fax Transfer Number A 33 ...

Страница 135: ...Appendix A Forms A 34 ...

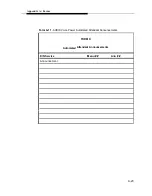
Страница 136: ...Form A 16 Automated Attendant Subscriber Administration FORM D1 Subscriber Administration Name Pers Max Ext Name Password Addressing Oper CC Rings Comments Identifier Yes Yes Yes Yes Yes Yes Yes Yes Yes Yes Yes Yes A 35 ...

Страница 137: ...Appendix A Forms A 36 ...

Страница 138: ...Appendix A Forms Form A 17 Automated Attendant Administrator Registration FORM E1 Service Administrator Registration 1 Service Administrator s Name Extension Automated Attendant A 37 ...

Страница 139: ...Appendix A Forms A 38 ...

Страница 140: ...Appendix A Forms Form A 18 Automated Attendant Holiday Administration FORM G Holiday Administration Date Description NOTE There is no FORM F for Automated Attendant A 39 ...

Страница 141: ...Appendix A Forms A 40 ...

Страница 142: ...Appendix A Forms Form A 19 Automated Attendant Service Hour Administration FORM H Service Hour Administration Day Service Start Time End Time Sun Mon Tue Wed Thu Fri Sat A 41 ...

Страница 143: ...AppendiX A Forms A 42 ...

Страница 144: ...ndix A Forms Form A 20 Automated Attendant Edit Workspace FORM I Edit Workspace Menu Name Description Menu Path Touch tone Action Object Description 1 2 ABC 3 DEF 4 GHI 5 JKL 6 MNO 7 PRS 8 TUV 9 WXY 0 A 43 ...

Страница 145: ...Appendix A Forms A 44 ...

Страница 146: ... JKL 6 MNO 7 PRS 8 TUV 9 WXY 0 Closing Type of Script Sample Opening Thank you for calling the XYZ Company 1 Sales For the Sales Department press 1 now 4 Ext For an extension beginning with 4 dial the extension now 0 Operator Press 0 if you want to speak with the operator Closing For all other calls remain on the line An operator will answer A 45 ...

Страница 147: ...Appendix A Forms A 46 ...

Страница 148: ...Appendix A Forms Form A 22 Automated Attendant Announcements FORM K Automated Attendant Announcements D N Service Menu Ann Announcement A 47 ...

Страница 149: ...Appendix A Forms A 48 ...

Страница 150: ...nt Custom Messages FORM L1 Custom Messages Place a check next to the custom message you are creating Touch Tone Gate Message Day Automated Attendant Good Bye Touch Tone Gate Message Night Message Standard System Messages listed on other side A 49 ...

Страница 151: ...s 1 now Automated Attendant Good Bye Message Good bye NOTE There is no Automated Attendant greeting message Instead If the touch tone gate is active record the welcome message as part of the Touch Tone Gate Message If the gate is not active record the welcome message at the start of the main menu A 50 ...

Страница 152: ...ing pages are taken from the Call Accounting System CAS Planning Guide and Forms which you should consult before completing the information Keep a supply of blank forms on hand and always keep a copy of the completed forms in case you have to reconstruct data A 51 ...

Страница 153: ...Appendix A Forms A 52 ...

Страница 154: ...Appendix A Forms Form A 24 CAS Site Information Form SITE INFORMATION SITE NAME AREA CODE EXCHANGE ADDRESS CITY STATE ZIP CONTACT PERSON CONTACT NUMBER A 53 ...

Страница 155: ...Appendix A Forms A 54 ...

Страница 156: ...Appendix A Forms Form A 25 CAS Telephone System Configuration Form TELEPHONE SYSTEM CONFIGURATION Page of Trk Grp Facility of Name Trks Dial Access Code RATE Tariff 1 or TRUNK LINE cents A 55 ...

Страница 157: ...Appendix A Forms A 56 ...

Страница 158: ... cents Group Type DIALED DIGITS 0 T 0 ZERO N 011 T N 102220 T 0 9999 ZERO 0 Y 10222011 T 9999 011 Y 10 0 T 0 ZERO 0 Y 10 011 T 011 Y 1800 C 0 SPCL N 1900 M 50 SPCL N 411 C 43 SPCL N 5551212 C 43 SPCL N 800 C 0 SPCL N 900 M 50 SPCL N 911 C 0 SPCL N 976 M 50 SPCL N D 11 C 0 SPCL N 411 C 43 SPCL N 5551212 C 43 SPCL N D D 5551212 C 60 SPCL N D 5551212 C 60 SPCL N D D A 57 ...

Страница 159: ...Appendix A Forms A 58 ...

Страница 160: ...Appendix A Forms Form A 27 CAS Dialed Digit Processing Form DIALED DIGIT PROCESSING Page of SEARCH PATTERN Trunk Group RATE cents REPLACE PATTERN Trunk Call Group Type DIALED DIGITS DIALED DIGITS A 59 ...

Страница 161: ...Appendix A Forms A 60 ...

Страница 162: ...ord Iegendisdn MERLIN LEGEND lSDN format with ANl Communication Type 1 Time Zone Hours from 4 hours Atlantic Greenwich Mean Time 5 hours Eastern 6 hours Central 7 hours Mountain 8 hours Pacific 10 hours Alaska 11 hours Hawaii Daylight savings time observed Yes No Direct PBX Interface Parameters PBX Port Baud Rate 1200 P B X P o r t B i t s 8 PBX Port Stop Bits 1 PBX Port Parity None A 61 ...

Страница 163: ...Appendix A Forms A 62 ...

Страница 164: ...Appendix A Forms Form A 29 CAS Organization Configuration Form ORGANIZATION CONFIGURATION P a g e _ o f _ DEPARTMENT File Name COST CENTER EXT PERSONNEL INFORMATION Last Name First Name A 63 ...

Страница 165: ...Appendix A Forms A 64 ...

Страница 166: ...ne P pipe R redirect A append Year Bi week H o u r Quarter Week _days Month Day All calls in storage ignore Start of Period lncrement Period Yes No Report Code Title Frequency Yearly Quarterly Monthly Bi weekly Weekly Daily Hourly Once E v e r y _ d a y s Next run date Time HH MM D a t e MM DD YY Output Method Device METHOD Print compressed P wide 570 I lp Print uncompressed P lp Other select one ...

Страница 167: ...Appendix A Forms A 66 ...

Страница 168: ...0 15 IWTS2 0 0 0 0 0 00 30 0 00 15 IWTS3 0 0 0 0 0 00 30 0 00 15 IWTS4 0 0 0 0 0 00 30 0 00 15 IWTS5 0 0 0 0 0 00 30 0 00 15 IWTS6 0 0 0 0 0 00 30 0 00 15 LATA 0 0 0 0 0 00 30 0 00 15 LOCAL 0 0 0 0 0 00 30 0 00 15 MTS 0 0 0 0 0 00 30 0 00 15 OS IL 0 0 0 0 0 00 30 0 00 15 OS OL 0 0 0 0 0 00 30 0 00 15 SPCL 0 0 0 0 0 00 30 0 00 15 WATS0 0 0 0 0 0 00 30 0 00 15 WATS1 0 0 0 0 0 00 30 0 00 15 WATS2 0 0...

Страница 169: ...Appendix A Forms A 68 ...

Страница 170: ...Appendix A Forms Form A 32 CAS Cost Adjustments Form COST ADJUSTMENTS Page of TAX CALLTYPE MINIMUM MINIMUM NETWORK MARKUP SURCHARGE cents CHARGE DURATION CORRECTION CENTS HH MM SS HH MM SS t J A 69 ...

Страница 171: ...Appendix A Forms A 70 ...

Страница 172: ...Appendix A Forms Form A 33 CAS Account Code Table ACCOUNT CODE TABLE Page of ACCOUNT CODE ACCOUNT NAME ACCOUNT CODE ACCOUNT NAME A 71 ...

Страница 173: ... System Reference Doc 555 610 110 AT T MERLIN LEGEND Communications System System Programming Guide Doc 555 610 111 AT T MERLIN LEGEND Communications System Key System Planning Guide and Key System Forms Doc 555 610 112 AT T MERLIN LEGEND Communications System PBX System Planning Guide and PBX System Forms Doc 555 610 113 AT T Call Accounting System CAS Integrated Solution II Planning Guide and Fo...

Страница 174: ...System Manager s Guide Doc 555 600 723 AT T AUDIX Voice Power Planning Guide and Forms Doc 555 600 721 AT T Integrated Voice Power Automated Attendant System Manager s Guide Doc 555 600 728 AT T lntegrated Voice Power Automated Attendant Installation and Maintenance Guide Doc 555 600 729 AT T Integrated Voice Power Automated Attendant Planning Guide and Forms Doc 555 600 727 B 2 ...

Страница 175: ...ng names or extensions 4 12 administering 4 11 database updating 4 15 exiting 4 16 removing names or extensions 4 12 subscriber data changing 4 13 subscriber list displaying 4 15 subscriber list printing 4 15 B Backing up files administrative to diskette 5 4 Backing Up Files 5 2 Call Accounting System 1 2 4 25 administering 4 26 database backing up 4 50 database restoring 4 51 employees removing 4...

Страница 176: ...3 Report generation 4 37 Report cancel 4 38 standard 4 39 Reports Account Code 4 37 ANI Demographics 4 37 CDR Analysis 4 37 detail 4 48 generating 4 37 master 4 48 Organization By Sic 4 37 scheduling 4 45 selection generating 4 43 N S Next Run Date field 4 47 Screen navigation 2 10 Shutting Down the System 5 12 SPM 1 2 4 2 exiting 4 8 System backup to tape 5 6 O Output Method field 4 41 Output Dev...

Страница 177: ...Index T Tape Drive 2 4 Tape cartridge 2 4 Time and Date setting 3 4 Time and date synchronizing 4 2 U User maintenance 5 1 V Video monitor 2 5 Voice System administration 5 13 ...

Отзывы: