background image


Using the Report Manager 

CentreVu Report Designer Version 8 User Guide

Copying a Designer Report to a File

3-7

Copying a Designer Report to a File

3

You can use the Report Manager Copy button to copy any designer 
report that you create to a file, either on diskette, on your hard drive, or on 
a network drive. You can use this feature to easily transport designer 
reports from one PC to another.

If a report was created by Lucent Technologies Professional Services, 
only a user with CMS services permissions can copy the report.

To copy a report, complete the following steps:

1. Open the Report Selector window.

2. Select the Designer Category

3. Select the designer report that you want to copy.

4. Click the Copy button.

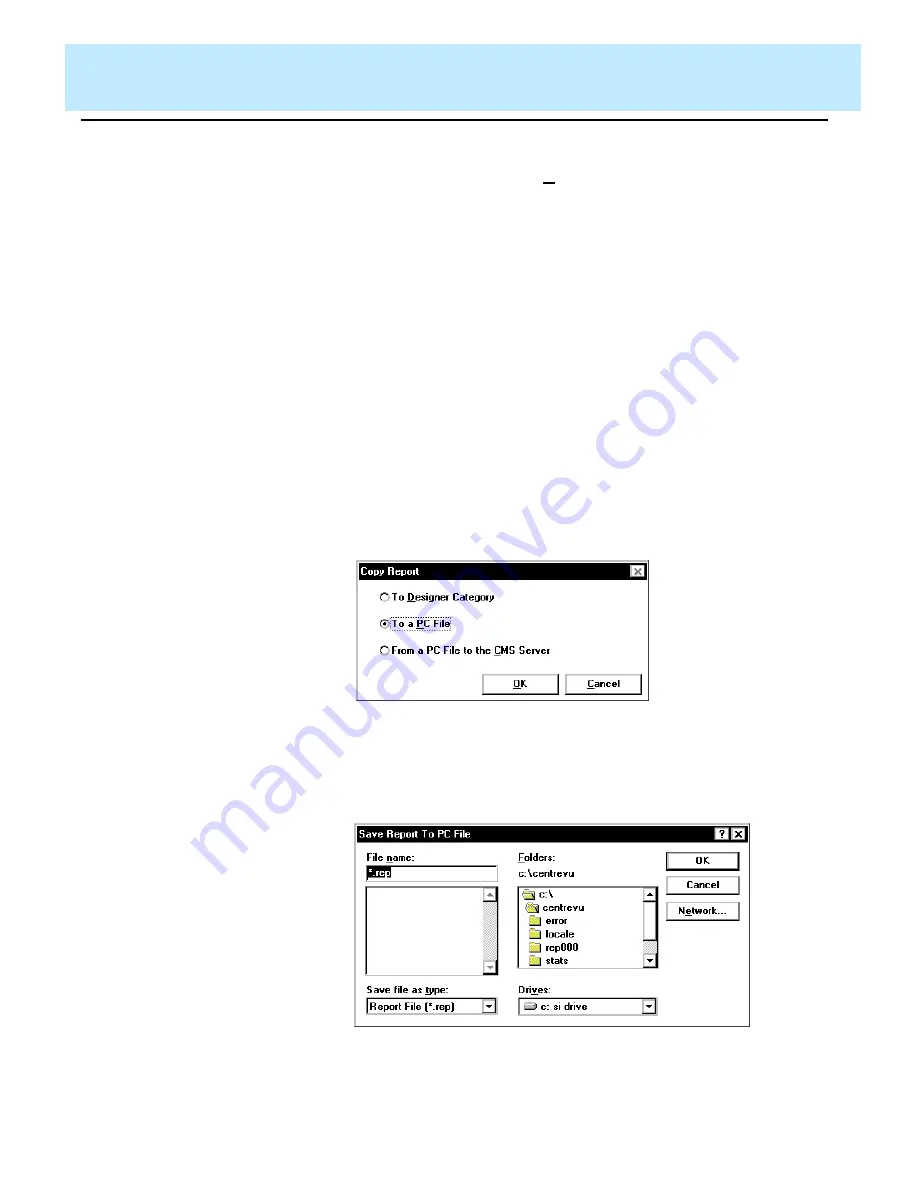
The Copy Report window displays with the To a PC File option 
enabled. This window allows you to select where you are copying 
the report to (the Designer category, a PC file, or from a PC file to 
the CMS server).

5. Select the To a PC File radio button.

6. Select the OK button.

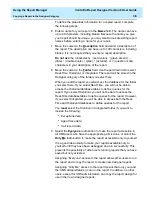
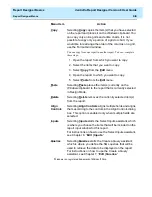
The Save Report to PC File window appears as shown below:

This window is a standard 

Windows

*

 browse window.

Содержание CentreVu Report Designer

Страница 1: ...CentreVu Report Designer Version 8 User Guide 585 210 930 Comcode 108502196 Issue 1 December 1999...

Страница 2: ...g the equipment off and on the user is encouraged to try to correct the interference by one or more of the following measures Reorient the receiving television or radio antenna where this may be done...

Страница 3: ...nt conforms to the referenced European Union EU Directives and Harmonized Standards listed below EMC Directive 89 336 EEC Low Voltage Directive 73 23 EEC The CE mark affixed to the equipment means tha...

Страница 4: ......

Страница 5: ...Selector Window 2 6 Creating a New Report 2 7 Selecting a Report Type Page 2 8 Selecting a Report Layout Page 2 10 Defining a Report Layout Section s 2 13 Selecting the Table Format 2 21 Changing Inpu...

Страница 6: ...ne Report and Pasting the Item Into Another Report 5 3 Cutting an Item from the Report 5 4 Deleting an Item from the Report 5 5 Using Drag and Drop to Arrange Items on the Report 5 6 Resizing an Item...

Страница 7: ...2 9 Insert Field 9 1 Introduction 9 1 Using the Field Assistant Select a field type Window 9 2 Inserting an ACD Name Field on the Report 9 3 Inserting Data Item Fields on the Report 9 4 Inserting Inpu...

Страница 8: ...Legend Tab 12 16 Series Labels Tab 12 17 Series Labels Tab Option 12 17 Using the Series Labels Tab 12 17 Title Tab 12 18 Title Tab Options 12 18 Using the Title Tab 12 18 Type Tab 12 20 Type Tab Opti...

Страница 9: ...Format Text 15 1 Introduction 15 1 Text Format Options Window Elements 15 2 Formatting Text on the Report 15 3 16 Error Messages 16 1 Introduction 16 1 Phase 1 Error Messages 16 2 Phase 2 Historical...

Страница 10: ...15 Step 3 Add Data to the Table 18 19 Modifying a Table 18 22 Adding a Column to a Table 18 22 Changing a Column 18 23 Deleting a Column 18 23 Changing Data in a Table 18 24 Adding Rows of Data to a...

Страница 11: ...e the report on the CMS server If you assigned Global user permissions to the report other Supervisor users with the appropriate permissions can run the report When you create real time historical and...

Страница 12: ...vailable to store the data CMS does not automatically check the available space If you fill up your disk with custom data you will lose or damage stored custom and ACD data See the CentreVu CMS R3V8 A...

Страница 13: ...zard feature is available only if you have purchased the Report Designer feature Report Wizard can be accessed only when Report Designer is activated on the CMS server and when you have the appropriat...

Страница 14: ...Using the Edit or New Button Chapter 4 Report Designer Basics teaches you the basic information that you need to know in order to use the Report Designer The procedures included in this chapter are St...

Страница 15: ...le option of the Format menu Chapter 14 Format Field gives you general information about the window that you access from the Format option of the Format menu Chapter 15 Format Text gives you general i...

Страница 16: ...he following operating systems Windows 95 Windows NT 4 0 Unless the right button is specified use the left mouse button whenever you are instructed to click or select an item Menu names menu items and...

Страница 17: ...s include additional information about the CMS or Supervisor CentreVu Supervisor Version 8 Installation and Getting Started 585 210 928 CentreVu CMS Release 3 Version 8 Administration 585 210 910 Cent...

Страница 18: ...Introduction CentreVu Report Designer Version 8 User Guide Related Documents 1 8...

Страница 19: ...Report Wizard have the same designation and accessibility as those created in Report Designer Thus reports created by Report Wizard are referred to as Report Designer reports This means that reports c...

Страница 20: ...pages This command is replaced with the Finished button on the final page of the wizard Finished Applies your settings or the default settings from all pages and completes the task Cancel Discards an...

Страница 21: ...h functions for reports which you create in the Report Wizard Report Wizard can create a report with charts and tables With the Report Wizard you will be able to create a report that contains the foll...

Страница 22: ...can edit a completed report in Report Designer Report Wizard does not allow reentry Report Wizard does not allow you to leave and then reenter to finish a partially completed report A report created i...

Страница 23: ...propriate permissions to access Report Designer There are two methods available to start the Report Wizard These methods are as follows Toolbar button on the Controller Report Selector window Toolbar...

Страница 24: ...ndow do the following 1 From the Commands menu located on the CentreVu Supervisor Controller window select the Reports menu item The Select a Report window appears as shown below 2 Select the New butt...

Страница 25: ...port Designer Version 8 User Guide Creating a New Report 2 7 Creating a New Report 2 When you start the Report Wizard the Report Wizard page appears The Report Wizard page provides a list of the tasks...

Страница 26: ...or historical For example if you select a real time report you will not be able to specify historical data in the report The following list provides information about each type of report Real Time Rep...

Страница 27: ...a historical report if you want to include the following data Exceptions Call Work Code Agent Trace Call Record The default for report type is always Real Time To select a report type other than the...

Страница 28: ...elect a Data Group page Selecting data group items accomplished through the Select Data Items page Selecting a format for the chart or table in the section accomplished through the Select the Chart Fo...

Страница 29: ...the following information Section you are about to define a section that appears to be pressed with an arrow pointing to it Section you have not defined a section that appears not to be pressed witho...

Страница 30: ...defining the report layout section s The Select a Data Group page appears as shown below Go to the next section Defining a Report Layout Section s in this chapter To redefine a previous section selec...

Страница 31: ...he following tasks Selecting a data group Selecting data items Selecting the chart or table format Previewing the work already done on the report optional Selecting a Data Group Page 2 The Select a Da...

Страница 32: ...ls multiple Trunk Group VDN single VDNs multiple and Vectors Second Level a breakdown of the first classification levels of data For example the second levels of data for the Split Skills multiple cat...

Страница 33: ...selection of a specific category of data The Next button will be disabled until you select a data group go to Step 2 2 Under the first second or third level of data click on the data group you want to...

Страница 34: ...t view contains predefined database items and calculations from the Available Data Items list that will be used in your report If you remove a calculation from the Available Data Items list you will h...

Страница 35: ...Filter data group items that appears in the Available Data Items list view Sort data group items in the Item Heading or Database Items columns of the list views Add data group items to the Selected Da...

Страница 36: ...Selected Data Items List View 2 You may want to add more data group items to your report than what is already preselected in the Selected Data Items list view You can add any data group item s listed...

Страница 37: ...any data group item s listed in the Selected Data Items list view by doing one of the following Dragging and dropping the selected data group item s onto the Available Data Items list view Clicking o...

Страница 38: ...ng the ALT up arrow key to move data group item s up or pressing the ALT down arrow key to move the data group item s Editing Item Headings to Create Custom Report Headings 2 Report Wizard allows you...

Страница 39: ...ble Format page in the wizard you define the characteristics of your table layout The default is a table in row order with grid lines The following types of table layouts are available to you Row orie...

Страница 40: ...Using the Report Wizard CentreVu Report Designer Version 8 User Guide Creating a New Report 2 22 Example of a row oriented report 2 Example of a Column Oriented Report 2...

Страница 41: ...if you want your report to have a column format 2 Select the Display Grid Lines check box if you want grid lines to separate the data on your report 3 Select Next to advance to the next page of the wi...

Страница 42: ...age 2 Select the Display Legend check box if you want to display a legend on your report The legend is a description of the data items contained in the chart and is displayed in the right corner of th...

Страница 43: ...t section Previewing the Report in this chapter Previewing the Report 2 The Preview page of the wizard allows you to preview what you have defined for your report exit the preview and then either use...

Страница 44: ...y the Selection Layout page From the Selection Layout page you will begin to define your next report section Select the Next button to advance to the next page of the report wizard go to the Defining...

Страница 45: ...r newly defined report and whether your report will be available to everyone or just yourself Your report will be saved when you enter a report name and select the Next button The report type and data...

Страница 46: ...the owner of this report In this case you will get a message stating that you cannot overwrite the existing report You will have to select a different name for your new report If you do not enter a r...

Страница 47: ...ing anything enabled for saved report only Running the Report 2 When you run your report from the Finish page of the Report Wizard it will be run with the appropriate inputs will access the CMS databa...

Страница 48: ...the Back buttons on the various pages of the wizard To edit your report do the following 1 From the Run Report for ACD combo box select the ACD 2 Click on the Edit Report in Report Designer radio butt...

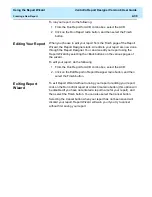
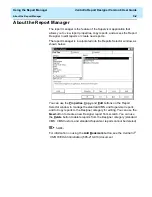
Страница 49: ...ort manager feature of the Supervisor application The sections of the chapter are as follows About Report Manager Viewing Report Properties Copying a Report to the Designer Category Copying a Designer...

Страница 50: ...eports Selector window as shown below You can use the Properties Copy and Edit buttons on the Report Selector window to manage the standard CMS and Supervisor reports and to Copy reports to the Design...

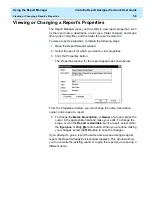
Страница 51: ...ck the Properties button The Properties window for the report appears as shown below From the Properties window you can change the name description owner and scope of a report 4 To change the Name Des...

Страница 52: ...ver Therefore if you edit a CMS Custom Report using the Report Designer the changes to that report will not be available when the report is run from the Terminal Emulator or another terminal interface...

Страница 53: ...ime you will not be able to access the Historical database tables to define queries for the report If you select Historical you will not be able to access the Real Time database tables to define queri...

Страница 54: ...design you create regardless of whether the report is accessible by all or only by you A user with CMS administration permissions always has the ability to modify your report design even if you make...

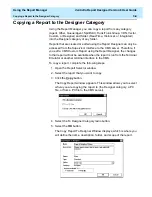
Страница 55: ...ofessional Services only a user with CMS services permissions can copy the report To copy a report complete the following steps 1 Open the Report Selector window 2 Select the Designer Category 3 Selec...

Страница 56: ...to any drive to which you have access including the floppy usually a drive on your PC You can save the report to a network drive by selecting the Network button which allows you to access the network...

Страница 57: ...Report Selector window 2 Click the Copy button The Copy Report window displays This window allows you to select where you are copying the report to the Designer category a PC file or from a PC file to...

Страница 58: ...on the CMS server the following window appears as shown below Select the Overwrite the existing report radio button to replace the report that currently resides on the CMS server Select the Save the r...

Страница 59: ...any of the standard CMS CMS Custom or standard Supervisor reports reports that reside in the Agent Other Queue Agent Split Skill Trunk Trunk Group VDN Vector and Custom categories To delete a Designe...

Страница 60: ...Report Manager to open the Report Designer by selecting a report from the Designer category and then clicking the Edit button or by clicking the New button to create a new report You can also access...

Страница 61: ...lines the features of the Report Designer and teaches you general use of the Report Designer The following sections are included in this chapter Starting the Report Designer Exiting the Report Designe...

Страница 62: ...user permissions You can start the Report Designer using one of four methods Select a report from the Designer category in any folder and clicking the Edit button on the Reports Selector window Click...

Страница 63: ...rt Designer using any of the standard Windows methods Select Exit from the Report menu Double click the System button Select the Close button at the top of the window If you try to exit the Report Des...

Страница 64: ...Report Edit Format Options Insert Help The following paragraphs outline the options available from each menu Report 4 From this menu you can test the report you are working on save the report and exit...

Страница 65: ...t name Exit Selecting Exit closes the Report Designer without saving the changes and additions you have made to the report You are prompted to save changes if you made any modifications to the report...

Страница 66: ...y on the Windows clipboard to the report that is currently selected in Design Mode Delete Selecting Delete removes the currently selected item s from the report Align Controls Selecting Align Controls...

Страница 67: ...ormation on using the Field Format Options window see Chapter 14 Format Field Table Selecting Table opens the Table Format Options window The Table Format Options window gives you access to the Genera...

Страница 68: ...lign To Grid aligns the currently selected items on the report to the Design Mode grid when they are moved The Design Mode grid is the grid that is shown on the window behind any charts grids or text...

Страница 69: ...contents of a table standard CMS report presentation format to be placed on the report This menu item is grayed out if no queries have been defined For more information on using the Table Assistant se...

Страница 70: ...ndow or close the window Online Access to Database Definitions 4 Report Designer provides access to online database item definitions when you are adding database items and calculations to a query With...

Страница 71: ...load 2 If the row skill spent all of its time in the normal state and has no other reason to be archived that is no agent staffed time no calls handled and so on then it will not be archived When crea...

Страница 72: ...nu options and standard Windows drag and drop conventions Editing an existing report design lets you rearrange and delete sections of the report quickly and easily 8 Save the Report Design Chapter 3 S...

Страница 73: ...om the Report menu This takes you directly into design mode and you will be asked if you want to save the report with a new name in the Designer category when you exit design mode 2 Define a Report s...

Страница 74: ...Report Chapters 8 9 and 10 optional Define what data from the queries should appear in each chart field or table on the report If you copy a report design the definitions of that report s charts field...

Страница 75: ...and Pasting the Item Into the Same Report Copying an Item from One Report and Pasting the Item Into Another Report Cutting an Item from the Report Deleting an Item from the Report Using Drag and Drop...

Страница 76: ...rt 5 You can copy an item in one report and paste the copy into the same report To do so complete the following steps 1 Open the report from which you want to copy 2 Select the item s that you want to...

Страница 77: ...want to copy 5 Select Paste from the Edit menu or press CTRL V Note that both reports must be open in design mode in order to copy from one report to another report If you want to copy an item from a...

Страница 78: ...rt 5 Selecting Cut removes the currently selected item from the report and places it on the Windows clipboard To cut an item from a report and place the information on the Windows clipboard complete t...

Страница 79: ...ct the item by placing your mouse cursor on the item and clicking 2 Select Delete from the Edit menu or press the DELETE key The item is removed from the report and is no longer available to be pasted...

Страница 80: ...steps 1 Select an item s by pointing the mouse cursor at the item and clicking one time You can select additional items by holding down the CTRL key and clicking the mouse cursor on the items You will...

Страница 81: ...5 To resize an item on a report complete the following steps 1 Select the item by placing the mouse cursor over the item and clicking one time 2 Place the mouse cursor over one of the sizing handles o...

Страница 82: ...lect the second item Handles around the items appear To move the group of items on a report complete the following steps 1 Place the cursor within the selected items 2 Hold down the left mouse button...

Страница 83: ...column widths in your table while in the design mode To change a column width do the following 1 Place the mouse pointer on the border between the column heading The mouse pointer changes to the foll...

Страница 84: ...eadings 5 You can quickly and easily change the column headings in your table while in the design mode To change a column heading do the following 1 Click on the heading name you want to change A dial...

Страница 85: ...You can now select multiple fields and align them according to the controls in the Align Controls dialog box In addition you can undo the alignment if you are not satisfied with the results The Align...

Страница 86: ...2 Scale to Page 5 When printing a report that is too large to fit on one page you will be prompted with a message s the number of messages will depend on how large your report is asking if you want Re...

Страница 87: ...ction on how to add delete and edit the input fields for a Report Designer report The sections in this chapter are as follows About Report Input Fields Adding Input Fields to the Input Window Deleting...

Страница 88: ...t field s you defined You define fields for the Report Input window using the steps described in the following pages In the example of an input window that is shown below the user has entered a split...

Страница 89: ...dd additional inputs that are not used in the queries then irrelevant information that references those inputs will display on the input window for the report To define the input fields for a report c...

Страница 90: ...nt group name as defined in the Dictionary Use the following query ACD acd and OLDEST_LOGON 0 and LOGID in select value from agroups where acd_no acd and item_name Agent Group Agent state An agent sta...

Страница 91: ...and 44 characters Login ID A login ID of one to nine digits as administered for System 75 Generic 1 Generic 3 or four digits as administered for System 85 Generic 2 Number A number which may include...

Страница 92: ...e or with AM or PM appended Trunk A trunk name or number The Trunk input field can only be a single value input for integrated reports Trunk group The number or name of a trunk group Trunk state A tru...

Страница 93: ...w this type of searching As an example of matching with an asterisk if an input field were a String type and were associated with the LOGID database item the user could enter 1 and CMS would include d...

Страница 94: ...added for a report input window complete the following steps If a field is used in a query the input cannot be removed until the query is removed or modified to eliminate the reference to the input 1...

Страница 95: ...he input window to the Inputs table 3 Select the entire row of the input for which you want to change positions by clicking on the left hand numbered column of the row 4 Use the Up and Down buttons to...

Страница 96: ...nput will be associated When you add an item from the Input Types list to the Inputs list the columns of the Inputs table are populated with the default values for that input item The columns of the I...

Страница 97: ...Associated ACD column lets you use the Current ACD or assign a specific ACD to be used for this input The default for this column is Current ACD If you want to allow the user to pick a specific ACD fo...

Страница 98: ...ed below so that the query for the report will work properly The following instructions use the split skill multi ACD report inputs as the example To create the inputs for a VDN multi ACD report use t...

Страница 99: ...it Skill 2 prompt line 6 of the Inputs table use the Associated ACD drop down list to select ACD 2 as the associated ACD 9 For the Split Skill 3 prompt line 7 of the Inputs table use the Associated AC...

Страница 100: ...Edit Inputs CentreVu Report Designer Version 8 User Guide Setting Up Inputs for a Multi ACD Report 6 14 The Inputs table looks like this 11 Select OK to save the inputs for this multi ACD report...

Страница 101: ...Input Window 6 15 Viewing the Input Window 6 You can view what the input window will look like at any point during the process of designing the report by selecting Run from the Report menu To return t...

Страница 102: ...Edit Inputs CentreVu Report Designer Version 8 User Guide Viewing the Input Window 6 16...

Страница 103: ...what data is retrieved for a specific report is done using queries This chapter teaches you to create queries for reports using the Query Assistant which is accessed by selecting Query from the Edit...

Страница 104: ...ues entered in the Report Input window as the query criteria for the report If you change the prompt in the Edit Inputs window it is automatically updated in the query Queries tell CentreVu CMS two th...

Страница 105: ...uery to be used in a Designer Report complete the following steps from the Report Designer Design Mode window 1 Select Query from the Edit menu The Query Select Select an existing query or add a new o...

Страница 106: ...ms that you want to include in the query For Real Time reports you can select only one table name For Historical reports you can select up to three table names Note that the calculations that are asso...

Страница 107: ...ctionary are listed in the Calculations box in addition to the calculations 7 Select the Add button or double click on the item You can view any database item or calculation by selecting the database...

Страница 108: ...gate function SUM AVG MIN or MAX is assigned to a database item or calculation 10 Highlight the first query item to which you want to assign an aggregate function 11 Highlight the Function that you wo...

Страница 109: ...for Split 1 and all intervals on 07 02 93 CMS would add all of the values for the ACDCALLS column on that date to display the value 1611 AVG The AVG aggregate function retrieves the average of all va...

Страница 110: ...and are using more than one table in the query the Specify all field joins for the tables window appears as shown below This window allows you to require that items between two or three tables be equa...

Страница 111: ...rieve the data defined in the SELECT box that matches the criteria defined in the WHERE box The SELECT box specifies which columns of data to consider in the database table s The WHERE box species whi...

Страница 112: ...n the Operator box and ACWINCALLS in the Operand2 box 23 Select the AND or the OR button as appropriate If you place and between clauses then both of the clauses must be true in order for CMS to retri...

Страница 113: ...can type MULTI_ACD in the where clause instead of entering each individual OR statement This will only work if you have correctly set up the inputs for the multi ACD report See Chapter 6 Edit Inputs f...

Страница 114: ...ort complete the following steps from the Report Designer Design Mode window 1 Select Query from the Edit menu The Query Select window appears 2 Select the New button The Query Assistant Select a data...

Страница 115: ...ment 585 210 939 5 Select the Next button The Query Assistant Add the database items and calculations for the SELECT portion of the query window displays as shown below On this window you will add and...

Страница 116: ...elect the Input Start Time or Select Start Time Now radio button If you select the Select Start Time Now radio button you need to define the time that the integrated data will always begin accumulatin...

Страница 117: ...his query window appears On this window you can choose the input item that will be used for the query 12 Highlight the input s you would like to use as criteria for the query You can create a new inpu...

Страница 118: ...Version 8 User Guide Creating an Integrated Query 7 16 The Query Assistant Enter a name for this query window appears 14 In the Name text box type the name that you would like to assign to the query...

Страница 119: ...the following steps from the Report Designer Design Mode window 1 Select Query from the Edit menu The Query Select window appears 2 In the Queries box highlight the name of the query you would like to...

Страница 120: ...ld like to edit a database item or calculation on the Query Items list highlight the item in the list and then select the Edit button The following window appears An example of how you might want to e...

Страница 121: ...QL Query and CMS Database Tables Basics in this document This window includes the following elements Item Purpose SELECT box Shows the Query Items that were defined on the previous windows including t...

Страница 122: ...ve the SELECT data from the table If you place or between clauses then either of the clauses can be true in order for CMS to retrieve the SELECT data from the table 11 Repeat Steps 7 through 10 until...

Страница 123: ...m the Report Designer Design Mode window 1 Select Query from the Edit menu The Query Select window appears 2 In the Queries box highlight the name of the integrated query you would like to edit 3 Sele...

Страница 124: ...light the first database item or calculation that you will reference in the query 5 Select the Add button or double click on the item The item is listed in the Query Items box 6 Repeat Steps 4 and 5 u...

Страница 125: ...Time or Select Start Time Now radio button If you select the Select Start Time Now radio button you need to define the time that the integrated data will always begin accumulating for this report If y...

Страница 126: ...window appears On this window you can choose the input item that will be used for the query 10 Highlight the input s you would like to use as criteria for the query You can create a new input by sele...

Страница 127: ...y from the Edit menu The Query Select window appears 2 In the Queries box highlight the name of the query you would like to copy 3 Select the Copy button The Copy Query window appears 4 In the To text...

Страница 128: ...s from the Report Designer Design Mode If you delete a query that is used in the report the report will not run 1 Select Query from the Edit menu The Query Select window appears 2 In the Queries box h...

Страница 129: ...the chart window Steps 2 through 4 Using the Chart Assistant Specify a chart type window Steps 5 through 9 Using the Chart Assistant Make category and series selections window Steps 10 15 There are tw...

Страница 130: ...the following steps 1 Select Chart from the Insert menu The first window of the Chart Assistant displays 2 From the Queries drop down list select the query from which you want to take data for the ch...

Страница 131: ...t by selecting the Format Chart menu item 5 Select the 2D radio button if you would like the chart to display in two dimensional format Select the 3D radio button if you would like the chart to displa...

Страница 132: ...f the gradient effect will vary depending on the video card installed in the PC or the capabilities of the printer for printed reports 8 Select the Rolling check box if you want the real time chart re...

Страница 133: ...item for historical charts As you select from the list of available items the currently selected item moves to the top of the Available Data list and the example on the right side of the window refle...

Страница 134: ...vious example showed a report with One Data Value per Row selected Below is an example of the same report using the same Category item STARTTIME without One Data Value per Row selected In the first ex...

Страница 135: ...at were required in the report input window See the following sections for instructions on adding any of the available types of fields to the report Using the Field Assistant Select a field type windo...

Страница 136: ...only with an Integrated Report 3 If you highlighted ACD Name Report Data Start Time or Time Report Run skip to Step 4 If you highlighted Data Item then select the Next button Go to the Field Assistan...

Страница 137: ...of the field and the field will not be visible To insert the name of the ACD for which the report was run complete the following steps 1 Select Field from the Insert menu The Field Assistant wizard op...

Страница 138: ...he following steps 1 Select Field from the Insert menu The Field Assistant wizard opens 2 Highlight Data Items in the Types box 3 Select the Next button The Select a query and associated data item for...

Страница 139: ...he Field Assistant wizard opens 2 Highlight Input Value in the Types box 3 Select the Next button The Select an input for your field window appears 4 Highlight the name of the input that you would lik...

Страница 140: ...is type of field applies only to integrated reports To insert the initial start time the time at which data began accumulating for an integrated report complete the following steps 1 Select Field from...

Страница 141: ...the field and the field will not be visible To insert on the report the time at which the report was run complete the following steps 1 Select Field from the Insert menu The Field Assistant wizard op...

Страница 142: ...Insert Field CentreVu Report Designer Version 8 User Guide Inserting Time Report Run Field on the Report 9 8...

Страница 143: ...lows Inserting a table on the report Using the Table Assistant Select a query and associated database items for the table window Steps 2 through 4 Using the Table Assistant Select a table layout windo...

Страница 144: ...e steps 1 Select Table from the Insert menu The Select a query and associated database items for the table window of the Table Assistant appears 2 From the Queries drop down list select the query from...

Страница 145: ...ton to place the Totals line at the top of the table as standard CMS reports do or the Bottom radio button to place the Totals line at the bottom of the table Select the None radio button if you do no...

Страница 146: ...d a New Query radio button b Type a name for the summary query in the Name field c Edit the table to include the database items and summary information that you feel is appropriate for this summary qu...

Страница 147: ...nsert Table CentreVu Report Designer Version 8 User Guide Inserting a Table on the Report 10 5 b Select the name of one of the existing queries from the drop down Queries list 11 Select the Done butto...

Страница 148: ...Insert Table CentreVu Report Designer Version 8 User Guide Inserting a Table on the Report 10 6...

Страница 149: ...option from the Insert menu to add items such as the report name to your designer reports This chapter teaches you how to use the Insert Text menu option Each item is initially inserted in the upper l...

Страница 150: ...you want to leave the font set to the default go to Step 6 The Font selector window which is a standard Windows window displays 4 Select the Font Style Point size Effects and Script that will apply t...

Страница 151: ...ve been inserted on the report You will use the Chart option from the Format menu to edit charts on your designer reports This chapter teaches you to use the Format Chart menu option The sections of t...

Страница 152: ...harts These data points are grouped into series that are identified with unique colors In many chart types one data point from each series is grouped together by category across an axis A chart can al...

Страница 153: ...he PC or the capabilities of the printer for printed reports Options Select the check boxes as appropriate to include or omit grid lines chart borders and legend borders on the report Real Time If the...

Страница 154: ...from the drop down list below the Gradient option The available types are Horizontal Vertical Rectangle and Oval 2 In the Options box select the check boxes as appropriate Select Grid Lines On to incl...

Страница 155: ...ard y axis display on the left hand side of the chart The Z Axis is available only for 3D bar charts Selecting this check box will make the chart display with a z axis making it appear 3 dimensional C...

Страница 156: ...mn 3 Data In the following example the Category Column 1 is the Time that was selected on the input window the Series are the Splits that were selected on the input window and the Data is the data tha...

Страница 157: ...beginning at 11 00 AM In the second example there is a row of data shown for each split skill for each interval Using the Axis Tab 12 To use the Axis tab complete the following steps 1 Depending on t...

Страница 158: ...e formats for the selected category If you would like to view all of the available formats for all types of data select the Show All Formats check box 6 Select the One Data Value per Row check box to...

Страница 159: ...eters can be changed Available Data Lists all of the data items that are available based on the query that is being used for the chart or table Data on Chart Displays the data items that are currently...

Страница 160: ...on the chart select an item on the Data on Chart list and use the Up and Down buttons to move the item to the appropriate place on the list 4 Select the Apply button to make the changes and to keep th...

Страница 161: ...is displayed below the data point This location is valid only for bar line area and step charts Center The label is displayed centered on the data point This location is valid only for bar line area...

Страница 162: ...ng it difficult or impossible to read the labels Using the Data Labels Tab 12 To use the Data Labels tab complete the following steps 1 In the Location box select the radio button next to the option N...

Страница 163: ...dit the fonts Choose Font takes you to the Font selector window where you can edit the font size and style for each type of text Using the Fonts Tab 12 To change the fonts complete the following steps...

Страница 164: ...nts Tab 12 14 4 Select the OK button 5 The Chart Format Options window displays 6 Select the Apply button to make the changes and to keep the Chart Format Options window open Select the OK button to m...

Страница 165: ...lows you to display or not to display the report legends Location of legend if you elect to have report legends visible you can select where the legend displays The available options are Top left Top...

Страница 166: ...to make the legend of the chart appear on the report 2 Select the Location Top Left Top Top Right Left Right Bottom Left Bottom or Bottom Right where you would like the legend to appear on the chart...

Страница 167: ...tly used in the chart To edit the text place the cursor in the Label column and type the appropriate information Using the Series Labels Tab 12 To use the Series Labels tab complete the following step...

Страница 168: ...sible you can select where the titles display The available options are Top left Top center Top right Left Right Bottom left Bottom center and Bottom right Since the title takes up space the drawn cha...

Страница 169: ...Left Top Top Right Left Right Bottom Left Bottom or Bottom Right where you would like the title to appear on the chart 4 Select the Apply button to make the changes and to keep the Chart Format Optio...

Страница 170: ...u may want to display charts as 2D Chart Type Specifies how the data is presented You choose a chart type from the list The types of charts available vary slightly depending on whether a 2D or 3D char...

Страница 171: ...Chart Type The available types for two dimensional charts are Bar Line Area Step Horizontal Bar and Pie The available types for three dimensional charts are Bar Line Area Step Clustered Bar Horizonta...

Страница 172: ...ugh 90 degrees and describes the relative height from which a chart is viewed An elevation of 90 looks directly down on the top of the chart while an elevation of 0 looks directly at the side of the c...

Страница 173: ...he chart is rotated or elevated Orthogonal Perspective is not applied to the chart resulting in less of a 3D effect The advantage of using this type of projection is that vertical lines remain vertica...

Страница 174: ...se the 3D Effects tab complete the following steps 1 Change the degree of Elevation top to bottom of the chart by typing a new number in the Elevation box 2 Change the degree of Rotation of the chart...

Страница 175: ...n the report You will use the Table option from the Format menu to edit tables on your designer reports This chapter teaches you to use the Format Table menu option The sections of this chapter are as...

Страница 176: ...the Table Format Options window which is accessed by doing the following Double clicking on a column heading in the report or Selecting Format Table or Sort by from the Format menu list or the right m...

Страница 177: ...scroll Valid values are in the range of 0 through 99 You can use the spin boxes can to select a valid value or type the value in Fixed Rows This specifies the number of rows from the top of the table...

Страница 178: ...3 In the Fixed Region box define the number of Rows on the table that will not scroll You can type the appropriate number or use the up and down arrows to select a valid number 4 In the Orientation b...

Страница 179: ...Using the Data Tab 13 To use the Data tab window complete these steps 1 To add data items to the table select an item from the Available Data list and click the Add button 2 To remove data items from...

Страница 180: ...ts tab allows you to edit the fonts of the data headers and summary information on the table report Fonts Tab Options 13 Fonts Lists all of the available report items for which you can edit the fonts...

Страница 181: ...ont window which is a standard Windows window appears 3 Select the Font Font style Size Effects Color and Script which you want assigned to the selected text 4 Select the OK button The Table Format Op...

Страница 182: ...ed The Show Value As formatting applies only to data types that can be defined in the Dictionary Align Allows you to select the alignment of a field or column in a table Available options for alignmen...

Страница 183: ...n the data item 3 In the Align column use the drop down list to select how you would like the data item to be aligned on the table Available values are Left Right and Center 4 In the Format column if...

Страница 184: ...report to include the headers Table Header This table shows the column headings that are currently used on the report Using the Headers Tab 13 To change the column headings on the table complete these...

Страница 185: ...on on the real time table report is displayed Sort Tab Options13 Sort by When you are setting up display order for a real time report specify the sort column Sort By and the sort order Ascending or De...

Страница 186: ...of agents alphabetically select Name from the first Sort By drop down list select Ascending as the sort order and leave the other two Sort By boxes set to none Searching for agents who have been in a...

Страница 187: ...You can include a summary line for each query that is used in the report If this table includes an integrated query then the Summary tab will not display Summary Tab Options 13 Summary Options Allows...

Страница 188: ...1 Select the Show Summary check box 2 Select a query from the Query box 3 Select the Top or the Bottom radio button based on where you would like the summary line to be located 4 Select the Apply butt...

Страница 189: ...ws you to format report fields after they have been inserted on the report You will use the Field option from the Format menu to edit fields on your designer reports This chapter teaches you how to us...

Страница 190: ...visible you can select where the legend displays The available options are Top left Top center Top right Left Right Bottom left Bottom center and Bottom right Label box Type a brief description of the...

Страница 191: ...Use the drop down list to select the format which you would like the value to be displayed Show Value as Name Shows the field as name Font box Opens the Font window which allows you to change the Font...

Страница 192: ...ecting the appropriate radio button c In the Label field type the word s that you would like the label to display d To change the font of the label select the Font button to access the Font window 4 T...

Страница 193: ...agent and so on that can be named in the Dictionary and you would like the Dictionary name for the field to display instead of the number d To change the font of the field select the Font button to a...

Страница 194: ...Format Field CentreVu Report Designer Version 8 User Guide Using the Field Format Options Window 14 6...

Страница 195: ...15 1 15 Format Text Introduction 15 The Report Designer allows you to format the font style and size of text that appears on a report You will use the Text option from the Format menu to edit text on...

Страница 196: ...Text Format Options window The Text Format Options window allows you to change the font display characteristics for the selected text Text contents Type the word or phrase that you would like to inser...

Страница 197: ...ont button The Font selector window which is a standard Windows window appears 4 Select the Font Style Point size Effects and Script that will apply to the text string you are editing 5 Select the OK...

Страница 198: ...Format Text CentreVu Report Designer Version 8 User Guide Formatting Text on the Report 15 4...

Страница 199: ...ages that Report Designer displays and tells you what to do when error messages appear Test design error messages are divided into three categories Phase 1 Error Messages Phase 2 Historical Report Err...

Страница 200: ...and one to the nonaggregate columns Message Cannot use the SYN function for order by Cause You cannot use a synonym to sort the output in the query Solution Remove the aggregate from the Order by fiel...

Страница 201: ...iguration data has been sent Then rerun the test of report design Message keyword AVG invalid in where clause Cause You cannot use the keyword AVG in a row search criteria Solution Remove the keyword...

Страница 202: ...riteria Message keyword SUM invalid in where clause Cause You cannot use the keyword SUM in a row search criteria Solution Remove the keyword SUM from the row search criteria Message keyword SYN inval...

Страница 203: ...error has occurred Solution Check that you have not misspelled an RDSQL statement placed key words out of sequence or included an INFORMIX SQL reserved word in your query 202 Description An illegal c...

Страница 204: ...do not have an illegal character and so on or a CONTROL character in the line prior to the FROM keyword 223 Description Duplicate table name table name in the FROM clause Solution Remove the redundan...

Страница 205: ...tructure the subquery by adding more components in the WHERE clause so that only one value is returned 297 Description The SELECT list may not contain a subquery Solution Remove the subquery from the...

Страница 206: ...n 309 Description ORDER BY database item must be included in a report field to which the row search ID is assigned Solution Check that database items included in the ORDER BY clause appear in the repo...

Страница 207: ...rd in your query 1202 Description An attempt was made to divide by zero Solution Check that you are not attempting to divide a numerical column type by a character column type for example 16 Jones or...

Страница 208: ...206 Description Invalid day in date Solution Days must be represented as the number of the day 01 through 31 Check the value entered in the date field 1226 Description Decimal or money value exceeds m...

Страница 209: ...nt s to mark the location of an error Error Description Solution 1 Description A syntax error has occurred Solution Check the select for misspelled keywords or keywords that are out of order 2 Descrip...

Страница 210: ...olumn in the select clause or a number that indicates a position of the column in the select clause 8 Description Bad argument given to an aggregate function For example you cannot take the SUM or AVG...

Страница 211: ...rsion 8 User Guide Phase 2 Real Time Report Error Codes 16 13 12 Description Memory allocation error Solution Check the error logs 13 Description Query cannot select more than one table Solution Check...

Страница 212: ...Error Messages CentreVu Report Designer Version 8 User Guide Phase 2 Real Time Report Error Codes 16 14...

Страница 213: ...a report is defining the data that goes in the report To define report data you must first understand how CentreVu Call Management System CMS stores and retrieves data This chapter provides the follow...

Страница 214: ...for agents 1001 to 3009 Because data in this table is in real time data changes second by second The example represents a snapshot or the most recent update of the table represent WORKMODE for values...

Страница 215: ...0900 1000 1000 1000 1100 1100 1100 1100 1100 1100 1000 1000 0900 0900 0900 0800 0800 0800 0800 0800 0800 0900 0900 0900 1000 1000 1000 1100 1100 1100 070293 070293 070293 070293 070293 070293 070293 0...

Страница 216: ...CDTIME A column that causes the values in a row to be related is called an index An index stores data sequentially and adds structure for the storage of data in the other columns For each value in an...

Страница 217: ...of information you supply when you design a report The name of the table The database items in the table The rows of data in the table To tell CentreVu CMS how to retrieve data you must tell CentreVu...

Страница 218: ...1 1 1 1 1 1 1 1 1 1 1 1 1 1 1 ACD 5544 3789 8675 3009 4477 ACDTIME 3002 3003 4003 21 19 15 9 11 20 7 18 18 13 14 10 19 400 777 988 851 901 688 299 340 589 980 256 704 188 322 367 109 745 569 616 452 4...

Страница 219: ...3 3 3 5 3 3 3 6 3 EXTENSION WORKMODE 2 1 2 2 2 2 1 1 1 4 2 2 2 3 1 4 2 2 4 1 3 3 1 1 1 1 5671 4440 1001 3201 1002 1003 1004 1005 1006 20 11 9 15 19 21 58 644 245 988 777 400 4003 3003 3002 1 1 1 1 1...

Страница 220: ...ows of data for the report should be defined on the basis of index values The indexes for each standard table are fixed and cannot be changed deleted or added to However if you define a custom table i...

Страница 221: ...070293 070293 070293 070293 070293 070293 070293 070293 1 1 1 1 1 1 1 1 1 1 1 1 1 1 1 1 1 1 1 1 1 1 1 1 1 1 1 1 1 1 1 1 1 1 1 ACD 070193 070193 070193 070193 070193 070193 070193 070193 070193 070193...

Страница 222: ...48 37 20 59 32 11 31 10 39 22 15 36 20 13 46 33 12 40 34 14 41 30 18 34 24 14 43 31 8 51 39 24 50 31 21 ABANDONS 36898 20012 13111 53442 27635 15321 19768 9786 33389 26789 12530 37651 29602 11523 3617...

Страница 223: ...data into readable tables charts and fields Reports use Structured Query Language SQL queries to retrieve specific data from the database tables You can create and edit queries using the Edit Queries...

Страница 224: ...ing paragraphs give you information on how to create and use WHERE clauses in your queries Basic WHERE Clause 18 A basic clause has the following format Expression Relational_Operator Value The Expres...

Страница 225: ...e previous examples create hard coded row search conditions That is when you run the report CentreVu CMS always searches for the values you entered in the WHERE clause However instead of a hard coded...

Страница 226: ...the Multi Value option your WHERE clause must use the equals sign with the variable name In addition if a variable name has the Multi Value option the WHERE clause for that variable name should appea...

Страница 227: ...er Version 8 User Guide About SQL Queries 18 5 WHERE Clause for Excluding Rows of Data 18 If you want to exclude Split 5 from the report but include all other splits you might enter a WHERE clause as...

Страница 228: ...les using INFORMIX For more information on the CMS database tables and definitions of the database items in each table see the CentreVu CMS R3V8 Database Items and Calculations 585 210 939 document Th...

Страница 229: ...kgrp Trunk group data summarized by day wtkgrp Trunk group data summarized by week mtkgrp Trunk group data summarized by month htrunk Trunk data for intrahour interval dtrunk Trunk data summarized by...

Страница 230: ...s 18 Standard database items are listed in the Dictionary subsystem as having all upper case letters as in the preceding examples A standard database item can store Identifiers for example SPLIT VDN L...

Страница 231: ...arly in integrated reports check that the correct table is being queried Custom Database Items 18 You must enter a custom database item with the custom table name as a prefix exactly as you defined it...

Страница 232: ...in order to have 9 5 in a query you would use 19 2 as the query entry Calculations 18 A calculation is a combination of database items and arithmetic operators You can also include constants in a calc...

Страница 233: ...d in each report a field uses the standard calculation name PERCENT_ACD_TIME PERCENT_ACD_TIME represents the calculation 100 I_ACDTIME I_ACWTIME I_STAFFTIME This calculation when assigned to the Intra...

Страница 234: ...example you may want the percentage of a split s ACD calls that an agent handled in a day Thus you can enter a calculation that merges data from the Daily Agent and Daily Split tables as in the follo...

Страница 235: ...ck the database for disk space used by data in custom tables As a result you can inadvertently fill up your disk with custom data When this happens you can lose or damage custom data and ACD data Ther...

Страница 236: ...reVu CMS database in INFORMIX use the following steps The CentreVu CMS supports only the following INFORMIX data types SQLSMFLOAT SQLFLOAT SQLMONEY SQLDECIMAL SQLSMINT SQLINT SQLSERIAL SQLDATE SQLCHAR...

Страница 237: ...back to the previous step press the Delete key on your keyboard 2a At the INFORMIX Main Menu select Table The Select Database screen appears 2b Type cms and press The Table menu appears 2c Select Cre...

Страница 238: ...re numbers The numbers stored can be one of the following five types Decimal A decimal is a number that contains a deci mal point Smallint A Smallint column stores integers from 32 767 to 32 767 Integ...

Страница 239: ...l prompts that appear The prompts that appear and the order in which they appear in depend on the data type you selected The following table lists the possible prompts When you have responded to all o...

Страница 240: ...e customer s employer you might want to allow the NULL value for the case where the person is unemployed Enter n if you want to require a value in each row NULLS appears for all types except Serial AD...

Страница 241: ...e screen appears The Create Table menu appears 2k Select Exit The Build new table menu appears 2l Select Build new table The Table menu reappears If no errors are found then your table has been added...

Страница 242: ...The PERFORM menu appears 3h Select Add The cursor moves to the first column in the table 3i Enter data for the first column of the table and press the key The cursor moves to the next column If you ge...

Страница 243: ...om Items window CentreVu CMS does not automatically check the database for disk space used by data in custom tables As a result you can inadvertently fill up your disk with custom data When this happe...

Страница 244: ...ect Database screen appears 2 Press the key The TABLE menu appears 3 Select Alter The ALTER TABLE screen appears A list of existing tables also appears 4 Enter the name of the table you want to change...

Страница 245: ...ging the column s and go to Step 3 of Deleting a Column in this section The ALTER TABLE menu appears Del 1 To delete a column use the arrow keys to move the cursor to the column Select Drop The REMOVE...

Страница 246: ...r the name of a form and press The PERFORM menu appears Return 1 Select Add to add rows of data The table s column fields appear with the cursor in the first field 2 Enter data in the fields Use or to...

Страница 247: ...ve the cursor to the data you want to change Overtype the data and press The PERFORM menu reappears The message This row has been changed also appears Return Esc 1 To delete a row of data repeat Steps...

Страница 248: ...SQL Query and CMS Database Table Basics CentreVu Report Designer Version 8 User Guide Modifying a Table 18 26...

Страница 249: ...ndow Define Inputs 3 From the Edit menu select Inputs The Edit Inputs Select inputs for this report window appears 4 From the Input Types list click on Split Skill and then select the Add button 5 Sel...

Страница 250: ...he Only Me radio button 18 Select the OK button Notice that your report is now displayed in the Integrated Designer Category Insert a Chart 19 From the Insert menu select chart The Chart Assistant Sel...

Страница 251: ...y This query is based on the following table s isplit window appears 8 From the Database Items list select the following database items by clicking on the item and then selecting the Add button AVAILA...

Страница 252: ...rs 19 From the Queries drop down list click on table and then select the Add All button 20 Select the Next button The Table Assistant Select a grid layout window appears 21 In the Orientation frame se...

Страница 253: ...ion B 1 B Database Items and Calculations General Information 0 Please refer to the CentreVu Call Management System R3V8 Database Items and Calculations document 585 210 939 for full descriptions of t...

Страница 254: ...Database Items and Calculations CentreVu Report Designer Version 8 User Guide General Information B 2...

Страница 255: ...d Or Using in Clauses 18 4 Appearance of Input Fields 6 10 Area Chart 12 20 Arithmetic Operators 18 10 Associated ACD 6 11 Available Data 12 9 13 5 AVG 7 6 Axis Display 12 5 Axis Tab 12 5 Axis Display...

Страница 256: ...3 9 Copy Query 7 25 Copy Report 3 4 Copy to diskette 3 8 Copying a Designer Report from a File 3 9 Copying a Designer Report to a File 3 7 Copying a Query 7 25 Copying a Report to the Designer Catego...

Страница 257: ...Document Contents 1 4 Documents Related 1 7 Drag and Drop to Arrange Items on the Report 5 6 dsplit 18 7 dtkgrp 18 7 dtrunk 18 7 dvdn 18 7 dvector 18 7 E Edit 3 2 3 12 6 3 Edit Inputs 6 1 Edit Querie...

Страница 258: ...d 9 6 Select a field type 9 2 Select a query and associated data item for this field 9 4 Select an input for your field 9 5 Time Report Run 9 7 Defining 7 6 7 7 18 9 18 11 18 12 Formatting 14 1 14 4 A...

Страница 259: ...5 String 6 5 Time 6 6 Trunk 6 6 Trunk group 6 6 Input Fields continued Trunk state 6 6 Type 6 10 VDN 6 6 Vector 6 6 Input Fields That Allow Pattern Matching 6 7 Input Types 6 3 Input Value Fields 9 5...

Страница 260: ...Arithmetic 18 10 Operators continued Relational 18 2 Options 12 3 Options Menu 4 8 Align To Grid 4 8 Status Bar 4 8 OR button 7 10 Order of Input Fields 6 9 Orientation 13 3 Orthogonal 12 23 Other 7...

Страница 261: ...enu 4 4 Exit 4 5 Run 4 4 Save 4 4 Save As 4 5 Report Properties 4 13 Reports Formatting Chart 12 2 see also Formatting Chart Reports 12 2 see also Formatting Grid Reports 13 2 Naming 3 5 Resizing Item...

Страница 262: ...g 13 4 Headers Tab 13 10 Using 13 10 Sort Tab 13 11 Using 13 12 Summary Tab 13 13 Using 13 14 Tables Formatting continued Horizontal 13 3 Inserting 10 2 Placement in report 10 1 Vertical 13 3 Technica...

Страница 263: ...12 Variable Name 18 3 VDN 6 6 vdnex 18 8 vecex 18 8 Vector 6 6 Vertical 13 3 Viewing Distance 12 23 Viewing or Changing a Report s Properties 3 3 Viewing the Input Window 6 15 Visible 12 15 12 18 14...

Страница 264: ...Index CentreVu CMS R3V8 Upgrades and Migration IN 10...

Страница 265: ...________ 3 What did you like most about this document ____________________________________________________________________________ _____________________________________________________________________...

Страница 266: ......
Отзывы: