


41/113
supported by 802.11n adapters.)
Auto: STA will dynamically change as AP announcement.
On: The frames are always sent with protection.
Off: The frames are always sent without protection.
TX Rate: Manually select the transfer rate. The default setting is auto.
(802.11n
wireless cards do not allow the user to select the TX Rate.)
Enable TX Burst: Ralink's proprietary frame burst mode.
Enable TCP Window Size: Optimise the TCP window size to allow for greater
throughput.
Fast Roaming at-: enables fast roaming, which is set by the transmit power.
Select Your Country Region Code: There are eight countries to choose from in the
country channel list.
(11A ListBox only shows for 5G adapters.)
Show Authentication Status Dialog: When you connect to an AP with
authentication, choose whether show the "Authentication Status Dialog" or not.
The Authentication Status Dialog displays the processes during 802.1x
authentication.
Apply the above changes.
Icons and buttons:
: Show the Status Section information.
: Hide the Status Section information.
2.5
Statistics
2.5.1
Statistics
The Statistics page displays detailed counter information based on 802.11 MIB
counters. This page translates that MIB counters into a format easier for the user to
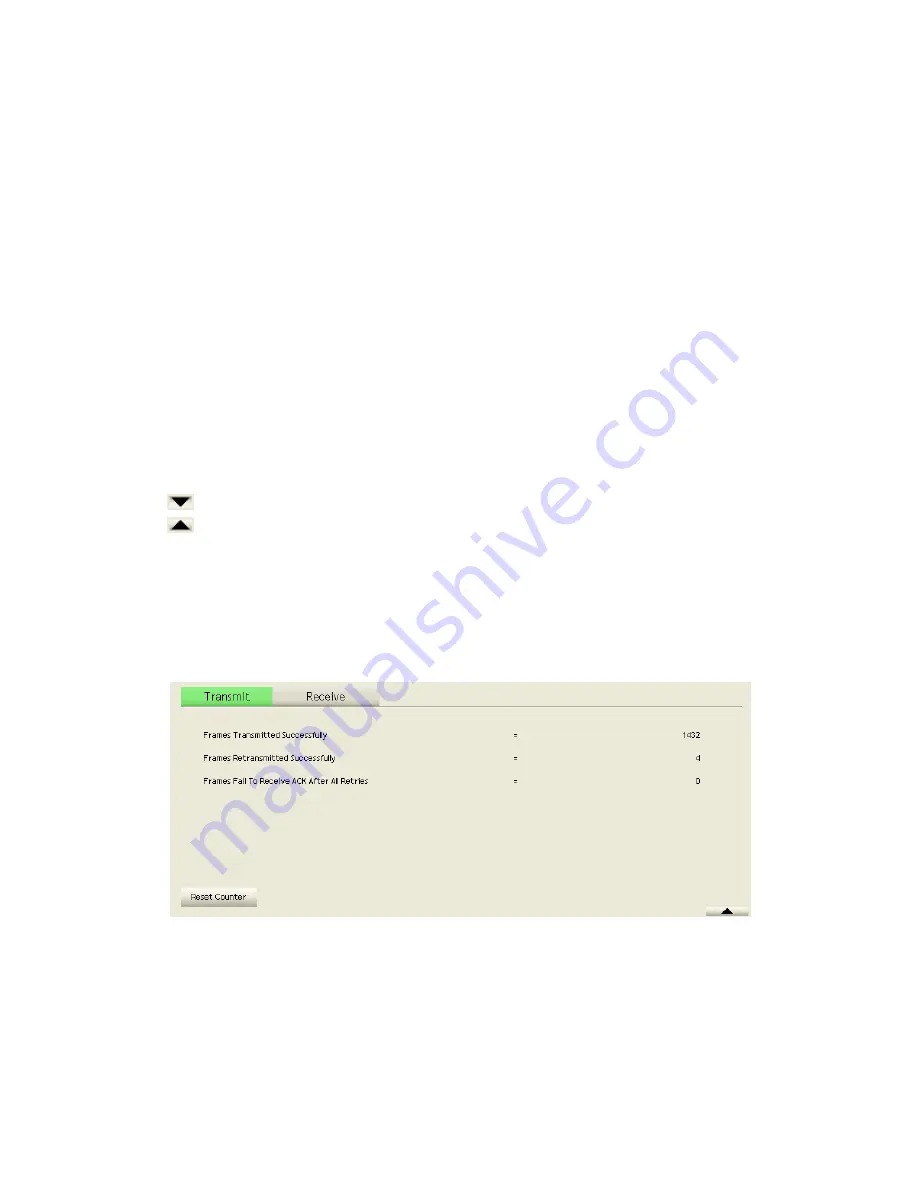
understand. Figure 2-5-1 shows the detailed page layout.
Figure 2-5-1 Statistics function
Transmit Statistics:
Содержание LP-7617
Страница 1: ...1 113 Wireless LAN USB Adapter User Manual 1 0 2010...
Страница 7: ...7 113 Figure 1 7 Select intended AP AP1 then click Connect Figure 1 8 Connect AP AP1 successfully...
Страница 14: ...14 113 Double click WLAN AutoConfig Manage the AutoConfig properties in the dialog box...
Страница 17: ...17 113 Double click the Network and Sharing Center icon...
Страница 21: ...21 113 Figure 2 1 5 Profile page Figure 2 1 6 Network page Figure 2 1 7 Advance page...
Страница 22: ...22 113 Figure 2 1 8 Statistics page Figure 2 1 9 WMM page Figure 2 1 10 WPS page...
Страница 28: ...28 113 The Add Profile will appear...
Страница 29: ...29 113 Specify a Profile Name Select an AP from the SSID drop down list The AP List from the last Network...
Страница 30: ...30 113 Now the profile which the user set appears in the profile list Click Activate...
Страница 37: ...37 113 Click Add to Profile...
Страница 39: ...39 113 Next you will see the new profile in the profile list Click Activate...
Страница 53: ...53 113 Select Enrollee from the Config Mode drop down list Click Rescan to update available WPS APs...
Страница 77: ...77 113 3 4 Example to Configure Connection with WEP on Select an AP with WEP encryption and click Connect...
Страница 78: ...78 113 The Auth Encry function will appear as below...
Страница 79: ...79 113 Enter 1234567890 in the Key 1 Hexadecimal field This value is same as our intended AP s setting...
Страница 80: ...80 113 Click OK The dialog box will appear as below...
Страница 82: ...82 113 Auth Encry function appears...
Страница 85: ...85 113 3 6 Example to Configure Connection with WPA Select an AP with WPA authentication mode and click Connect...
Страница 87: ...87 113 Click 8021X and the setting page will appear...
Страница 89: ...89 113 2 Click OK The dialog box should appear as below...
Страница 93: ...93 113 3 Click OK The dialog box should appear as the image below...
Страница 98: ...98 113 2 Click OK The dialog box should appear as the image below...
Страница 99: ...99 113 3 If the connection is successful the dialog box will appear as the image below...
Страница 101: ...101 113 Press Connect button show Auth Encry window authentication mode is WAPI PSK...
Страница 102: ...102 113 Key type is Hex enter 1234567890...
Страница 103: ...103 113 You can also connect AP with WAPI CERT authentication mode...
Страница 104: ...104 113 Select user certificate...
Страница 105: ...105 113 Select authentication server certificate...
Страница 111: ...111 113 It can t add the profile in Network page...


