20
Recording
1. Connect the DV camcorder to the unit using an
IEEE-1394 4-pin cable.
2. Turn on your TV and this unit.
3. Make sure a recordable disc or a video cassette is
inserted or loaded for recording.
When you insert a new recordable disc for recording, the recorder
will automatically start the disc preparation process.
4. Turn on the DV camcorder. Start playback on the DV
camcorder and cue at the point where you want to
start recording from.
5. Press [
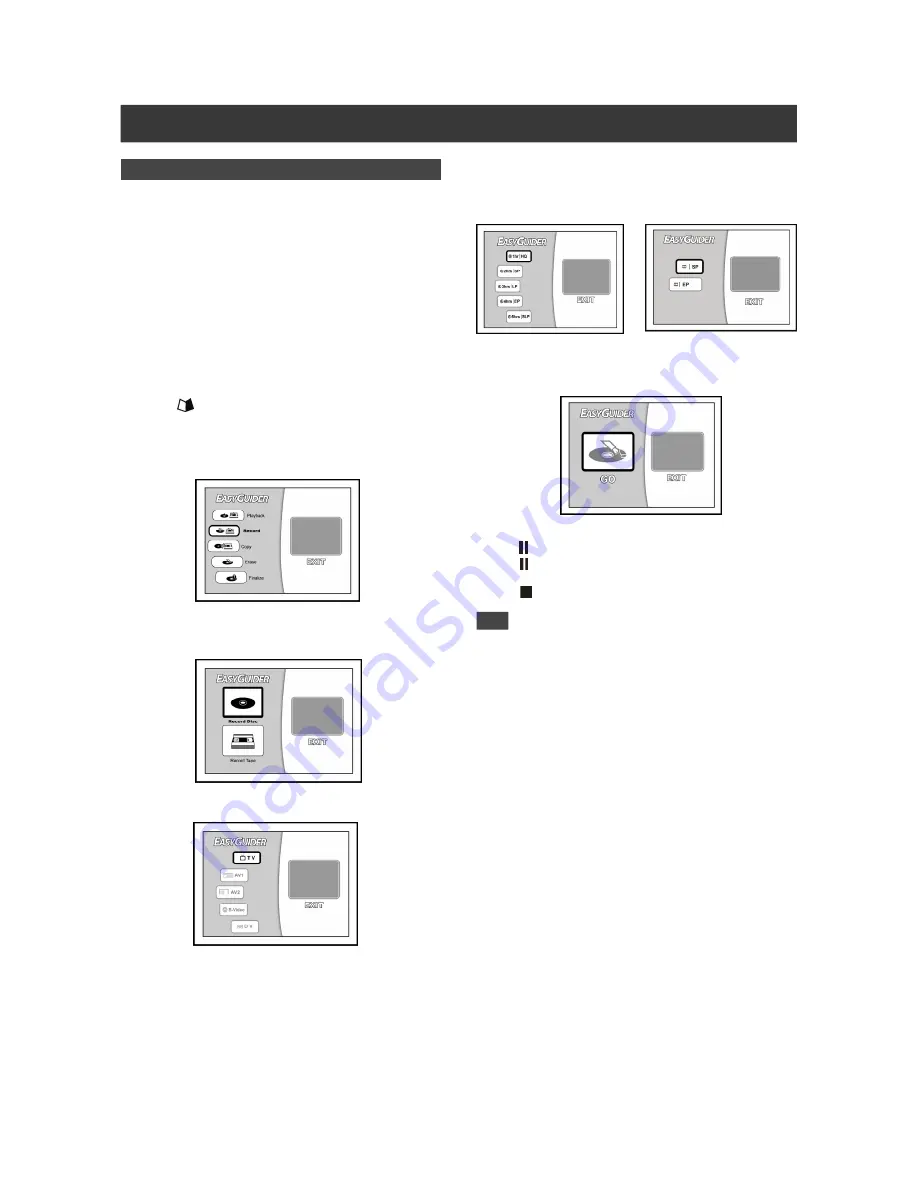
GUIDER] to display the Easy Guider
menu.
6. Press [
] [
] to select “Record” and press
[ENTER].
7. Press [
] [
] to select “Record Disc” or “Record
Tape” and press [ENTER].
8. Press [
] [
] to select “DV” and press [ENTER].
Using “Easy Guider” to Record DV Signals
9. Press [
] [
] to select a recording quality and
press [ENTER].
Disc Quality
Tape Quality
10. Press [ENTER] to start recording.
otes:
Press [
PAUSE ] to pause recording .
Press [
PAUSE ] again or [RECORD] to resume
recording.
Press [
STOP] to stop recording.
Note:
1. This unit stays in “Pause” mode when no DV input signal is
detected.
2. Before playing a DVD+R/DVD+R DL (double layer)/DVD-R/DVD-
RW disc on other compatible equipment, you need to
finalize
the disc.


