Adding a printer under Windows 95, 98, or Millennium is done in two parts.
First, you’ll identify the printer for the PrintServer and then the printer will be
configured. In the example given below, our printer may vary from yours and
it is assumed that no printer has yet been added. Screens, therefore, will vary
depending on the printer you add and if a printer was previously added.
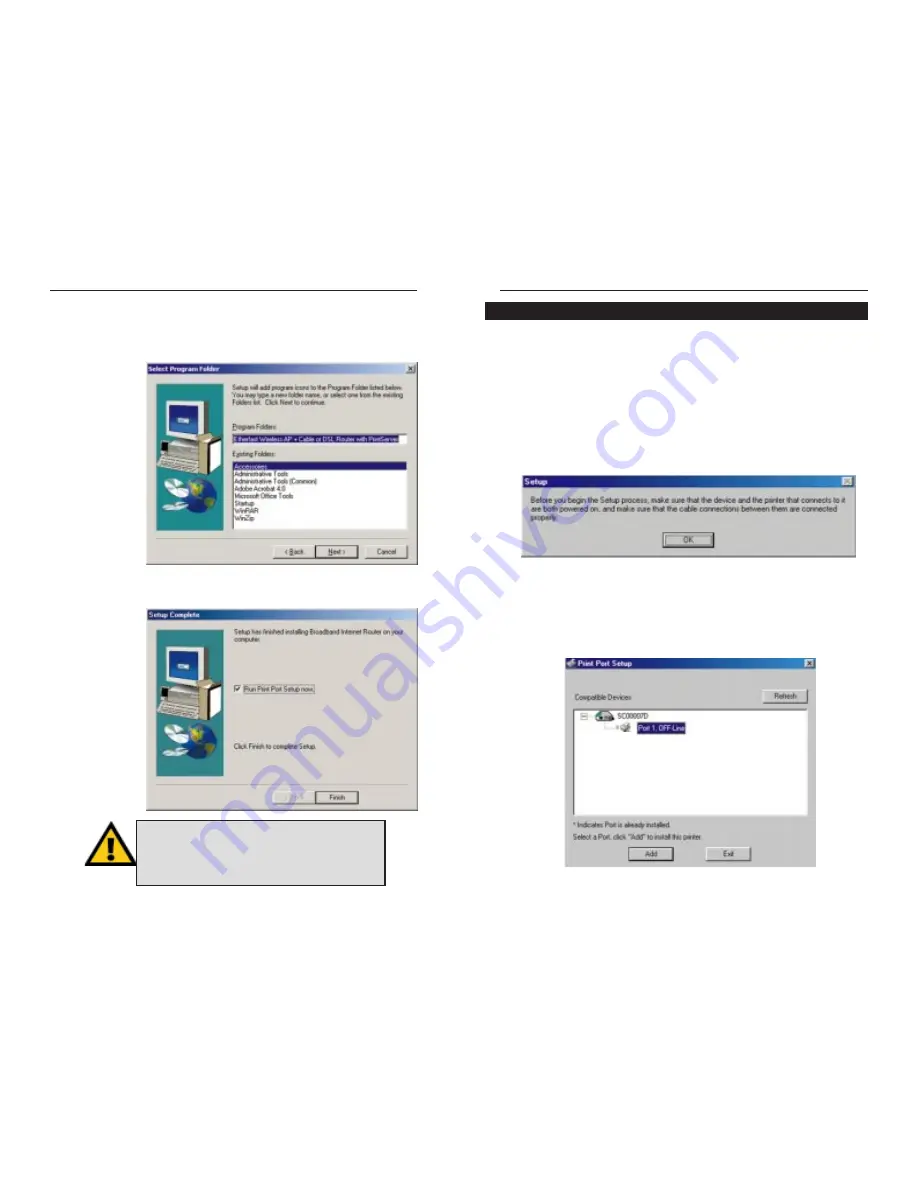
1. After you finish installing your PrintServer drivers, the following screen
will appear, asking for you to verify that the Wireless AP + Cable/DSL
Router and the printer that connects to it are both connected properly and
powered on. Make sure you have done this and click the OK button.
2. The Wireless AP + Cable/DSL Router will now scan the printer port for
your printer. As no printer has previously been added, the Print Port Setup
screen will show the printer port (Port 1) OFF-Line. This port should be
selected. If it is not, click on it to select it. Then, click the Add button to
begin adding the printer.
44
3. You will now be asked to select a Program Folder from which you can run
the PrintServer software. The PrintServer Program Folder will be created
after the PrintServer software has been installed. If you wish to keep the
default folder, click the Next button to continue. Otherwise, select or type
in a Program
Folder and
click the Next
button to con-
tinue.
4. Driver installation is now ready to begin. The “Run Print Port Setup now”
selection will
be selected by
default. This
will assign
your printer to
the Wireless
AP + Cable/DSL
Router’s print-
er port. Click
the
Finish
button to Add
your Printer.
43
Etherfast
®
Wireless AP + Cable/DSL Router with PrintServer
Adding a Printer under Windows 95, 98, and Millennium
Instant Broadband
TM
Series
NOTE: If you are using Windows NT or 2000, you
must NOT select “Run Print Port Setup now”. Make
sure the box next to this selection is NOT selected
before clicking the Finish button.


