23
5. Input the following parameters:
Share host:
Enter the IP address of your Console PC here (e.g. 192.168.2.103)
Share name:
Test
(The share name of the previously created folder)
Path to image:
image.iso
(the name of the CD image)
User:
super
(Your user name, the default is super)
Password:
pass
(Your password, the default is pass)
6. Click Set
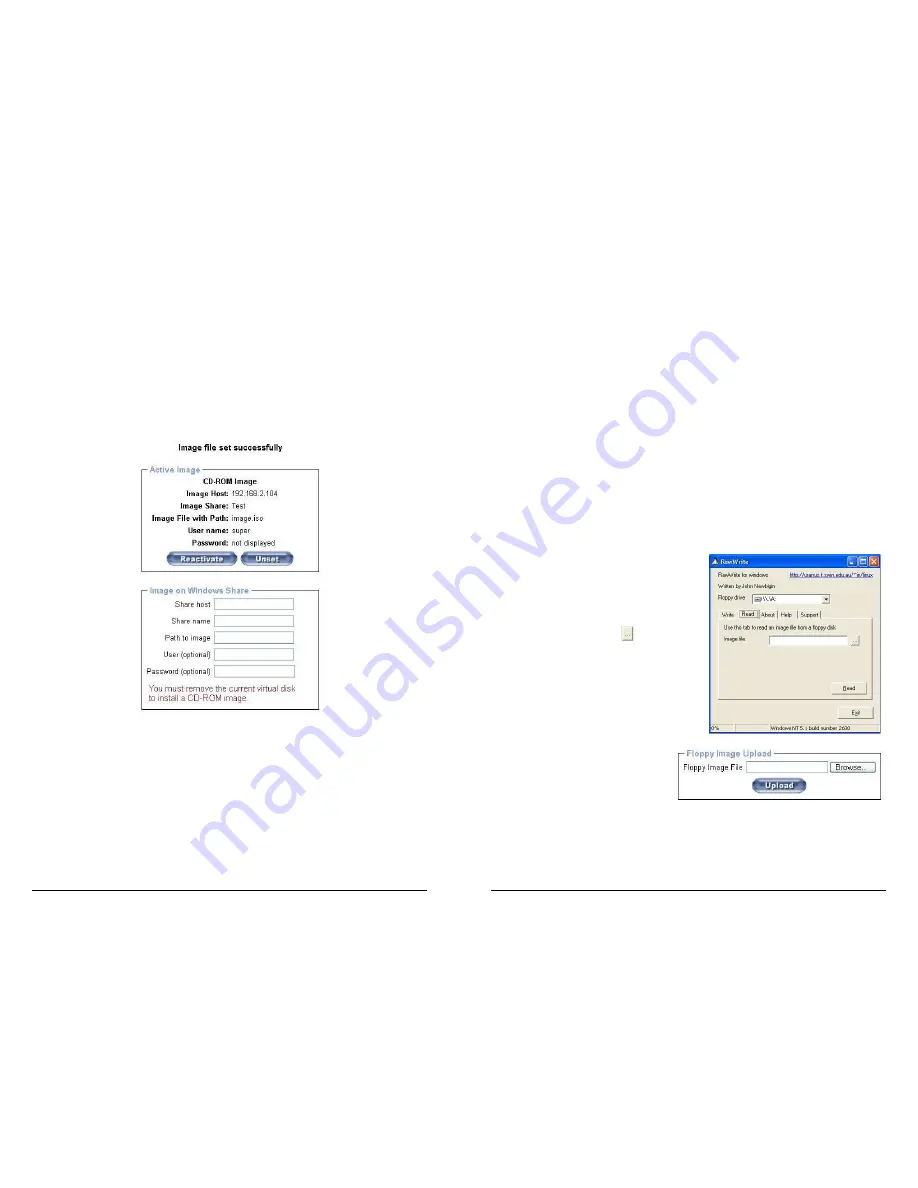
7. You will see the dialog below detailing the active image:
8. Click Reactivate. Access the console window and you will see that another CD drive has
been installed on the host computer. This is the virtual drive you have just set up. You can
access the uploaded CD image as though it were a regular CD. Click Unset to remove the
image.
SAMBA
If you would like to access the share via SAMBA, SAMBA must be set up properly. You may
either edit the SAMBA configuration file /etc/samba/smb.conf, or use the Samba Web
Administration Tool (SWAT) or WebMin to set the correct parameters.
24
5.2.3 Floppy Disk
Follow the steps below to upload a virtual floppy image to the KVM OVER IP SWITCH and
create a virtual floppy drive on the host system
Create a Floppy Image
First, on your client PC you must create an image of your floppy disk which can be uploaded to
the KVM OVER IP SWITCH ’s built in memory.
UNIX and UNIX-like OS
To create an image file, make use of dd. This is one of the original UNIX utilities and is included
in every UNIX-like OS (UNIX, Sun Solaris, and Linux).
To create a floppy image file copy the contents of a floppy to a file. You can use the following
command:
dd [ if=/dev/fd0 ] [ of=/tmp/floppy.image ]
dd reads the entire disc from the device /dev/fd0 and saves the output in the specified output
file /tmp/floppy.image. Adjust both parameters exactly to your needs (input device etc.)
Windows
Windows users should use the tool RawWrite for
Windows which is included on the supplied CD.
Launch RawWrite, you will see the window
opposite:
Insert your floppy disk into your floppy drive. Click
the Read tab and then click on
Select a name and destination for the floppy image
file and click the Read button. As the image is
written, you will see the progress as a percentage
figure in the bottom left hand corner.
When the image has been written you can upload it
to the KVM OVER IP SWITCH .
Uploading a Floppy Image
Click the Browse button and navigate to
the location of the image file, then click
the Upload button.
After the image has uploaded you will see the dialog below:


