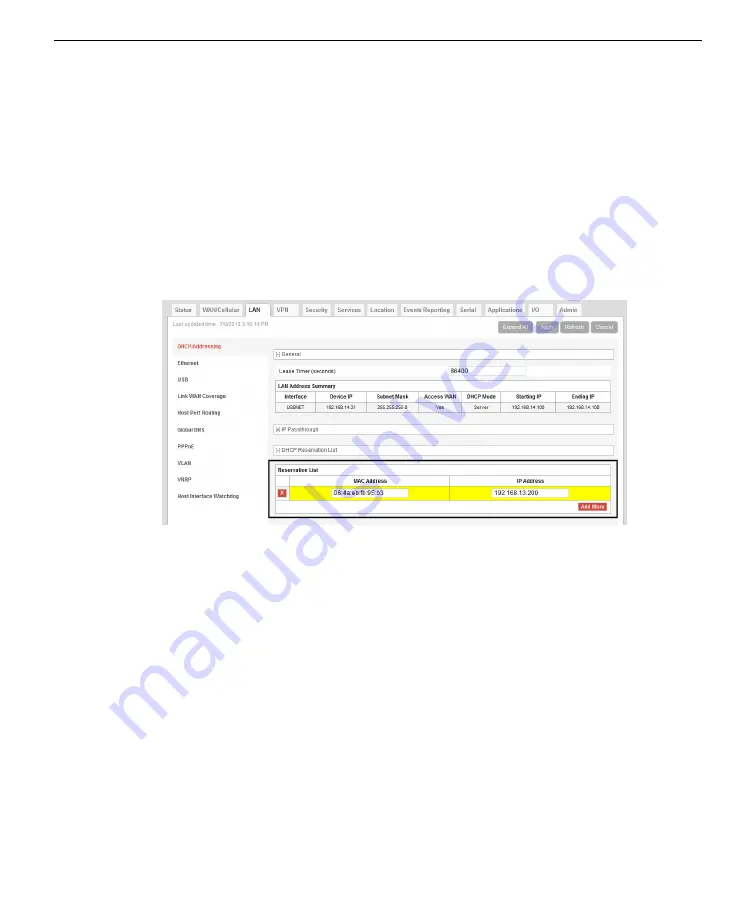
Setting the SmartFlux 2 System IP address via the RV50X
To enable two-way communication with the Biomet Data Acquisition System (to
update the configuration remotely, for example) or to use the SmartFlux 2 System
as an NTP server, the RV50X must be configured to set the SmartFlux 2 System IP
address (see
About the SmartFlux 2 System IP address
on page A-7 for more details).
This is accomplished by entering the MAC address of the device you want to
reserve an IP address for (the SmartFlux 2 System in this case) and the desired
IP address for the device. To apply the setting:
1
Click the
LAN > DHCP Addressing
tab and expand the
DHCP Reservation List
.
2
Click
Add More
and enter the following:
l
MAC Address
: Enter the SmartFlux 2 System MAC address. See
SmartFlux 2 System MAC address
l
IP Address
: Enter the IP address you want to reserve for the SmartFlux 2 System.
Use 192.168.13.200 if following suggestions in this manual.
3
Click
Apply
.
4
Reboot the modem.
You can configure the remaining settings before restarting the RV50X. The
SmartFlux System will switch addresses automatically, but it may take up to 24
hours for the setting to be applied. Restart it to apply the setting immediately.
Section 4. Configuring the RV50X
4-11
For the Biomet Data Acquisition System
Содержание AirLink RV50X
Страница 1: ...Using the AirLink RV50X with LI COR Eddy Covariance and Soil Gas Flux Systems Instruction Manual ...
Страница 2: ......
Страница 6: ...iv ...
Страница 10: ...viii ...
Страница 14: ...Section 1 Introduction to the communication system 1 4 AirLink Cellular Communication ...
Страница 28: ...Section 2 Initial assembly 2 10 AirLink Cellular Communication ...
Страница 36: ...Section 3 Configuring instrument IP addresses 3 8 AirLink Cellular Communication ...
Страница 52: ...Section 4 Configuring the RV50X 4 16 AirLink Cellular Communication ...
Страница 66: ...Section 6 Troubleshooting 6 4 AirLink Cellular Communication ...
Страница 68: ...Section 7 Maintenance 7 2 AirLink Cellular Communication ...
Страница 89: ......


