8
Lighting
This model has automatic direc-
tional lanterns on the front and
the rear of the loco. The cab is
also illuminated. A voltage stabi-
lization circuit reduces changes in
the brightness of the lights.
This model has a „flat“ multi-pur-
pose socket, with a removable
cover, at the rear of the loco. This
socket can be used to provide
track power to cars with lighting or
sound electronics.
To remove the cover of the
socket, pull it straight out. If the
cover is tight, gently use a small
straight screwdriver, to pry it out.
(Do not pull out the rectangular
outer housing.)
If your cars have the older,
„round“ lighting connectors, use
the Light Socket Adapter (68334).
Power Supply
Attention! For safety and reliabi-
lity, operate this model with LGB
power supplies (transformers,
power packs and controls) only.
The use of non-LGB power sup-
plies may void your warranty.
For more information on LGB
power supplies for indoor, outdoor
and multi-train operation, see the
LGB catalog.
Attention! After extended opera-
tion, this model may leave a small
amount of carbon dust around the
track. This dust can stain carpet
and other materials. The user
assumes full responsibility for any
damage.
MAINTENANCE
Attention! Improper service may
void your warranty. For factory
authorized service, contact an
authorized retailer or send this
product to an LGB service station
(see Factory Service).
Cleaning
This model can be cleaned using
a mild detergent and gentle stre-
am of water. Do not immerse this
model. If this model is equipped
with sound electronics, do not
expose the speaker directly to
water.
Replacing the light bulbs
Front and rear lanterns: Pull the
lantern housing away from the
model. Remove and replace the
bulb. Reassemble.
Cab light: Hook your finger into
the open cab window and gently
pull outward while lifting the roof.
Remove the roof. Remove and
replace the bulb. Reassemble.
Replacing the traction tire
- Use a small, straight-blade scr-
ewdriver to gently pry the old
traction tire out of the wheel
groove.
- Gently warm the new traction
tire in a dish of warm water.
- Use a small, straight-blade scr-
ewdriver to gently pry the new
traction tire into the wheel groo-
ve.
- Make sure that the traction tire is
completely in the wheel groove.
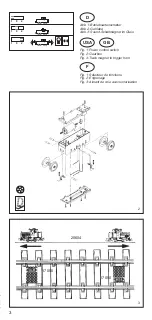
Replacing the motor (Fig. 4)
- Remove the two screws on each
of the gearbox retainers behind
and in front of the gearbox.
- Pull out the gearbox.
- Disconnect the wiring cables on
the gearbox.
- Remove the two screws on top
of the gearbox and take off the
gearbox cover.
- Replace the motor. Reassem-
ble.
Attention! If the motor is repla-
ced, generously lubricate the
gears with LGB Gear Lubricant
(51020).
Replacing the brushes, pick-up
shoes and wheelsets (Fig. 4)
- Remove the four screws on the
bottom of the gearbox.
- Remove the bottom gearbox
cover.
- Replace the brushes, pick-up
shoes or wheelsets.
- Reassemble.
Attention! If the wheelsets are
replaced, generously lubricate
the gears with LGB Gear Lubri-
cant (51020).
Hint: Make sure that the number
„1“ molded inside the gearbox is
aligned with the number „1“ mol-
ded inside the bottom.
Maintenance parts
50019 Maintenance Oil
50020 Special Tool Set
51020 Gear Lubricant
55020 Multi-Train System Deco-
der
55026 Decoder Interface Cable
62201 Standard Motor
63120 Brushes, 14mm, 16mm,
8 pieces
63218 Standard Pick-Up Shoes,
2 pieces
68511 Plug-In Bulb, Clear, 5V,
10 pieces
69104 Traction Tire, 37.5 mm,
10 pieces
Содержание 22604 Schoema Diesel Loco
Страница 13: ...13...


