background image

Entertainment


 Drag the Album View switch 

 to the right to view the album 

contents in stacks.

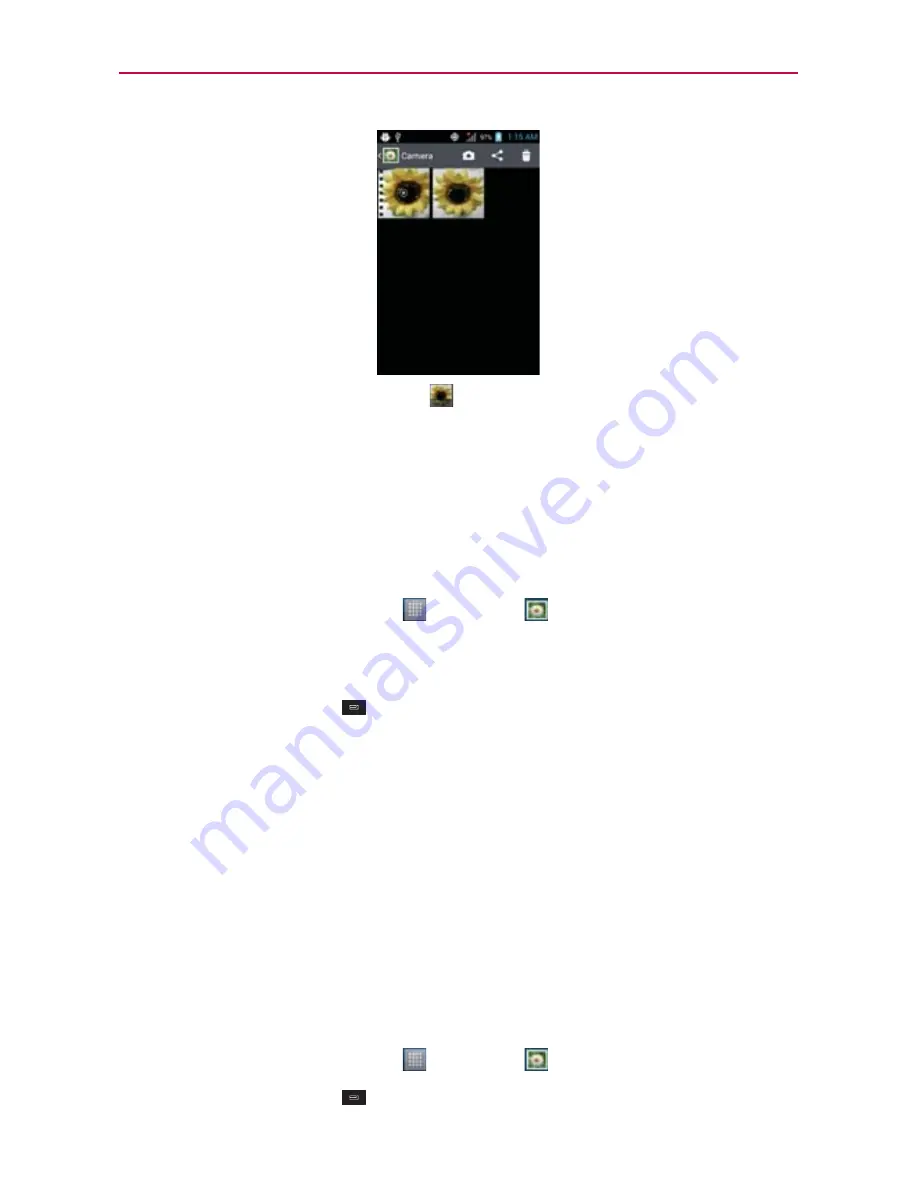
To Work with Batches of Pictures or Videos

In addition to working with whole albums and with individual pictures, you can 
select one or more pictures or videos in an album to work on them in batches. 
For example, to send a few pictures from an album to a friend.

1. Touch the 

Applications Key


 > 

Gallery


.

2. Open the album that contains the pictures and videos you want to work 

with as a batch.

3. Touch the 

Menu Key


.

4. Touch the pictures and videos you want to work with to checkmark 

them. Touch a checkmarked item to remove the checkmark. 

  You can checkmark all items or remove all checkmarks, by touching 

Select all

 or 

Deselect all

 at the top of the screen.

5. Use the control buttons at the bottom of the screen to perform actions 

on the checkmarked items. The control buttons available depend on the 
mix of items you’ve selected.

To share an album

You can share the entire contents of one or more albums or individual 
images or videos from an album.

1. Touch the 

Applications Key


 > 

Gallery


.

2. Touch the 

Menu Key


.

3. Checkmark or uncheckmark the album(s) you want to share.

Содержание MS770

Страница 1: ...the phone or your service provider O Copyright 2012 LG Electronics Inc All rights reserved LG and the LG logo are registered trademarks of LG Group and its related entities LG AS695 is a trademark of LG Electronics Inc All other trademarks are the property of their respective owners O Google Maps Gmail YouTube Talk and Android Market are trademarks of Google Inc LG AS695 User Guide English ...

Страница 2: ...sensor or near the sensor to avoid problems with the touchscreen O The use of a film cover produced by manufacturers other than LG can cause a disturbance in touch operation the display etc 2 Quick Keys Phone Key Opens the Phone application for access to the dial pad Call log Contacts and Groups Contacts Key Opens the Contacts application Messaging Key Opens the Messaging application Email Key Open...

Страница 3: ... current screen or application 6 Touchscreen Displays all the information needed to operate your phone such as applications call status date time signal status and battery strength 7 Front Camera Lens Use to take pictures and video of yourself Keep clean for optimal performance 8 Power Lock Key Locks the screen with a single press Press and hold to open the phone Options menu for the following opt...

Страница 4: ...es the battery compartment 13 Speaker Allows you to hear sounds and ringers It also allows you to hear the caller s voice when using Speaker mode 14 Microphone Transmits your voice to the other caller and for Voice activated functions 15 Volume Keys Allow you to adjust the ringer media volumes or the in call volume during a call 16 Accessory Charger Port Allows you to connect the phone charger USB...

Страница 5: ...reen Removing the battery 1 Turn the phone off and use the fingertip cutout at the bottom of the phone to remove the battery cover 2 Remove the battery from the battery compartment by lifting the bottom of the battery using the fingertip cutout 1 Use the fingertip cutout at the bottom of the phone to remove the battery cover 2 Align the battery contacts with the terminals in the battery compartment a...

Страница 6: ...n below Then remove the battery cover and locate the microSD card slot Carefully push the exposed edge of the microSD card to release it and gently pull it out to remove it To unmount the microSD card It is important to unmount the microSD card to avoid damage to it or data saved on the card 1 Touch the Applications Key 2 Touch Settings Storage 3 Touch Unmount SD card OK Installing the 4G micro SI...

Страница 7: ...warranty 1 Connect the USB cable into the adapter When connecting as shown below the LG logo on the USB cable should face toward you 2 Plug the USB cable as shown below into the phone s Accessory Charger port Charging with USB You can use your computer to charge your phone To be able to charge with the USB cable you need to have the necessary USB drivers installed on your PC first Connect one end o...

Страница 8: ...tooth or GPS use the Settings menu to turn them off Note that the GPS receiver is only turned on when you re using an application that makes use of it 㻌 Turn down screen brightness and set a shorter screen timeout 㻌 Turn off automatic syncing for Gmail Calendar Contacts and other applications if you don t need it 㻌 Use the Power Control widget to control the wireless connections GPS connection Blu...

Страница 9: ... offer different kinds of information and they may even include options to modify the settings so you can reduce power consumption by that application Setup Wizard The first time you turn on your phone the Setup Wizard guides you through signing in to your Google Account If you don t have one don t worry the Setup Wizard will help you create one You can also set up social networking accounts such a...

Страница 10: ...were working on opens NOTE This is the default Lock Screen If you ve set up an Unlock Pattern use your fingertip to draw the pattern To turn the phone sounds off If you re in a place where your phone sounds may disturb others you can quickly silence your phone from the Home screen 1 Press the Power Lock Key and unlock the screen 2 Press and hold the Power Lock Key then touch Silent mode OR Press th...

Страница 11: ...ext 5 Touch Next to begin the Google Account setup or Skip to skip to the next step With a Google Account Google applications are automatically synced between your phone and computer regardless of where you make an update 6 Select e mail SNS accounts you want to set up Email Facebook Twitter etc 7 Touch Use phone to start using the phone Setting up your Google Account 1 At the setup screen touch C...

Страница 12: ...gn into your Google Account now during setup If you wait until after setup is complete your settings are not restored O If you don t have a Google Account you re prompted to create one O If you have an enterprise account through your company or other organization your IT department may have special instructions on how to sign into that account O When you sign in your contacts Gmail messages Calend...

Страница 13: ...NOTE The difference between Wi Fi Cast and SmartShare is that Wi Fi Cast only allows you to share the added selected files whereas SmartShare allows you to share all of the files from the My Phone library Moreover SmartShare can push contents to the renderer device eg TV PC Touch to select the device from the device renderer list Touch to select the device from the remote content library Select an i...

Страница 14: ...to open the Notifications panel to view them all The following icons indicate the status of your phone Call icons Microphone muted during a call Missed call notification In call In call using Bluetooth device Speaker on Privacy call Calendar Alarm icons Calendar event notification Alarm set Email Messaging icons Other Email event received Sending Other Email failed New message received Sending messag...

Страница 15: ...3G network connected Using 3G data network Download through 3G network Upload through 3G data network Downloading data Uploading data GPS on No Signal Acquiring GPS access Strong network signal Airplane mode is on Weak network signal Roaming Location service on No service Connectivity icons Open Wi Fi connection detected Android debugger connected Bluetooth on Bluetooth device connected USB connec...

Страница 16: ...ystem secure Internal memory full System alert SD card inserted No SD card inserted Google sync started Error during Google sync Battery empty Battery full Battery charging Battery status unknown error No SIM card Unknown SIM card Preparing the SD card for use ...

Страница 17: ...screen Opens the Messaging application Opens the Applications screen and displays phone options and applications To return to the Home screen 㻌 Touch the Home Key at any time from any application To view other Home screen panes 㻌 Slide your finger left or right across the Home screen The Home screen spans seven screen widths allowing more space for icons widgets shortcuts and other items Status Bar...

Страница 18: ...he different available actions using the touchscreen Touch A single finger touch selects items For example touch an icon e g application or menu item touch words e g menu selection or to answer onscreen question or touch letters and numbers to type Touch and hold Touch and hold an item on the screen by touching it and not lifting your finger until an action occurs For example to open an Options menu...

Страница 19: ...ing from left to right and vice versa Double tap Double tap to zoom a web page or a map For example quickly double tap a section of a web page to zoom that section to fit the width of the screen You can also double tap to control the zoom in Maps and in other applications Pinch to Zoom Use your index finger and thumb in a pinch or spread motion to zoom in or out when using the MetroWEB a map or pict...

Страница 20: ...ercase Highlight text Double tap a word to highlight it To highlight a range of text double tap the screen then drag the blue highlight markers to highlight the text you want Cut or copy selected text Touch and hold the desired text to highlight it Then touch Cut or Copy Paste the cut or copied text Touch and hold the location to paste the text then touch Paste Delete a character Touch Touch and h...

Страница 21: ...r phone including any applications that you downloaded and installed from Android MarketTM or other sources are grouped together on the Applications screen which you access from your Home screen If you have more applications than can fit on the Applications screen you can slide the screen up or down to view more Home screen Applications screen Touch to open the Applications screen Touch an applicat...

Страница 22: ...plications screen by moving the position of applications so that you don t have to scroll the screen up to access the applications you use most often You can also add additional categories to the screen to organize your files Condensing and expanding the application categories 1 From the Home screen touch the Applications Key 2 Place your thumb and index finger on the screen and move them together i...

Страница 23: ...hen you open another application There s no need to quit an application before opening another You can use and switch among several open applications Android manages each application stopping and starting them as needed to ensure that idle applications don t consume resources unnecessarily Opening an application Open an application simply by touching its icon on the screen TIP You can customize yo...

Страница 24: ... often 1 Open the Applications screen 2 Touch and hold the application icon you want to add to your Home screen Your Applications screen will close so that you can place the icon on the Home screen 3 Lift your finger to place it or drag the icon to where you want it on the screen then lift your finger NOTE You can place application icons on any of the Home screen panes Simply drag the icon to the le...

Страница 25: ...have Options menus if you touch the Menu Key on a screen that has no Options menu nothing will happen Some applications have more Options menu items than can fit in the options menu To view the additional menu items touch More Context menus Context menus contain options that apply to a specific item on the screen To open a Context menu touch and hold an item on the screen Not all items have Context ...

Страница 26: ...f all recent notifications Depending on your settings you may hear a notification sound and or the phone may vibrate To open the Notifications panel Touch and drag the Status Bar to the bottom of the screen OR From the Home screen touch the Menu Key Notifications The Notifications panel displays your wireless provider and a list of your current notifications organized into ongoing and event based notific...

Страница 27: ... in the list To close the Notifications panel Touch and drag the tab at the bottom of the Notifications panel to the top of the screen or just press the Back Key The panel will also close when you touch a notification Searching Your Phone and the Web You can search for information on your phone and on the web by using the Google search application Some applications such as Gmail Contacts and MetroWEB...

Страница 28: ... can use the Search preferences to configure some aspects of web search for example whether it makes suggestions below the Quick Search Box as you type and what phone features you want to include in searches To access settings open the application and touch the Menu Key Search settings 3 Touch to search for the entered terms Voice Search Touch to search by voice Provides one touch shortcut to match...

Страница 29: ...k the screen you will need to draw your unlock pattern or enter your PIN or password to unlock the screen NOTES O You have 5 opportunities to enter your unlock pattern PIN or password If you used all the 5 opportunities you can try again after 30 seconds O When you can t recall your unlock pattern If you ve created a Google Account on the phone touch Forgot pattern Then you are required to sign in...

Страница 30: ... Keys Changing Your Unlock Pattern PIN or Password 1 Touch the Application key Settings Lock Screen 2 Touch Select screen lock under the Lock Screen section 3 Draw your current unlock pattern 4 Touch the type of unlock setting to change it or touch None to remove it 5 You re prompted to enter your new unlock information ...

Страница 31: ... variety of widget applications to your Home screen including a clock a music player a picture frame Google search bar a power manager a calendar of upcoming appointments and Weather widget and more Note that more widgets can also be found on Android MarketTM Shortcuts Add shortcuts to applications a bookmarked web page a favorite contact a destination in Maps a Gmail label a music playlist and mo...

Страница 32: ...allpapers to open a list of animated wallpapers installed on your phone Live wallpapers can change according to the time of day respond to touching the screen tell the time or offer other information Touch any available wallpaper and it will automatically be applied to your phone 3 Touch Set wallpaper or Save if necessary To rename a folder 1 Touch the folder icon to open it 2 Touch and hold the f...

Страница 33: ...he Quick Contact bubble Depending on the contact information saved the available actions will be displayed below the name Touch a Quick Contact icon to communicate with the contact Depending on the icon you ve touched a different application will open Open your contacts list and long press the contact you can access you can see context menu to edit delete forward add to home screen etc If you add ...

Страница 34: ...ervice provider s network roaming The icons in the Status Bar indicate which kind of data network you re connected to and the network signal strength When connected to slower networks you may want to postpone using your phone for data intensive tasks until you are connected to a faster network again or find a Wi Fi network to connect to To disable data when roaming You can prevent your phone from t...

Страница 35: ...r phone so it can connect to them Turn off Wi Fi when you re not using it to extend the life of your battery The following Status Bar icons indicate your Wi Fi status Connected to a Wi Fi network waves indicate connection strength Notification that an open Wi Fi network is in range When you connect to a Wi Fi network the phone obtains a network address and other information it needs from the networ...

Страница 36: ...red you will be prompted to enter a password Ask your network administrator for details O When you re connected to a network you can touch the network name in the Wi Fi settings screen for details about the speed security address and related settings To receive notifications when open networks are in range By default when Wi Fi is on you receive notifications in the Status Bar when your phone detect...

Страница 37: ...etwork 3 Enter the Network SSID name of the network If the network is secured touch Security and touch the type of security deployed on the network 4 Enter the required passwords and security credentials 5 Touch Save The phone will connect to the wireless network Any credentials that you entered are saved so you are connected automatically the next time you come within range of this network To for...

Страница 38: ... Touch LG software to connect to the PC Touch Charge only to use only the charging function and not the USB function Always ask You can choose to be asked to confirm the USB connection when connecting to a computer When Always ask is checkmarked the USB selection window is displayed Using the Status Bar to change the settings The Status Bar shows the current USB connection mode so you can easily op...

Страница 39: ...e exposed edge of the microSD card in with your fingertip to release it from the slot 4 Carefully pull the microSD card out of the slot NOTE You can easily damage the microSD card and its adapter by improper operation Please be careful when inserting removing or handling them microSD Card Settings Viewing Memory in the microSD Card 1 Touch the Applications Key Settings Storage 2 Review the availabl...

Страница 40: ... or from the device memory To connect your device to a computer via USB 1 Use the USB cable that came with your phone to connect the phone to a USB port on your computer 2 Open the Notifications panel and then touch USB connected 3 Touch the connection mode you want to use to connect to the PC Choose from the following options Charge only Media sync MTP or USB tethering LG software Camera PTP Devic...

Страница 41: ...ou want to send data to from the list Sending multi selected contacts Open the Contacts application To select more than one contact touch the Menu Key Share Select all Share Bluetooth Check whether Bluetooth is turned on then touch Scan for devices Choose the device you want to send data to from the list Connecting to FTP only FTP server is supported on this handset From the Home screen touch the ...

Страница 42: ...If you enter a wrong number touch the Delete Key to erase digits one by one O To erase the entire number touch and hold the Delete Key O To dial an international number touch and hold to enter the plus symbol Then enter the international prefix for the country followed by the full phone number 3 Touch the Call Key to dial the number that you entered To dial an international number touch and hold to...

Страница 43: ...ptions NOTE If you opened other applications while on a call you ll need to return to the Call screen to end the call You can touch the Home Key then the Phone Key or drag the Notifications panel down and touch the Call icon You can also touch the Contact s name or number at the top left corner of the Home screen Airplane mode Some locations may require you to turn off your phone s wireless connect...

Страница 44: ...incoming calls are recorded in the Call log To answer a call If the screen is unlocked simply touch the Answer Key If the screen is locked swipe the Answer Key to outer circle to answer If you were already on a call the first call is placed on hold while you answer the new call NOTE To silence the incoming call ringer press the Volume Keys Unlocked Screen Locked Screen Touch the Answer Key to answe...

Страница 45: ... you ve dialed received or missed It offers a convenient way to redial a number return a call or add a number to your Contacts To open the Call log Touch the Phone Key from the Quick Keys bar then touch the Call log tab at the top of the screen Calls are listed in the Call log tab The most recent calls are located at the top of the list Scroll down to see older entries Touch the Decline Key to dec...

Страница 46: ... Call Key at the right of the call entry You can also touch and hold the entry to open a Context menu with more options to communicate with that contact in other ways To add an entry s number to your Contacts 1 Touch and hold the call entry 2 Touch Edit number before call to contacts in the Context menu When the screen turns to dial screen you can edit the number before adding in the contacts 3 To...

Страница 47: ...nchronized with your phone when you first synchronize to your GoogleTM Account To call a contact 1 Touch the Contacts Key from the Quick Keys bar 2 Touch the contact you wish to call 3 Touch the contact s phone number you want to call To call a favorite contact 1 Touch the Contacts Key from the Quick Keys bar then touch the Groups tab 2 Touch Favorites and then touch the contact you wish to call 3 ...

Страница 48: ...r way and dial by voice using your headset For details see the documentation that came with your headset 2 Say Call followed by the name of the contact or say Dial followed by a phone number Options During a Call Touch to turn the speakerphone on or off The Speaker Key lights up to indicate that the speakerphone is on WARNING To avoid damage to your hearing do not hold the phone against your ear w...

Страница 49: ...ough the phone s speaker When viewing the in call screen you can turn the speakerphone off by touching the Speaker Key again The speaker is turned off automatically when the call ends WARNING To avoid damage to your hearing do not hold the phone against your ear when the speakerphone is turned on To switch between a Bluetooth headset and the phone When a Bluetooth headset is paired and connected t...

Страница 50: ...nce call Contact your wireless service provider to learn whether they support conference calls and how many participants you can include 1 Place a call to the first participant 2 When you re connected touch Contacts or Dialpad 3 Choose a contact to call from your Contact list or enter the number on the dial pad 4 After you re connected touch the Merge calls Key The participant is added to the confe...

Страница 51: ...tion icon appears in the Status Bar If you have not set up your voicemail number or if you need to change it you can do that in the Call settings To listen to your Voicemail Open the Notifications panel and touch New voicemail OR Touch and hold on the dial pad to listen or manage your voicemail ...

Страница 52: ...web page touch the URL input field enter the web address URL of the web page and touch 2 Touch the Menu Key to access the Browser options Navigate web pages using the following options URL Input Field Touch here to enter a web address for the web page you wish to access Bookmarks Touch here to view and edit your bookmarks While browsing the web page use the following options To zoom in or out doubl...

Страница 53: ... want to save To go to a next page in history touch the Menu Key Forward To send the web address URL of the web page to others touch the Menu Key More Share page To search for text on the web page touch the Menu Key More Find on page To select text on the web page touch the Menu Key More Select text Use your finger to highlight the text you want to select Touching the screen displays begin and end ...

Страница 54: ...address URL 5 Touch OK From the bookmark list touch and hold a bookmark and use the following options To open the web page in the current window touch Open To open the web page in a new window touch Open in new window To edit the bookmark details touch Edit bookmark only available for Bookmarks you have added To add the bookmark shortcut to one of the Home screen panes touch Add shortcut to Home T...

Страница 55: ...rtencias de se Muestre una advertencia si hay un problema con la seguridad de un sitio Aceptar cookies Permitir a los sitios guardar y leer datos de cookies Borrar los datos de cookies Borrar todas las cookies del navegador Recordar datos de formula Recordar datos ingresados en formularios para uso posterior Borrar datos de formulario Borrar todos los datos de formas guardados Habilitar ubicación ...

Страница 56: ...gina automático Aplique formato a las páginas Web para adaptarlas a la pantalla Bloquear ventanas emergentes Codificación de texto Latin 1 ISO 8859 1 Restaurar a valores predeterminados Restaurar ajustes predeterminados Gestión de ancho de banda Buscar resultados precargados Permitir al navegador precargar recargar resultados de búsqueda altamente confiables en segundo plano Cargar imágenes Mostrar ...

Страница 57: ...rections Getting Directions Maps can provide directions for travel by car public transportation cycling or by foot To get directions 1 Touch the Applications Key Maps 2 Touch the Menu Key Directions 3 Enter a starting point in the first text box and your destination in the second text box You can also select an address from your Contacts Point on map or My Places To reverse directions touch the Men...

Страница 58: ... Home screen touch it to open the Weather application to view summarized and detailed weather information Weather Widget Weather Application To update or add city Touch the Weather widget on the Home screen to open the Weather application to view summarized and detailed weather information Touch the City list icon Touch Current to update your current location Touch at the bottom of the screen to a...

Страница 59: ...ettings City list You can add edit or remove a city from your list General Settings These settings control how frequently the information on the Weather widget is updated and the temperature unit to use Refresh interval Allows you to set how often to update the weather More frequent updates trade the convenience of current information for increased data use and decreased battery life between charg...

Страница 60: ...ts in the Quick Keys bar All of your contacts are displayed alphabetically in a list If you have a new phone and haven t added any contacts yet the Contacts application will display hints on how to start adding contacts to your phone To open a list of your favorite contacts Open your Contacts application and touch the Groups tab at the top of the screen Then touch Favorites Favorites lists the con...

Страница 61: ...at process manually To add a new contact 1 Open the Contacts application 2 Touch the plus button at the right of the search bar 3 If you have more than one account with contacts touch Contact type at the top of the screen and choose the account to which you want to add the contact 4 Enter the contact s name 5 Touch a category of contact information such as phone number and email address to enter t...

Страница 62: ...vCard format onto your microSD card then import them into your phone 1 Insert the memory card that contains the vCard files into your phone 2 Open the Contacts application 3 Touch the Menu Key Import Export 4 Touch Import from SD card 5 If you have more than one account on your phone touch the account into which you want to import the contacts 6 Touch the contacts you want to import to the microSD ...

Страница 63: ...Your Favorites The Favorites section contains a short list of the contacts you communicate with most often To add a contact to your favorites list 1 Open the Contacts application 2 Touch a contact to view its details 3 Touch the star to the right of the contact s name When the contact is added to your favorites list the star will be gold colored To remove a contact from your favorites list 1 Open ...

Страница 64: ...etails You can change or add details saved in your contact entries You can also set specific ringtones to specific contacts or determine whether calls from specific contacts are diverted to your voicemail Some contact entries contain information from multiple sources information that you added manually information that Contacts joined from multiple accounts to consolidate duplicates etc If you find du...

Страница 65: ...h the name of a contact in the list to view its details 3 Touch and hold the phone number to use as the contact s default phone number 4 Touch Set as default number in the menu that opens The default phone number is indicated by a checkmark To set a ringtone for a contact 1 Open the Contacts application 2 Touch the name of a contact in the list to view its details 3 Touch the pencil right to the n...

Страница 66: ... hidden not deleted 4 Touch OK to confirm that you want to delete the contact Communicating with Your Contacts From the Contacts or Groups tab you can quickly call or send a text SMS or multimedia message MMS to a contact s default phone number You can also open a list of all the ways you can communicate with that contact This section describes ways to initiate communication when viewing your list ...

Страница 67: ...to call that number To call a contact s default number 1 Open the Contacts application 2 Touch call button on the contact list you wish to call Selecting Which Contacts are Displayed You can hide contacts that don t have phone numbers You can also configure which groups of contacts you want to display in the Contacts list To change which groups are displayed 1 Open the Contacts application 2 Touch ...

Страница 68: ...you want to join with the first contact The information from the two contacts will be merged and displayed under the name from the first contact Separating Contact Information Each contact entry on your phone may contain joined information from a variety of sources If contact information from different sources was joined in error you can separate the information back into individual contact entries ...

Страница 69: ...you open the Email application a setup wizard opens to help you add an Email account After the initial setup Email displays the contents of your Inbox The Accounts screen The Accounts screen lists your Combined Inbox and each of your email accounts Open the Email application If you re not on the Account screen touch the Menu Key Accounts Each folder and account on the Accounts screen displays the ...

Страница 70: ...ceived email message You can reply to it forward it or even just delete it To reply to or forward a message While reading a message touch Reply to reply to the message While reading a message touch Forward to forward the message To mark a message as unread You can set a message to appear as though it has not been read for example to remind yourself to read it again later From the Inbox touch and h...

Страница 71: ... the server address O Use SSL Choose whether or not to use SSL for Microsoft Exchange Other E mail Account POP3 and IMAP4 The following settings must be entered when setting up a POP3 or IMAP4 E mail Account O Email address Enter the account e mail address O Password Enter the account password O IMAP4 POP3 Select the protocol type from IMAP4 or POP3 O Incoming server Enter the incoming e mail serv...

Страница 72: ...ts to view the messages in each Inbox Conversations with new messages are displayed with bold subject lines To read a message in a conversation touch its subject line text indicates that this message was sent directly to you indicates that you were CC d on this message No indicator indicates that this message was sent to a group that includes you To open your Inbox when Gmail is running If you are...

Страница 73: ...Google Account at a time If you have more than one account you can open the Accounts screen to view how many unread messages you have in each account and to switch accounts 1 From your Gmail Inbox touch the Menu Key Accounts 2 Touch the account that contains the email you want to read ...

Страница 74: ...he sender of each message if the sender has a Google Account Touch the contact s picture to open Quick Contact When reading messages in a conversation you can use the buttons at the bottom of the screen to archive the entire conversation or delete it After you delete a conversation you can touch Undo in the green bar that appears at the top of the screen to undo the last action and restore the mes...

Страница 75: ... of hidden messages 1 Touch the Applications Key Gmail Then touch the conversation you want to view and the tab indicating minimized messages 2 Touch the contact name to open that message When reading a message you can touch the Menu Key Mark unread to return a read message to the unread state For example to remind yourself to read it again later ...

Страница 76: ...opy recipients if necessary 4 Enter a subject for the message in the Subject field 5 Continue into the next field to enter your email message 6 Touch the Menu Key Attach to add an attachment to the email 7 Touch Send to send your message If you re not ready to send the message touch to save the message as a Draft You can read your drafts by opening messages with the Draft label To erase the message ...

Страница 77: ...ou can add or remove addresses edit the subject and add or remove text or attachments You can add one or more people to an ongoing conversation by replying to all and then adding the new person s address es to the reply Note that the conversation text and previous messages are also included in your reply or forward 3 Touch Send to send your message Changing Gmail Settings You can change a number o...

Страница 78: ... Delete thread in the Context menu that opens 3 Touch OK to confirm you want to delete the message thread To send a text message 1 On the Messaging screen touch New message 2 Enter a mobile phone number in the To field As you enter the mobile phone number matching contacts appear You can touch a suggested recipient or continue entering the phone number 3 Touch the text field to start entering your me...

Страница 79: ...essage thread with that contact To create and send a multimedia message 1 On the Messaging screen touch New message 2 Enter a mobile phone number or email address in the To field As you type matching contacts appear You can touch a suggested contact or continue typing 3 Touch the text field to start entering your message 4 Touch the Menu Key Add subject to add a message subject 5 Touch to open a men...

Страница 80: ...Contact vCard your Contacts list opens and allows you to select a picture of a Contact to send 6 Touch Send MMS to send the message To respond to messages you receive If you re working in a message window messages that you receive from that contact are displayed Otherwise you receive a new message notification and a new message icon appears in the Status Bar When you touch the new message notificati...

Страница 81: ...ssaging application touch the Menu Key Settings How to select the type of keyboard you want to use 1 Touch and hold a text field 2 Touch Input method 3 Choose between Swype and LG Keyboard You will now be able to enter text using the new keyboard Touch and hold the text field Touch Input method Choose the type of keyboard you want ...

Страница 82: ...Google Talk on the web or on the phone Touch here to add account To sign out of Google Talk You can sign out of Google Talk For example if you want to limit Google Talk conversations to your computer Also signing out can extend your battery life From your Friends list touch the Menu Key Sign out You will no longer receive chat notifications or see others Google Talk status in other applications suc...

Страница 83: ...n out Settings Help and Send feed back To accept an invitation to chat When a friend sends you a Google Talk message you will receive a notification The friend s name in the Friends list turns white and displays the message Touch the friend in your Friends list OR Open the Notifications panel then touch the chat notification A chat window will open where you can exchange messages with your friend Mor...

Страница 84: ...nd other applications indicate your and your friends Google Talk status Available Signed into Google Talk and available to chat Away Signed into Google Talk but not active Busy Signed into Google Talk but too busy to chat Signed out of Google Talk Invisible Signed into Google Talk but appear signed out to others Video Chat Video chat is available Voice Chat Voice chat is available ...

Страница 85: ... a new chat message arrives 3 Touch Notifications in the Text chat settings and Voice video chat settings to receive a notification in the Status Bar when a new chat message arrives 4 Touch Ringtone in the Text chat settings and Voice video chat settings to open a list of the ringtones that will ring to notify you of a new chat 5 Touch Vibrate in the Text chat settings and Voice video chat settings ...

Страница 86: ...it When Sign in automatically is checkmarked you are signed into Google Talk when you turn on your phone To set Google Talk to change your status 1 From the Friends list touch the Menu Key Settings 2 Touch Automatic away status to select or deselect it When Automatic away status is checkmarked your status will automatically be changed to Away when the screen is turned off ...

Страница 87: ...al then a name or a phone number Or you can say Redial to redial the last number dialed 3 If a list of results is displayed touch the one you want to use Open an Application using Voice Dialer 1 Touch the Applications Key Voice Dialer 2 Say Open and then an application name 3 If a list of results is displayed touch the one you want to use The device opens the corresponding application ...

Страница 88: ...imply touch this icon and your Gallery will appear on the screen Voice photo Zoom in or zoom out The Volume Keys will also adjust the zoom Settings Opens the settings menu Shot Mode Allows you to set the Shot mode Normal Set as normal shot mode HDR HDR combines photos taken at different exposures to one optimal photo while compensating for backlight by enhancing multiple exposure control Panorama ...

Страница 89: ...ifferent lighting conditions Choose from Auto Incandescent Sunny Fluorescent and Cloudy O Color effect Applies artistic effects to pictures Choose from None Mono Sepia or Negative O Timer Allows you to set a timer to delay taking the picture Choose from 3 sec 5 sec or 10 sec O Geotagging Allows you to select if you want to save the location information for the pictures you take Choose from Off or ...

Страница 90: ...ou touch an option or icon to proceed if Auto review is set to On The following options are available after taking a photo Share Touch to share your photo using Bluetooth Email Facebook Gmail Google mail metro Messaging Picasa Social Twitter Wi Fi Cast or any other application you ve downloaded that supports this feature Set as Touch to use the image as a Contact icon Lockscreen Wallpaper or Wallp...

Страница 91: ...the icon identifying a contact or set it as your phone wallpaper Move Touch to move the picture to another album or folder Rename Rotate Left Touch to rotate the photo counter clockwise Rotate Right Touch to rotate the photo clockwise Crop Allows you to manually crop the photo Use your finger to move or resize the cropping box to encompass only the part of the photo you want to see then touch Save ...

Страница 92: ...lorescent and Cloudy Color effect Applies artistic effects to videos Choose from None Mono Sepia and Negative Brightness Defines and controls of the amount of sunlight entering the lens Slide the brightness indicator along the bar toward for a lower brightness video or toward for a higher brightness Video Zoom Zoom in or zoom out The Volume Keys will also set the zoom Set the zoom before starting a...

Страница 93: ...ra mode icon changes to and the Capture button changes to 3 The Video camera s viewfinder will appear on the screen 4 Holding the phone horizontally point the lens toward the subject of the video 5 Touch Record once to start recording 6 The Record dot at the bottom of the viewfinder turns red and the video length timer begins counting 7 Touch Stop on the screen to stop recording After recording a vi...

Страница 94: ...the screen 3 Touch the video to play it automatically Your Photos and Videos Adjusting the volume when viewing a video To adjust the volume of a video while it is playing use the Volume Keys on the right side of the phone Touch to delete the video you just made and confirm by touching OK The viewfinder will reappear Touch to record another video right away Touch to view the Gallery of your saved vid...

Страница 95: ...the pictures and videos saved in your external memory including those you ve taken with the Camera application and those you downloaded from the web or other locations If you have a PicasaTM account synchronized with one of your phone s GoogleTM Accounts you ll also see your Picasa web albums in Gallery Touch an album to open it and view its contents The pictures and videos in the album are displa...

Страница 96: ...your pictures and videos The date of the images in view is displayed so you can scroll by date You can also scroll through an album by swiping the screen left or right To change how the contents of an album are displayed You can view the images andvideos in your albums in a chronological grid or in stacks sorted by the date and the location where they were taken You switch album views with the Alb...

Страница 97: ... batch 3 Touch the Menu Key 4 Touch the pictures and videos you want to work with to checkmark them Touch a checkmarked item to remove the checkmark You can checkmark all items or remove all checkmarks by touching Select all or Deselect all at the top of the screen 5 Use the control buttons at the bottom of the screen to perform actions on the checkmarked items The control buttons available depend...

Страница 98: ... of the screen then touch Details To delete an album You can delete an album and its contents from your microSD card 1 Touch the Applications Key Gallery 2 Touch the Menu Key 3 Checkmark or uncheckmark the album s you want to delete 4 Touch Delete at the bottom center of the screen Touch Confirm Delete to confirm Working with Pictures Use Gallery to view pictures that you ve taken with the Camera ap...

Страница 99: ...icture to view parts that are not in view When the picture is zoomed to fit in the window drag left or right to view the next or previous picture in the album To watch a slideshow of your pictures When viewing a picture touch the screen to view the control buttons then touch Slide show Touch the screen or touch the Back Key to end the slideshow To rotate a picture 1 Touch a picture you want to rota...

Страница 100: ...h the picture If you decide to set the picture as your wallpaper crop it if necessary then touch Save To crop a picture You can crop and save pictures that are stored on your microSD card 1 Touch the picture you want to crop then touch Menu 2 Touch More 3 Touch Crop The cropping box appears on top of the picture 4 Use the cropping box to select the portion of the picture to keep the rest of the ph...

Страница 101: ...Touch Share 3 In the menu that opens touch the application to use to share the selected picture 4 Enter the necessary information and share it To delete a picture You can delete a picture from your microSD card and internal memory 1 Touch the picture you want to delete then touch Menu 2 Touch Delete then touch Confirm Delete in the dialog box that opens Working with Videos Use the Gallery applicati...

Страница 102: ...ebsite 1 Touch the Applications Key Gallery then touch an album 2 While viewing an album touch the Menu Key 3 Touch to checkmark the videos you wish to share 4 Touch Share 5 In the menu that opens touch the application you would like to use to share the selected videos 6 Enter the necessary information and share it To delete a video 1 Touch the Applications Key Gallery then select an album 2 While...

Страница 103: ...you open Android Market application for the first time you must read and accept the terms of service to continue Scroll to the left and right to view and explore sub categories Touch here to search for the apps To get help with Android Market Android Market Help web pages are available from all Android Market screens Touch the Menu Key Help The Browser application opens to the Android Market Help p...

Страница 104: ... in Android Market Touch the Play Store icon at the top left corner the screen Downloading and Installing Applications When you find an application you want you can install it on your phone To download and install an application NOTE Before you can download a paid application you must set up a billing arrangement 1 Find an application you want and open its details screen In the application s detail...

Страница 105: ...out screen to pay for the application before it s downloaded to your phone If you selected a free application or after touching Accept buy in Google Checkout you receive a series of notifications as the application is downloaded and then installed on your phone When the application is installed you can touch the notification to open the application or open it by touching its icon in the Applications...

Страница 106: ... phone to transfer music To copy music files onto the phone s microSD card 1 Connect the phone to your computer with a USB cable If the default connection mode is not set to Media sync MTP open the Notifications panel and touch USB connected Media sync MTP Done Your computer will prompt you with different actions to take Choose to open the folder to view files Use the computer to organize your audio ...

Страница 107: ...ur ways To open Music Player and view your music library Touch the Applications Key Music Player The Music Player application searches the microSD card for music files you copied to your card then builds a catalog of your music based on the information contained in each music file This can take from a few seconds to several minutes depending on how may files you have copied onto the microSD card When...

Страница 108: ...e Menu Key Delete OK You can also delete music files from the microSD card when your phone is connected to the computer To do this connect your device as Media sync MTP browse for the music files you wish to delete and delete them from the folder Playing Music You can listen to music using the phone s built in speaker through a wired headset or through a wireless Bluetooth stereo headset that suppor...

Страница 109: ...tifications panel and touching the ongoing music notification To control playback The Playback screen contains several icons that you can touch to control the playback of songs albums and playlists Touch to pause playback Touch to resume playback Touch to skip to the next track in the album playlist or shuffle Touch to restart the current track or skip to the previous track in the album playlist or s...

Страница 110: ... Music Player application creates a playlist of tracks selected randomly from your microSD card and starts playing them View the current playlist that Party Shuffle is playing by touching the Playlist icon on the Playback screen Add a track to the end of the Party Shuffle playlist by touching and holding the name of a track in your library In the menu that opens touch Add to playlist Current playlis...

Страница 111: ...uch Set as ringtone OR On the Playback screen touch the Menu Key Set as ringtone Working with Playlists You can create playlists to organize your music files into sets of songs which you can play in the order you set or in a shuffle To create a playlist 1 When viewing a list of songs in the Library touch and hold the first song you want to add to the new playlist 2 Touch Add to playlist 3 Touch New p...

Страница 112: ...h and hold a song to display a Context menu 2 Touch Add to playlist 3 Touch the name of the playlist you want to add the song to You can also add the song that is playing in the Playback screen to a playlist by pressing the Menu Key Add to playlist To remove a song from a playlist 1 Open a playlist 2 Touch and hold the song you want to remove then touch Remove from playlist To delete or rename a p...

Страница 113: ...m other devices 4 Under the My shared contents section touch to checkmark the types of content you would like to share Choose from Pictures Videos and Music 5 SmartShare is now activated and ready to share contents To share contents from remote content library to other devices Let your renderer device e g TV play multimedia contents from your remote content library e g PC NOTE Make sure that the D...

Страница 114: ... the files NOTE Follow the similar steps to use the Music player Camera and Video player to share contents NOTICE s HECK THAT YOUR DEVICE IS CONNECTED WITH YOUR HOME NETWORK USING 7I I CONNECTION to use this application s 3OME ENABLED DEVICES E G 46 SUPPORT ONLY THE 0 FEATURE OF AND will not appear in the renderer device list s 9OUR DEVICE MIGHT NOT BE ABLE TO PLAY SOME CONTENTS To download content...

Страница 115: ...play a wide variety of videos using the Video player The video player supports the following file formats mp4 avi wmv mov mkv Codec MPEG4 H 263 Sorenson H 263 H 264 VC 1 DivX XviD NOTE Supported file formats are dependent on the software version of the phone To open the Video player application 1 Touch the Applications Key Video Player 2 Touch the video you want to play Playback controls Touch the s...

Страница 116: ... Delete OK to confirm DivX R VOD Touch the Menu Key DivX R VOD to view the DivX registration code for your device NOTE The screen capture function on the Video player is not supported by your LG MS770 YouTubeTM Opening YouTube and Watching Videos You can browse search for view upload and rank YouTube videos on your phone with the YouTube application To open the YouTube application Touch the Applica...

Страница 117: ...s visit the YouTube website To search for videos 1 At the top of the main YouTube screen touch 2 Enter the text to search for or touch the Microphone icon to search by voice 3 Touch a suggestion below the search box or touch the Search icon 4 Scroll through the search results and touch a video to watch it To share your videos on YouTube You can record and share a video using the YouTube applicatio...

Страница 118: ...frame the scene where you want to start 4 Touch to start recording 5 Touch to stop recording 6 Touch The YouTube Upload details screen is displayed 7 Enter a title description and tags for your video 8 If you want to share the video with everyone touch the Privacy field and touch Public If not touch Private or Unlisted 9 Touch Upload ...

Страница 119: ... saved to your recordings list Touch to listen to your recording Touch to record a new voice memo Touch to view your list of recordings Play a Voice Memo 1 Touch the Applications Key Voice Recorder 2 Touch 3 Touch the voice memo you wish to play NOTE You can send the voice memo to others by touching and holding a voice memo and touching Share Managing your Voice Memos 1 Touch the Applications Key ...

Страница 120: ...Entertainment Touch Delete and select the recordings you wish to delete Then touch Delete OK Touch Delete all OK to delete all of your recordings ...

Страница 121: ...Google Account on the web To access the Calendar application Touch the Applications Key Calendar Events from each account you ve added to your phone and configured to synchronize calendars is displayed in Calendar Touch the Day Week Month or Agenda tabs above the calendar Each view displays the events in your calendar for the period of time specified To view more information about an event in Day or...

Страница 122: ...y tab above the calendar Touch here to create new event Tab here to switch to Week Month or Agenda View To learn more about events in Day view Touch an event to view its details Touch and hold an event to open a Context menu to view edit or delete the event Also allows you to create another new event in the same time slot for juggling multiple events To add an event in Day view Touch and hold an e...

Страница 123: ...uch and hold an event to open a Context menu to view edit or delete the event Also allows you to create another new event in the same time slot for juggling multiple events To add an event in Week view Touch and hold an empty spot or an event in the week to open a Context menu then touch New event to create a new event at that time Working in Month View Month view displays a chart of the events of...

Страница 124: ... to view more information about it Working in Agenda View Agenda view is a list of your events in chronological order All day and multi day events are listed at the start of each day To switch to Agenda view Touch the Agenda tab above the calendar Touch here to create new event Tab here to switch to Day Week or Month View To learn more about events in Agenda view Touch an event A screen with detai...

Страница 125: ...he events below the calendar Then touch an event to view its details Touch here to go back to calendar view Touch here to delete the event Touch here to edit the event Touch the Attending field to set or change whether you ll attend the event Other attendees status is displayed below your own Touch the Reminders field to change reminder settings or touch to add a reminder If you have permission to c...

Страница 126: ...utomatically add a reminder for 10 minutes before the event If a reminder is already set you can add an additional reminder by touching 3 Touch the Reminders field and touch the length of time before the event that you want to be reminded of it When the time comes you receive a notification about the event You can use Google Calendar on the web to configure additional reminder settings To delete an e...

Страница 127: ...s and arithmetic operators on the Basic panel Drag the Basic panel to the left to open the Advanced panel Touch and hold the Calculator s display to open a Context menu where you can copy what you ve entered and access other tools Touch Clear to delete the last number or operator you entered Touch and hold Clear to delete all of the entered information ...

Страница 128: ...cations Key Alarm Clock Setting Alarms You can set an alarm by modifying an existing alarm or by adding a new one To set an alarm 1 Touch or touch an existing alarm to change its time and other attributes to modify it Select from Alarm Timer World Clock or Stopwatch tab Touch here to edit existing alarm Touch here to add new alarm Touch here to delete the alarm ...

Страница 129: ...ct it 7 Touch Puzzle lock to checkmark the setting which requires you to wake up enough to solve a simple puzzle to dismiss the alarm 8 Touch Memo to enter a name for the alarm 9 When you re finished touch Save Setting the Timer The Timer can be used to alert you with an audible signal when a set amount of time has passed 1 Open the Alarm Clock application and touch the Timer tab 2 Set the time by ...

Страница 130: ...ons anywhere anytime using their mobile device Managing Files Polaris Office 3 0 provides mobile users with the convenience of managing files including copying moving and deleting files and folders right on the device Viewing Files Mobile users now have the convenience of being able to view a wide variety of file types including Microsoft Office documents Adobe PDF right on their mobile device When vie...

Страница 131: ...gs You can configure a number of Browser settings including several that you can use to manage your privacy To open the Browser settings screen touch the Menu Key from Browser Software Update This feature allows you to update the software of your device from the internet fast and conveniently 1 Touch the Menu Key Settings About phone Software update 2 Select the task Device service O Check now for ...

Страница 132: ... the date when the next check for software update will occur NOTE If no connection to the data network has previously been made since purchase the timeline for the next update cannot be identified since the interval for the automated update will not be created You will not be charged for data for software updates ...

Страница 133: ...ications that are not expressly approved by the manufacturer could void the user s authority to operate the equipment FCC Part 15 105 statement This equipment has been tested and found to comply with the limits for a class B digital device pursuant to Part 15 of the FCC Rules These limits are designed to provide reasonable protection against harmful interference in a residential installation This ...

Страница 134: ...s to this interference noise and phones also vary in the amount of interference they generate The wireless telephone industry has developed a rating system for wireless phones to assist hearing device users to find phones that may be compatible with their hearing devices Not all phones have been rated Phones that are rated have the rating on their box or a label located on the box The ratings are ...

Страница 135: ...T marks are recommended by the Alliance for Telecommunications Industries Solutions ATIS The U and UT marks are referenced in Section 20 19 of the FCC Rules The HAC rating and measurement procedure are described in the American National Standards Institute ANSI C63 19 standard When you re talking on a cell phone it s recommended that you turn the secondary transmitters like a BT Bluetooth or WLAN ...

Отзывы: