LOCATION OF CUSTOMER CONTROLS
6
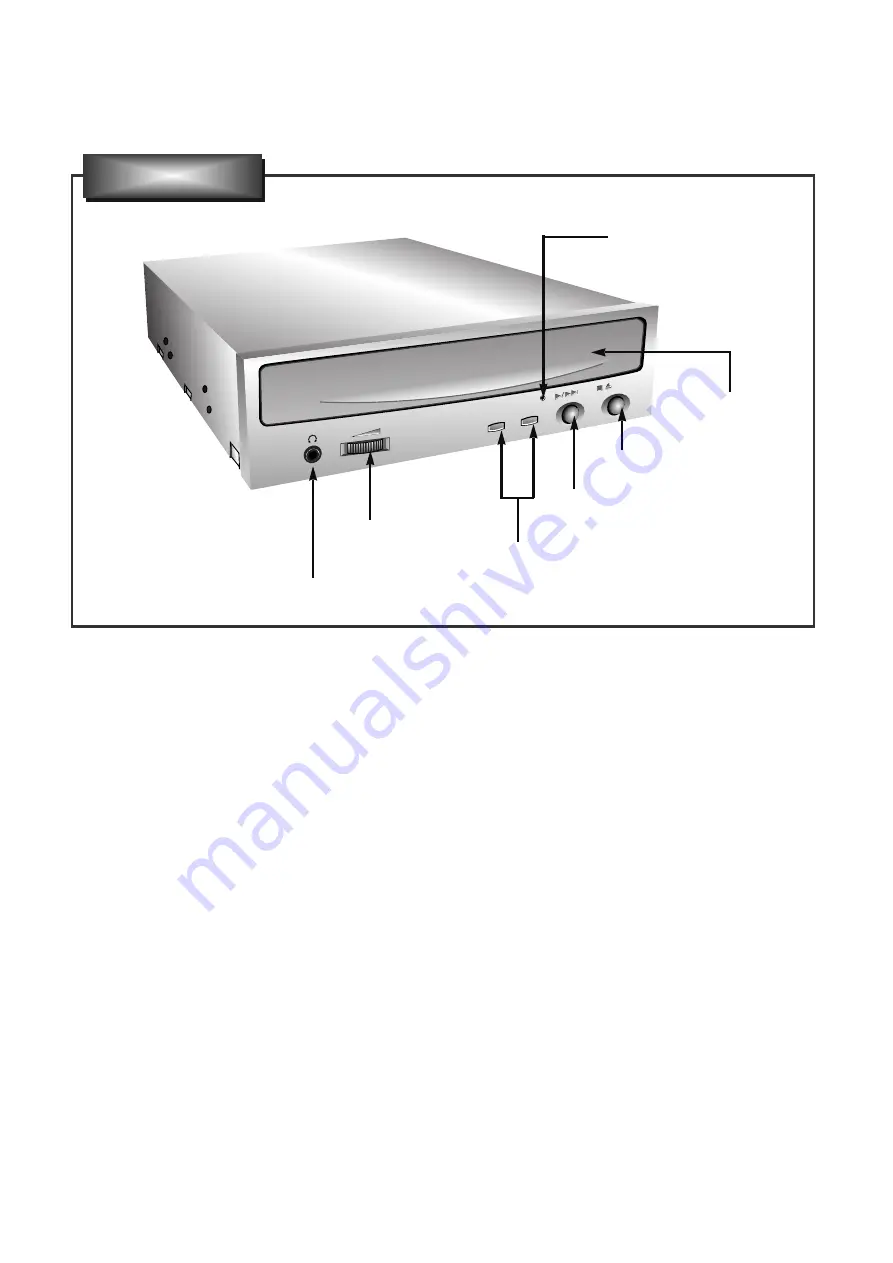
1. Disc tray
This is the tray for the disc. Place the disc on the
ejected disc tray, then lightly push the tray (or
push the eject button) and the CD will be loaded.
NOTE:
Don’t pull out or push in the disc tray
forcibly. This might cause damage to the loading
section of the drive.
2. Stop/Eject button
This button is pressed to open the CD tray.
This button works only when power is supplied to
the drive.
If an Audio CD is playing, pressing this button will
stop it, and pressing it again will open the tray.
3. Play/Skip button
When an Audio CD is in the disc drawer, pressing
this button will start playing Audio CDs from the
first track. If an Audio CD is playing, pressing this
button will skip to the next track.
4. Emergency Eject Hole
Insert a paper clip here to eject the Disc tray
manually or when there is no power.
5. Volume control
This is used to adjust the output volume of the
headphone jack. It can’t be used to adjust the
output volume for the audio output connectors on
the rear panel.
NOTE :
Turn the volume down before turning on
the power. Sudden loud noises can damage your
hearing.
6. Headphone jack
This jack is for connecting headphones or mini-
speakers.
7. Drive activity indicators
Two colored LEDs are used to indicate the
operation of CD-R/RW Drive.
(1) Read
The orange color is displayed when the spindle
motor begins the Spin up operation: accessing
data, reading data, playing Audio, and up loading
tray.
(2) Write
The green color is flashed during disc writing
sessions.
READ
READ
WRITE
WRITE
Headphone Jack
Volume
Control
Drive Activity Indicators
Play/Skip Button
Stop/Eject Button
Disc Tray
Emergency Eject Hole
Front Panel


