


•
Print All Guides
•
Mono Quality Guide
•
Connection Guide
•
Copy Guide
•
E
‑
mail Guide
•
Fax Guide
•
FTP Guide
•
Information Guide
•
Media Guide
•
Moving Guide
•
Print Quality Guide
•
Scan Guide
•
Supplies Guide
Print Quality Test Pages
Cleaning the Scanner
Device
Preferences
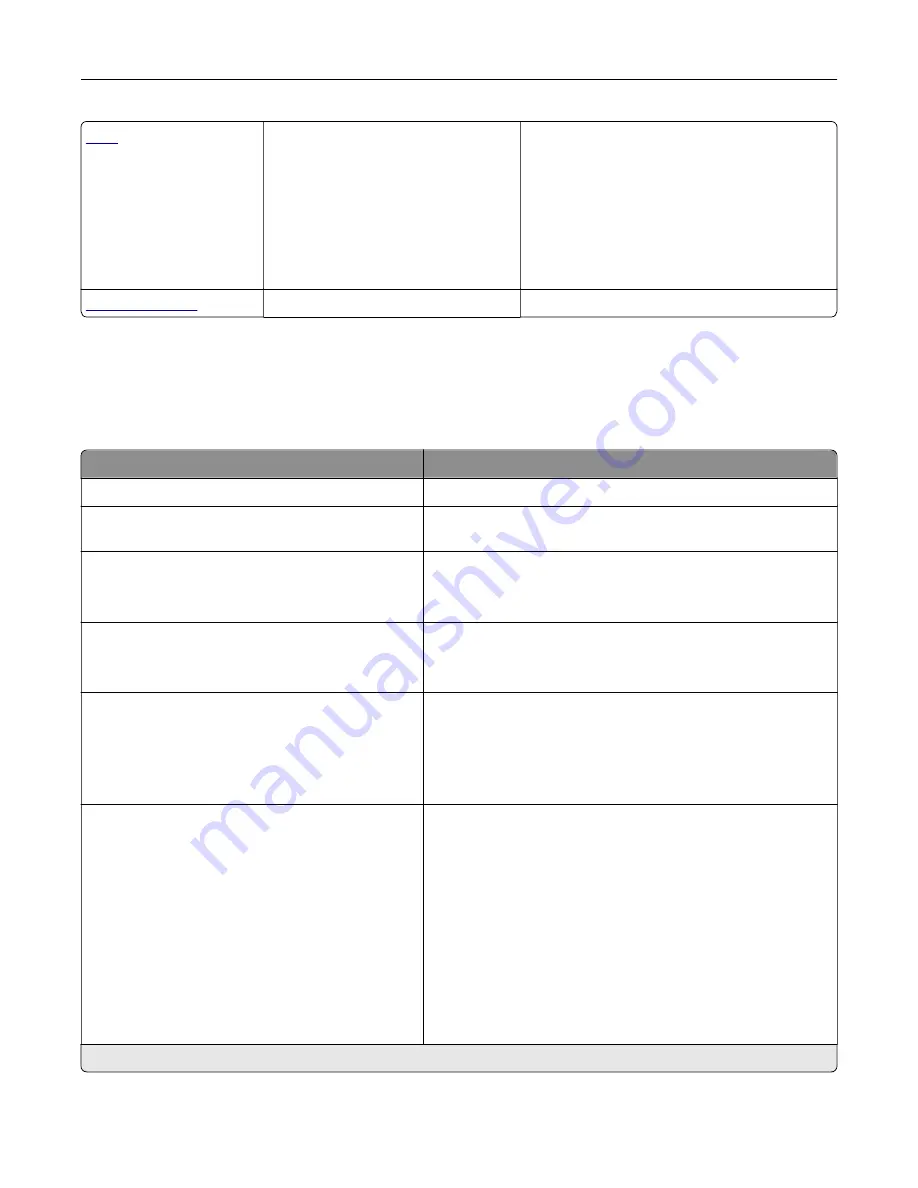
Menu item
Description
Display Language
Set the language of the text that appears on the display.
Country/Region
Identify the country or region that the printer is configured to
operate.
Run initial setup
Off*
On
Run the setup wizard.
Keyboard
Keyboard Type
Select a language as a keyboard type.
Note:
All the Keyboard Type values may not appear or may
require special hardware be installed to appear.
Displayed information
Display Text 1 (IP Address*)
Display Text 2 (Date/Time*)
Custom Text 1
Custom Text 2
Specify the information to appear on the home screen.
Date and Time
Configure
Current Date and Time
Manually Set Date and Time
Date Format (MM
‑
DD
‑
YYYY*)
Time Format (12 hour A.M./P.M.*)
Time Zone (UTC
‑
5:00*)
Network Time Protocol
Enable NTP (On*)
NTP Server
Enable Authentication
Configure the printer date and time and network time protocol.
Note:
An asterisk (*) next to a value indicates the factory default setting.
Understanding the printer menus
80
Содержание XC9225
Страница 168: ... Scanner glass Scanner glass pad 3 Close the scanner cover Maintaining the printer 168 ...
Страница 171: ...2 Remove and then empty the hole punch box 3 Insert the hole punch box 4 Close the door Maintaining the printer 171 ...
Страница 176: ...5 Insert the new toner cartridge 6 Remove the waste toner bottle Maintaining the printer 176 ...
Страница 181: ...8 Insert the waste toner bottle and then close the door Maintaining the printer 181 ...
Страница 193: ...Replacing the ADF separator roller 1 Turn off the printer 2 Remove the ADF separator pad Maintaining the printer 193 ...
Страница 196: ...2 Open door B 3 Remove the ADF pick and feed rollers 4 Unpack the new pick and feed rollers Maintaining the printer 196 ...
Страница 198: ...2 Remove the empty staple cartridge 3 Unpack the new staple cartridge Maintaining the printer 198 ...
Страница 211: ... Below the fuser area Duplex area Clearing jams 211 ...
Страница 216: ...2 Open door J Clearing jams 216 ...
Страница 218: ... Areas H1 and H2 Area H6 Clearing jams 218 ...
Страница 222: ...2 Remove the staple cartridge holder 3 Remove the loose staples Clearing jams 222 ...
Страница 224: ...2 Remove the staple cartridge holder 3 Remove the loose staples Clearing jams 224 ...
Страница 226: ...2 Remove the staple cartridge holder 3 Remove the loose staples Clearing jams 226 ...
Страница 276: ...6 Remove the controller board shield 7 Unpack the printer hard disk Upgrading and migrating 276 ...
Страница 280: ...6 Remove the controller board shield Upgrading and migrating 280 ...
Страница 283: ...4 Remove the controller board shield Upgrading and migrating 283 ...
Страница 285: ...8 Attach the thumbscrews 9 Connect the wireless print server to the controller board Upgrading and migrating 285 ...
Страница 289: ...7 Connect the tray connector to the printer 8 Open trays 2 and 3 Upgrading and migrating 289 ...
Страница 294: ...9 Remove the stabilizing feet from the tray Upgrading and migrating 294 ...
Страница 298: ...17 Secure the tray cable with the clamp Upgrading and migrating 298 ...
Страница 299: ...18 Connect the tray cable to the printer 19 Attach the tray cable cover Upgrading and migrating 299 ...
Страница 300: ...20 Slide the tray until it clicks into place 21 Attach the stabilizing feet to the printer Upgrading and migrating 300 ...
Страница 305: ...7 Remove the paper guides 8 Attach the sensor cover Upgrading and migrating 305 ...
Страница 311: ...8 Attach the finisher to the printer Upgrading and migrating 311 ...


