


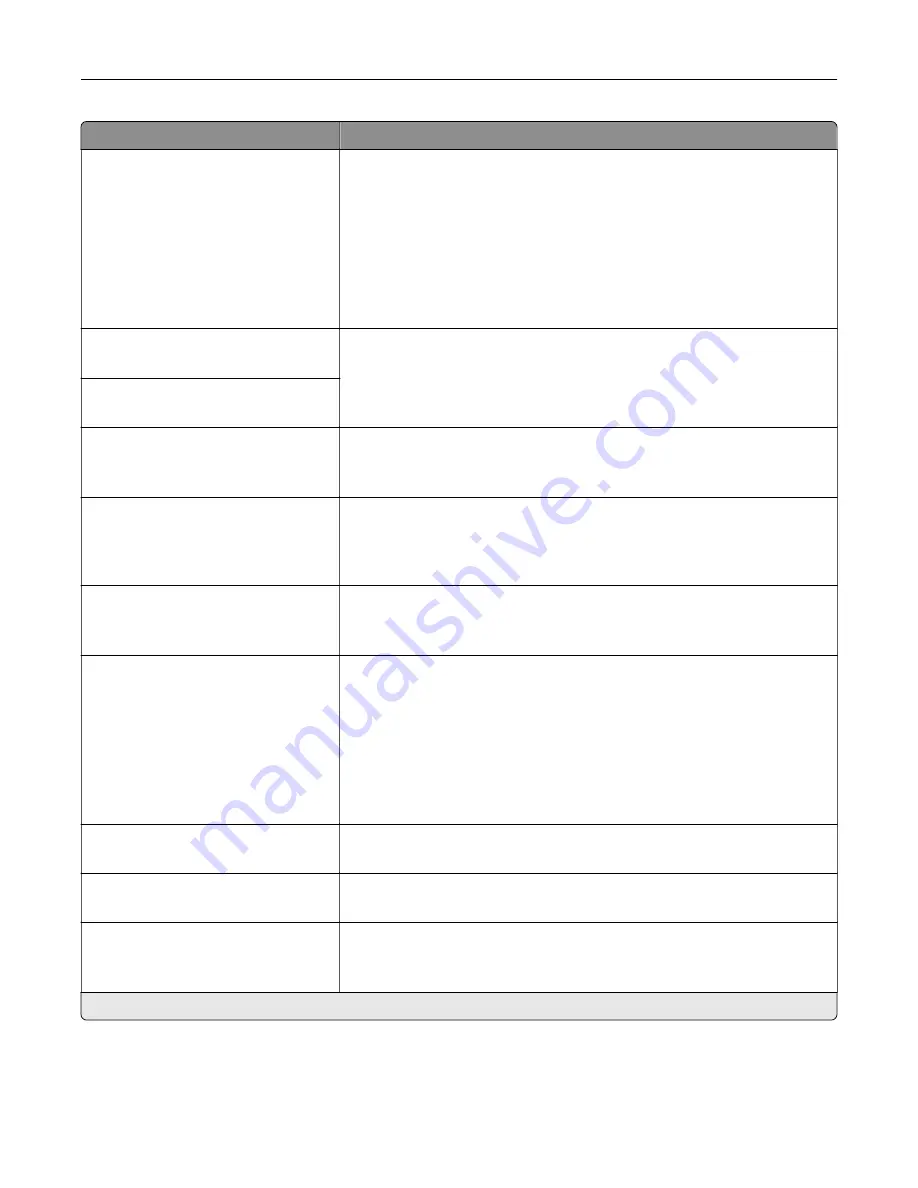
Menu item
Description
Lines per Page
1–255
Specify the number of lines of text for each page printed through the PCL®
datastream.
Notes:
•
This menu item activates vertical escapement that causes the
selected number of requested lines to print between the default
margins of the page.
•
60 is the U.S. factory default setting. 64 is the international factory
default setting.
PCL5 Minimum Line Width
1–30 (2*)
Set the initial minimum stroke width.
Note:
Jobs printed in 1200 dpi use the value directly.
PCLXL Minimum Line Width
1–30 (2*)
A4 Width
198 mm*
203 mm
Set the width of the logical page on A4
‑
size paper.
Note:
Logical page is the space on the physical page where data is
printed.
Auto CR after LF
Off*
On
Set the printer to perform a carriage return after a line feed control
command.
Note:
Carriage return is a mechanism that commands the printer to move
the position of the cursor to the first position on the same line.
Auto LF after CR
Off*
On
Set the printer to perform a line feed after a carriage return control
command.
Tray Renumber
Assign MP Feeder
Assign Tray [x]
Assign Manual Paper
Assign Manual Envelope
Configure the printer to work with a different print driver or custom
application that uses a different set of source assignments to request a
given paper source.
Choose from the following options:
Off*—The printer uses the factory default paper source assignments.
None—The paper source ignores the Select Paper Feed command.
0–199—Select a numeric value to assign a custom value to a paper
source.
Tray Renumber
View Factory Defaults
Show the factory default value assigned for each paper source.
Tray Renumber
Restore Defaults
Restore the tray renumber values to their factory defaults.
Print Timeout
Off
On* (90 seconds)
Set the printer to end a print job after it has been idle for the specified
amount of time.
Note:
An asterisk (*) next to a value indicates the factory default setting.
Understanding the printer menus
101
Содержание XC9225
Страница 168: ... Scanner glass Scanner glass pad 3 Close the scanner cover Maintaining the printer 168 ...
Страница 171: ...2 Remove and then empty the hole punch box 3 Insert the hole punch box 4 Close the door Maintaining the printer 171 ...
Страница 176: ...5 Insert the new toner cartridge 6 Remove the waste toner bottle Maintaining the printer 176 ...
Страница 181: ...8 Insert the waste toner bottle and then close the door Maintaining the printer 181 ...
Страница 193: ...Replacing the ADF separator roller 1 Turn off the printer 2 Remove the ADF separator pad Maintaining the printer 193 ...
Страница 196: ...2 Open door B 3 Remove the ADF pick and feed rollers 4 Unpack the new pick and feed rollers Maintaining the printer 196 ...
Страница 198: ...2 Remove the empty staple cartridge 3 Unpack the new staple cartridge Maintaining the printer 198 ...
Страница 211: ... Below the fuser area Duplex area Clearing jams 211 ...
Страница 216: ...2 Open door J Clearing jams 216 ...
Страница 218: ... Areas H1 and H2 Area H6 Clearing jams 218 ...
Страница 222: ...2 Remove the staple cartridge holder 3 Remove the loose staples Clearing jams 222 ...
Страница 224: ...2 Remove the staple cartridge holder 3 Remove the loose staples Clearing jams 224 ...
Страница 226: ...2 Remove the staple cartridge holder 3 Remove the loose staples Clearing jams 226 ...
Страница 276: ...6 Remove the controller board shield 7 Unpack the printer hard disk Upgrading and migrating 276 ...
Страница 280: ...6 Remove the controller board shield Upgrading and migrating 280 ...
Страница 283: ...4 Remove the controller board shield Upgrading and migrating 283 ...
Страница 285: ...8 Attach the thumbscrews 9 Connect the wireless print server to the controller board Upgrading and migrating 285 ...
Страница 289: ...7 Connect the tray connector to the printer 8 Open trays 2 and 3 Upgrading and migrating 289 ...
Страница 294: ...9 Remove the stabilizing feet from the tray Upgrading and migrating 294 ...
Страница 298: ...17 Secure the tray cable with the clamp Upgrading and migrating 298 ...
Страница 299: ...18 Connect the tray cable to the printer 19 Attach the tray cable cover Upgrading and migrating 299 ...
Страница 300: ...20 Slide the tray until it clicks into place 21 Attach the stabilizing feet to the printer Upgrading and migrating 300 ...
Страница 305: ...7 Remove the paper guides 8 Attach the sensor cover Upgrading and migrating 305 ...
Страница 311: ...8 Attach the finisher to the printer Upgrading and migrating 311 ...


